


This month we are going to learn of crouu-doughnuts/ kronut. Actually it is a Cronut but we can’t use the name as the creator of dish has trademarked the name. We are learning both yeasted doughnuts as well puff pastry making.
If you want to know what is crouu-doughnuts/Kronut are, here is the link from the original bakery who created this Cronut 101 and from Wikipedia. People in New York stand in long lines to get these delicious treats.
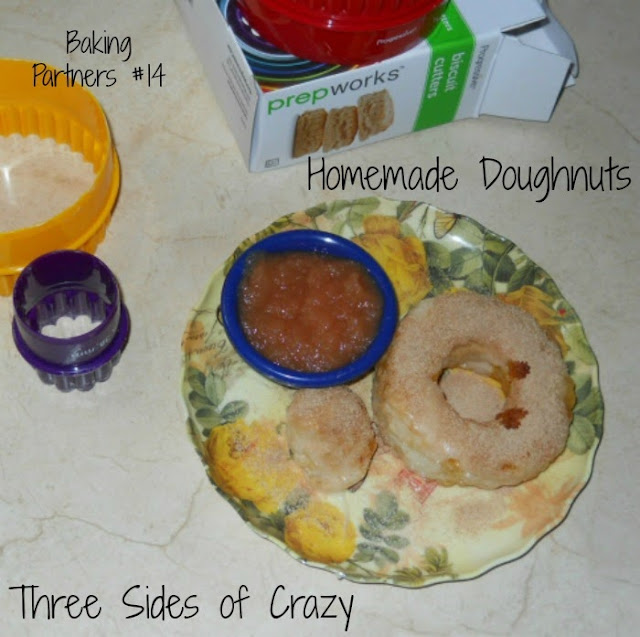
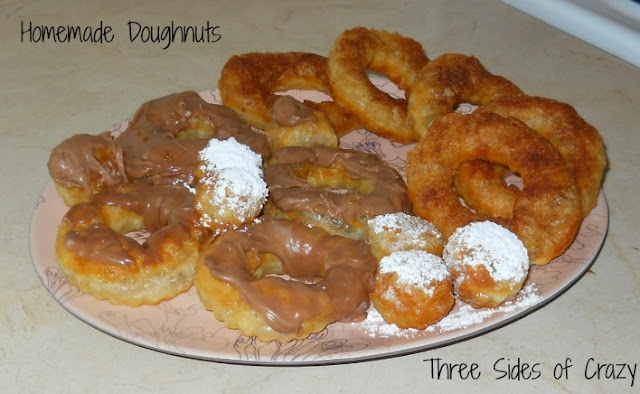
I agree that as a baker, these are a wonderful challenge. Everyone should make their own puff pastry at least once in their life if only to appreciate why it is so expensive from Pepperidge Farm. The original recipe came from BootLeg cronut. Personally I added a side of pureed fried cinnamon apple for dunking the first time I made them. I absolutely love mixing apples and cinnamon – my all time favorite! The next time I added a chocolate glaze substituting candy bark for the semi-sweet chips as well as a powdered sugar sprinkle and a cinnamon sugar sprinkle.


Patience is the key to these delectable doughnuts.
This recipe is tried and tested for crouu-doughnut. The recipe for filling and glaze recipe was suggested by Reeni of Cinnamon Spice and everything nice. Please stick to the recipe as much as possible. You can modify the recipe as your taste needs, like eggless, gluten free. etc…

Crouu-doughnuts/Kronut Recipe adapted from BootLeg cronut
Makes 16ish
For dough
3 cups all purpose flour+ more for dusting the work table
3 cups all purpose flour+ more for dusting the work table
1 teaspoon salt
1/2 cup sugar
1/2 cup + 2 tablespoon milk
1 packet quick rise yeast/ active dry yeast/ instant yeast/ 2 ¼ teaspoon
2 jumbo eggs (If you are using large eggs use 3)
3.5 tablespoon unsalted butter
3.5 tablespoon unsalted butter
For butter layer
1 1/4cup + 1/2 tablespoon (2 sticks and little more than a ½ stick) unsalted butter (if you can find European style butter like plugra that will be good)
1 1/4cup + 1/2 tablespoon (2 sticks and little more than a ½ stick) unsalted butter (if you can find European style butter like plugra that will be good)
For frying
2-4 cups canola oil
Water: 200 g for brushing on the top
Cinnamon sugar (400g sugar and 100 g cinnamon)
- First day makes dough
- 30 minutes before dough preparation, take 50 g butter and eggs out of the refrigerator allowing each to reach room temperature. If using fresh yeast, mix with room temperature milk beforehand to activate yeast.
- Combine the dry ingredients —flour, salt, sugar, instant yeast (if using) — in the bowl of a stand mixer.
-
IF USING ACTIVE YEAST, heat half milk to Luke warm (around 110F , 43C) and add yeast and. Otherwise heat milk to microwave for high for 30 seconds and add butter that way butter melts well.
- Then to the dry mixture add butter and milk mixture and the eggs. Mix on low speed for 3 minutes, or until everything is incorporated. Mix on higher speed for another 8 minutes. Mix on higher speed for another 8 minutes. If you kneading with your hand make sure to knead well for about 10-15 minutes or until you get smooth shiny dough.
- Remove the dough and tuck under edges to form a ball. Coat a bowl with PAM or any oil of your choice and place the dough in it with seams down. Use a knife to cut a cross into top surface (this will help the dough relax). Cover tightly with clear plastic wrap, making sure it is in contact with the dough.
- Place dough in a warm area and allow it to double in size. This should take 60 minutes. Once dough has “poofed, or double in size ” transfer to refrigerator to overnight.
- Second day start incorporating butter into the dough
- Cut the cold butter lengthwise into 1/2-inch-thick slabs.
- Arrange the pieces on a piece of parchment or waxed paper to form a 5 to 6 inch square, cutting the butter crosswise as necessary to fit. Top with another piece of parchment or waxed paper.
- With a rolling pin, pound the butter with light, even strokes. As the pieces begin to adhere, use more force.
- Pound the butter until it’s about 4 x 6 inches square and then trim the edges of the butter.
- Put the trimmings on top of the square and pound them in lightly with the rolling pin.
- Place in refrigerator to cool for at least 2 hours.
-
Laminate the dough
- Unwrap and lay the dough on a lightly floured work surface. Roll into a 10-1/2-inch square. Brush excess flour off the dough. Remove the butter from the refrigerator. If not, refrigerate a bit longer. Unwrap and place the butter on the dough so that the points of the butter square are centered along the sides of the dough. Fold one flap of dough over the butter toward you, stretching it slightly so that the point just reaches the center of the butter. Repeat with the other flaps. Then press the edges together to completely seal the butter inside the dough. (A complete seal ensures butter won’t escape.).
- 1st Turn. Lightly flour the top and bottom of the dough. With the rolling pin, firmly press the dough to elongate it slightly and then begin rolling instead of pressing, focusing on lengthening rather than widening the dough and keeping the edges straight. Turn the dough so that a shorter end faces you. Roll to expand the length of the dough, making sure that the dough doesn’t stick to the table. Add flour if needed. When you have a rectangle about 21 x 9 inches, fold the top third of the rectangle down and fold the bottom third up to cover it. Turn the dough 90 degrees so that the opening resembles a book.
- 2nd Turn. Try to do this turn right away, but if the dough is too warm, wrap in film and place in the refrigerator until it cools. Repeat rolling, just like the first turn, then turn 90 degrees and gently press two fingers into the lower right corner to mark the number of turns. (Marking the dough allows you to track your progress, and ensure that the orientation of the dough is correct when you remove it from the refrigerator.) Cover the dough in a parchment paper and then again with plastic wrap and refrigerate for at least 1 hour.
- 3rd Turn. The dough will be hard, so gently pound the dough to warm the butter. If it is too cold the butter will separate and not spread as it should. Repeat the previous steps, and turn again, marking the corner with three fingerprints. Cover dough with parchment paper and plastic wrap and refrigerate for 1 hour.
- 4th Turn. Make the final turn, repeating the steps from turns 1-3. Refrigerate overnight
- Third day Fry the dough
- Rolling out the Dough. Lightly dust a work surface with flour and roll out the dough to approximately the size of a sheet pan, 1/2 inch thick. Make sure the dough stays cold, without sticking to the surface. If it starts to stick, place in the refrigerator and roll again when cool. Transfer to a sheet pan with parchment paper, film and chill before use.
- Punching out cronuts. Prepare a sheet pan with parchment paper, sprayed with PAM or oil . Remove dough from fridge and take two ring molds, approximately outer molds should be 3 ½ inch and inner should be 1 ½ inch. ( use you peanut bottle cap for outer mold and prescription medication bottle for inner ones) Only start punching if the dough is very cold. Otherwise, your Kronut won’t fry straight.
- Transfer half of the punched kronuts to the sheet pan, leaving room for kronuts to “poof.”
- Brush tops of the Kronut with water and set aside. Place Kronut holes on the same sheet tray, leaving enough space for them to poof without sticking to each other. Leave in a warm area until they have proofed, about 30 min.
- Once it is proofed keep it in the refrigerator for 1 hour or in the freezer for 15 minutes before frying.
- Frying cronuts. Heat canola oil in a pot, about 3 inches high. Test oil with a pinch of flour: if flour foams it is ready for deep frying. Turn heat to low and place Kronuts in oil, 1-2 at a time, in order to avoid overcrowding the pot. Turn and flip Kronuts often so that they brown evenly.
- Once golden brown throughout, test one to see if it is cooked all the way through. Remove and place on paper towels.
- Now is a good time to prepare the Glaze
Important points to Remember
- Don’t over work with dough with too much kneading.
- Don’t over work with butter, if butter starts to leaking, try to put it back in the refrigerator.
- Flour the area well so that dough won’t stick.
- Heat oil in medium temperature and fry the kronuts in low temperature otherwise outside become too dark soon and inside won’t cook properly.

Pastry cream and filling suggested by Reeni of Cinnamon Spice and everything nice Adapted From King Arthur Flour
Pastry cream is one of the building blocks of a great dessert. Delicious as is, it can also be flavored in an almost infinite number of ways to create the perfect touch for your cake, pie, or pastry. Make sure you have all of your ingredients and equipment on hand before you begin; once the egg yolks begin to cook, they won’t wait for you to find your strainer! This base recipe calls for 1/2 cup of sugar, which makes a pastry cream that’s just barely sweet. If you’re planning to use the pastry cream for a pie filling and you want it to be sweeter, increase the sugar to 3/4 cup.
Pastry Cream (I omitted)
Measurements by Volume:
3 cups whole milk
1/2 cup sugar
1/4 teaspoon salt
2 teaspoons vanilla extract or Vanilla Crush; or 1/2 vanilla bean, slit lengthwise
1/4 cup cornstarch
1 tablespoon King Arthur Unbleached All-Purpose Flour
4 large egg yolks
1/4 cup (1/2 stick) butter
1 cup heavy cream, whipped to soft peaks
- In a medium-sized saucepan, stir together 2 1/2 cups of the milk, the sugar, salt, and the vanilla bean. (If you’re using vanilla extract or Vanilla Crush, add it at the end.) Bring to a simmer over medium heat, stirring to dissolve the sugar.
- Meanwhile, whisk the cornstarch, flour, and egg yolks with the remaining 1/2 cup milk.
- Whisk some of the hot milk mixture with the egg yolks to temper them. This keeps the yolks from turning to scrambled eggs when you add them to the simmering milk.
- Pour the egg/milk mixture back into the remaining simmering milk. Doing this through a strainer will help prevent lumps later. Bring to a boil, stirring constantly with a whisk, until the mixture thickens.
- Remove from the heat and strain through a fine sieve. Stir in the butter and vanilla extract (if you’re using it). If you’re going to flavor the pastry cream with chocolate or some other flavor, this is the time to do it (see variations below).
- Rub a piece of butter over the surface of the cream, top with a piece of plastic wrap (make sure it touches the top of the pastry cream so it doesn’t develop a skin), then refrigerate until cool.
- To complete, fold the whipped cream into the cooled pastry cream.
Variations:
Butterscotch Pastry Cream: Add 1/4 teaspoon butter-rum flavor and/or 1 cup (6 ounces) butterscotch chips to the pastry cream after straining, stirring until the chips have melted.
Caramel Pastry Cream: Add 3/4 cup chopped caramel (7 1/2 ounces, or 21 to 23 unwrapped individual caramels) to the hot, strained pastry cream, stirring until melted and the mixture is smooth.
Chocolate Pastry Cream: Add 1 cup (6 ounces) chopped chocolate to the hot, strained pastry cream, stirring until melted and the mixture is smooth.
Hazelnut Pastry Cream: Omit the butter and increase the sugar to 3/4 cup (5 1/4 ounces). Add 3/4 cup (8 1/4 ounces) praline paste to the hot, strained pastry cream, stirring until combined.
Orange Pastry Cream: Increase the sugar to 3/4 cup (5 1/4 ounces). Add 1 teaspoon orange extract; 1/4 teaspoon orange oil; or 3 tablespoons orange zest to the hot, strained pastry cream.
Peanut Butter Pastry Cream: Add 3/4 cup (7 1/4 ounces) smooth peanut butter to the hot pastry cream, stirring until melted and the mixture is smooth. If you’re using a natural or freshly-made peanut butter, omit the butter from the recipe, or the pastry cream will be greasy.
Pistachio Pastry Cream: Omit the butter and increase the sugar to 3/4 cup (5 1/4 ounces). Add 3/4 cup (8 1/4 ounces) pistachio paste, or blanched pureed pistachio meats.
Easy Vanilla Glaze
5 ounces confectioners’ sugar or glazing sugar, sifted to remove any lumps
3/4 ounce light corn syrup
1/2 ounce butter, melted
1/2 to 1 ounce milk or water
1/2 teaspoon vanilla extract
Chocolate Glaze
3 ounces semisweet chocolate chips
3 ounces semisweet chocolate chips
1 ounce butter
7/8 ounce light corn syrup
1/4 teaspoon vanilla extract
Apple Cider Glaze
3/4 ounce bottled boiled cider
1/2 ounce heavy cream
4 ounces confectioners’ or glazing sugar
Easy Vanilla Glaze
1 1/4 cups confectioners’ sugar or glazing sugar, sifted to remove any lumps
1 tablespoon light corn syrup
1 tablespoon melted butter
1 to 2 tablespoons milk or water
1/2 teaspoon vanilla extract

Chocolate Glaze
1/2 cup semisweet chocolate chips
2 tablespoons butter
1 tablespoon plus 1 teaspoon light corn syrup
1/4 teaspoon vanilla extract
Apple Cider Glaze
2 tablespoons bottled boiled cider
1 tablespoon heavy cream
1 cup confectioners’ or glazing sugar
- To make the vanilla glaze: Stir the ingredients together, adding extra liquid or confectioners’ sugar to adjust the consistency as needed. Yield: about 1/2 cup glaze.
- To make chocolate glaze: Melt the ingredients together over low heat or in the microwave, stirring often. Add extra corn syrup if needed to make a smooth, shiny glaze. Yield: about 1/2 cup glaze.
- To make apple cider glaze: Stir all of the ingredients together, adding additional sugar or cream if needed to make the glaze the consistency of molasses. Dip top of doughnuts in glaze, or drizzle glaze over doughnuts. Yield: about 1/2 cup glaze.
- Once doughnut is no longer shiny, transfer it to a container with sugar and cinnamon and toss.