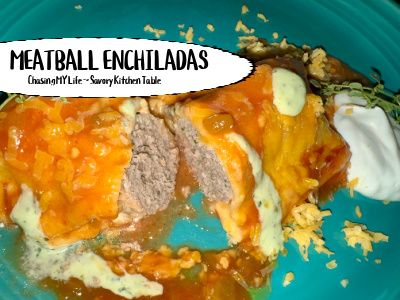
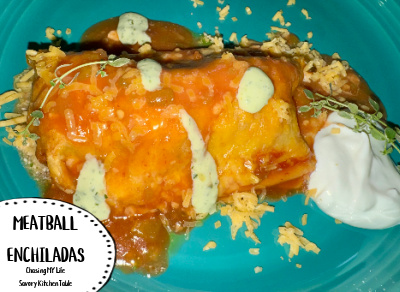
COOKING THURSDAY ~ MEATBALL ENCHILADAS ~ BLOG 365.190C

MEATBALL ENCHILADAS serves 4 adapted from Dempsters 

8 Golden Blend tortillas
1 1/2 cups enchilada or taco sauce
1 1/2 cups shredded Cheddar cheese, divided
24 SMALL prepared cooked meatballs of choice, homemade or pre-prepared
1 cup seasoned black beans, drained and rinsed
2 tablespoons sliced pickled jalapeño peppers (optional)
1 small can green chiles, drained well! Or in August 2 tablespoons FRESH roasted Hatch chiles
1 ripe avocado, halved, pitted, peeled and chopped
2 green onions, thinly sliced
Sour cream, lime wedges and cilantro lime cream

  • Preheat oven to 425°.
  • Grease 13×9-inch baking dish.
  • Spread 1/2 cup sauce in bottom of dish; set aside.
  • In a small bowl combine black beans with chiles and or jalapeños.
  • Sprinkle 1 tablespoon cheddar cheese down the center of each tortilla.
  • Top with 3-4 meatballs and a spoonful of the bean mixture.
  • Roll up tightly and place seam side down in baking dish.
  • Top with remaining sauce and sprinkle with remaining cheese.
  • Bake, uncovered, 20 to 25 minutes or until tortillas are lightly browned and filling is heated through.
  • Garnish with avocado and green onions before serving.

NOTE: If using large meatballs cut them in half.

COOKING THURSDAY ~ SMOKED BEEF BRISKET 2 ways ~ BLOG 365.190A

Smoking meat in your kitchen is easier than you think. I recently bought a NordicWare Kettle Smoker to use indoors! Being a Texas girl Beef Brisket is one of my ALL time favorites and I’m already working on my recipes for next year’s charity BBQ. One of those is my Jailhouse chili which requires some beef brisket so I decided to smoke my own! The first version is marinaded first, which was great flavor, but ended up being my least favorite. 

SMOKED BEEF BRISKET (marinaded) serves 5-6

1 tablespoon Meat Church Texas Sugar BBQ rub
1 clove garlic, minced
2 tablespoons Bragg’s liquid aminos
1 tablespoon jalapeno ketchup
1 tablespoon avocado oil
FRESH ground black pepper, to taste
2 pounds beef brisket, cut in half

  • Score meat diagonally 1/4″ deep.
  • Rub all sides of brisket with BBQ rub. Set aside for 30 minutes.
  • Whisk together ketchup, liquid aminos, oil and pepper together.
  • Brush sauce on both sides of brisket.
  • Wrap meat in wax paper and refrigerate overnight.


  • Prepare smoker by adding wood chips of choice. I like apple, peach or cherry.
  • Cover drip pan with aluminum foil to make cleanup easier and place on top of chips.
  • Unwrap meat and place on smoker tray.
  • Open vent 1/4 of the way.
  • Smoke 1 1/2-2 hours at the recommended internal smoker temperature (190°-210° F) or until done using dry smoke method.
  • Rest 5-10 minutes.

~~~~~~~~~~~~~~~~~~~~~~~~~~~~~~~~~~~~

To guarantee A MELT IN YOUR MOUTH TENDER BRISKET FOLLOW THESE TIPS.

SMOKE CLEAN & DRY: Place a water pan in your smoker to stabilize the heat, but DO NOT inject or heavily baste the meat with liquid. This allows the smoke to adhere and the fat to render properly.

THE WRAP: At around 165°, the brisket will hit the dreaded “stall”. This is when the juices & fat of the meat are coming out of the brisket and actually “cooling” the brisket instead of cooking it. The stall at 165° can last 2-5 hours sometimes. By wrapping in butcher paper or foil, you help to break through that stall quicker. I prefer unwaxed butcher paper to foil. Butcher paper allows more smoke into the brisket as it is porous compared to foil. When wrapping your brisket, lathering it with warmed beef tallow all over will help to make it extra moist and tender. It will also amp up the beef flavor.

  • Lay out two pieces of butcher paper so they are slightly overlapping.
  • Warm your beef tallow up slightly, then drizzle it over the butcher paper.
  • Remove the brisket from the smoker, set it onto the butcher paper about 2 feet from one end.
  • Drizzle the brisket with even more beef tallow. 
  • Pull the short end of the butcher paper over the top of the meat, and then fold it underneath.
  • Fold the sides into the brisket, then roll the meat up in the paper until it’s completely wrapped. 
  • Place the wrapped brisket back into the smoker. Be sure that the loose end of the butcher paper is on the bottom so it stays nicely wrapped.
  • Cook another 7+ hours or until the brisket’s internal temperature is anywhere between 202-203º. 

PROBE TENDER: Don’t rely solely on temperature. The brisket is done when a meat thermometer probe glides into the thickest part of the meat with zero resistance—just like a warm knife sliding through butter.

OPTIONAL ~ TEXAS CRUTCH: Once the brisket hits the “stall” (around 165°-170° internal temp), wrap it tightly in peach butcher paper or foil to lock in natural juices while retaining the bark.

THE LONG REST: Pull the brisket and let it rest in a dry cooler (or a warmed oven set to its lowest setting) for at least 2 to 4 hours before slicing. This essential step allows the muscle fibers to relax and the juices to redistribute.

When it is ready to slice, unwrap and begin slicing the brisket right where you made your “against the grain” cut when prepping.

RESULT: This steamy environment allows the meat’s internal temperature to rise more quickly and helps it become more tender. 

HERE A FEW DEFINITIONS TO HELP:

THE STALL: During smoking, meat temperature can plateau (the “stall”) as moisture evaporates from the surface, cooling the meat down. 

WRAPPING: Wrapping the meat in foil or butcher paper creates a sealed environment, trapping steam and moisture. 

TEXAS CRUTCH ~ The “Texas Crutch” is a barbecue technique where meat, typically brisket or pork, is wrapped tightly in aluminum foil or butcher paper during the final stage of smoking to speed up cooking, push through “the stall,” and lock in moisture. This creates a steamy environment that helps tenderize the meat and retain juices, resulting in a more moist and faster cook, though some pitmasters prefer butcher paper for a more traditional bark. 

I don’t or at least didn’t know much about smoking meat, but I DO know that brisket is my favorite BBQ meat and it takes absolutely forever (10-20 hours for a full brisket) to do it well. Being a Texas girl I knew I needed to perfect my technique and work until I came up with the ultimate recipe. In Texas BBQ Brisket that’s been done well is like the Holy Grail of all meats.

PREPPING BRISKET FOR THE SMOKE:

I personally DO NOT like to trim my brisket. It will look more rustic, but I feel that the fat add so much more to the flavor.

MAKE AN AGAINST THE GRAIN CUT BEFORE YOU SMOKE: When the brisket is fully cooked, seeing the grain structure is difficult so while prepping your brisket, make sure to cut a corner of the brisket. This will reveal the grain structure so that you know how you are supposed to cut it when done.

DRY BRINE: After seasoning thoroughly, place that smoked beef brisket in the fridge uncovered overnight or 4-24 hours. That dry brine is key to drying out the outside layer of the brisket to get an amazing bark.

FAT SIDE UP OR DOWN?: Choosing which side to place up depends more on the grill and fire. If you are cooking on a classic offset smoker, it doesn’t really matter. But if you are using a drum smoker, pellet smoker or something where the heat comes from the bottom you should definitely do fat side down. The fat will help “protect” the meat more from the heat this way.

Place the brisket in the smoker with the fat side of the brisket facing the heat. This layer of fat serves as a “protection” layer against the heat. Start checking at 7 hours, adding time as needed. You can check that it’s done with a meat thermometer. The internal temperature of the meat at the thickest point  should be 165-170ºF. 

REST 2 HOURS: If there is one true secret to brisket, it’s RESTING! Place the brisket in a room temperature cooler (slightly opened) or a room temperature oven.

TRIMMING: First, you need to trim the whole brisket. To do so, lay the cold brisket on a cutting board, fat cap side down. Next, trim off any silver skin or pockets of fat with a sharp knife. Remove the large pocket of fat near where the flat and point meet, then square off all sides of your brisket.  Flip the brisket over and carefully remove the fat cap. Be sure that the fat cap side is about 1/4″ thick, then remove most of the fat “flap” located at the top of the brisket.

SEASONING: Rub the brisket generously with kosher salt, black pepper, and optional garlic powder for a basic traditional seasoning or use your favorite preprepared rub. Place the seasoned brisket into the fridge and allow it to dry brine overnight. 

SMOKING: Preheat your smoker to a temperature of 250-265º. I like to use a maple cherry combo for flavor or an oak and peach combo.

~~~~~~~~~~~~~~~~~~~~~~~~~~~~~~~~~~~~

TEXAS SMOKED BEEF BRISKET adapted from OVER THE FIRE serves 8

Prep Time: 1 hour hour
Cook Time: 14 hours hours
Total Time: 15 hours hours

12-15 pounds beef brisket, trimmed
2 1/2 tablespoons FRESH ground sea salt
2 1/2 tablespoons FRESH ground black pepper
2 tablespoons garlic powder, optional
1 cup Beef Tallow, warmed up

  • Season brisket thoroughly.
  • Place your brisket into the fridge to dry brine overnight.


  • Preheat smoker for 250-265° with wood chunks or chips choice.
  • Add the brisket on to the smoker fat side towards the heat.
  • Cook the brisket 7-8 hours until it reaches about 165-170° at the thickest and fattiest part.
  • Once it has hit 165°, wrap the brisket in butcher paper.
  • Return the brisket back onto the smoker at 250-265° so that the loose end of butcher paper is on bottom to prevent it from unraveling.
  • Cook 7-8 hours more until the meat hits 202-203°.
  • Rest at room temperature for at least 2 hours before slicing.

COOKING THURSDAY ~ CARNE ASADA MEATBALLS & ARROZ AMARILLO ~ BLOG 365.183D

CARNE ASADA MEATBALLS with ARROZ AMARILLO adapted from The Castaway Kitchen

MARINADE
Juice of 1  lemon
Juice of 1 lime
2 teaspoons fine salt
1 teaspoon ground black pepper
1 teaspoon ground cumin
1/4 cup minced fresh cilantro
1 teaspoon dried oregano
1/2  large onion, small diced
2 cloves garlic minced
2 tablespoons apple cider vinegar
2 tablespoons avocado oil

  • Mix all of the marinade ingredients in a small bowl and let it sit in the fridge overnight or at least one hour.

MEATBALLS
2 pounds chili grind ground beef
1 LARGE egg, slightly beaten
2 tablespoons coconut flour
1 tablespoon bacon fat, melted
FRESH chopped cilantro, for garnish
Sour cream, for garnish

  • When ready to cook, pre-heat oven to 400°.
  • Add the marinade to a large bowl along with the meat, beaten egg, and coconut flour. Mix well.
  • Shape 18-20 2 inch meatballs.
  • Brush with bacon fat.
  • Put meatballs in the oven, center rack for 25 minutes.
  • Prepare rice while meatballs bake.
  • Remove the meatballs from the oven. Keep warm.
  • Increase heat to broil.

ARROZ AMARILLO aka YELLOW RICE
6 cups frozen riced cauliflower or prepared Jasmine rice
1 tablespoon garlic powder
1 teaspoon fine salt
1 teaspoon ground cumin
1 teaspoon ground turmeric
3 tablespoons bacon fat
Extra Fresh cilantro, for garnish

  • Toss the frozen cauliflower or rice with the rest of the ingredients on a lightly greased sheet pan, spreading even.
  • Pop the rice on the top rack.
  • Broil for 5 minutes.
  • Remove from the oven.
  • Serve 3-4 meatballs over the rice.
  • Spoon the pan sauce over everything (yum) and sprinkle with fresh cilantro!

COOKING THURSDAY ~ JAILHOUSE BRISKET CHILI ~ BLOG 365.176D

We LOVE chili!!! What’s not to love! Being a Texas born girl the one thing I learned early on is that chili does NOT have been, but is FULL of rich flavors and LOTS of meat, preferably slow BBQed brisket in my opinion. I took my best chili and combined it with these two recipes from Meat church.com to make my own version of JAILHOUSE CHILI.

The history of the Jailhouse chili is below and it’s good by itself, but one of our favorite cold weather comfort foods is brisket chili. Brisket adds a smokiness plus the brisket breaks down much more quickly. You can’t get much more Texan than adding brisket to your chili! I even add it to my home made BBQ baked beans!

Jailhouse Chili ~ Dallas County Style ~ straight from Dallas County lore.

“Back in 1962, Dallas Morning News columnist Frank X. Tolbert wrote a piece called “That Bowl of Fire Called Chili” for The Saturday Evening Post. It was one of the first times Texas chili got a national spotlight, and folks across the country paid attention. Tolbert got more than 29,000 letters after it ran — proof that people take their bowl of red real serious.

Now here’s where it gets good. In that article, Tolbert shared a chili recipe from a Dallas County sheriff in the 1930s named Smoot Schmidt. This wasn’t some fancy competition chili — this was jailhouse chili. The kind served inside the Dallas County jail system all the way into the early ’60s. Rumor has it former inmates even requested the recipe when they were released. That’s how you know it was legit.

This was old-school Texas chili at its core: beef, chiles, garlic, and cumin. No fluff. No filler. Just bold flavor.

Of course, this being Texas, the story doesn’t end without a little rivalry.

Bill “Billy Goat” Hauck, the sheriff of Bexar County — home of San Antonio, the Tex-Mex capital of the world — took issue with Dallas getting bragging rights. He claimed his jail system produced a better bowl and even joked he ought to arrest Tolbert for suggesting otherwise.

Problem is… Hauck never shared his recipe. So Dallas keeps the credit, the legend lives on, and the debate rolls forward — just like it always has in Texas. Because around here, arguing about chili might be our favorite pastime after eating it.”

JAILHOUSE BRISKET CHILI adapted from Meat Church Jailhouse Chili and Meat Church Brisket chili

2 T beef tallow ~ I use FATWORKS from my local butcher
2 pound chuck roast cut into 1/2 inch pieces after removing most of the fat
2 pounds SMALL diced smoked brisket
1 Vidalia onion, chopped SMALL
1 red/purple onion, chopped SMALL
6 garlic cloves, FINELY minced
7 + 1 cups homemade beef bone broth
2 cans fire roasted diced tomatoes (undrained)
4-5 dried chilis de arbol
8 (6-in.) corn tortillas, chopped (optional)
2 tablespoons Kinders Steak Blend or Cowboy Butter seasoning
3 tablespoons of your favorite chili seasoning
Toppings of choice: chopped onions, shredded cheese, jalapenos, olives… (optional)

  • Boil 1 cup homemade bone broth +2 tablespoons water and pour into a bowl over your chilies de arbol. Let steep for 10 minutes. Once the chilies are soft, chop finely and set aside.
  • Toss the meat to season evenly with Steak Blend or Cowboy Butter.
  • Add the beef tallow to a LARGE Dutch oven set to medium high heat.
  • Brown the meat in batches, making sure not to overcrowd the pan.
  • With a slotted spoon remove meat to a large mixing bowl, make sure to leave all the fat and goodies in the pan.
  • Add the onion to the pan, sautéing for 5-7 minutes on medium heat until browned.
  • Add garlic, chilis de arbol and Texas chili seasoning and cook for two minutes or until fragrant.
  • Add tomatoes and the remaining 7 cups of beef broth.
  • Return the beef and any of its liquids the the Dutch oven. Add the chopped corn tortillas if using.
  • Periodically stir and break up meat pieces as they fall apart.
  • Bring to a boil and reduce to a simmer for 3 hours until liquid has reduced and thickened.

NOTES:

  • Cornbread is great, but FRESH tortillas add a little something to chili as an alternative to the cornbread.
  • As an alternative you can smoke the chili at 250 for 8 hours using your favorite hardwood or use a slow cooker 6 – 8 hours on low, stirring periodically.
  • I often use leftover SMOKED BEEF BRISKET to speed things up.

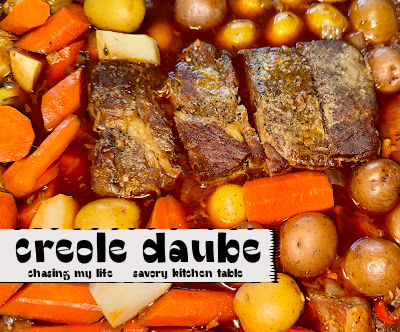
COOKING THURSDAY ~ CREOLE DAUBE aka NOLA POT ROAST ~ BLOG 365.155C

The New Orleans area is a rich base of cultural traditions from many regions that dates back centuries. These traditions have been adapted using locally available ingredients including Cajun and Creole seasonings that give this dish its distinctive flavor. Creole daube quickly became a beloved comfort dish by the 19th century and was often associated with special occasions, holidays and celebrations.

Daube is a French slow-cooked traditional stew that originated in southern France. Creole daube, a variation of this dish, reflects the cultural fusion of French, African, Spanish, and Native American influences in Louisiana. and is a classic, hearty Louisiana beef stew that blends slow cooking French braising techniques with Italian tomato sauced red gravy and the essential Creole/Cajun “trinity” of vegetables, onion, bell pepper, and celery that is low and slow-cooked to help tenderize tougher, less-expensive cuts of meat. It is most often served over rice or mashed potatoes or even pasta. 

This is definitely a fall or winter dish when the air is crisp and you crave a hearty stew to warm your soul head to toe! I ran across this New Orleans Louisiana based stew with strong French and Italian flavors. 

When preparing this dish, you can really benefit from what the late Anne Burrell always stressed on her show Worst Cooks in America, Mise En Place! Mise en place is a French culinary term meaning “everything in its place,” referring to the crucial practice of gathering, prepping, and organizing all ingredients, tools, and equipment before cooking to ensure a smooth, efficient, and stress-free process which involves first reading the recipe ALL the way through, chopping vegetables in advance, measuring spices and arranging cooking utensils and ingredients in a logical order which allows the cook to focus solely on the cooking steps.

While Mise en place is vital in professional kitchens, it’s also a wonderful habit for ALL home cooks to adapt. It is an especially good habit when preparing complex dishes or fast-cooking recipes like stir-fries that having A LOT of ingredients.

Every ingredient in this recipe plays a special role. From the hickory-smoked bacon to the red wine and aromatic vegetables. Each adds layer upon layer of rich, savory flavor that leaves you craving seconds.

Hickory-smoked bacon adds a smoky depth and salty, meaty flavor to the dish. Boneless chuck roast which is a tough cut of beef becomes juicy, tender and flavorful when slow-cooked. Yellow onions, green (red) bell pepper, and celery, the classic flavor base referred to as the holy trinity of Creole AND Cajun cooking add layer after layer of seasoned flavor. I personally CANNOT eat green pepper so substitute red pepper. QUALITY tomato paste adds richness, umami, and depth to the dish and a dry red wine adds an acidity to help break down the meat even more and adds a complexity to the dish. A homemade beef stock; a savory, liquid base helps create a gravy like consistency to the sauce. And the addition of carrots and turnips add a mild sweetness and heartiness.

This is also a fantastic dish to make ahead! The flavors continue to meld and deepen as it rests. Prepare it as directed, then cool completely before transferring to an airtight container. You can refrigerate for up to two days for the freshest flavor or freeze for up to three months. But, the BIGGEST key to a good daub is LOW & SLOW, with QUALITY seasonings and NO PEEKING while it cooks!!

This is a NOLA humble, but glorious dishes that was served regularly, but unfortunately, not so much the4se days. Ultimately, French braising meets an Italian red gravy and a trinity roux to meld the flavors together. These three methods blended together magically transform an inexpensive cut of meat into a tender comfort food. This is traditionally a family Sunday meal. The key to a good DAUB is LOW & SLOW with good seasonings and NO PEEKING while it cooks.

To reheat, thaw it overnight in the refrigerator if frozen. Reheat slowly over low heat on the stove top or covered in a preheated 300° oven, stirring occasionally, until heated through. Adjust the consistency with broth or wine to loosen the sauce slightly if needed.

CREOLE DAUBE aka NOLA POT ROAST adapted from Southern Living 
Cook Time: 10 mins
Active Time: 50 mins
Additional Time: 3 hrs 15 mins
Total Time: 4 hrs 15 mins
Servings: 6

3 thick hickory smoked bacon slices, coarsely chopped
3 1/2 pound boneless chuck roast, trimmed
FRESH ground sea salt and black pepper
1 LARGE Vidalia onion, chopped
1 LARGE red bell pepper, chopped
1 LARGE celery stalk, chopped
3 tablespoons tomato paste
6-8 cloves garlic, FINELY minced
1 cup QUALITY dry red wine 
2 cups homemade beef stock
5 Lemon thyme sprigs
1/2 teaspoon ground bay leaves
1/8 teaspoon ground cloves
1 pound baby potatoes, optional

5 carrots, sliced on an angle into 2 inch pieces
2 medium turnips, peeled and cut into 1 inch piece 

  • Preheat oven to 325°.
  • Cook bacon 7-8 minutes in a large Dutch oven OR a deep skillet over medium, stirring occasionally, until it’s browned and fat has COMPLETELY rendered. Transfer bacon pieces to paper toweling to drain and reserve drippings in bottom. 

  • Sprinkle roast with FRESH ground sea salt and black pepper.
  • Increase heat to medium-high.
  • Add roast to Dutch oven, and sear 4-6 minutes per side until you get a deep sear.
  • Transfer to a cutting board to rest. 

  • Reduce heat to medium.
  • Add onions, red pepper and celery to Dutch oven cooking and stirring often 6-7 minutes and scraping up browned bits from bottom of Dutch oven, until onions soften. 

  • Add tomato paste and garlic; cook, stirring constantly 2-3 minutes until tomato paste turns a shade or two darker.
  • Add wine, and bring to a simmer, stirring occasionally 3-4 minutes, until it’s slightly thickened and most of the alcohol burns off. 

  • Stir in the beef stock, thyme sprigs, ground bay leaves and cloves.
  • Nestle roast and bacon back into Dutch oven along with any juices that have accumulated and bring to a SLOW simmer over medium heat.
  • Remove from heat, cover and transfer to preheated oven, braising for 2 hours.
  • Stir in potatoes, carrots and turnips. 

  • Cover and return to oven; braising another hour and 15 minutes until meat and vegetables are tender.
  • Remove from oven, and let rest 15 minutes. 

  • Transfer roast to a work surface.
  • Skim off fat and discard.
  • Shred into large pieces, if desired. 

  • Remove and discard thyme sprigs.
  • Let it rest 5 minutes.
  • Return shredded beef to Dutch oven and serve over mashed potatoes or egg noodles if not using baby potatoes.

COOKING THURSDAY ~ SOUTHWEST CHICKEN SKILLET ~ BLOG 365.148A

HUGE flavor and all in one pan with minimal time effort gets a delicious, hearty meal on the table on the busiest night or for a casual get together in record time.

SOUTHWEST CHICKEN SKILLET serves 4-6

1 tablespoon avocado oil
1½ pounds boneless skinless chicken thighs, (6 pieces)
1 + 1 teaspoons Pampered Chef Street Corn Seasoning Mix or Chile lime
1 onion, chopped
½ cup Peppadew peppers
15 ounce can fire-roasted diced tomatoes, drained
15 ounce can black beans, drained and rinsed
15 ounce can fire roasted corn, drained
4 oz. (1 cup) grated Colby jack cheese
Taco-size tortillas, Optional for Serving
Chopped cilantro, Optional for Serving
Salsa, Optional for Serving
Lime wedges, Optional for Serving
Guacamole, Optional for Serving
Sour Cream, Optional for Serving
Pampered Chef Cilantro-Lime Rice Meal Mix (prepared according to the package), optional

  • Heat the oil 2–3 minutes over medium heat in deep skillet.
  • Season both sides of the chicken thighs with half of the seasoning mix.
  • Sear the chicken 5–6 minutes, or until they release easily.
  • Flip and cook for another 2 minutes.
  • Remove the chicken from the skillet.
  • Add the onion, cooking 6-7 minutes until softened.
  • Add the tomatoes, beans, corn, and remaining seasoning mix; stirring to combine.
  • Nestle the chicken into the pan along with any juices.
  • Top each piece of chicken with cheese.
  • Sprinkle Peppadew peppers around chicken pieces.
  • Cover with the lid, reduce the heat to low, and cook until the chicken, cooking 10-15 minutes until chicken is cooked through.
  • Serve over Cilantro-Lime Rice or in warmed tortillas and topped as desired with cilantro, lime wedges, sour cream and guacamole.

COOKING THURSDAY ~ ENCHIRITOS aka SMOTHERED DOUBLE BAKED TAQUITOS ~ BLOG 365.134C

Taco Bell’s Enchirito is a discontinued fan-favorite where an enchilada, taquito and a burrito cross together have a menage-a-trois whose beautiful baby is the enchirito.

It consisted of a soft flour tortilla filled with seasoned ground beef, refried beans, and diced onions, rolled up and smothered in red enchilada sauce and melted cheddar cheese, traditionally topped with black olives. Personally, I’m not an olive fan so those are out 🙂 I’ve also changed out the flour tortillas for a golden blend that has more flavor and crisps really well. I also made them lighter by using less refried beans

Super easy AND quick with a tasty ground beef taco seasoned filling of ground beef with enchilada sauce and cream cheese is all stuffed into corn tortillas with a hint of jalapeño and cilantro before being baked until crispy. Add a heavy splash of enchilada sauce over the top, layer them with cheese and bake them again!

ENCHIRITOS aka SMOTHERED DOUBLE BAKED TAQUITOS serves 4

1 can refried beans
1 pound ground beef
1 yellow onion, chopped
3 tablespoons Homemade Taco Seasoning (see recipe below) or store bought seasoning
2 1/2 cups red enchilada sauce
4 ounces cream cheese, at room temperature, cut into pieces
2 ounces velveeta, diced
16 to 20 corn tortillas or 8-10 golden blend (half flour, half corn) tortillas
Avocado oil
2 cups shredded Mexican cheese blend

  • Preheat the oven to 425°.
  • LIGHTLY oil a shallow baking dish or deep baking sheet.
  • In a large skillet set over medium high heat, place the beef and onion, cooking 8-10 minutes and breaking up the meat into small pieces until the fat has completely rendered and the beef is browned.
  • Add the taco seasoning and 1/2 cup water.
  • Reduce the heat to medium and simmer 5-6 minutes until the sauce thickens to coat the meat. Stir in 1/2 cup of the enchilada sauce and the cream cheese, cooking and stirring 1-2 minutes, JUST until the cream cheese melts. Remove the skillet from the heat.
  • Working in batches, warm the tortillas in the microwave in 30-second intervals until pliable.

  • Place the tortillas on a baking sheet and rub one side with avocado oil.
  • Flip them over and spread a thin layer of refried beans.
  • Spoon 2-3 tablespoons of the beef mixture down the center on to the beans.
  • Roll up like a cigar and place seam-side down on the baking sheet.
  • Repeat with the remaining tortillas and beef.
  • Bake 10 minutes until they begin to crisp and then carefully flip them over and cook 4-5 minutes more until both sides are crispy.
  • Remove from the oven.
  • During the 1st baking time heat 2 cups on enchilada sauce in a small sauce pan. Add velveeta, stirring to completely melt into the enchilada sauce.
  • Coat the bottom of a lightly oiled 2nd baking dish with 1 cup of enchilada sauce.
  • Arrange the enchiritos over the sauce and top with the remaining enchilada sauce followed by the shredded cheese.
  • Bake 8-10 minutes until the cheese is melted and bubbling.

2 avocados, chopped
1/3 cup chopped fresh cilantro
1 jalapeno, seeded and FINELY chopped
1/4 cup fresh lime juice, plus lime wedges, for serving
flaky sea salt
Crumbled Cotija cheese
sour cream

  • Meanwhile, in a medium bowl, combine the avocados, cilantro, jalapeno, lime juice and a pinch of flaky salt.
  • Fold ingredients gently to mix.
  • Top the taquitos with the avocado mixture, sour cream and crumbled Cotija.
  • Serve warm with lime wedges for squeezing.

HOMEMADE TACO SEASONING
2 tablespoons chili powder
1 tablespoon chipotle chile powder
1 tablespoon smoked paprika
1 tablespoon garlic powder
1 tablespoon onion powder
2 teaspoons ground cumin
1 teaspoon dried oregano
1 teaspoon fine pink Himalayan salt

  • In a glass jar, combine everything, mixing well.
  • Store at room temperature in a cool, dark place for up to 6 months. 

SALSA VERDE CHICKEN CASSEROLE ~ BLOG 365.121

SALSA VERDE CHICKEN CASSEROLE
1 tablespoon butter
2 boneless, skinless chicken breasts
1 teaspoon Hatch chile seasoning
FRESH ground sea salt and black pepper
1/2 cup sour cream
3/4 cup chunky salsa
3/4 cup salsa verde
2 cups chopped tomatoes
1/4 cup FRESH chopped cilantro
2 cups Mexican blend shredded cheese
2 green onions, sliced thin
1 small mini red pepper, diced
1 can Green Giant Mexican corn, drained well
8 corn tortillas
OPTIONAL TOPPINGS – avocado slices, sliced green onions, FRESH chopped cilantro, sour cream or guacamole

  • Melt butter in a medium skillet.
  • Season chicken breasts on both sides with the Hatch chile season and FRESH ground sea salt and black pepper.
  • Sear chicken on both sides 4-5 minutes until cooked through.
  • Shred chicken into small pieces.
  • Combine chunky salsa and salsa verde until well blended.
  • In a mixing bowl combine chicken pieces, corn, 3/4 cup salsa mix, green onions and pepper pieces with the sour cream.
  • Spread 1/4 cup of the salsa mixture on the bottom of an 8 inch greased baking dish.
  • Layer half the tortillas on top of salsa.
  • Spread half the chicken mixture over the tortillas followed by half the cheese.
  • Repeat layers ending with remaining salsa and a couple pepper rings for color.
  • Bake 20-25 minutes until bubbly.
  • Serve with additional toppings.

NOTE: This recipe converts well to a dip or “loose” casserole that I often serve over tortilla chips. I find the leftovers keep better that way.


SALSA VERDE PASTEL AZTECA ~ BLOG 365.107

It’s no surprise that where we live shapes our families and the recipes we pass down – the very way we gather around the kitchen table. The culinary traditions of the places we call or have called home have a HUGE impact on our personal journeys.

I’m from Texas, but I didn’t grow up there. I have lived there a few times and LOVE the farm to market way of cooking. I miss when I’m not there and have a difficult time acquiring the necessary ingredients to re-create the family recipes that have been handed down over the years.

That said, life goes on and we do our best to make substitutions that work well enough to recreate those recipes. Think of Pastel Azteca as a Mexican style lasagna, where the sauce is a smooth salsa; corn tortillas are substituted for the pasta, chicken or pork instead of traditional beef for the protein, roasted green chiles for the tomatoes and both crumbly as well as melty cheeses instead of Mozzarella and Parmesan cheeses. Mexican recipes are a lot like Italian recipes – layer after layer of flavor and slow cooking to get the right depth of those flavors.

PASTEL AZTECA Servings: 8 servings
SAUCE
1 1/2 pounds tomatillos, husked and rinsed
4 dried guajillo, colorado or ancho chiles, stemmed and seeded
2 cups FRESH cilantro
1 white onion, chopped
2 cloves garlic, minced
1 cup tomato puree
1 teaspoon Mexican oregano
1 sprig fresh epazote (optional)
FRESH ground sea salt and black pepper
1 tablespoon butter
2 tablespoons avocado oil

  • Add the dried chiles to a bowl and pour boiling water over them. Cover the bowl to let them rehydrate. 

  • Heat a grill or cast iron pan over medium high heat.
  • Char the onion and garlic cloves until they are nicely blackened. Add to a blender.
Add the rehydrated chiles to the blender, along with all the rest of the sauce ingredients, except for the lard.
  • Puree extremely well.
Get the lard hot in a saucepan.
  • Add the sauce and bring to a boil,, stirring constantly to incorporate the fat.
  • Reduce the heat to a bare simmer and cook 10 minutes or so. Turn off the heat.

CASSEROLE & ASSEMBLY
18 6 inch corn tortillas
2 tablespoons butter
1 pound shredded chicken
6 poblanos, Hatch or Anaheim peppers, roasted, peeled, seeded and cut into strips
1 + 1/2 cup ELOTE corn kernels (see notes for recipe)
4 ounces cotija, crumbled
1 pound Oaxaca or mozzarella cheese, grated
1/2 cup Mexican crema, or sour cream (Darigold has a Mexican Sour Cream I like)


  • Preheat the oven to 400°F.
  • Butter a 9×13 casserole or baking dish.
  • Ladle a thin layer of the sauce into the bottom.
  • Layer the casserole with 6 tortillas.
  • Spread some meat evenly over the top.
  • Add the 1 cup of elote corn and strips of roasted peppers. 
Sprinkle a layer of cotija cheese, then crema, then shredded Chihuahua or Oaxaca cheese.
  • Top with another layer of tortillas, a bit more sauce, meat, pepper and cheese.
  • Finish with the remaining tortillas.
  • Sprinkle with the remaining cotija cheese, drizzle some more crema, and sprinkle the last of the grated cheese over the top.
  • Season with FRESH ground pepper and last of the corn.
  • Bake for 20 minutes until the cheese starts to brown.
  • Let stand for 10 minutes before serving.

NOTES & TIME SAVERS

  • Keep in mind this is the full-on, Sunday supper version of pastel azteca, but here are some serious time-saving hacks for an equally tasty week night meal.
  • You can use canned green chiles. Or even frozen. In August I buy Hatch chiles (they are only available for about a month a year) and roast them and portion them for freezing so I have some all year round. If you don’t know how to roast green chiles, here’s a great tutorial.
  • I make elote corn and then cut it from the cob or better yet make esquites for this recipe. Elote and street corn are the same thing. The word elote means “corn cob”. It’s the seasonings that make all the difference. Esquites, also called elote en vaso means corn in a cup. These can be made ahead and frozen also. Recipes below.
  • Literally any cooked meat will work, just make sure to chop or shred it small. Use a rotisserie chicken or left over carnitas. A HUGE time saving hack is using tamales (without the husks) and rolling them in the golden blend tortillas to layer at the bottom of the baking dish.
  • You can use canned enchilada sauce, or even canned tomato sauce.
  • If you have trouble finding crema, thin regular sour cream with a little buttermilk, milk or cream to get you closer to the real thing. 

OPTIONAL TORTILLA STEP

  • Heat about 1/4 inch of oil in a pan until it hits about 350°.
  • Fry the tortillas for about 30 seconds or so, JUST enough for them to stiffen up a bit, but not enough so they are stiff like tostadas. You want semi limp.
  • Cool tortillas on a cooling rack.

ELOTE aka MEXICAN STREET CORN
4 ears corn, husked (see notes)
2 tablespoons DUKE’s mayonnaise
2 tablespoons Mexican crema or sour cream
½ cup Cotija cheese , freshly grated, or queso fresco (see notes)
chili powder , or tajin, to taste
1 lime, cut into wedges
FRESH chopped cilantro , for garnish, optional

  • Bring a large pot of salted water to a boil over medium-high heat.
  • Add the ears of corn and cook 10 minutes or until tender.
  • Brush corn with melted butter and grill corn on medium heat until slightly charred.
  • Mix the mayonnaise and Mexican crema together.
  • Spread a thin layer all over the corn ears. 
Sprinkle generously with cotija cheese and the desired amount of chili powder.
  • Serve garnished with cilantro, and with a lime wedge on the side for squeezing on top.
  • For this recipe cut the corn from the cob in the end.

NOTES:

  • White corn is traditionally used in Mexico, but yellow corn easily substitutes.
  • Cotija cheese is traditional, but Quesa Fresca will substitute in a pinch.
  • If using fresh husked corn, leave stem end attached as something to hold on to while eating. Otherwise stick a long wooden skewer into the end of the corn before grilling or coating, to make them easier to hold and eat.

ESQUITES

1 tablespoon salted butter , softened
1/3 cup diced onion
1 jalapeño or serrano pepper, seeded, diced (optional)
1/3 cup homemade chicken broth or water
3 cups (4 cobs), husked, cut from the cob
FRESH ground salt and pepper, to taste
5 tablespoons DUKE’s mayonnaise
5 tablespoons Mexican crema or sour cream
1/3 cup Cotija or queso fresco cheese, shredded
chili powder, Tajin or hot sauce, to taste
1 lime, cut into wedges

  • Add butter to large cast iron skillet over medium heat.
  • Once melted, add onion and pepper, sautéing until tender.
  • Add broth or water and corn. Cover and cook, stirring occasionally, until corn is tender (about 5-8 minutes).

  • Season with black pepper and a little salt then divide among 4 cups – for making Pastel Azteca I just make one big bowl.

  • In each cup, add 1 heaping teaspoon of mayonnaise and 1 heaping teaspoon of Mexican crema (or sour cream), stirring to combine.
  • 
Sprinkle generously with grated cheese and chili powder, to taste.
  • Serve with lime wedges to squeeze on top.


NOTES:

  • White corn is traditionally used in Mexico, but yellow corn can be substituted. You could also substitute 3 cups frozen corn.
  • Cotija cheese is traditional, but if you can’t find it, substitute Quesa Fresca will substitute in a pinch or FINELY grated Parmesan cheese.

SLOW COOKER TEX-MEX CHICKEN ~ BLOG 365.10

This is super easy and packs a punch of traditional Mexican flavor and spices with the ease of a slow cooker that allows the chicken to absorb all the seasonings and make it tender and juicy that’s ready to serve whenever you are. It is not only easy, but versatile! Serve it in tacos, in burritos or over rice. Works well to feed a crowd also.

SLOW COOKER TEX-MEX CHICKEN

2 pounds boneless, skinless chicken breasts
1 tablespoon avocado oil
FRESH ground salt and pepper
1 LARGE onion halved and sliced

16 ounce jar PACE chunky mild salsa (or use medium for a spicier kick)
3-4 tablespoons brown sugar
4 ounce can mild diced green chilies
14.5 ounce can fire roasted diced tomatoes, drained
1 tablespoon chili powder
1 1/2 teaspoons salt
1 teaspoon ground cumin
1 teaspoon onion powder
1 teaspoon garlic powder
1/2 teaspoon smoked paprika
1/2 teaspoon FRESH ground black pepper
1/2 teaspoon dried oregano

1/2 teaspoon ground chipotle chili pepper (optional, for added heat)
1 teaspoon liquid smoke
1 can black beans, rinsed and drained
Hot sauce, to taste
Warm tortillas, for serving
Chopped green onions, for serving
Shredded Mexican cheese, for serving
Sour cream, for serving

  • Rub the chicken breasts all over with the oil and place them in the bottom of your slow cooker.
  • Generously season with FRESH ground sea salt and black pepper.
  • Scatter onions over chicken.
  • Mix together the brown sugar, seasoning, liquid smoke, salsa, green chiles and diced tomatoes. Pour over the chicken and onions.
  • Set your slow cooker to high and cook for 2-4 hours, or on low for 6-7 hours until the chicken is tender enough to shred.
  • Shred chicken and return it to the slow cooker adding the **black beans at this time, letting it simmer on low for an additional 20 minutes to absorb the flavors.
  • Drain off any excess liquid if necessary before serving.
  • Adjust the seasoning to taste.
  • Serve with tortillas, green onions, shredded cheese and sour cream.

NOTE:

  • You can replace ALL of the seasonings with 2-3 tablespoons of your favorite Mexican blend seasoning or taco seasoning.
  • I often add the black beans into the salsa mixture and it’s just as tasty. 😀
  • You can also substitute 2 cans of ROTEL tomatoes for the green chiles and fire roasted tomatoes making it easier to choose your heat level.

CHILE CORNBREAD SALAD ~ BLOG 365.7B

Perfect side dish for a potluck, picnic or church social. You’ll take home an empty bowl and many requests for the recipe.

CHILE CORNBREAD SALAD serves 8

1 package (8-1/2 ounces) cornbread/muffin mix
4 ounces can chopped green chiles, undrained
1/8 teaspoon ground cumin
1/8 teaspoon dried oregano

  • Prepare cornbread batter according to package directions.
  • Stir in chiles, cumin and oregano.
  • Spread in a greased 8-in. square baking pan.
  • Bake 20-25 minutes at 400° until a toothpick inserted in the center comes out clean.
  • Cool COMPLETELY.

1 cup Duke’s mayonnaise
1 cup Mexican sour cream
1 envelope ranch salad dressing mix
2 cans (15 ounces each) pinto beans, rinsed and drained
2 cans (15-1/4 ounces each) whole kernel corn, drained
3 medium tomatoes, chopped
1 cup chopped red pepper
1 bunch chopped green onions
1 cup chopped red onion
10 bacon strips, cooked and crumbled
2 cups shredded cheddar cheese

  • In a small bowl, combine mayonnaise, sour cream and dressing mix; set aside.
  • Crumble half of the cornbread into a 13×9-in. Baking dish.
  • Layer with half of the beans, mayonnaise mixture, corn, tomatoes, green pepper, onions, bacon and cheese.
  • Repeat layers. Dish will be VERY full.
  • Cover and refrigerate for 2 hours.

CHICKEN TOSTADA CUPS ~ BLOG 365.2

CHICKEN TOSTADA CUPS
12 (6 inch) corn OR flour tortillas, warmed
Cooking spray
2 cups shredded rotisserie chicken pieces
1 cup chunky salsa
16 ounce can refried beans
1 cup shredded Mexican cheese blend

Optional toppings: Shredded lettuce, sour cream, chopped cilantro, diced avocado, sliced jalapeno, lime wedges, sliced ripe olives, sliced green onions, sliced radishes, and pico de gallo or additional salsa

  • Preheat oven to 425°.
  • Press warm tortillas into 12 muffin cups coated with cooking spray, pleating sides as needed.
  • Spritz tortillas with additional cooking spray.
  • Bake 5-7 minutes until lightly browned, 5-7 minutes.
  • Toss chicken with salsa.
  • Layer each cup with beans, chicken mixture and cheese.
  • Bake 9-11 minutes until heated through.
  • Serve with toppings as desired.