MINI CHOCOLATE CHIP CANNOLI CUPS ~ BLOG 365.161

MINI CHOCOLATE CHIP CANNOLI CUPS

ABSOLUTELY everything you love about a silky and sweet cannoli, but in a tasty, fun, and easy bite-sized form!

CHOCOLATE CHIP CANNOLI CUPS
2 Pillsbury pie crusts (1 box)
1 LARGE egg, lightly beaten with 1 teaspoon water
2 tablespoons granulated sugar
2 tablespoons QUALITY ground cinnamon

  • Preheat oven to 375°.
  • LIGHTLY spray two 24 cup mini muffin pans with cooking spray and set aside.
  • Whisk together the sugar and cinnamon. Set aside.
  • On a lightly floured surface, roll out pie crust one at a time.
  • Sprinkle with some of the cinnamon sugar and lightly roll to push the cinnamon sugar into the pie crust on both sides.
  • Using a 2 inch round cutter, cut out circles from the crust.
  • 
Gently press each circle into the muffin pan, forming a cup shape.

  • Use a pastry brush to coat the insides of the cups with egg wash.
  • Sprinkle remaining cinnamon sugar over the cups.
  • 
Bake in preheated oven for 10-12 minutes, until golden brown and crispy.
  • 
Remove from oven and let cool completely in the pan before removing.

FILLING
8 ounces ricotta cheese
4 ounces cream cheese, room temperature
1 cup powdered sugar whisked to remove any lumps
1 teaspoon PURE vanilla extract
1/2 teaspoon lemon zest
Juice from 1 LARGE lemon
1/2 cup mini chocolate chips

  • Add ricotta cheese to a cheesecloth and squeeze out the excess water. If using sieve instead of cheesecloth gently press down with a rubber spatula to remove the water.
  • Add the drained ricotta, cream cheese, powdered sugar, vanilla extract, lemon zest and lemon juice to a large mixing bowl. With a hand mixer beat until combined and creamy.
  • Fold in 1/2 cup mini chocolate chips.
Cover and refrigerate.

GARNISH
mini chocolate chips or chocolate jimmies
powdered sugar for dusting

ASSEMBLY

  • Once the pie crusts are cooled, fill each cup with the ricotta filling.

  • Add a few extra chocolate chips or jimmies to each cannoli cup and dust with powdered sugar.
  • Serve and enjoy!


*TAMY’S SOUTHERN APPLE WALNUT CARROT CAKE ~ BLOG 365.142

TAMY’S SOUTHERN APPLE WALNUT CARROT CAKE

CAKE

1 cup golden raisins
1/4 cup Malibu rum
2 cups plus more for pans all purpose flour
2 cups sugar
2 teaspoons baking soda
2 teaspoons QUALITY ground cinnamon
1 teaspoon salt
4 LARGE eggs
1 1/2 cups vegetable oil
1 1/2 cups grated apples – half grated and half chopped (I used Pink Lady apples)
1 1/2 cups grated carrots
1/4 cup WONDRA flour
1 cup small chopped walnuts

  • Pour rum over raisins in a small bowl. Set aside for 10 minutes and then drain well for several minutes.
  • Preheat oven to 350°.
  • Grease and flour 2 (9-inch) round pans or a 9×13 cake pan.
  • Line bottom of the pans with parchment paper.
  • In a large bowl whisk together the flour, sugar, baking soda, cinnamon and salt.
  • Add eggs and vegetable oil, blending JUST until combined.
  • Dredge drained raisins in Wondra flour, shaking off excess.
  • Fold in apples, carrots, raisins and walnuts, if using.
  • Pour into pans.
  • Bake for 40 minutes or until toothpick comes out clean.
  • Remove from oven and cool for 5 minutes.
  • Remove from pans to a cooling rack.
  • Allow to cool completely before frosting.

FROSTING

8 ounces cream cheese, room temperature
8 ounces salted butter, room temperature
4 cups powdered sugar
1 teaspoon PURE vanilla extract
FINELY chopped walnuts for garnish, optional

  • In a large bowl cream together the cream cheese and butter.
  • Add the vanilla and powdered sugar, beating until fluffy.
  • Fold in nuts if using.
  • Spread frosting on top of each cake layer.
  • Stack the cakes on a serving plate and serve.

NOTE: I tried making this gluten free. I also tried using Bob’s red mill egg substitute in making this recipe. Both are FAILS!

CHICKEN CORDON BLEU, GRUYERE POTATO CASSEROLE, DRIED CHERRY SALAD & PEANUT BUTTER PIE ~ BLOG 365.128

I LOVE watching cooking shows! Every now and then there is a menu I want to duplicate in its entirety. Joanna Gaines had an episode in July that fits that bill EXACTLY!

CHICKEN CORDON BLEU serves 4
Adapted from Joanna Gaines

4 skinless, boneless chicken breasts (5-6 ounces each)
FRESH ground sea salt and black pepper
4 thin slices of ham, cut in half (8 slices)
6 thin slices of baby Swiss cheese, cut in half (12 small slices)
1 cup dry panko breadcrumbs
1 teaspoon garlic salt
1 LARGE egg
1 tablespoon water
½ cup AP flour
½+ teaspoon FRESH ground nutmeg
5 cups NEUTRAL oil
Garlic salt, for garnish
Flaky salt, for garnish
Hollandaise Sauce

  • Place a rack in the middle of the oven and preheat to 375°.
  • Trim off any fat around the edges of the chicken.
  • Working with one breast at a time, place the chicken between two sheets of parchment paper and pound with a mallet, or rolling pin, until about ¼-inch thick.
  • Season the chicken on all sides with FRESH ground sea salt and black pepper.
  • Arrange the chicken smooth side down on a work surface.
  • Layer one half of each breast with one slice of cheese, one slice of ham, another slice of cheese, another slice of ham and a final slice of cheese leaving space around the edges.
  • Fold breast in half over the ham and cheese and press edges together to firmly seal.
  • In a shallow bowl, combine the breadcrumbs, garlic salt, and FRESH ground pepper until completely combined.
  • In a separate shallow bowl, whisk the egg and water together.
  • On a plate combine the flour and nutmeg.
  • Once again working with one chicken breast at a time, press both sides into the flour, shaking off any excess, dip both sides into the egg mixture and then completely coat with the breadcrumb mixture, pressing with clean fingers to adhere.
  • Transfer to a separate plate and continue with the remaining chicken breasts until all are completely covered.
  • Heat the oil in a large heavy skillet (4½ quart) over medium-high until simmering.
  • Cook the chicken 2-3 minutes per side, turning occasionally, until browned on all sides.
  • Transfer to a wire rack set in a rimmed baking sheet and season as desired with garlic salt.
  • Bake the chicken 15 minutes until an instant-read thermometer inserted into the thickest part of the breast registers 165°.
  • Carefully remove the chicken from the oven and garnish with flaky salt, let sit for 5 minutes.
  • Plate chicken breasts and top with the Hollandaise sauce.

BLENDER HOLLANDAISE SAUCE
Adapted from Downshiftology

3 egg yolks
2+ tablespoons FRESH lemon juice
1/4 teaspoon creamy horseradish
3/4 teaspoon DUKE’s mayonnaise
FRESH ground sea salt and black pepper
1/2 cup QUALITY unsalted butter, melted and hot

  • Melt the butter in a microwave.
  • Add the egg yolks, lemon juice, horseradish, mayonnaise, salt and cayenne pepper into a high powered blender and blend for 5 seconds until combined.
  • With the blender running on medium high, slowly stream in the hot butter into the mixture until it’s emulsified.
  • Pour the hollandaise sauce into a small bowl and serve while warm.


GRUYERE POTATO CASSEROLE serves 6-8
Adapted from Joanna Gaines

4 tablespoons unsalted butter
6 medium russet potatoes, scrubbed, peeled and cut into medium chunks
3-4 garlic cloves, FINELY minced
2 tablespoons WONDRA flour
1 cup heavy cream
1½ cup milk
2 cups Gruyère cheese, grated and divided in half
FRESH ground sea salt and black pepper
2 teaspoons QUALITY paprika
1 teaspoon onion powder
Paprika and black pepper, for garnish

  • Preheat the oven to 350°F.
  • Butter a 8 x 11.5-inch baking dish.
  • Bring a large pot of generously salted water to a rolling boil.
  • Add the potatoes and simmer until just tender but not falling apart, about 13 minutes. Drain thoroughly and set aside.
  • In a medium saucepan, melt the butter over medium heat.
  • Add in the garlic and sauté over medium-low until softened and fragrant, about 30 seconds. Increase the heat to medium, whisk in the flour and cook, stirring constantly, until lightly browned and fragrant, 2 to 3 minutes.
  • While whisking constantly, slowly pour in the heavy cream and milk until the sauce is smooth.
  • Add in 1 cup of the Gruyère, the salt, pepper, paprika, and onion powder, then cook, whisking gently, until the cheese is melted.
  • Arrange the potatoes to cover the bottom of the prepared baking dish and pour the sauce over them and top with the remaining Gruyère.
  • Place the baking dish in the oven and cook for 15 minutes. Turn the broiler to high and broil for 5 minutes more, until fully golden brown.
  • Top with black pepper and paprika to serve.

DRIED CHERRY SALAD serves 4-5
Adapted from Joanna Gaines

“This salad strikes that sweet spot between simple and elevated. It’s all the more enjoyable because it surprises people with unexpected flavors. Arugula is a peppery green, so combining it with cherries gives this recipe a nice blend of sweet and spice. Since the prep work for the cherries can happen the night before, this side is a favorite of mine whenever I’m hosting. I like to pair it with whitefish or grilled chicken, but really, it’s delicious on the side of anything.” – Joanna Gaines, Magnolia Table, Volume 3

Joanna makes this with arugula, but I find arugula too peppery and bitter so I substitute micro greens, small chopped romaine or butter lettuce.

½ cup apple cider vinegar
½ cup water
4 ounces dried tart cherries
5 ounces micro greens, small chopped romaine or butter lettuce
½ cup small chopped toasted almonds
4 ounces crumbled Gorgonzola or goat cheese (about 1 cup)
¼ cup avocado oil
½ teaspoon crushed red pepper flakes
1 small garlic clove, FINELY grated
FRESH ground sea salt and black pepper

  • Add the apple cider vinegar and ½ cup of water to a large mason jar with a lid and stir in the cherries.
  • Cover and let sit at room temperature for 6 hours or overnight. The cherries will plump slightly and soak up some of the vinegar mixture.
  • When ready to make the salad, add the micro greens, almonds, and Gorgonzola to a large bowl.
  • Drain the vinegar mixture from the cherries into a mason jar with a lid, reserving the cherries.
  • To the mason jar, add the avocado oil, 1 tablespoon of water, pepper flakes, garlic, salt, and pepper.
  • Shake well.
  • Add half the dressing to the salad, toss well, and taste. Add more dressing if desired.
  • Top with the cherries and serve.

NOTE: Alternatively, microwave the mixture for 1 minute and let stand at room temperature for 30 minutes.

PEANUT BUTTER PIE with OREO CRUST
Adapted from Joanna Gaines

CRUST
24 Oreo cookies
⅓ cup sugar
7 tablespoons unsalted butter, melted

  • Preheat the oven to 350°.
  • In a food processor, pulse the wafers until they are the consistency of sand.
  • Add the sugar and melted butter and pulse a few more times, until combined.
  • Using your hands, press the wafer mixture into the bottom and up the sides of a 9-inch pie pan.
  • Bake for 12 minutes.
  • Let cool for 20 minutes.

FILLING
1 cup JIF creamy peanut butter
1 cup powdered sugar
4 ounces cream cheese, at room temperature
¼ teaspoon kosher salt
¾ cup heavy cream
1 tablespoon unsalted butter, melted
2 teaspoons PURE vanilla extract

  • Cream together the peanut butter, powdered sugar, cream cheese, and salt on medium speed. With the mixer on low, add the cream, melted butter, and vanilla and whip until the mixture is smooth and fluffy.
    Pour the mixture into the baked crust.

ASSEMBLY
1 cup heavy cream
¼ cup powdered sugar
1 teaspoon PURE vanilla extract
Crushed toffee bits, for garnish (optional)

  • Combine the cream, powdered sugar, and vanilla. Start on low speed, then slowly turn the mixer up to high speed and mix about 2 minutes until the cream holds a soft peak.
  • Spoon the whipped cream on top of the peanut butter filling.
  • Refrigerate for at least 2 hours.
  • Sprinkle with crushed toffee bits, cookie crumble, or nuts if desired.
  • Serve chilled.
  • Store in the refrigerator covered with plastic wrap for up to 3 days.

OLD FASHIONED WACKY CAKE aka DEPRESSION CAKE or WAR CAKE ~ BLOG 365.98

I’ve been obsessed with WWII lately. I’ve also been researching recipes that were popular during times of rationing and this one caught my attention, so much so that I JUST had to try it! I’m so glad I did – it is completely scrumptiously rich and moist and uses NO eggs, milk or butter! I’ve updated the original ingredients and instructions a bit.

OLD FASHIONED WACKY CAKE aka DEPRESSION CAKE or WAR CAKE

1½ cups flour
1 cup sugar
4 3 tablespoons QUALITY cocoa powder
1 teaspoon baking soda
½ teaspoon salt
5 tablespoons NEUTRAL oil
1 tablespoon vinegar
2 1 teaspoons PURE vanilla
1 cup water

  • Preheat oven to 350°.

  • Spray 8×8 inch cake pan with Baker’s Joy.
  • Whisk together the flour, sugar, cocoa powder, baking soda, and salt in an 8×8 inch pan large bowl.
  • Make 3 wells in the flour mixture.
  • Pour the oil into one well, the vinegar into another well, and the vanilla into another well.
  • Pour the water over everything.
  • Whisk the mixture until cake batter forms. You may need to use a spatula on the corners of the pan to make sure all of the dry ingredients get mixed in. Spread into prepared cake pan.
  • Bake for 30–35 minutes, or until a toothpick inserted into the center comes out clean.
  • Let cool, slice, and serve.
  • Top the cake with powdered sugar, whipped cream, or frosting (chocolate or cream cheese are best). 


PRETTY IN PINK TRES LECHES (3 MILKS) CAKE ~ BLOG 365.86B

You can make the cake a day ahead before poking it with holes and storing it tightly wrapped at room temperature. The cake benefits from sitting in the refrigerator to absorb all of the milk. It needs at least 1 hour but can sit in the fridge overnight before frosting and serving. The longer it sits, the more it can absorb, making the cake better and better.

CAKE
1 1/2 cups AP flour
1 1/2 teaspoon baking powder
1/2 teaspoon kosher salt
1/4 – 1/2 cup freeze dried fruit powder, optional

5 LARGE eggs, separated
1 1/4 cups granulated sugar, divided
1 teaspoon PURE vanilla extract
1/2 cup WHOLE milk
4 tablespoons unsalted butter, melted and cooled

  • Preheat oven to 350°.
  • Grease a 13″ x 9″ baking pan with cooking spray.
  • In a large bowl sift together the flour, baking powder, salt and freeze dried fruit powder if using.
  • In a medium bowl, using a handheld mixer on medium-high speed, beat egg yolks and 1 cup sugar until stiff ribbons trail behind beaters.
  • Beat in vanilla.
  • In another large bowl, using handheld mixer on medium-high speed, beat egg whites until soft peaks form.
  • Gradually add remaining 1/4 cup sugar and continue to beat until stiff peaks form.
  • Add yolk mixture to dry ingredients and beat to combine.
  • Add milk and butter and beat until combined.
  • Gently fold in egg whites until just combined.
  • Pour batter into prepared pan.
  • Bake cake until a tester inserted into middle of cake comes out clean, about 30 minutes.
  • Let cool.

FILLING
1 (14 ounnce) can sweetened condensed milk
1 (12 ounce) can evaporated milk
1/2 cup WHOLE milk
1 teaspoon PURE vanilla extract

  • In a medium bowl, whisk condensed milk, evaporated milk, whole milk and vanilla until combined.
  • Using a fork, poke holes all over cake, then pour milk mixture over cake.
    Cover pan with plastic wrap and refrigerate until milk mixture is absorbed, AT LEAST 1 hour, BUT PREFERABLY OVERNIGHT.

WHIPPED CREAM & ASSEMBLY
2 cups heavy cream
1/2 cup granulated sugar
1/4 cup cinnamon-sugar
Sliced FRESH strawberries (or fruit of choice), for serving

  • In a large bowl beat the heavy cream and sugar until stiff peaks form.
  • Frost cake with whipped cream.
  • Sprinkle with cinnamon-sugar.
    Serve with strawberries alongside.

NOTES:

  • The trick to this recipe is in the egg whites. Be sure to beat them until they hold STIFF peaks and then fold them ever so GENTLY into the cake batter. The goal is to avoid deflating them while folding, so that the cake bakes up nice and tall with lots of lift.
  • Egg temperature matters! You’ll get the most stable whip and tallest sponge cake by using room temperature eggs. Make sure to let the eggs sit at room temperature for 30 minutes before using.
  • To make this flavored I add freeze dried powdered fruit flavors to the sifted dry mixture. 1/4 – 1/2 cup is all it takes.
  • DO NOT rush the soaking step. A longer soak results in a deeper flavor AND a moister cake.

EARTHQUAKE CAKES ~ BLOG 365.59

EARTHQUAKE CAKES

Where did the name come from? I’m not sure where this cake got it’s name, but I think it’s from the cracks and crevices that form on the top of the cake while it’s baking, which resembling fault lines or the after effects of an earthquake. The cake also spouts gooey cream cheese chocolate tunnels throughout its rich German chocolate flavor filled with coconut and pecans.

1 German chocolate cake mix – the base of the cake
1/3 cup Avocado oil
3 LARGE eggs
1 1/3 cups water
1/3 cup shredded coconut – use sweetened coconut flakes
1/3 cup semi-sweet chocolate chips
1/2 chopped pecans
1 stick (1/2 cup) unsalted butter
8 ounces full fat cream cheese
1 pound (3 3/4 cups) powdered sugar

  • Preheat the oven to 350°.
  • Lightly spray a 9 x 13 inch pan with non-stick cooking spray.
  • Sprinkle the coconut, chocolate chips, and pecans on the bottom of the pan.
  • Mix the German chocolate cake mix with the oil, eggs, and water until well blended.
  • Pour the cake mix on top of the coconut layer.
  • In a saucepan, melt the butter and cream cheese.
  • Beat in 1 pound of powdered sugar until it’s smooth to the butter and cream cheese.
  • Spread this mixture german chocolate cake layer.
  • With a knife swirl the layers together gently.
  • Bake for 35-45 minutes. It is done when it doesn’t wobble in the pan if you shake it. The toothpick test won’t work because of the cake’s gooey texture.

CAKE LAYERS
Layer #1 (on the left) – chocolate chips, pecans, and coconut
Layer #2 (on the right) – German chocolate cake mix
Layer #3 – the butter, cream cheese, powdered sugar goodness. Let’s not think about the calories.. they don’t exist 🙂

NOTES: ALTERNATE FLAVOR COMBOS: Lemon with white chocolate, coconut and walnuts Carrot Cake with the addition of golden raisins and made with white chocolate and coconut.

APPLE WALNUT CAKE with CARAMEL GLAZE ~ BLOG 365.16

APPLE WALNUT CAKE with CARAMEL GLAZE
Tart apples, crunchy walnuts and homemade caramel sauce makes for the perfect decadent autumn dessert.


CAKE
1½ cups neutral oil
2 cups granulated sugar
LARGE eggs
3 cups AP flour

1 teaspoon baking soda
½ teaspoon QUALITY cinnamon
1 teaspoon salt

2 teaspoons PURE vanilla extract
3½ cups Granny Smith apples peeled and FINELY chopped (3-4 LARGE apples)
1 cup TOASTED walnuts, FINELY chopped

  • Preheat oven to 325°F.
  • Grease and flour a bundt pan or two loaf pans COMPLETELY.
  • In a large mixing bowl, combine the oil, sugar and eggs until the mixture is smooth and creamy.
  • In a another bowl, sift together the flour, baking soda, cinnamon, and salt.
  • Gradually add the dry ingredients to the wet mixture, mixing JUST until combined. DO NOT OVER MIX!
  • Add the vanilla extract.
  • With a large spatula FOLD in the chopped apples and walnuts until they are evenly distributed throughout the batter.
  • Pour the batter into the prepared pan(s).
  • Bake 50-60 minutes. Begin checking for doneness at 50 minutes by inserting a toothpick into the center of the cake. If it comes out clean, the cake is done. If not, continue baking but monitor closely to avoid over baking.

GLAZE
¾ cup unsalted butter (1 ½ sticks)
1 cup brown sugar
¼ cup whole milk

1 teaspoon PURE vanilla extract

  • In a small saucepan, melt the butter over low heat.
  • Stir in the brown sugar and milk, and bring the mixture to a SLOW boil over low heat. Reduce to a simmer and continue to stir constantly, SLOW boiling for 10 minutes until it thickens slightly, then remove from heat.
  • Stir in the vanilla extract and let the glaze cool slightly. It should still be pourable but not too hot.
  • When the cake is mostly cooled and the glaze is the right consistency, pour the caramel glaze evenly over the top of the cake, allowing it to drip down the sides.

NEAPOLITAN CAKE ~ BLOG 366.362

Why have one flavor when you can have three? Neapolitan bundt cake is a tribute to nostalgic classic Neapolitan ice cream from childhood. It was a family favorite with a flavor for everyone in the family. I was never a single flavor girl. I always ate a mix of all three flavors together.

This bundt cake is dense but soft, similar to a pound cake in texture with strawberry, vanilla, and chocolate layers of soft and fluffy cake and all three flavors – strawberry (sweet), vanilla (basic), and chocolate (deep and rich) are all made from the same batter, making this cake much easier than it looks. But, with just a few additions for the sweet strawberry layer and the deep rich chocolate layer combined with the base vanilla flavor it all balances out! Not the best picture, but the flavor made up for it!

VANILLA CAKE
1 cup or 2 sticks unsalted butter, room temperature
1 cup sugar
2 teaspoons PURE vanilla extract
3 LARGE eggs, room temperature
2 and 1/4 cups AP flour
3 teaspoons baking powder
1/4 teaspoon kosher salt
1 cup full fat or whole milk
2 tablespoons full fat sour cream

  • Grease and line three 6-inch round baking pans.
  • Preheat oven to 350 (320 convection).
  • In a large mixing bowl, beat the butter, sugar and vanilla together until smooth and creamy.
  • Add eggs, one at a time, beating after each addition.
  • Sift in flour, baking powder and salt.
  • Add milk and sour cream and beat on a low speed until just combined. DO NOT OVER MIX!!!!!
  • Divide batter evenly into three bowls.

STRAWBERRY CAKE
1 teaspoon strawberry extract
Pink food gel or food coloring

  • Add strawberry extract to one bowl and a few drops of pink food gel and stir together.

CHOCOLATE CAKE
1 tablespoon cocoa powder, sifted
1 tablespoon milk

  • Add the cocoa powder and milk to another bowl, stirring until smooth.
  • Leave the final batter as is for the vanilla layer.


  • Carefully pour each batter, one layer at a time, into prepared cake tins.
  • Bake cakes 25-30 minutes or until a skewer inserted in the middle comes out clean.
  • Carefully remove the cakes and set on a wire rack to cool completely.

VANILLA BUTTERCREAM
1 cup or 2 sticks butter, room temperature
2 teaspoons PURE vanilla extract or vanilla bean paste
5 cups powdered sugar
3–4 tablespoons WHOLE milk, room temperature

  • Beat butter with an electric mixer until smooth and creamy.
  • Add the vanilla.
  • Add powdered sugar, one cup at a time.
  • Add a tablespoon of milk as needed.
  • Continue until you have used all the icing sugar and milk and the frosting is smooth and creamy.
  • Use a serrated knife to trim tops of cakes to even them out.
  • Place one cake on a small cake board, then cover the top with buttercream.
  • Place the second cake on top. Cover top with buttercream.
  • Place the third cake on top.
  • Cover the entire cake, top and sides, with remaining buttercream. 
  • Use a cake scraper to remove excess buttercream on the sides.

MOONSHINE FRUITCAKE ~ BLOG 366.361B

I KNOW, I know not everyone likes fruitcake and fruitcake has gotten a bad name over the years. Some even say that fruitcake is the culinary equivalent of receiving socks for Christmas. BUT, if you are willing to try it, this fruitcake will put all that to rest.  This is my new go to recipe.  I took all the parts from all my other fruitcake recipes and concocted this one. I have since tossed ALL the other recipes.

This fruitcake CANNOT be used as a doorstop because it is so moist, light and fluffy too. Nor will this fruitcake will last long enough to be passed around and down through the years because it is so flavorful.  This picture doesn’t do it any justice, but trust me it is SOOOOOO GOOD!

1/2 cup finely chopped candied red cherries
1/2 cup finely chopped candied green cherries
1/2 cup finely chopped candied lemon
1/2 cup finely chopped dried apricots
1/2 cup finely chopped candied ginger
1 cup golden raisins
2+ tablespoons coconut rum*
2+ tablespoons brandy*
2+ tablespoons spiced apple moonshine*

  • Toss fruit pieces together with the alcohol and soak for 24 hours. The fruit will soak up the alcohol and make an ooey gooey yummy mess. You can soak for up to a week, adding more of your favorite alcohol each day 😀

1 cup finely chopped pecans
1 cup finely chopped walnuts
1 cup AP flour

  • Toss nut pieces with the flour.
  • Toss nut mixture with the ooey gooey fruit mess mixture.
  • Set aside.

1 1/2 cups flour
2 teaspoons baking soda
2 teaspoons QUALITY cinnamon
1 teaspoon finely ground sea salt
1 teaspoon ground nutmeg
1 teaspoon ground cloves
1 teaspoon ground allspice

  • Sift together the flour, baking soda, cinnamon, salt, nutmeg, cloves and allspice.
  • Set aside.

1 cup butter, room temperature
2 cups finely granulated sugar
2 eggs, room temperature
2 cups applesauce ***
2 teaspoons PURE vanilla

  • Preheat oven to 325°.
  • Grease and flour a 10 tube pan.**
  • Cream the butter.
  • Add the sugar and blend until uniform in color.
  • Add eggs one at a time, mixing well after each addition.
  • Add the applesauce and vanilla until well blended.
  • Gradually add the flour mixture to the butter mixture until well blended.
  • Fold in fruit and nut mixture until uniform in consistency.
  • Spoon into prepared pan(s) of your choice.
  • Bake 60-65 minutes or until tester comes out clean. If using many smaller pans or papers be sure and spray them well and begin checking at the 30 minute mark for doneness.
  • Cool for 15 minutes on wire rack BEFORE inverting or removing from pan!

NOTES

  • *Change up the flavor choice of your liking.
  • ** I like to use many little loaf pans or paper rounds when I make this recipe for neighbor gifts.
  • ***This year I substituted a walnut fig rum for all the other alcohols and was out of applesauce and substituted a jar of pumpkin apple butter and think it was even better!

Original posting December 24, 2016 – updated December 26, 2024

Save

BLUEBERRY LEMON CRINKLE CAKE ~ BLOG 366.305

BLUEBERRY LEMON CRINKLE CAKE inspired and adapted from TIK TOK and MASTER CHEF

Flakey, gooey yet sweet and custardy make this “cake” more similar to a yummy pastry that you’d have for a Sunday brunch dish.

PREP TIME 15 minutes BAKE TIME 1 hour. TOTAL TIME 1 hour 15 minutes

CAKE
1 package phyllo dough 2 rolls
1 cup butter melted

  • Thaw phyllo dough COMPLETELY in refrigerator overnight.
  • Preheat your oven to 350°.
  • Line a 9×13 pan with parchment paper.
  • Working with two sheets of phyllo dough stacked on top of each other gently gather into a loose accordion ruffle about an inch thick.
  • Place in prepared pan, folds facing up, and repeat until all phyllo dough has been used.
  • Lightly fluff and adjust phyllo accordions as needed to make sure they fill the pan LOOSELY! You do NOT want any dense folds.
  • Bake for 10 minutes.
  • Remove from oven and drizzle the melted butter evenly over the phyllo dough.
  • Return to oven and bake for an additional 10 minutes.

CUSTARD
1 cup WHOLE milk
LARGE eggs
1 cup sugar
1 tablespoon PURE vanilla extract
1 teaspoon PURE almond extract 
1 cup SMALL wild blueberries

  • Whisk together the milk, eggs, sugar, and vanilla extract in a LARGE spouted measuring cup or bowl. 
  • Remove phyllo from the oven and pour the custard EVENLY over top.
  • Bake another 30-40 minutes until the top is golden and crispy and custard is set.
  • During the last 5-10 minutes sprinkle blueberries gently and evenly, but randomly amongst the cake folds.

SYRUP
1 cup sugar
1 cup water
1 tablespoon FRESH lemon juice

  • In a small saucepan over medium heat whisk together the sugar, water and lemon juice.
  • Whisk to combine and heat to a simmer.
  • Simmer 10 minutes or until some of the liquid has evaporated and the syrup has thickened to the consistency of maple syrup otherwise it will make a soggy cake!
  • Drizzle evenly over completely baked cake.
  • Allow cake to cool to room temperature, cut, and serve.

NOTE:  Change up the flavors to your liking by using different flavored extracts, lemon zest, fresh berries or even mini chocolate chips.

BOSTON CREAM PIE CUPCAKES ~ BLOG 366.277

Are you a fan of traditional Boston Cream Pie? I AM!!!! Boston Cream Pie is my ALL time favorite dessert. And it is relatively easy to make using simple pantry ingredients, yet appearing beautifully elegant. The moist tender cake filled with rich vanilla pudding and then topped with a silky chocolate ganache is completely irresistible!

Every year since my cousin passed away in 1998 her sister and I make cakes on her birthday. With the passing of their father this past spring we will now also do it on his birthday. The day I made these would have been his 81st birthday and Boston Cream Pie was one of his favorites.

Traditional Boston Cream Pie was a dessert that grams made frequently for Sunday dinners so it has a status of not only a favorite recipe, but also one that evokes fond memories of family long lost. These made as individual cakes are a wonderful modern twist to a beloved classic that allows for individual indulgence in smaller portions. I’ve been making Boston Cream Pie for years in honor of grams, but must admit it never occurred to me to make them as individuals. These layered individual beauties are perfect in the new small bite format and bring a flavor symphony to your mouth!

Now all of that said, next time I will be assembling them differently. I found that there wasn’t enough custard doing it this way and having followed her recipe exactly also found that her ganache was too runny and not chocolatey enough. I will take pictures at that time and update this post to the changes.

BOSTON CREAM PIE CUPCAKES  Adapted from Recipes by Clare

Clare offers dairy free and gluten free versions of her Boston Cream Pie Cupcakes at her site Recipes by Clare.

CUPCAKES

1 cup all-purpose flour
1 teaspoon baking powder

1/4 teaspoon salt
1/2 cup unsalted butter, room temperature
1/2 cup granulated sugar
2 LARGE eggs

1 1/2 teaspoons PURE vanilla extract

1/2 cup WHOLE milk

  • Preheat oven to 350° and line a muffin tin with cupcake liners or spray well with non-stick baking spray.
  • In a medium bowl, whisk together flour, baking powder, and salt. Set aside.
  • In a large bowl, beat butter and sugar together until light and fluffy.
  • Add eggs one at a time, beating well after each addition.
  • Mix in vanilla extract.
  • In a 3rd larger bowl combine the wet and dry ingredients alternately adding the flour mixture and milk to the butter mixture, beginning and ending with the flour mixture. Mix until JUST combined. DO NOT OVER MIX!!!
  • Divide the batter evenly among the cupcake liners.
  • Bake 18-20 minutes or until a toothpick inserted into the center comes out clean. Let cool completely.

CUSTARD FILLING

1/3 cup sugar

scant 3 tablespoons cornstarch
1 1/2 cup WHOLE milk
3 JUMBO egg yolks
1/2 cup heavy cream
1/4 teaspoon salt
2 teaspoons PURE vanilla extract

3 tablespoons unsalted butter

  • Combine the cornstarch, sugar, milk, eggs, cream, vanilla extract, and salt in a saucepan. Whisk until smooth.
  • Bring the custard to a boil over moderate heat, whisking constantly. Continuing to whisk, let the custard boil for two minutes.
  • Remove from heat, and whisk in the butter. Set custard aside to cool, continuing to whisk occasionally.
  • Once the cupcakes are cool, cut a small circle out of the center of each cupcake and fill with vanilla pudding.

GANACHE

1 cup heavy cream
1 cup semi-sweet chocolate chips

  • In a small saucepan, heat heavy cream JUST until it begins to simmer.
  • Remove from heat and pour over chocolate chips.
  • Let sit for 5 minutes, then stir until smooth and glossy.
  • Spoon the ganache over each cupcake, allowing it to drip down the sides.
  • Let the ganache set before serving.

NOTES WORTH CONSIDERING

  • Ensure that all ingredients are at room temperature to make a smoother batter.

  • Use a piping bag to fill the cupcakes with pudding for a cleaner result.

  • Enhance the flavor by adding a teaspoon of espresso powder to the chocolate ganache.

  • Serve these cupcakes with a scoop of vanilla ice cream or a glass of cold milk.
  • You can use a box pudding and it will work wonderfully, we just prefer homemade.

  • Store the cupcakes in an airtight container in the refrigerator for up to 3 days. Let them come to room temperature before serving for the best texture.
  • They freeze well before the ganache. Add ganache after thawing.

My version that I have made for many, many years!

BOSTON CREAM PIE
CAKE
1 cup sugar
5 tablespoons unsalted butter, softened
1 teaspoon PURE vanilla extract
1 JUMBO egg
1 1/4 cup cake flour
1 1/2 teaspoon baking powder
1/4 teaspoon salt
3/4 cup WHOLE milk

  • Preheat oven to 350°.
  • Butter and flour a 9 1/2-inch spring form baking pan OR line cupcake tin. I use a square spring form pan when I make a whole cake to make pieces easier to cut.
  • Combine the butter, sugar, and vanilla in a bowl and cream together using an electric mixer until the mixture is light and fluffy.
  • Add the eggs one at a time, beating thoroughly after each one.
  • In a separate bowl, sift together the flour, baking powder, cream of tartar and salt.
  • Combine the dry ingredients with the creamed mixture and add the milk.
  • Pour batter into the prepared pan.
  • Bake in the middle of the oven for 50 to 60 minutes, or until a toothpick comes out clean.
  • Remove from oven and let the cake cool in the pan on a wire rack.

CUSTARD

1/3 cup sugar
scant 3 tablespoons cornstarch
1 1/2 cup WHOLE milk
3 JUMBO egg yolks
1/2 cup heavy cream
1/4 teaspoon salt
2 teaspoons PURE vanilla extract
3 tablespoons unsalted butter

  • Combine the cornstarch, sugar, milk, eggs, cream, vanilla extract, and salt in a saucepan, whisking until smooth.
  • Bring the custard to a boil over moderate heat, whisking constantly. Continuing to whisk, let the custard boil for two minutes only.
  • Remove from heat, and whisk in the butter.
  • Set custard aside to cool, continuing to whisk occasionally.

GLAZE/GANACHE
2 ounces semi-sweet chocolate
3 tablespoons unsalted butter
1 cup powdered sugar
3/4 teaspoon vanilla
2 tablespoons hot water

  • In a double boiler, melt together the chocolate and butter until smooth.
  • Remove from heat and stir in powdered sugar and vanilla.
  • Stir in hot water 1 teaspoon at a time until desired consistency.

BUILDING THE PERFECT PIE

  • Remove the cake from the pan and cut it in half horizontally with a long serrated knife.
  • Place one half of the cake on a plate with the cut side facing up.
  • Top with custard.
  • Place the other half of the cake on top, with the cut side down.
  • Coat the top of the cake with glaze allowing it to drip down the sides.

NOTE: The traditional custard substitutes in this recipe for a pineapple custard which is what we like to do.

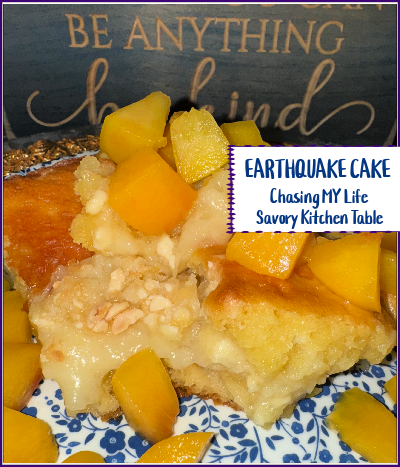
PEACH or STRAWBERRY EARTHQUAKE CAKE ~ BLOG 366.158

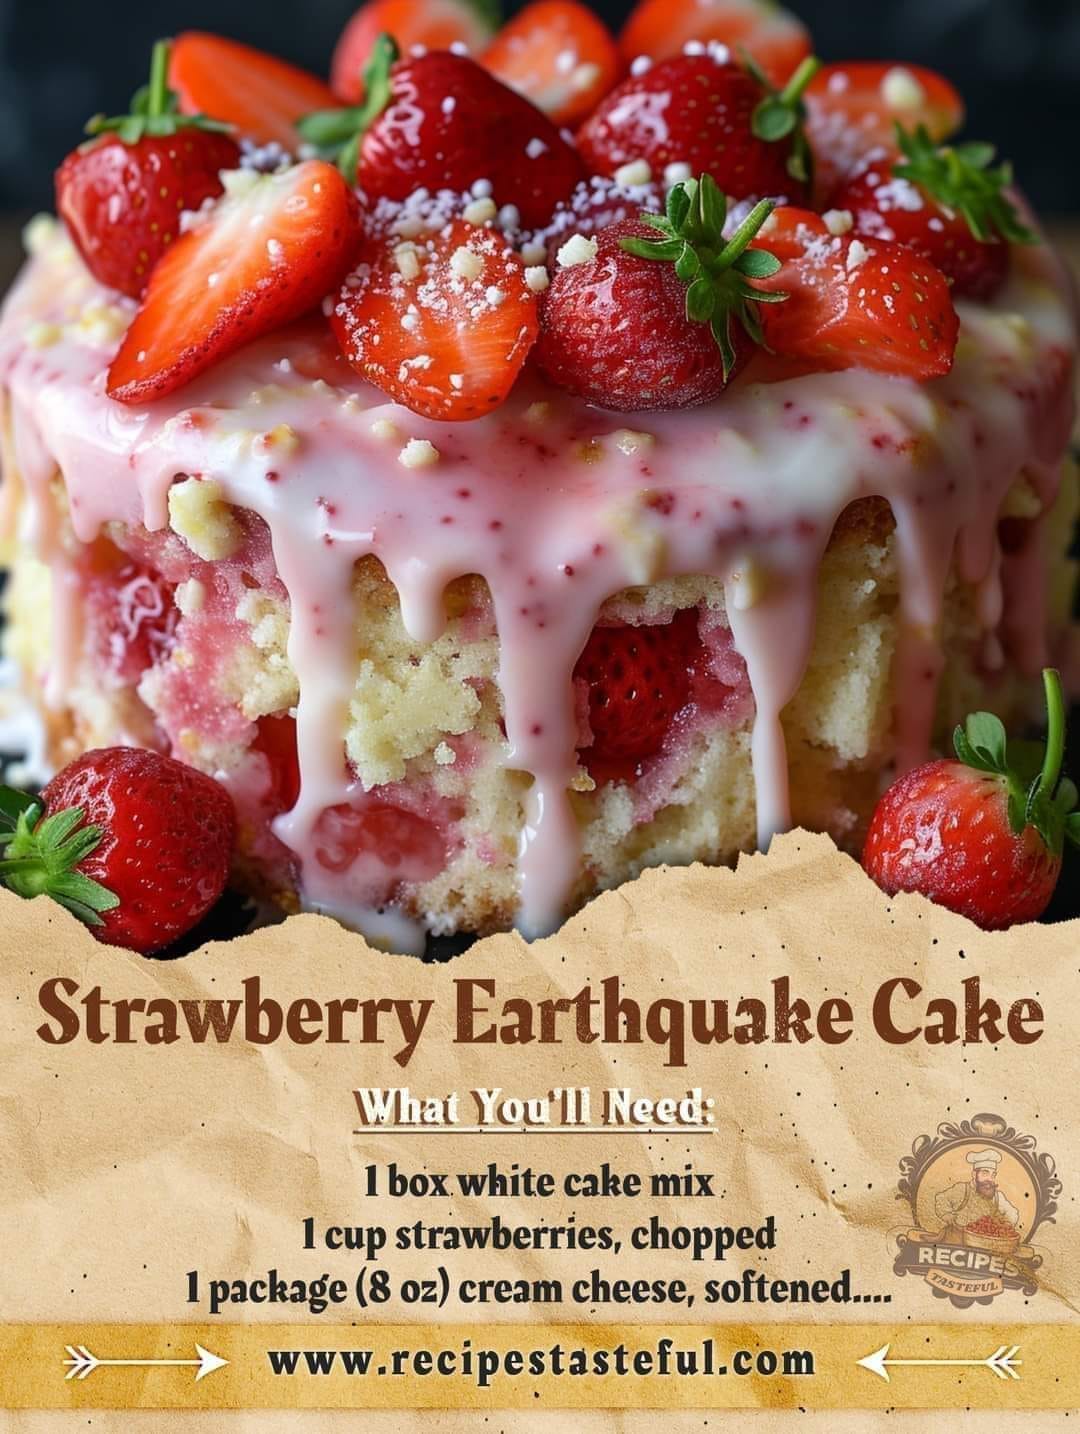
I found this recipe on Facebook originally and it looked so intriguing I just HAD to try it and am so glad I did! You won’t be disappointed either. The original recipe called for strawberries, but we LOVE it with peaches too. The picture on facebook is quite deceptive also – they evidently added a great looking glaze that isn’t included in their recipe. I will be adding the glaze below from now on.
EARTHQUAKE CAKE

1 white cake mix prepared per box directions
1 cup fruit pieces, chopped
8 ounces cream cheese, softened
1/2 cup unsalted butter, melted
4 cups powdered sugar
1 teaspoon PURE vanilla extract
1/2 cup sweetened and toasted coconut flakes
1/2 cup white chocolate chips, chopped

  • Preheat your oven to 350°
  • Grease a 9 X 13 baking dish.
  • Fold the chopped strawberries into the prepared cake mix.
  • Pour batter into the greased baking dish.
  • In another medium bowl, beat together the softened cream cheese, melted butter, powdered sugar and vanilla extract until smooth.
  • Drop spoonfuls of the cream cheese mixture over the cake batter in the baking dish.
  • Sprinkle coconut flakes and white chocolate pieces evenly over the top of the batter.
  • Bake 40-45 minutes until the cake is set and the edges have turned golden brown.
  • Allow the cake to cool COMPLETELY before serving. As it cools you’ll notice a beautiful cracked, earthquake cracked effect on the top, with delicious pockets of cream cheese and strawberry throughout. Top with additional chopped fruit if desired.

NOTE: Change up the fruit flavor as desired, peaches, blueberries, raspberries, blackberries or cherries work well also.

GLAZE (optional)
2 cups powdered sugar
1/4 cup lemon juice
1/2 teaspoon PURE vanilla extract

  • Whisk together the powdered sugar, lemon juice and vanilla.
  • Drizzle over cooled cake and let glaze harden 10 minutes or so before serving.
  • Transfer to serving platter and serve with FRESH blueberries or berry of choice 😀

This is what it looked like on facebook.