Category: MISC
SNAP PEA SALAD ~ BLOG 365.52
This is a perfect, crisp side for any meal, but especially loved by my family with a carb heavy meal.

SNAP PEA SALAD
1/4 cup champagne vinegar
2 tablespoons avocado oil
2 tablespoons QUALITY honey
Juice of 1 FRESH lemon
FRESH ground sea salt and black pepper
2 LARGE green onions, minced
1 pound sugar snap peas, trimmed and halved
- Whisk together the vinegar, oil, honey, lemon juice, FRESH ground sea salt and black pepper until well blended.
- Add pea pieces and minced green onions to a medium bowl and toss together.
- Drizzle vinaigrette over top and toss again.
- Chill several hours before srving.
CRANBERRY LIME PIE

CRANBERRY LIME PIE 8 Servings adapted from Ann Redding & Matt Danzer
In this luscious pie, key lime meets a luscious cranberry curd to create a heavenly mouthful of flavor.
CRUST
4 ounces gingersnap cookies (about 16 if using Nabisco) (1 cup crumbs)
1 cup pecans
4 tablespoons unsalted butter, melted
3 tablespoons light brown sugar
- Preheat oven to 350°.
- Pulse cookies in a food processor until very finely ground.
- Add pecans; pulse until finely ground.
- Add butter and brown sugar; pulsing to combine.
- Transfer to a deep 9″ pie dish. Using your fingers or a measuring cup, press firmly onto bottom and up sides of dish.
- Bake 10-15 minutes until firm and slightly darkened in color. If crust slides down sides, gently press back up.
- Let cool completely.
NOTE: Crust can be baked 1 day ahead. wrap tightly and store at room temperature.
FILLING & ASSEMBLY
1 12-ounce package FRESH (or frozen, thawed) cranberries, plus 4 ounces (about 1¼ cups) for serving OPTIONAL
1 cup + 1/2 cup + 1/2 cup + 1/2 cup sugar, divided
¼ orange juice
½ cup water
3 LARGE eggs
2 LARGE egg yolks
1 teaspoon FINELY grated lemon zest
2 teaspoons FINELY grated lime zest, divided
½ cup FRESH key lime juice
Pinch of kosher salt
¾ cup (1½ sticks) unsalted butter, room temperature, cut into pieces
Whipped cream (optional)
- Bring 12 ounces of the cranberries, 1 cup of the granulated sugar, and orange juice to a boil in a large saucepan over medium-high. Reduce heat; simmer 12-15 minutes until cranberries burst and most of the liquid evaporates.
- Let cool.
- Purée in a blender until very smooth.
- Add the purée, eggs, egg yolks, lemon zest, lime juice, salt, ½ cup sugar, and 1 teaspoon of lime zest to a heatproof bowl set over a saucepan of simmering water (bowl should not touch water), stirring with a rubber spatula 8-10 minutes and scraping down sides of bowl often, until curd thickens and coats spatula.
- Let cool until just warm.
- Using an electric mixer on medium-high, beat curd about 5 minutes, adding butter a piece at a time and incorporating after each addition, until curd looks lighter in color and texture.
- Scrape into crust and chill until firm, about 2 hours.
- OPTIONAL from here: Bring ½ cup granulated sugar and ½ cup water to a simmer in a small saucepan over medium heat, stirring to dissolve sugar.
- Add remaining 4 ounces of the cranberries and cook 1 minute until barely starting to soften.
- Using a slotted spoon, transfer cranberries to a wire rack set inside a rimmed baking sheet.
- Chill 20–30 minutes until no longer sticky.
- Toss remaining ½ cup granulated sugar and 1 teaspoon lime zest in a small bowl.
- Toss chilled cranberries in lime sugar.
- Top pie with cranberries; serve with whipped cream if desired.
NOTE: Pie can be made 2 days ahead. Cover once filling is firm and keep chilled. Let sit at room temperature 2 hours before serving.
BLENDED 5 CHEESE PASTA

BLENDED 5 CHEESE PASTA adapted from Ree Drummond serves 8
1 pound fusilli (or desired shape)
6 slices thick-cut bacon, diced
2 teaspoons chopped FRESH thyme
1 small onion, diced
1 tablespoon butter
1 clove garlic, grated
1/2 cup white wine
1 cup heavy cream
1/2 cup grated Fontina cheese
1/2 cup grated white Cheddar
1/2 cup grated Romano
1/2 cup grated Gruyère
FRESH ground sea salt AND black pepper, to taste
1 cup mozzarella balls, quartered
3 green onions, sliced thin and separated (greens are for garnish)
- Bring a large pot of salted water to a boil.
- Add the pasta and cook for 1 to 2 minutes less than the package instructions.
Reserve 1/2 cup of the pasta water, then drain and set aside. - Cook the bacon in a heavy-bottomed skillet over medium heat until crisp, 8 to 10 minutes.
- With a slotted spoon remove bacon pieces to paper toweling to drain and remove all but 1 tablespoon of bacon grease. Add butter to melt.
- Add the thyme, onions and garlic to the skillet and cook until softened, about 5 minutes. Add the wine and cook until mostly evaporated, 1 to 2 minutes.
- Add the cream and heat until bubbly, 30 seconds.
- Gradually add the fontina, Cheddar, Romano and Gruyère in handfuls, letting each melt into the cream before adding the next cheese.
- Add the pasta to the skillet along with a good pinch of salt and pepper and half the bacon pieces, tossing everything together, thinning with the reserved pasta water as needed.
- Divide the pasta into 8-ounce individual gratin dishes or 1 baking dish.
- Place casserole on a baking sheet.
- Divide the mozzarella pearl pieces over the top of the pasta.
- Position oven rack in the center of the oven and preheat to broil.
- Broil 3-4 minutes on the center rack until the mozzarella pearls are brown and the pasta is bubbling.
- Remove and garnish with the remaining cooked bacon and sliced green onions.
PASTEL DEVILED EGGS

PASTEL DEVILED EGGS
This recipe is making the rounds these days and is absolutely perfect for the late Easter this year. These colored deviled eggs will make a beautiful addition to any Easter table! Also fun to do for baby or wedding showers as well.
EGGS
12 LARGE eggs
- Place eggs in a large saucepan and cover with cold water.
- Set pan over medium-high heat and bring water to a boil.
- Turn off heat, cover pan with a lid and let sit for 12 minutes.
- Drain and rinse eggs under cold water.
FILLING
1/2 cup mayonnaise
2 teaspoons pickle juice
2 teaspoons QUALITY mustard
4 tablespoons FINELY chopped dill pickles
FRESH ground sea salt and pepper (to taste)
- Peel shells off of the eggs.
- Cut eggs in half lengthwise and scoop out yolks into a bowl.
- Add mayonnaise, pickle juice, and mustard to bowl, then mash the yolks and stir until mixture is smooth.
- Stir in minced pickles and then season with salt and pepper.
- Place the mixture in a large ziplock bag. Set aside.
DYE
6-8 ounces water in a cup
1 teaspoon white vinegar
GEL Food coloring* SEE NOTE
- Stir desired color of food coloring into cups of water.
- Add the vinegar to the colored water.
- Gently place boiled and peeled eggs into the cups.
- Let the eggs soak in the colored water for at least 10 minutes until desired shade is achieved.
- While the eggs are soaking in food colored water prepare the deviled eggs from the recipe above.
- Gently remove the colored eggs with a large slotted spoon and place them on a stack of paper towels to dry.
- Pat dry with additional paper towels.
- Cut the tip off of the ziplock bag, your DIY piping bag and fill the egg halfs with the prepared egg mixture.
- Garnish as desired with paprika, creamed horseradish or a favorite spicy mustard.
NOTE: You can use “regular” food coloring, but gel makes a cleaner consistent color.
CHICKEN with TARRAGON SAUCE
When I was searching my recipe file (a big old tote full of scraps) I found two other even older scraps of recipes (Chicken with Tarragon Sauce and Baked Tomatoes with Broccoli stuffing) that had been torn from old cookbooklets, one was even handwritten it was so old. They also begged me to make them. I often substitute thyme or flat leaf parsley for the tarragon or mix and match them based on what I have on hand.

CHICKEN with TARRAGON SAUCE 4 servings
This is comfort food at its finest – maybe serve it with homemade mashed potatoes and sautéed fresh green beans?
4 boneless skinless chicken breast halves (5-6 ounces each)
1/4 cup flour, for dredging
FRESH ground sea salt and black pepper
1 tablespoon butter
1 tablespoon avocado oil
1 shallot, chopped
3/4 cup heavy whipping cream
2 tablespoons minced FRESH tarragon
1 tablespoon sherry vinegar
2 teaspoons lemon juice
- Pound chicken breasts with a meat mallet to 1/2 inch thickness.
- Sprinkle chicken with 1/2 teaspoon salt and pepper.
- In a large skillet, heat butter and oil over medium heat.
- Add chicken, searing 3 to 4 minutes on each side or until no longer pink. Remove chicken from pan; keep warm.
- Add shallot to same pan, cooking and stirring over medium heat until tender.
- Add lemon juice and sherry vinegar.
- Add most of the tarragon.
- Add cream, stirring to loosen browned bits from pan. Increase heat to medium high, simmering until slightly thickened.
- Serve with chicken.
- Sprinkle with remaining tarragon as garnish.
BEFORE AND AFTER UPDATE ~ AKA WHAT DID WE GET OURSELVES INTO?????
Our original thought as we walked through the door (after braving the jungle of a backyard) 431 days ago was WTF did we get ourselves into here. We were weary and tired, the dogs and cat were miserable after 6 days on the road. We honestly considered turning around and going straight back to Oregon for about 10 minutes, but that made us even more tired when we thought about it. ALSO, we had moving trucks from where we had things stored in two different states already on the way and had already spent a fortune to get here. PLUS this was to help family so we stayed to see it through and have been working REALLY hard ever since. I know grams is no longer turning in her grave at what her house became and is resting peacefully seeing it restored.
Coming here was supposed to accomplish three things. The first being a place for us to settle and re-group our life after the Cancer, multiple surgeries, years of care giving for multiple people and have time to deal with the VA claim from hell. Well, that has YET to happen as we have spent every waking hour just making this place livable. The second was to be near family – the same family that now that we’re here can’t seem to take time to spend together unless there’s an emergency. The third was to help out my aunt and uncle after my cousin’s death. My uncle had his hands FULL since my aunt’s Alzheimer’s diagnosis. We were glad we could be here to help him especially after the fall that shattered her knee, the surgery for that along with the hospitalization and skilled nursing for the infection that ultimately took her life. We did NOT expect him to decide two weeks later he was getting re-married and moving 5 states away.
You know how people say you’ll never use algebra after you get out of school? Well, I’m here to prove them wrong. I loved word problems and algebraic equations and find I really do use them all the time. This house is a perfect example.
Seems like a simple equation right? That was before when my uncle said all the fixtures, appliances and flooring were good. He did say the garage and backyard needed some cleanup as well as the house needing cleaned up and painted. He did NOT say that the garage leaked like a sieve and would also need major work.
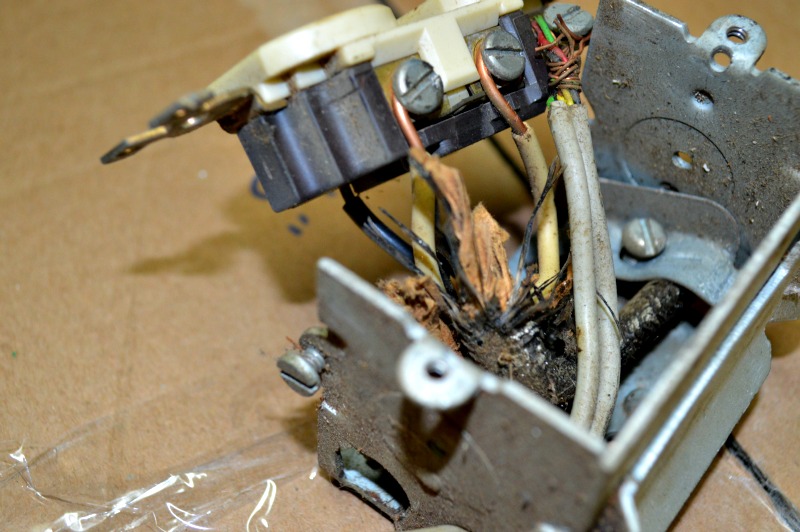
So now factor in the ALL the things he DIDN’T tell us about “correctly” – like ALL fixtures, appliances, flooring, windows and doors, electrical and plumbing needing to be replaced, city and county code infractions, major drywall repair, bug and rodent infestation, as well as the fact that my cousin was a pack rat/hoarder who didn’t clean and that it would take 2 1/2 months of 12+ hour days, 7 days a week JUST to clear out ALL her trash and potential donations, not to mention the $900 or so of beer and soda to keep the trash guys happy so they would take everything each trash day (which is twice a week fortunately) and that she was a chain smoker that left everything covered in a layer of tar and nicotine. So now the equation looks something like:
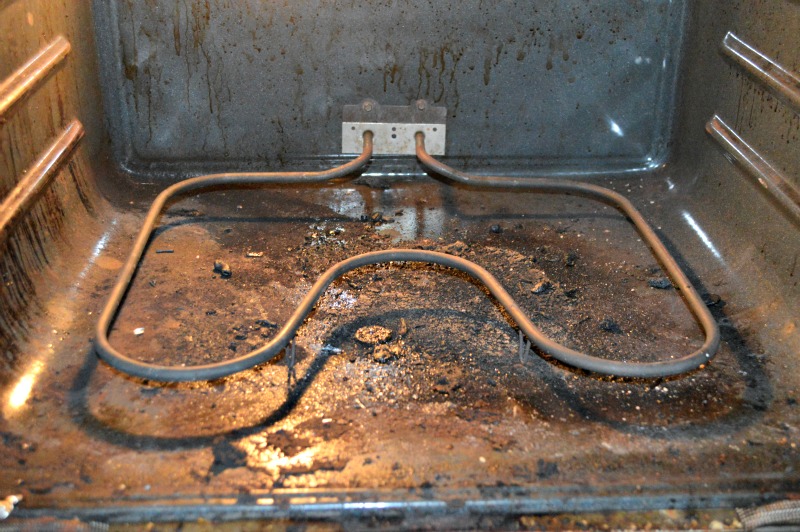
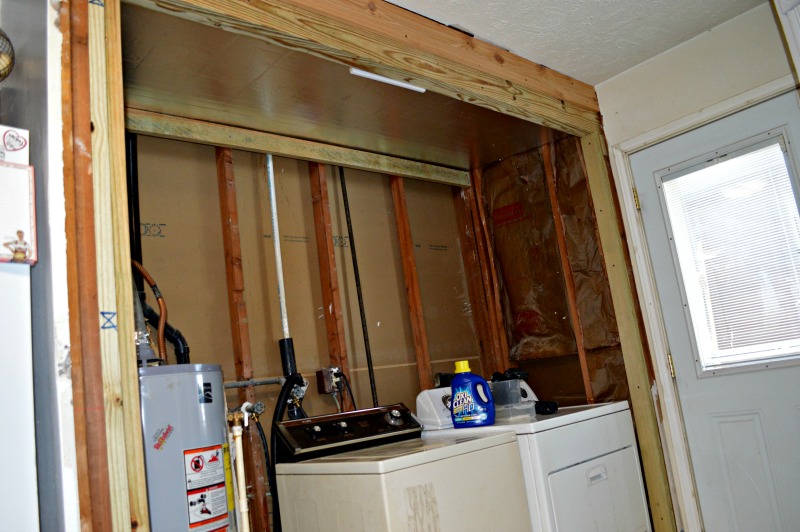
So on to the before and after pictures. Hubby is upset that the before pictures don’t truly show how HORRIBLY DISGUSTING this place really was. I just hope the after pictures show how truly GREAT it is now – it really is turn key now!
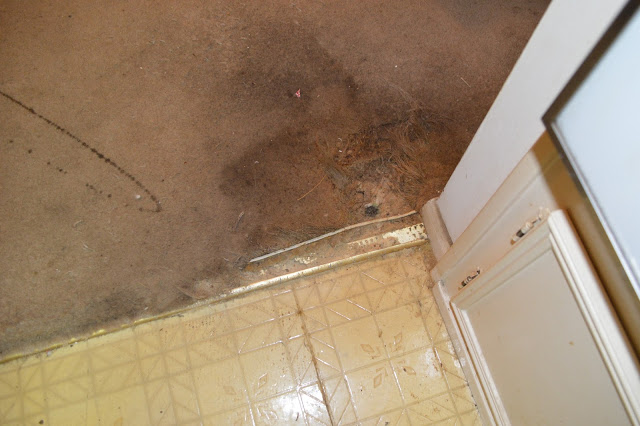
There was “STUFF” everywhere! The walls where all stained from who knows what and the carpeting was full of melted wax and cigarette burns even in the closet. I have to say that my cousin was evidently suffering from some form of mental illness because this is NOT how she was raised!
The picture above is what I got out of the bedroom carpet on the first pass of available floor with my Rainbow Water Vacuum. Disgusting does not begin to describe how it looked or felt. Below was just one of the cracks to be repaired that was caused by the foundation issues.
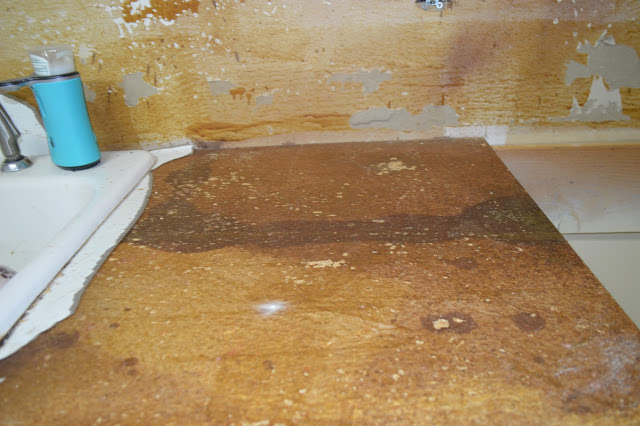
The master bathroom didn’t look too bad until you looked close or opened a door and saw all the mold in the wood. So, it ended up getting gutted too. It took me 2 weeks, but I did get the tile clean in the shower, but we still need to find someone to professionally refinish the tile.
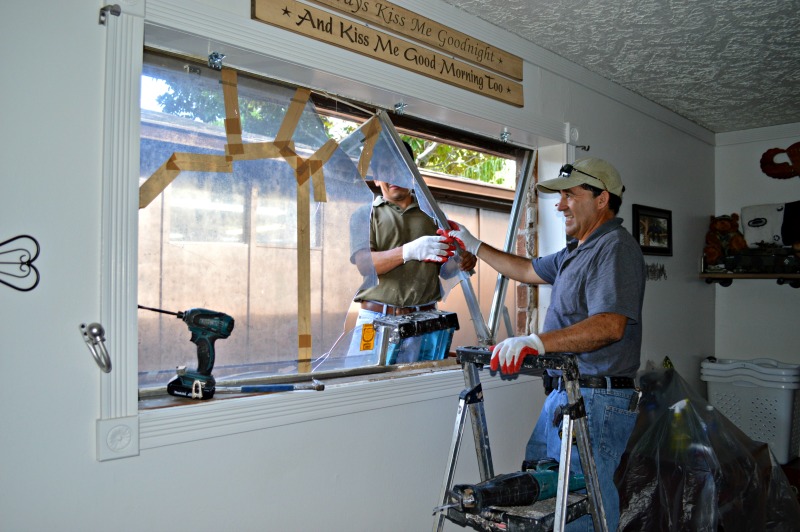
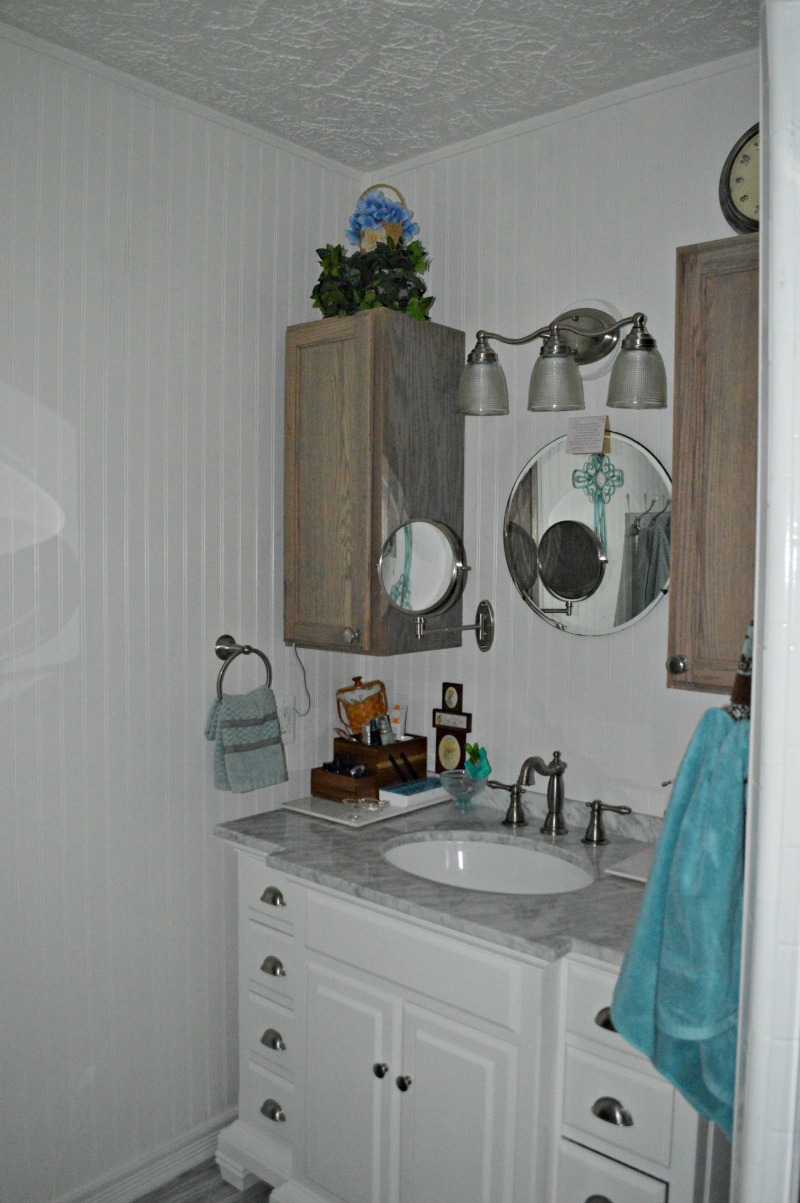
Finally a new window and completed bedroom. We used wainscotting floor to ceiling for the new bathroom walls.
The spare bedroom was stacked to the ceiling with junk! It also housed much of her “business” food products. What was the city thinking when they gave her a food license to operate out of this house? Not to mention it is completely against the H.O.A. rules and regulations for this neighborhood. In the photo below the bottom left hand corner was mouse droppings. YUCK!!
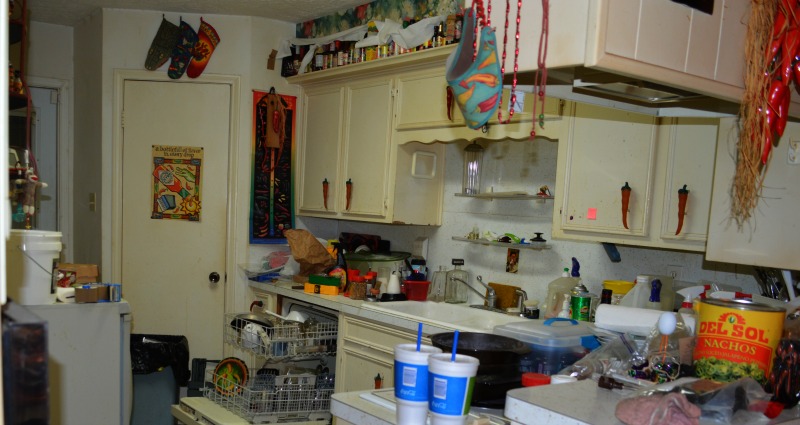 |
| THERE WAS “STUFF” EVERYWHERE. NOT ONE CABINET WAS CLEAN OR ORGANIZED . |
 |
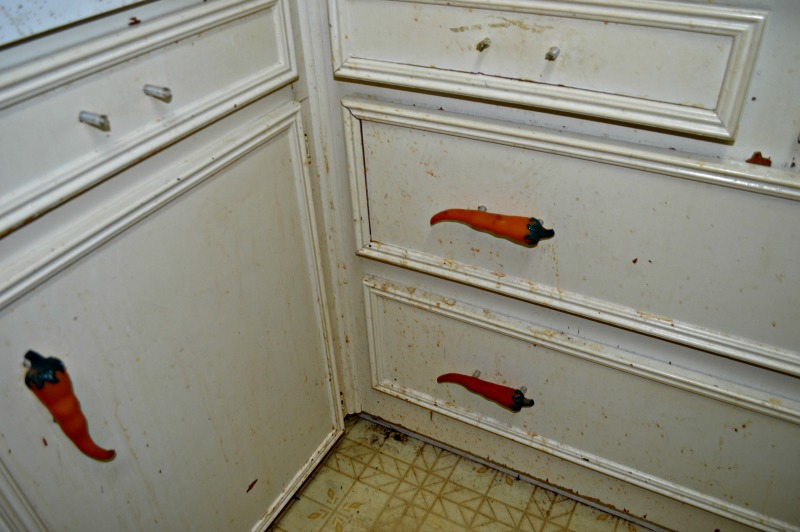
| THE CABINET HANDLES THAT WHERE THERE WERE GREASE AND DUST COATED. THE CABINET DOORS WERE HANGING BY A THREAD. |
 |
| This is the pantry floor as clean as it would get! We scraped off all the linoleum and sanitized the foundation before re-flooring. |
 |
| This 10 pound bag of sugar was spilled ALL over a pantry shelf and was one of the biggest sources for the ants, cockroaches and mice. |
The door would no longer open due to the foundation issues and she used this 24 square feet (8×3) as a “CAT BOX” area. I hate to admit that this was the MOST disgusting of ALL the house and required several bottles of hydrogen peroxide etcher after we removed the toxic 2 layers of tiles.
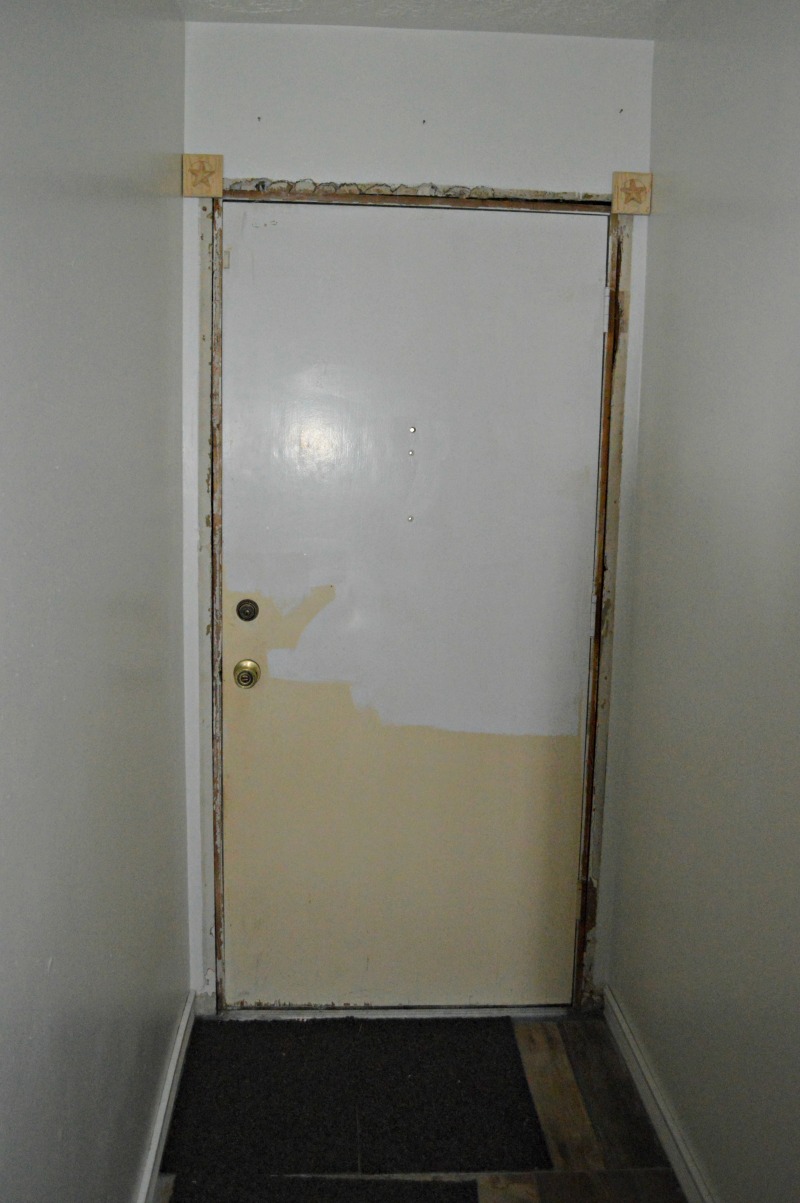
New floor, new door and new paint are done and looking good. I LOVE how much light the new door lets in.
These are cracks, tears and stains in the atrium/living room carpeting.
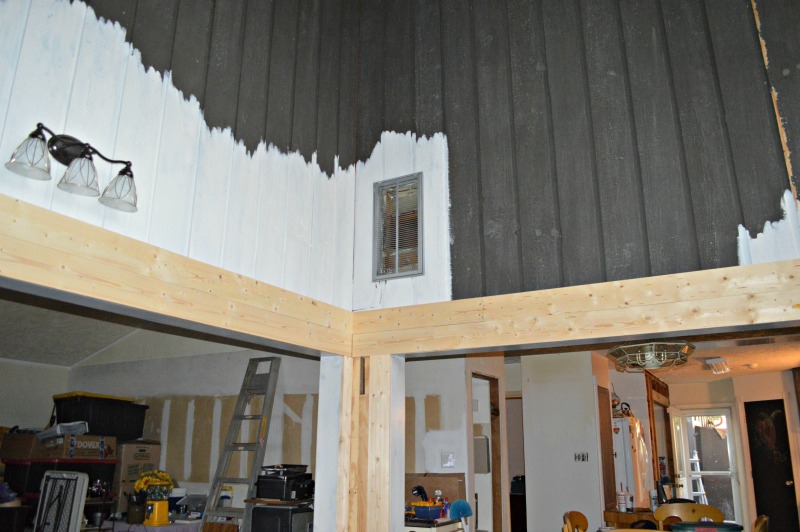
It took weeks/months to get the living room to this organized point LOL. Notice the crack near the vent? It went all the way to the floor and was 3 inches wide. It is also why we waited over 3 months for the highly recommended dry wall guy that turned out to be a HUGE joke. The picture below is the living room after we finally got it emptied and ready to start painting.
| This is one of 3 sections of the living room carpet that had melted candle wax all over it. She had just arranged the furniture over it. |
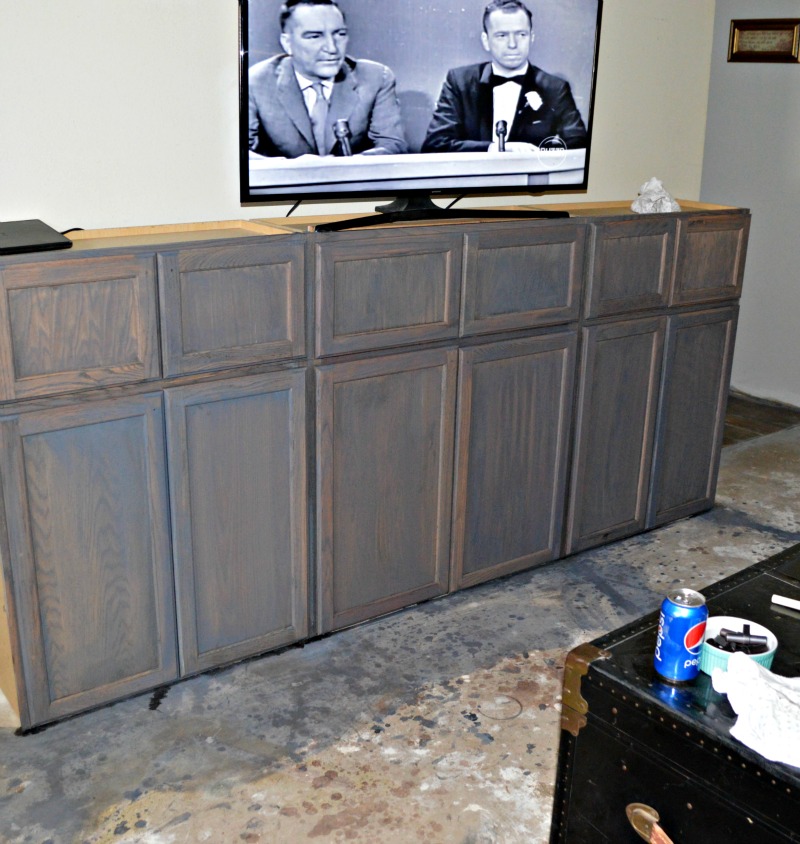 |
| We made built in cabinets in the living room to hold things like the DVD player, WiiU, movies and games, etc… |
I could not get Whiskey to move so she’s in the picture! There are still many Christmas things sitting around as I get them pack up to put away, but all in all it’s looking good.
There was a funky built in area above the tub for linens that needed to be removed and the walls had to be re-done after the 2 layers of wall paper were removed and the wall board was peeling away.
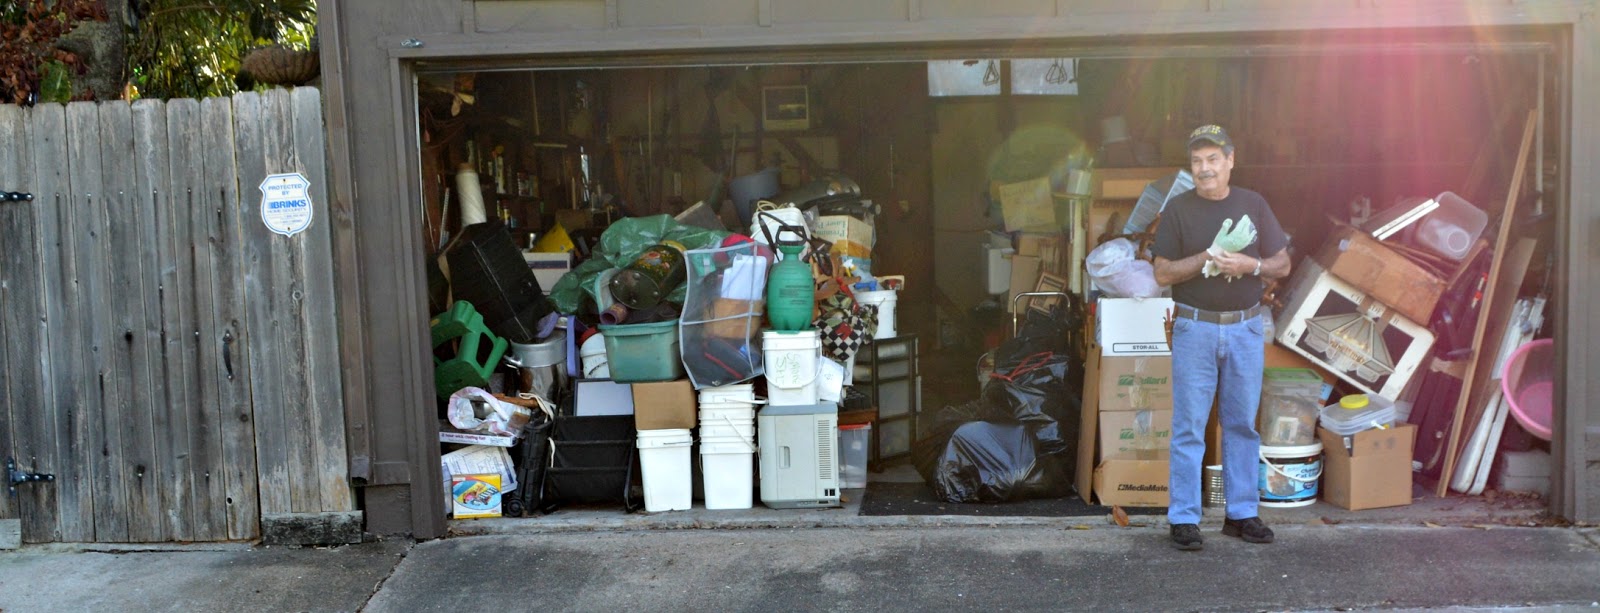
This was after hubby spent 4 weeks cleaning and and making a path for donation and trash.
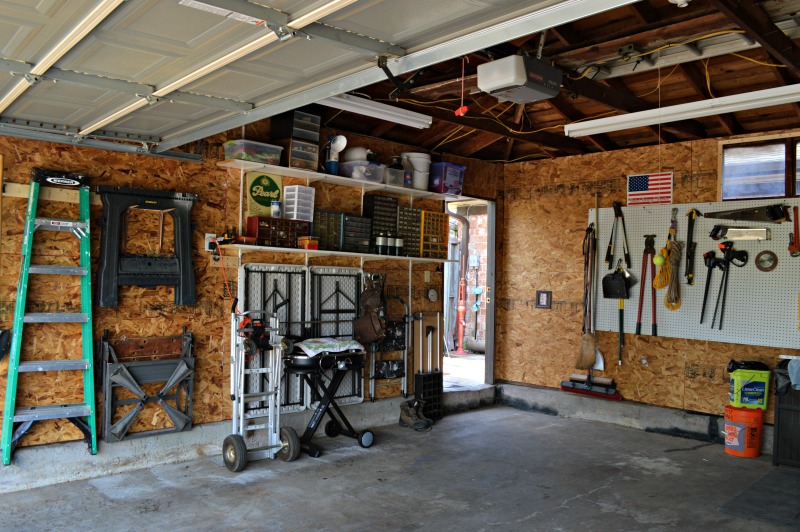
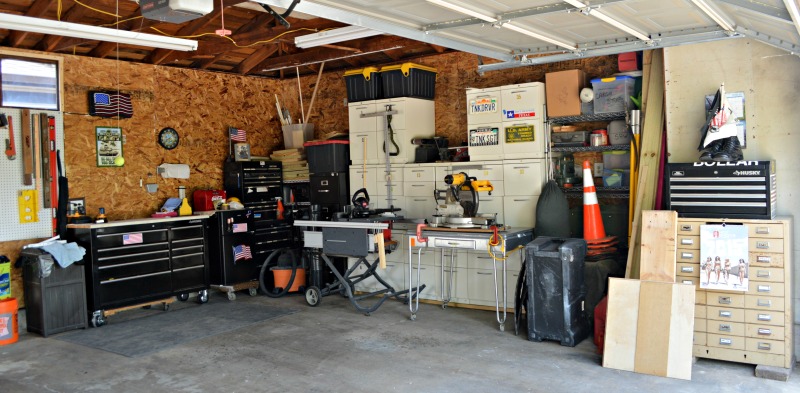
Hubby has done wonders at creating a neat and organized garage!
| It took months to get to this freezer and then weeks to get into it. The key wouldn’t work! Turns out the seal had failed and there was a HUGE layer of ice sealing it shut. It then took hubby days to chip away ALL the ice and bag the food that was there.
We are SO thankful for our trash guys. For a case of beer and soda twice a week they took ALL we gave them. Way more than they were supposed to or should have. We thank them for going ABOVE and BEYOND! |
 |
| I tried to salvage these globes covered in nicotine and dirt, but in the end it was a lost cause. |
 |
| JUST A TYPICAL TRASH DAY. It looked like this, sometimes double this EVERY! trash day (2 times a week) for 9 months! |
This was the path hubby created through to the back gate. We are anxious to get this area done next month. Right now it is empty, but very uneven so we will begin with 100 bags of leveling sand and see where it goes from there.
Did I ever mention that the neighbor next door in a 2 story tried to buy this place because he loved the floor plan, but my uncle wouldn’t sell until the foundation work was done? In ALL honestly this house would still be sitting here in the same condition we found it if we hadn’t come long when we did. Unfortunately for us it appears my uncle does NOT appreciate any of this. He still wants more money than it was worth and said if he’d realized it’s condition, he would have just dumped it. If that is the case I have to wonder why he didn’t sell to the next door neighbor to begin with and honestly if he’s going to “DUMP” it why not do so to the people who spent the money for the parts and labor AND did the back breaking work for over a year?
GINGERBREAD BARS
GINGERBREAD BARS
1 cup butter, room temperature
1 1/4 cups sugar
1 egg
3 tablespoons molasses
3 cups flour
1 teaspoon baking soda
2 teaspoons ground cinnamon
1 teaspoon ground ginger
4 ounces crystallized ginger, coarsely chopped
1/4 cup chopped candied lemon
OPTIONAL frosting:
4 ounces cream cheese, softened
4 tablespoons butter. room temperature
2 cups powdered sugar
- Preheat oven to 350 degrees.
- Sift together the flour, baking soda, cinnamon and ground ginger.
- Toss flour mixture with lemon and ginger pieces. Set Aside.
- In a large mixing bowl combine butter, sugar, molasses and egg, beating until creamy.
- Gradually add flour mixture to sugar mixture until well blended.
- Press dough into an un-greased jelly roll pan. (15x10x10).
- Bake 16-24 minutes or until evenly golden brown.
- Top with powdered sugar or cream cheese frosting.
BLOGMAS 2016 ~ DAY 8 ~ FAVORITE FAMILY CHRISTMAS RECIPE
I’ve been looking forward to this day! I have many many recipes, but these are the closest to my heart. Grab a cup of my SIL’s homemade hot chocolate and homemade marshmallows and join me while we chat.
There are 3 recipes that come to mind here. The first is my OATNUT SOURDOUGH HERB DRESSING, a recreation of my dad’s cornbread dressing.
OATNUT SOURDOUGH HERB DRESSING
10 slices Brownberry or Oroweat OATNUT bread, cut into bite size chunks
1/2 loaf sourdough French bread, cut into bite size chunks
1 large sweet onion, chopped fine
1 small bunch celery (leaves and all), chopped fine
1/2 bag baby carrots, chopped fine
1 box mushrooms, chopped fine
1 tablespoon sea salt
1 tablespoon white pepper
2 sticks unsalted butter
4 cups hot water
2 tablespoons Better than Bouillon Chicken base
2 tablespoons Buttery Herb & Garlic Mix (I believe McCormick makes it)
4 teaspoons minced garlic, Jar
- Cut bread into bite sized chunks and spread out in a thin layer over cookie sheets.
- Bake at 200 degrees for 3-4 hours until pieces are actually hard.
- Chop all the vegetables.
- In a large cast iron pan melt 1/4 cup of the butter.
- Add the onions and saute until translucent. The add the celery and carrots and continue sauteing until crisp tender. Add the garlic last as it will burn first.
- Whisk together the water, better than bouillon chicken base and all of the seasonings.
- Add the melted butter.
- In a large pan toss the bread slices together.
- Add the sauteed vegetables and toss again.
- Add the liquid mixture and toss again until well absorbed.
- Fold entire mixture into at least a 9×13 baking dish.
- Bake uncovered 1 hour.
- At this point I use a small portion for our dinner that night and freeze the rest.
- When it’s time to cook it again, I defrost it, put it back in the same baking dish and bake it again, but this time covered with foil until the last 15 minutes so it doesn’t dry out. We like it crisp on top so I remove the foil the last 15 minutes.
The second is crazy aunt Lousie’s Corn Flake Wreaths.
HOLIDAY WREATHS
(these are better when they are made a few days ahead)
30 large marshmallows (or 1 jar marshmallow cream)
1/2 cup butter
1 teaspoon vanilla
2 teaspoon green food color
3 1/2 cups cornflakes
Red Hots
- Combine marshmallows, butter, vanilla and food color in top of double boiler. Heat and stir frequently until well blended.
- Gradually stir in cornflakes until well blended.
- Drop onto wax paper and arrange into wreath shapes. I plop them onto the wax paper and then push out from the center to form the wreaths.
- Decorate with red hots.
- Let cool.
- If your house is warm – chill in refrigerator until set.
The third is a fairly recent one for my Marinated Prime Rib.
MARINATED and SEASONED PRIME RIB
5 pound boneless beef rib roast
3/4 cup Mad Housewife Merlot wine
1 small Vidalia onion, sliced thin
1/4 cup water
1 tablespoon Worcestershire sauce
Avocado oil
*2 tablespoons Savory Spice Shop Hidden Cove Lemon Garlic Blend
*2 tablespoons Penzey’s English Prime Rib Rub
*1 teaspoon Penzey’s OR Savory Spice Shop’s Horseradish powder
- Whisk together the wine, water and Worcestershire sauce.
- Place roast in a large plastic bag that has been placed in a shallow baking dish.
- Pour marinade over roast and seal bag.
- Marinate 6-8 hours, turning bag occasionally.
- Preheat oven to 325 degrees.
- Place sliced onions in bottom of roaster.
- Drain roast and discard marinade.
- Rub roast generously with the avocado oil. Let roast sit on drainboard a moment to allow excess oil to drain off. At this point wash your hands to remove the excess oil also so the rub will go on better.
- Stir together the Hidden Cove Lemon Garlic Blend, English Prime Rib Rub and the horseradish powder until well mixed.
- Sprinkle rub mixture over roast until well coated all the way around.
- Place roast, fat side up on onion slices.
- Insert oven thermometer.
- Roast until desired doneness (we like medium rare which was 135 degrees and about 2 1/4 hours), but no more!
- Transfer roast to cutting board and immediately tent with foil for 20 minutes before carving. This is the resting phase and mandatory to the perfect prime rib. During this phase your roast will raise another 10 degrees.
*If you want a thicker rub add more spices making sure to keep these proportions.
This is for one of my go to neighbor plate recipes:
CARAMEL BUTTERSCOTCH FUDGE
1 1/4 cup milk chocolate chips
1 1/4 cup butterscotch chips
1/2 cup Kraft caramel bits
1 can Eagle-Brand sweetened condensed milk
1/3 cup Fisher’s Cinnamon Pecans
- Line a 9×9 pan with heavy duty foil leaving enough foil overhanging the edges to use as handle to lift the foil out of the pan after the fudge has set.
- Using a double boiler over medium heat melt the chips, caramel bits and condensed milk together until smooth.
- Immediately pour into the foil lined pan.
- Top with pecans using a piece of wax paper to press the pecans slightly into the fudge.
This is Cinnamon Roll day too – YUMMY! One of my favorite days of the year. The recipe originally came from one of my favorite aunts who taught me a lot about art, cooking and just plain being creative. I have made a few minor updates to suit our tastes, but this recipe was ALL her and a secret that my cousin and I kept until the day she died.
ROLLS OF SHARON aka CINNAMON RAISIN BUNS
ROLLS
2 packages Fleischman’s Rapid Rise Yeast
1/2 cup + 2 teaspoons sugar
1/2 cup WARM water
1 cup scalded milk (2 minutes in the microwave)
1/2 cup Crisco stick
5 cups flour, divided
2 large eggs, well beaten
1 teaspoon salt
- In a small bowl combine the warm water, 2 teaspoons of sugar and both packages of yeast until well blended. Set aside.
- In a mixing bowl combine the scalded milk, Crisco stick, 1/2 cup sugar and salt. Blend well.
- Add yeast mixture and blend well.
- Add the well beaten eggs and half the flour. Mix until well blended.
- Add the remaining flour (a little more if too sticky) and mix well until dough leaves the sides of the bowl and is elastic.
- With vegetable oil, wipe the inside of another bowl.
- Place dough in bowl and turn once.
- Cover with wax paper and a towel.
- Let rest in a warm place until double in size.
- Punch down and divide into 2 balls.
- Put one on the pastry board and one back in the bowl.
- Let rest 10 minutes.
- While resting prepare the filling ingredients.
- Roll the dough to 1/8 inch thickness in a rectangle about 18×24 inches.
- Spread half the melted butter over the dough and sprinkle with half the cinnamon sugar.
- Spread half the raisins over that.
- Roll tightly jelly roll style and cut into 18 rolls.
- Place rolls in greased pans 1/4 to 1/2 inches apart.
- Cover with wax paper and a towel.
- Let rise again until double in size.
- Bake 15-20 minutes at 350 degrees.
- While baking prepare the icing.
- When rolls come out the oven, put globs of icing on each one. Return to the oven for a minute or two to melt icing all over the rolls.
FILLING
1 stick melted butter
1 cup sugar
2 tablespoons cinnamon
1 teaspoon Pumpkin pie spice
1 cup golden raisins
- Whisk together the sugar and cinnamon until well blended.
ICING
1 stick butter, softened
3 3/4 cups powdered sugar
1 tablespoon powdered vanilla
4-6 tablespoons milk
- Mix all together until smooth.
When re-heating rolls, put a pad of butter on top of roll before microwaving.
These freeze really well.
BLOGMAS 2016 ~ day 5 ~ PICTURES and MEMORIES of CHRISTMAS past
I can’t actually get to the disks with pictures from some of our more favorite Christmases so will share these 2013 ones with you. This was a great year as we actually had snow in Oregon. We loved living so close to the Christmas tree farm also. Beautiful trees for reasonable costs unlike here.
The year had been VERY wet which is the normal, but an arctic storm blew in and all of a sudden everything turned white. This was our first snowstorm of the season, just before Christmas.
Hubby made this for me to wake up to in the back yard before the snow got too bad.
The house across the street usually looks horrible, but NOT when it’s under a blanket of snow.
BLOGMAS 2016 – DAY 4 ~ FAVORITE MUSIC
- Silent Night
- White Christmas
- Jingle Bell Rock
- Winter Wonderland
- Frosty the Snowman
- Little Drummer Boy
- The twelve days of Christmas
- Deck the Halls
- Come All Ye Faithful
- It Came upon a Midnight Clear
- We three Kings of Orient
- Joy to the World
- Rudolph the Reindeer
- Do You Hear What I Hear
- The Most Wonderful Time of Year
- It’s Beginning to Look a lot like Christmas
- Grandma Got Run Over by a Reindeer
BLOGMAS 2016 ~ DAY 2 ~CHRISTMAS MOVIES ON THE MUST WATCH LIST
Today’s category is an easy one for me. I start taping Christmas movies on Lifetime, Hallmark and INSP as soon as they air so I can watch all year long. I’m a sucker for a happy ending and let’s face it, Christmas movies have happy endings.
So this list could be reallllllllllly long, but I will just keep it to the top 5 MUST watch each and every year movies.


