Remember when I promised you
this product review? Well, it’s time and I have the perfect recipe for you too!
After a good seasoning, these pans are awesome and produce super tasty recipes! My opinion? CSN carries the highest of quality items and these pans are the proof in the pudding so to speak. They are even heating and consistent. CSN really ROCKS! I can’t think of an easier way to shop with reliable shipping, awesome communication and plain nice, accommodating people to work with!

How to Season Cast Iron Cookware
Cast iron lasts nearly forever if you take care of it. Seasoning cast iron cookware is necessary to ensure a non-stick surface and to prevent the pot or pan from rusting. If seasoned correctly your cookware can last a lifetime and more.
- For crusty cast ironware that you inherited or picked up at a garage sale: Your cookware may have some combination of rust and thick crackly black crud. It can be restored fairly easily to good as new condition! First place the cookware in a self-cleaning oven and run one cycle OR place in a campfire or directly on a hot charcoal fire for 1/2 hour, until dull red. The crust will be flaking, falling and turning to white ash. Then, after allowing to cool a bit to avoid cracking your cast iron,use the following steps. If you have more rust than crust, try using steel wool to sand it off.
- Wash your cast iron cookware with warm water and soap using a scouring pad. If you have purchased your cast iron cookware as new then it will be coated in oil or a similar coating to prevent rust. This will need to be removed before seasoning so this step is essential.
- Dry the cookware thoroughly, it helps to put the pan in the oven for a few minutes to make sure it’s really dry. Oil needs to be able to soak into the metal for a good seasoning and oil and water don’t mix.
- Coat the pot or pan inside and out with lard, Crisco, bacon fat, or corn oil. Ensure that the lid is also coated.
- Place both the lid and the pot or pan upside down in your oven at 300F for at least an hour to bake on a “seasoning” that protects the pan from rust and provides a stick-resistant surface.
- For best results repeat steps three, four and five.
- Ongoing care: Every time you wash your pan, you must season it. Place it on the stove and pour in about 3/4 tsp. corn oil or other cooking fat. Wad up a paper towel and spread the oil across the cooking surface, any bare iron surfaces, and the bottom of the pan. Turn on the burner and heat until smoke starts to appear. Cover pan and turn heat off.
- First, if you find your cast iron needs to be stripped down and re-seasoned do not fear. All you have to do is place the utensil in your Self Cleaning Oven on the shortest cleaning cycle (usually 3 hrs. on most models), and it will come out looking like the day it came out of the mold. Allow it to cool overnight. Wash the residue off with WATER ONLY in the sink using a stiff abrasive pad. Make certain NO DISH SOAP comes in contact with the utensil during this procedure. If it does you will have to start over!!! Dry the cast iron utensil off with a paper towel, and IMMEDIATELY place BACK in the oven at 350 degrees Fahrenheit for 10 minutes or so.
- Next, take the utensil out of the oven after the 10 minute drying time is complete, and lightly brush the utensil with a paper towel coated with Crisco or other solid cooking oil. Liquid vegetable oil will do in a pinch, but it’s better to save the liquids until AFTER your initial seasoning. It is important in this step only to lightly coat the cast iron with a light, thin coat of oil until it only glistens. Do not allow any puddles or pools of liquid as this will cause problems at a later time.
- Then, place the Cast Iron in the oven set to 500 to 550 degrees Fahrenheit with the COOKING SIDE FACING THE BOTTOM OF THE OVEN. This allows for any excess oil to drain off to the sides, and prevents pooling during the seasoning process. The higher heating temps allows for the oil to truly ‘cook’ as it should as opposed to just ‘gumming up’ at lower temps. Cook undisturbed for 1 hour.
Please note: During the previous step it will be best to turn off any smoke alarms in the immediate area as it may smoke quite a lot. Ceiling fans also aid in ventilation.
Finally, after your cast iron is finished seasoning for 1 hour or so, take it out of the oven and IMMEDIATELY wipe it down with another extra – light coat of Crisco. Allow it to completely cool.TIPS
- If food burns, just heat a little water in the pan, and scrape with a flat metal spatula. It may mean that re-seasoning is necessary.
- If you’re washing the cast iron too aggressively (for instance with a scouring pad), you will regularly scrub off the seasoning. Wash more gently or repeat oven-seasoning method regularly.
- If your pan develops a thick crust, you’re not washing it aggressively enough. Follow “crusty pan” instructions.
- If storing your Cast Iron Dutch oven for any length of time, it is always best to place one or two paper towels in between the lid and the oven to allow for air flow.
- Also, after cleaning after each use it is always best to place it back in the oven on 350 degrees for 10 minutes or so to ensure all water has vaporized and left the surface of the cast iron.
WARNINGS
- Do not cook tomatoes and other acidic foods in your cast iron cookware unless it has been well seasoned.
- Washing pans with detergent after they have been seasoned will break down the seasoning. Either wash without detergent (if you’re cooking similar foods with the pan, this is fine) or repeatedly oven-season your cookware.
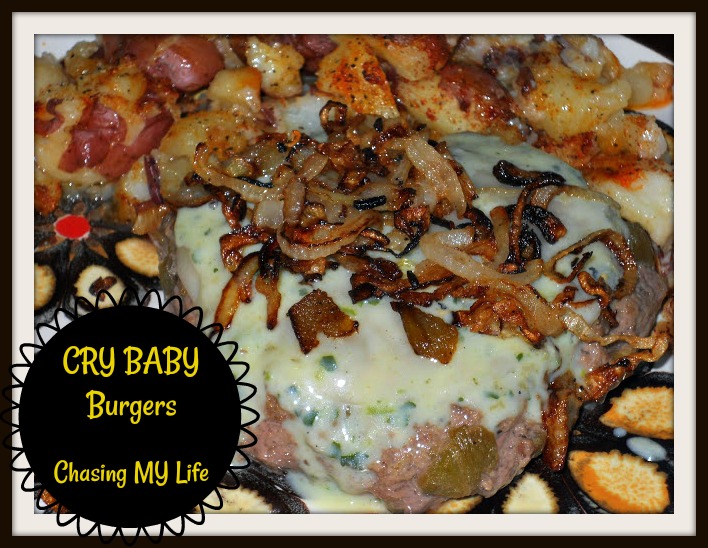
2 pounds ground sirloin
1 sleeve Keebler club crackers, crushed
1/2 teaspoon sea salt
1/2 teaspoon white pepper
1 tablespoon Worcestershire sauce
1/2 cup finely chopped onion
2 Jumbo eggs
1 tablespoon liquid Smoke – MYSTERY ingredient
3 tablespoons butter
2 cloves garlic, minced
1 large heirloom tomato, chopped,
1 large Vidalia onion, sliced thin
large shred cheddar cheese
- Combine all the hamburger steak ingredients until well mixed. Form six steaks.
- In a well seasoned cast iron grill, sear steaks on both sides. About 4-5 minutes each side should leave you with medium steaks.
- In a large skillet melt the butter. Saute the onions and garlic until fragrant and caramelized.
- Top steaks with onions, tomatoes and cheese.


 BUNLESS BURGER SERIES – ITALIAN WHITE CHEDDAR CHEESEBURGERS with BALSAMIC GLAZED ONION & ROASTED POTATOES