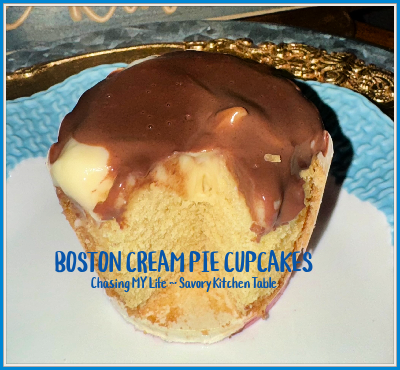
PEACH PINEAPPLE JALAPENO CHICKEN ~ BLOG 366.201

I adapted this recipe for Strawberry-Jalapeño Chicken from DELISH

This one is for sweet-and-spicy lovers. When I found this recipe it was for a strawberry jalapeño chicken. It sounded intriguing to me, but everyone I cook for turned their noses up at the idea UNTIL I converted it to either peach, apricot or pineapple. Or better yet a combination of all three flavors.

Start well seasoned chicken breasts and pan sear them 2-3 minutes per side until golden brown, smother them in your peach or pineapple or apricot chipotle sauce, and topped with FRESH SALSA made from the same flavors to create this scrumptious dish that will leave them begging for more. The sweetness of the fruit coupled with the spicy of the pepper and the smokey of the chiles are a match made in heaven.

PEACH PINEAPPLE JALAPENO CHICKEN Yield: 4 – 6 servings

SALSA
2 tablespoons FRESH chopped cilantro or flat leaf parsely, plus more for serving
1 cup+ chopped FRESH pineapple
3 peaches, chopped

1-3 jalapeños, seeded, chopped, divided (depending on the heat level you want)
2 shallots, FINELY chopped, divided
3-4 tablespoons pineapple balsamic vinegar (or a QUALITY balsamic)
2 tablespoons Frank’s Chile Lime sauce
2 tablespoon QUALITY honey

  • In a small bowl, toss cilantro, peaches, pineapple, jalapeños, shallots, vinegar, and a pinch of salt. 
  • Spoon over chicken or eat with a spoon 🙂
  • Top with cilantro.

1 + 1 tablespoon avocado oil, divided
4 boneless, skinless chicken breasts
FRESH ground sea salt and black pepper, to taste
3/4 teaspoon garlic powder

  • In a large skillet over medium heat, heat 1 tablespoon oil.
  • Pat chicken dry and season both sides with pepper, garlic powder, and 2 teaspoons salt.
  • Add chicken to skillet and cook 5-7 minutes per side, turning occasionally, until golden brown and cooked through.
  • Top with salsa and Enjoy!

GREEN CHILE BEEF CALDILLO ~ BLOG 366.194

I saw this recipe on facebook and it looked oh so good!!! I just had to try it and am extremely pleased by the results.

GREEN CHILE BEEF CALDILLO

This thick, spicy, and flavorful dish becomes the MOST satisfying soup or stew you’ve ever had.

3 tablespoons avocado oil
1 1/2 – 2 pounds beef stew meat, cut into 1-inch cubes
FRESH ground sea salt and pepper, to taste
1 LARGE onion, chopped
3 cloves garlic, minced
1 pound tomatillos, husked and chopped
3-4 green chiles (such as poblano or Anaheim), roasted, peeled, and chopped
1 jalapeño, seeded and finely chopped (optional for extra heat)
4 cups beef broth
1 teaspoon ground cumin
1/2 teaspoon dried oregano
FRESH cilantro, chopped for garnish
Lime wedges, for serving (optional)

  • Heat oil in a large pot over medium-high heat.
  • Season the beef with salt and pepper.
  • Add the beef to the pot in batches, browning on all sides.
  • Transfer the browned beef to a plate.
  • Add the onion to same pan, cooking 3-5 minutes until softened.
  • Add the garlic, cooking for an additional minute until fragrant.
  • Stir in the chopped tomatillos, green chiles, and jalapeño (if using), cooking 5-7 minutes until the tomatillos start to break down.
  • Return the browned beef to the pot. SEE NOTE
  • Add the beef broth, ground cumin, and dried oregano, bringing the mixture to a boil, then reduce the heat to low.
  • Simmer, partially covered for 1 1/2 to 2 hours, or until the beef is very tender.
  • Taste and adjust the seasoning to taste with additional salt and pepper if needed.
  • Ladle into bowls.
  • Garnish with fresh cilantro and serve with lime wedges and warm tortillas on the side.

NOTE: At this point I usually use the slow cooker for 4-6 hours.

FRENCH ONION CHICKEN ~ BLOG 365.17

If you love French Onion Soup, you’ll go COMPLETELY bonkers over this recipe.

FRENCH ONION CHICKEN adapted from MARIA’S MIXING BOWL

2  LARGE shallots, halved and sliced
1/3 cup chopped dried chanterelle mushrooms
1/2 cup crisp white wine

3-4 tablespoons butter, divided
1 3/4 cups beef broth
4 thin chicken steaks
2 tablespoons avocado oil
FRESH ground sea salt and black pepper
1 teaspoon FRESH thyme leaves
1 1/2 tablespoons WONDRA flour
4 slices deli-style provolone cheese
FRESH parsley, for garnish
French fried onions, for serving, optional
Mashed potatoes, for serving

  • Soak mushrooms in wine for 30 minutes to reconstitute.
  • Preheat oven on to 350°.
  • Melt 2 tablespoons butter in an oven-safe skillet over medium high heat.
  • Add shallots and stir, cooking 8-10 minutes until softened.
  • Add mushrooms and any remaining wine and stir, cooking 8-10 more minutes until caramelized.
  • Remove from skillet and set aside.
  • Add another tablespoon of butter to the pan.
  • Season chicken breasts with salt, pepper, and FRESH thyme leaves.
  • Cook chicken in skillet for about 2-3 minutes per side.
  • Move chicken to a plate and cover to keep warm.
  • Return onion and mushrooms to skillet and sprinkle with flour.
  • Stir and cook 1 minute before adding beef broth, whisking until thickened.
  • Add chicken back to skillet and spoon sauce over the chicken.
  • Top each breast with one slice of provolone. Spoon a bit of sauce over the cheese.
  • Move to oven and bake 8-10 minutes until cheese is melted and chicken is cooked through.
  • Remove from oven and spoon more of the sauce over the chicken.
  • Top with parsley and French fried onions.
  • Serve over mashed potatoes. 


BLUEBERRY ALMOND COFFEE CAKE ~ BLOG 365.13

BLUEBERRY ALMOND COFFEE CAKE adapted from SLOW ROASTED ITALIAN

Bursting with blueberries and the perfect balance of flavors with the crispy almonds. Make this easy coffee cake recipe for any occasion!

2 cups granulated sugar
3 LARGE eggs, room temperature
12 tablespoons (1 1/2 sticks) salted butter, room temperature
1 teaspoon PURE almond paste
1 tablespoon PURE vanilla extract
2 cups all-purpose flour
1 teaspoon baking powder

1 1/2 cups (12 ounces) FROZEN small WILD blueberries, thawed and drained WELL
1/2-1 cup sliced almonds

  • Preheat oven to 350°.
  • Spray a 9×13 baking pan with non-stick cooking spray and set aside.
  • Beat sugar and eggs for 5 minutes with a mixer on medium. The volume of mixture will increase by almost half and will be thickened and light in color.
  • Add butter and extracts, beating 2 more minutes.
  • Gradually add flour and beat until just combined.
  • FOLD in blueberries with a spatula.
  • Pour and smooth batter into prepared pan.
  • Sprinkle almonds on top.
  • Bake for 40-45 minutes until a toothpick comes out clean.
  • Allow to cool COMPLETELY before serving, or the cake will crack.
  • Use a serrated knife to cut the cake.

NOTE: The cake freezes really well. Wrap individual pieces (so you can snack as desired) in plastic wrap and then place in a resealable freezer bag. Allow thawing for 10-15 minutes on the counter before eating.

MONKEY MEAT SANDWICH SPREAD

I found the original recipe on face book, but it’s a new favorite of hubbies (despite the yellow color). Monkey Meat… it’s not what you think! I love how she begins this recipe, “Before you run away, let me clarify – no monkeys were harmed in making this Monkey Meat. There are also no bananas… let me explain…” I had no idea where the name REALLY came from, but I adored it so I read on. The mixture itself reminds me of the UNDERWOOD deviled ham from when I was a kid.

She said it was an old family recipe, a sandwich spread made by her grandma when she was trying to feed 4 hungry kids on a tight budget. She would grind up bologna with her homemade pickles to save a bit of money and stretch her food budget. Her grandfather, a quirky science teacher was the one that coined the name, Monkey Meat. And while an odd name, the recipe is so worth a try! Her recipe used only mayo, but hubby can’t eat bologna without mustard so I adapted it to suit him, though the color is a bit off putting 😀

MONKEY MEAT SANDWICH SPREAD adapted from I WASH YOU DRY

1 pound piece of bologna, cut into cubes
5 to 6 QUALITY baby dill pickles, drained
1/4 cup mayo
1/4 cup mustard

  • In a food processor pulse the bologna several times until it becomes very finely chopped, place in a large bowl.
  • Wipe out the food processor and add the dill pickles, pulse a few times until very finely chopped.
  • Toss the dill pickles with the bologna.
  • Stir in the may and mustard mixture.
  • Keep chilled.
  • Spread on crackers or your bread for a delicious sandwich!

AMISH COUNTRY CASSEROLE

The beauty of casseroles is that the sky’s the limit. You CAN make them up as you go! Whether you are trying to clean out the refrigerator or recreate your grandmother’s budget leftover dinner at the end of the week this is a category of recipes that has no end.

With fall approaching we are entering the CASSEROLE phase of the year. This Amish Country Casserole I adapted from LOU LOU GIRLS is ALL about the comfort!! It can easily be made ahead of time and tastes wonderful whether you bake it and serve it now or freeze it and bake it later!

AMISH COUNTRY CASSEROLE
1 (12 oz.) bag medium bow tie noodles or pasta shape of your choice
1 tablespoon butter
1/2 pound ground beef
1/2 pound ground sweet Italian sausage
1 can CAMPBELL’S condensed tomato soup
1 can CAMPBELL’s cream of ANYTHING soup (your choice, though I like either mushroom or celery)
1 cup WHOLE milk
FRESH ground sea salt & black pepper, to taste
2 teaspoons Worcestershire sauce 
1/2 cup sweet Vidalia onion, diced
2 to 3 cloves garlic, FINELY minced
1/3 cup grated Parmesan cheese or cheese flavor of choice (I often use Jack)

  • Preheat oven to 350°. 
  • Spray a 9×13 baking dish with non stick cooking spray and set aside.
  • Cook pasta according to package directions and drain well.
  • In a large skillet melt butter, add onions and cook a couple minutes before adding beef, cooking crumbly.
  • Drain off grease.
  • In a large bowl stir together tomato soup, cream of anything soup, milk, salt, pepper, Worcestershire sauce and minced garlic.
  • Fold in pasta and ground beef mixture.
  • Spread mixture into prepared baking dish.
  • Bake, uncovered, for 25-30 minutes.
  • Then top with grated cheese and serve with a salad.

CRUSTED STUFFED CHICKEN

CRUSTED STUFFED CHICKEN adapted from HEY GRILL HEY

Crusted Chicken is stuffed with a ooey, gooey, creamy and cheesy filling of chiles and bacon with a BIG crunch on the outside. This recipe as written was for the grill, but I’ve adapted it slightly for stove top or oven. I also changed the jalapeños to green chiles for the wimps in my family. You can also use flavored cream cheese if you want to change up the flavor a bit. The type of chip you use also adds or changes the flavor accordingly. I sometimes use Fritos or Doritos.

4 boneless skinless chicken breasts
1 8.5 oz bag of your favorite chips – I use Kettle salt and vinegar or Lays wavy sour cream flavored chips
1/3 cup WONDRA flour
3 LARGE eggs, lightly beaten

STUFFING
8 ounce cream cheese, softened
2/3 cup medium cheddar cheese
4 ounce can chopped green chiles, drained WELL
1/2 cup crumbled bacon (about 8 pieces)
1 tablespoon Homemade Sweet Rub (recipe below)
2-3 tablespoons avocado oil
2-3 tablespoons butter

  • Preheat oven to 375°.
  • Line baking sheet with parchment paper if baking.
  • Use a sharp knife to slice each chicken breast almost all the way in half creating a pocket.
  • Open the slice and press each breast flat.
  • In a small bowl, combine the cream cheese, cheddar cheese, green chiles, bacon, and homemade sweet rub.
  • Spread 1/4 of the mixture onto each of the butterflied chicken breasts.
  • Fold the breasts over and press the cream cheese mixture so it is evenly distributed within the chicken.
  • Mash the chips into crumbs with a food processor or blender and pulse until the chips are broken down into fine crumbs.
  • Make a dredging station by pouring the crumbs into a shallow dish.
  • In another dish add the flour and season with a little paprika.
  • Break the eggs into a third shallow dish and beat lightly with a fork.
  • Dredge the stuffed chicken breasts into the flour first, shaking off the excess.
  • Then dip into the eggs followed by the chip crumbs, coating each side well.
  • Heat avocado oil and butter in a heavy cast iron skillet over medium high heat.
  • Gently add chicken breasts to hot oil searing each side 5-6 minutes or until cooked through depending on breast thickness OR place on baking sheet and bake 30 minutes or until cooked through.
  • Serve immediately and enjoy

SWEET RUB
¼ cup brown sugar
2 teaspoons FRESH ground Himalayan sea salt
2 teaspoons FRESH ground black pepper
2 teaspoons QUALITY smoked paprika
2 teaspoons garlic powder
2 teaspoons onion powder
½ teaspoon cayenne pepper

  • Combine all of the ingredients for the rub in a small bowl.
  • Stir well to combine, using a fork to break up any clumps.

  • Store in an airtight container.
  • This will last in your cupboard for up to a month
.

BAKED GRILLED CHEESE

Do you ever see those recipes on facebook or instagram that just look so perfect you have to try them? Or maybe they seem so so simple that it’s a no brainer. I’ve tried more than one that just didn’t live up to all the hype, BUT this isn’t one of them! Donna’s recipe for baked grilled cheese sandwiches has the same golden, crispy crust and gooey melted center you’ve always known and loved, but you can cook a HUGE batch for a crowd all at once in under 30 minutes total WITH THE ADDED BONUS OF NOT BEING TOO GREASY! I did adapt the flavoring to our likes, but the process is pretty much the same.

Adapted from the Slow Roasted Italian  Yield: 12 Sandwiches

BAKED GRILLED CHEESES
24 slices of thick sliced bread (Texas toast or a thick sourdough are perfect)
1 cup FRESH FINELY grated Parmesan cheese
12 thick slices Baby Swiss cheese
12 thick slices mild cheddar cheese
12 slices Havarti cheese
12 slices beefsteak tomato
12 slices bacon, halved and cooked crisp
1/2 + cup unsalted butter, room temperature
Tomato soup for dipping

Preheat oven to 450°.

  • Generously butter a slice of bread.
  • Sprinkle a tablespoon of Parmesan cheese evenly over the butter and press cheese gently into the buttered surface. Place it face down on your baking sheet.
  • Place a slice of Baby Swiss cheese on each slice of bread followed by a slice of Havarti, a slice of tomato, 2 bacon slices and then a slice of cheddar.
  • Place a slice of buttered bread on top.
  • Sprinkle a tablespoon of Parmesan cheese evenly over the butter and press cheese gently into the buttered surface. Set aside and repeat until you have enough sandwiches for your crowd.
  • Bake 5 minutes until tops are golden and crusty. Watch carefully to make sure sandwiches don’t get too brown.
  • Flip sandwiches and bake another 5 minutes until second side is golden and crusty and centers are melted.

GRASSHOPPER CHEESECAKE SQUARES

I’ve made Creme de Menthe Brownies for years, but when I found this recipe over at The Kitchen is My Playground I instantly fell in love.

The classic combination of a Grasshopper cocktail (creme de cacao and creme de menthe with cream) turned into a beautifully layered cheesecake treat is so very delicious! and a nice change from the deeper, darker and heavier brownie version.

GRASSHOPPER CHEESECAKE SQUARES Yield: 9 squares
1 1/2 cups (30-40 cookies) chocolate wafer cookie crumbs (gingersnaps are also quite good)
1/4 cup butter, melted
24 ounces cream cheese, at room temperature
1 1/4 cup granulated sugar
3 LARGE eggs, at room temperature
4 tablespoons white creme de cacao
1/4 cup + 2 tablespoons green creme de menthe
2 drops green food coloring (optional)
2 ounces semi-sweet baking chocolate squares, chopped

  • Preheat oven to 350°.
  • Spray a 9×9 baking dish with non-stick cooking spray.
  • Combine chocolate cookie crumbs and melted butter, mixing well.
  • Press cookie crumb mixture into the baking dish. Set aside.
  • Beat cream cheese for a minute at medium speed with an electric mixer until light and fluffy. Gradually add sugar, beating well.
  • Add eggs, one at a time, beating after each addition.
  • Stir in creme de cacoa.
  • Scoop out 2 and a 1/2 cups of the cheesecake batter and pour it over the cookie crumb crust, spreading evenly with a spatula.
  • Stir creme de menthe into remaining cheesecake batter.
  • Using a spoon or small measuring cup to work with small amounts of batter at a time, GENTLY pour the green cheesecake batter on top of the white cheesecake batter in the baking dish. You don’t want to disturb the layers too much.
  • Bake 45 – 55 minutes.
  • Cool to room temperature and then chill over night.
  • Cut cheesecake into small bars. cutting the bars prior to putting on the chocolate drizzle helps keep the drizzle intact and pretty.
  • Microwave chocolate squares in 20 second intervals until melted, stirring after each interval.
  • Add melted chocolate to a ziplock bag and seal.
  • Snip a very tiny hole in one corner of the bag and drizzle the chocolate over the bars. 
  • Store covered in the refrigerator. 

HAMBURGER HASH

Toss out the hamburger helper and make this instead. Another tasty one pot meal full of flavor and texture that’s quick and easy for classic comfort food weeknight family meal. The beauty of this recipe is that it is super easy to adjust the servings. I’m making most recipes for 2 these days, but just double or triple up and feed 4-6 in a jif.

HAMBURGER HASH – serves 2 adapted from SpaceShips and Laser Beams
Prep Time 15 mins Cook Time 20 mins Total Time 35 mins

1 SMALL russet potatoes, peeled and chopped into bite size pieces
1 small turnip or rutabaga, peeled and chopped into bite size pieces

3/4 pound lean ground beef
1/2 Vidalia onion, diced
2 teaspoons avocado oil
1-2 cloves garlic, minced
1 tablespoon Garden Gourmet Italian seasoning (or 2 teaspoons dried)
FRESH ground sea salt and black pepper
1/4 cup beef broth

1 1/4 cup shredded sharp cheddar cheese

  • Boil potatoes 3-5 minutes until tender, BUT NOT too soft.
  • Drain and set potatoes aside.
  • In a large nonstick or greased skillet, over high heat, cook ground beef until browned. Drain off fat. Set cooked beef aside.
  • 
Using the same skillet over medium heat avocado oil.
  • Add onion, potatoes, Italian seasoning, minced garlic, salt, and pepper. Toss well to evenly coat potatoes and onions in seasoning, cooking 10-15 minutes and stirring often until potatoes and onions have started to brown and crisp.
  • Fold ground beef back to the skillet, stirring well to mix.
  • Add broth and simmer until broth is mostly absorbed.
  • Add cheese, stirring until well mixed and melted.
  • Remove from heat.
  • Serve hot. 


NOTES

  • ALWAYS start your potatoes in cold water. Adding them directly to boiling water will immediately cook the outsides while the insides will take longer. Use a fork to gently pierce the potatoes while they are boiling. When the fork will pierce the potato easily but not break it apart, your potatoes are ready.
  • If using dried herbs, use a mortar and pestle or rub them between your clean dry palms to break them up and revive their flavor essence before adding them to your recipe.

TACO SPAGHETTI

I loved this recipe because it was ALL made in the same pan so it’s quick and easy clean up, but also because I can no longer eat a lot of grain products so I still feel like I’m getting my tacos without have to deconstruct them! After making it exactly as written the first time, I adapted it the next time and found it was just easier and tastier to prepare the noodles separately.

You can always add your favorite taco toppings such as extra cheese, green onions or a dollop of sour cream to make it your own.

TACO SPAGHETTI servings 2 – adapted from Space Ships & Laser Beams

2 teaspoons avocado oil
1/3 pound QUALITY ground beef
1/4 cup chopped yellow onions
2 teaspoons taco seasoning
1/3 cup original Rotel tomatoes with juice
spaghetti noodles for 2, prepared al dente
1/3 cup homemade bone broth (chicken or beef – your choice)
1/2 cup Mexican style shredded cheddar/Jack cheese
scant 1/4 cup cilantro, chopped
minced green onions, for garnish
chopped olives, for garnish
chopped jalapeños, for garnish

  • Heat oil in a LARGE skillet over medium heat. 

  • Brown ground beef and onion in skillet until meat is no longer pink and onions are soft and translucent.

  • Add taco seasoning, tomatoes (including juice) and broth.

  • Cover and simmer for 10 minutes until most of the liquid is absorbed.

  • Stir in noodles, stirring to coat well and simmer 5 minutes more.
  • Remove from heat.
  • Sprinkle half of the cheese and half the cilantro into the pan and stir to coat the spaghetti with the cheese and sauce.

  • Top with remaining cheese and cilantro.
  • Serve with a dollop of sour cream and your favorite taco toppings.


NOTES

  • For the best flavor, grate your own cheese rather than using a store bought bag of grated cheese. The store bought grated version usually has an anti-caking agent on it so it doesn’t melt as well.
  • For a quicker weeknight cooking time, ground beef can be cooked ahead of time. Store in the refrigerator for up to 3 days or in the freezer for up to a month.

APPLE PIE STREUSEL MUFFINS

APPLE PIE STREUSEL MUFFINS adapted from OMG CHOCOLATE DESERTS I made this batch using a Texas size muffin pan, but find they are better as regular size because they are so rich and filling.

CINNAMON STREUSEL TOPPING
1 cup all-purpose flour
¼ cup granulated sugar
¼ cup light brown sugar
6 tablespoons unsalted butter, melted and cooled slightly
1 teaspoon QUALITY cinnamon

  • In a small bowl, whisk together flour, sugar, brown sugar and cinnamon, add melted butter and stir with a fork until crumbly and set in the fridge until ready to use.

MUFFINS
2 cup all purpose flour
3 teaspoons baking powder
½ teaspoon salt
¼ teaspoon ground nutmeg
1 1/2 teaspoons QUALITY ground cinnamon
2 LARGE eggs
1 cup granulated sugar
1 cup vanilla Greek yogurt
1/2 cup vegetable oil
1 teaspoon PURE vanilla extract
1 ½ cups COMSTOCK apple pie filling, chopped small

  • Preheat the oven to 400°.
  • Line standard muffin pan with paper liners and set aside.
  • Prepare streusel topping and set aside.
  • In a large bowl stir together flour, baking powder, salt, cinnamon and nutmeg, then set aside.
  • In a medium bowl, whisk together eggs and granulated sugar until combined.
  • Whisk in yogurt, oil, and vanilla extract – mixture should be a pale yellow.
  • Fold wet ingredients into dry ingredients and mix everything together by hand. The batter will be quite thick.
  • Spoon batter into prepared muffin tins, filling less than two thirds.
  • Tap the pan onto working surface to remove air bubbles.
  • Add a heaping tablespoon of chopped apple pie filling on top of batter and gently press the apples into the batter.
  • Reduce the heat to 375° and place pan in center of shelf.
  • Bake about 19-22 minutes or until the toothpick inserted in the center comes out clean.
  • Cool for 5 minutes in the pan then remove muffins and cool on a wire rack.

Honestly these are great without the glaze, but they are phenomenal with the glaze.

GLAZE
1 cup powdered sugar
1–2 Tablespoons milk

  • Stir together powdered sugar and milk. If it’s too thin add more powdered sugar, if it’s too thick add more milk.
  • Drizzle glaze over cooled muffins.