COOKING THURSDAY ~ SMOKED BEEF BRISKET 2 ways ~ BLOG 365.190A

Smoking meat in your kitchen is easier than you think. I recently bought a NordicWare Kettle Smoker to use indoors! Being a Texas girl Beef Brisket is one of my ALL time favorites and I’m already working on my recipes for next year’s charity BBQ. One of those is my Jailhouse chili which requires some beef brisket so I decided to smoke my own! The first version is marinaded first, which was great flavor, but ended up being my least favorite. 

SMOKED BEEF BRISKET (marinaded) serves 5-6

1 tablespoon Meat Church Texas Sugar BBQ rub
1 clove garlic, minced
2 tablespoons Bragg’s liquid aminos
1 tablespoon jalapeno ketchup
1 tablespoon avocado oil
FRESH ground black pepper, to taste
2 pounds beef brisket, cut in half

  • Score meat diagonally 1/4″ deep.
  • Rub all sides of brisket with BBQ rub. Set aside for 30 minutes.
  • Whisk together ketchup, liquid aminos, oil and pepper together.
  • Brush sauce on both sides of brisket.
  • Wrap meat in wax paper and refrigerate overnight.


  • Prepare smoker by adding wood chips of choice. I like apple, peach or cherry.
  • Cover drip pan with aluminum foil to make cleanup easier and place on top of chips.
  • Unwrap meat and place on smoker tray.
  • Open vent 1/4 of the way.
  • Smoke 1 1/2-2 hours at the recommended internal smoker temperature (190°-210° F) or until done using dry smoke method.
  • Rest 5-10 minutes.

~~~~~~~~~~~~~~~~~~~~~~~~~~~~~~~~~~~~

To guarantee A MELT IN YOUR MOUTH TENDER BRISKET FOLLOW THESE TIPS.

SMOKE CLEAN & DRY: Place a water pan in your smoker to stabilize the heat, but DO NOT inject or heavily baste the meat with liquid. This allows the smoke to adhere and the fat to render properly.

THE WRAP: At around 165°, the brisket will hit the dreaded “stall”. This is when the juices & fat of the meat are coming out of the brisket and actually “cooling” the brisket instead of cooking it. The stall at 165° can last 2-5 hours sometimes. By wrapping in butcher paper or foil, you help to break through that stall quicker. I prefer unwaxed butcher paper to foil. Butcher paper allows more smoke into the brisket as it is porous compared to foil. When wrapping your brisket, lathering it with warmed beef tallow all over will help to make it extra moist and tender. It will also amp up the beef flavor.

  • Lay out two pieces of butcher paper so they are slightly overlapping.
  • Warm your beef tallow up slightly, then drizzle it over the butcher paper.
  • Remove the brisket from the smoker, set it onto the butcher paper about 2 feet from one end.
  • Drizzle the brisket with even more beef tallow. 
  • Pull the short end of the butcher paper over the top of the meat, and then fold it underneath.
  • Fold the sides into the brisket, then roll the meat up in the paper until it’s completely wrapped. 
  • Place the wrapped brisket back into the smoker. Be sure that the loose end of the butcher paper is on the bottom so it stays nicely wrapped.
  • Cook another 7+ hours or until the brisket’s internal temperature is anywhere between 202-203º. 

PROBE TENDER: Don’t rely solely on temperature. The brisket is done when a meat thermometer probe glides into the thickest part of the meat with zero resistance—just like a warm knife sliding through butter.

OPTIONAL ~ TEXAS CRUTCH: Once the brisket hits the “stall” (around 165°-170° internal temp), wrap it tightly in peach butcher paper or foil to lock in natural juices while retaining the bark.

THE LONG REST: Pull the brisket and let it rest in a dry cooler (or a warmed oven set to its lowest setting) for at least 2 to 4 hours before slicing. This essential step allows the muscle fibers to relax and the juices to redistribute.

When it is ready to slice, unwrap and begin slicing the brisket right where you made your “against the grain” cut when prepping.

RESULT: This steamy environment allows the meat’s internal temperature to rise more quickly and helps it become more tender. 

HERE A FEW DEFINITIONS TO HELP:

THE STALL: During smoking, meat temperature can plateau (the “stall”) as moisture evaporates from the surface, cooling the meat down. 

WRAPPING: Wrapping the meat in foil or butcher paper creates a sealed environment, trapping steam and moisture. 

TEXAS CRUTCH ~ The “Texas Crutch” is a barbecue technique where meat, typically brisket or pork, is wrapped tightly in aluminum foil or butcher paper during the final stage of smoking to speed up cooking, push through “the stall,” and lock in moisture. This creates a steamy environment that helps tenderize the meat and retain juices, resulting in a more moist and faster cook, though some pitmasters prefer butcher paper for a more traditional bark. 

I don’t or at least didn’t know much about smoking meat, but I DO know that brisket is my favorite BBQ meat and it takes absolutely forever (10-20 hours for a full brisket) to do it well. Being a Texas girl I knew I needed to perfect my technique and work until I came up with the ultimate recipe. In Texas BBQ Brisket that’s been done well is like the Holy Grail of all meats.

PREPPING BRISKET FOR THE SMOKE:

I personally DO NOT like to trim my brisket. It will look more rustic, but I feel that the fat add so much more to the flavor.

MAKE AN AGAINST THE GRAIN CUT BEFORE YOU SMOKE: When the brisket is fully cooked, seeing the grain structure is difficult so while prepping your brisket, make sure to cut a corner of the brisket. This will reveal the grain structure so that you know how you are supposed to cut it when done.

DRY BRINE: After seasoning thoroughly, place that smoked beef brisket in the fridge uncovered overnight or 4-24 hours. That dry brine is key to drying out the outside layer of the brisket to get an amazing bark.

FAT SIDE UP OR DOWN?: Choosing which side to place up depends more on the grill and fire. If you are cooking on a classic offset smoker, it doesn’t really matter. But if you are using a drum smoker, pellet smoker or something where the heat comes from the bottom you should definitely do fat side down. The fat will help “protect” the meat more from the heat this way.

Place the brisket in the smoker with the fat side of the brisket facing the heat. This layer of fat serves as a “protection” layer against the heat. Start checking at 7 hours, adding time as needed. You can check that it’s done with a meat thermometer. The internal temperature of the meat at the thickest point  should be 165-170ºF. 

REST 2 HOURS: If there is one true secret to brisket, it’s RESTING! Place the brisket in a room temperature cooler (slightly opened) or a room temperature oven.

TRIMMING: First, you need to trim the whole brisket. To do so, lay the cold brisket on a cutting board, fat cap side down. Next, trim off any silver skin or pockets of fat with a sharp knife. Remove the large pocket of fat near where the flat and point meet, then square off all sides of your brisket.  Flip the brisket over and carefully remove the fat cap. Be sure that the fat cap side is about 1/4″ thick, then remove most of the fat “flap” located at the top of the brisket.

SEASONING: Rub the brisket generously with kosher salt, black pepper, and optional garlic powder for a basic traditional seasoning or use your favorite preprepared rub. Place the seasoned brisket into the fridge and allow it to dry brine overnight. 

SMOKING: Preheat your smoker to a temperature of 250-265º. I like to use a maple cherry combo for flavor or an oak and peach combo.

~~~~~~~~~~~~~~~~~~~~~~~~~~~~~~~~~~~~

TEXAS SMOKED BEEF BRISKET adapted from OVER THE FIRE serves 8

Prep Time: 1 hour hour
Cook Time: 14 hours hours
Total Time: 15 hours hours

12-15 pounds beef brisket, trimmed
2 1/2 tablespoons FRESH ground sea salt
2 1/2 tablespoons FRESH ground black pepper
2 tablespoons garlic powder, optional
1 cup Beef Tallow, warmed up

  • Season brisket thoroughly.
  • Place your brisket into the fridge to dry brine overnight.


  • Preheat smoker for 250-265° with wood chunks or chips choice.
  • Add the brisket on to the smoker fat side towards the heat.
  • Cook the brisket 7-8 hours until it reaches about 165-170° at the thickest and fattiest part.
  • Once it has hit 165°, wrap the brisket in butcher paper.
  • Return the brisket back onto the smoker at 250-265° so that the loose end of butcher paper is on bottom to prevent it from unraveling.
  • Cook 7-8 hours more until the meat hits 202-203°.
  • Rest at room temperature for at least 2 hours before slicing.

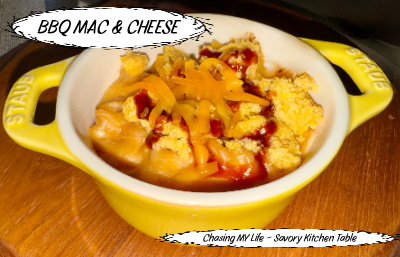
COOKING THURSDAY ~ BBQ MAC & CHEESE ~ BLOG 365.141C

This year’s BBQ competition for the DIGG’S Mercy Children’s Foundation had us coming up with more new recipes. This year I entered my BBQ Baked Beans, Smoked BBQ Cheesecake and BBQ MAC & CHEESE.

BBQ MAC & CHEESE
1/4 cup + 1 1/2 teaspoons kosher salt, divided
2 1/2 cups WHOLE milk
12 ounce can Jalapeño condensed milk
6 tablespoons butter, cut into pieces
6 tablespoons WONDRA flour
1 pound pasta (such as elbow, penne, cavatappi, or rotini)
2 cups shredded Sharp Cheddar cheese
2 cups shredded Fontina or Havarti cheese
1 teaspoon hot sauce (Tabasco or Frank’s Original)
1/2 teaspoon FRESH ground black pepper
1 1/2 cups crumbled cornbread
1 tablespoon melted butter
1/2 cup chopped green onions
1/2 cup barbecue sauce of choice

  • Spray baking dish with non-stick spray and set aside.
  • Bring 1/4 cup salt and 4 quarts of water to a boil in a large covered Dutch oven over high heat.
  • Add pasta to boiling water, cooking 8 minutes.
  • Microwave milk in a microwave safe glass measuring cup covered with plastic wrap on HIGH 3 minutes.
  • Melt butter in a large skillet over medium heat.
  • Whisk in flour, cooking 1-2 minutes until golden.
  • Slowly whisk in hot milk; bring to a SLOW boil, cooking 2-3 minutes until thickened. Remove from heat and whisk in cheeses, most of the BBQ sauce, hot sauce, remaining salt and pepper.
  • Toss together cornbread and melted butter. Set aside
  • Drain pasta.
  • Fold pasta into cheese sauce.
  • Pour pasta mixture into baking dish.
  • Sprinkle cornbread mixture over top.
  • Sprinkle green onions over cornbread mixture.
  • Broil 1 to 2 minutes or until breadcrumbs are golden brown.
  • Drizzle with remaining barbecue sauce.
  • Serve immediately.

NOTES: You can make this dish up to 3 days in advance. Bake at 325° until heated throughout and then broil.


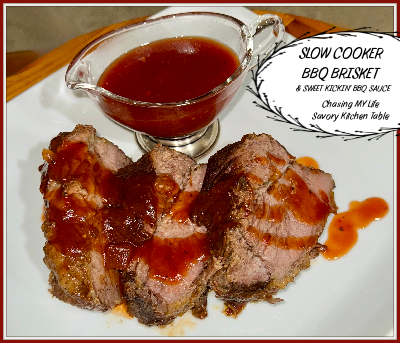
SLOW COOKER BBQ BRISKET with SWEET KICKIN’ BBQ SAUCE ~ BLOG 365.93

SLOW COOKER BBQ BRISKET

The secret to this juicy, flavor exploding, melt-in-your-mouth BBQ Beef Brisket is not only slow cooking it to perfection, but oven searing it the day before! Use it for a company dinner or backyard get together and will be a success either way!

SPICE RUB
2 tablespoons paprika
4 tablespoons packed brown sugar
1 tablespoon chili powder
2 teaspoons garlic powder
2 teaspoons garlic salt
1 teaspoon onion powder
1 teaspoon chipotle powder
1 teaspoon FRESH ground pepper
1/2 teaspoon dried thyme
1/4 teaspoon cayenne pepper

  • Bring brisket to room temperature for 30 minutes.
  • Preheat oven to 425°.
  • Line a large baking dish or jelly roll pan with parchment paper or foil for easy clean up. Set aside.
  • Trim brisket of excess fat and rinse and pat dry.
  • In a medium bowl, whisk together the above ingredients. Remove 1 tablespoon Spice Rub and add to a medium bowl to use in your barbecue sauce.
  • Rub all remaining spice rub evenly all over the meat then place brisket on prepared baking sheet.
  • Bake uncovered for 30 minutes at 425 to sear meat.
  • Wrap in heavy duty foil and refrigerate overnight.

SLOW COOKING BRISKET
Oven seared 3-4 pound beef brisket
1 cup water
1 tablespoon Better than Bouillon beef base
2 tablespoons Worcestershire sauce
1 tablespoon Bragg’s liquid aminos
1/2 cup favorite homemade barbecue sauce

  • Add brisket to slow cooker, fat side up.
  • Whisk together 1/2 cup BBQ sauce, water, Worcestershire sauce, Bragg’s liquid aminos and 1 tablespoon beef bouillon.
  • Cover and cook on LOW for 8-10+ hours until brisket is VERY tender, flipping over half way through cooking.
  • Remove brisket to a foil lined baking sheet.
  • Brush with more BBQ sauce and broil 5-10 minutes, until slightly caramelized.
  • Simmer remaining BBQ sauce until warmed through.
  • Brush brisket again with BBQ sauce and slice across the grain or chop as desired.
  • Serve with remaining barbecue sauce plain or they make delicious sandwiches.

SWEET KICKIN’ BBQ SAUCE
2 cups ketchup
4 1/2 tablespoons sugar
1/3 cup packed brown sugar
3/4 cup apple cider vinegar
1 tablespoon reserved Spice Rub from above
1 tablespoon Frank’s Hot Honey hot sauce
1 teaspoon red pepper flakes
1/2 teaspoon Ancho chili powder
FRESH ground sea salt and black pepper

  • In a medium sauce pan whisk together all of the ingredients plus the 1 tablespoon reserved spice rub, whisking to combine.
  • Cook over medium heat, stirring frequently 10 minutes until sugars are dissolved and sauce is smooth.

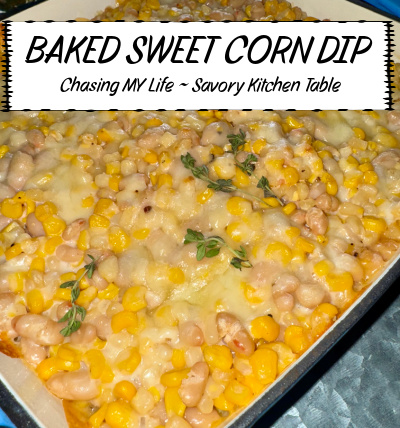
BAKED SWEET CORN DIP ~ BLOG 365.42

Dive into a delightful fusion of sweet corn and melted mozzarella with a hint of a spicy zing, rounded off with the subtle sweetness of sugar and a pinch of classic seasoning. SUPER easy and ready in just 12 minutes! A truly gourmet dish without all the fuss and preparation!

The original recipe was called Korean Cheese corn and inspired by the smells and tastes of a trip to Seoul by That Oven Feeling. This dish was evidently a staple of street cooking. I have since adapted it to my own family.

The recipe called for Kewpie mayo and the author claimed once you’ve tried it, you’ll never go back, but alas, I am just not a fan. 🙁 I do promise that even with the changes I’ve made there is still a perfect balance of sweet, creamy, cheesy and umami.

BAKED SWEET CORN DIP

15.25 ounce can QUALITY sweet corn, WELL drained
15.25 ounce can SMALL white beans, rinsed and WELL drained

3/4-1 cup shredded mozzarella cheese plus 1/4 cup more for garnishing
3-4 tablespoons DUKE’S mayonnaise
2-3 tablespoons Frank’s Original hot sauce *SEE NOTES
1/2 teaspoon sugar
FRESH ground sea salt and black pepper, to taste
Pinch of minced cilantro, for garnish
Scoopable corn chips or veggie sticks for dipping

  • Adjust the oven’s baking rack to the position second from the top.
  • Preheat the oven to a temperature of 450°.
  • Lightly grease a small (5-6 inch) cast iron skillet.
  • In a small mixing bowl whisk together the mayonnaise, hot sauce, salt and pepper.
  • In a medium mixing bowl toss together the corn and cheese.
  • Fold the mayonnaise mixture into the corn and cheese until well mixed.
  • Spread the mixture into your prepared cast iron.
  • Garnish with your additional cheese.
  • Bake for 10 minutes or until the cheese is beginning to get golden.
  • When you remove it from the oven garnish with the minced cilantro.
  • Cool for a few minutes before serving.

NOTES:

  • Recipes are just guidelines; the real flavor is in your unique creativity!
  • You can use FROZEN corn, but it MUST be thawed and thoroughly drained!!!
  • You can use Frank’s Chile Lime Hot Sauce or the Hot Honey sauce for a nice flavor change-up.
  • This recipe EASILY doubles into a 10 inch cast iron for a crowd.
  • When doubling I often add more white beans and white shoepeg corn to the sweet corn for a nice medley. These trade out ounce for ounce quite well.
  • This recipe EASILY adapts to other flavor combinations! Any meltable cheese (cheddar, Gouda, Guyere cheese is GREAT!
  • Hubby likes it when I change out the original Frank’s for BBQ sauce or even for a creamy homemade salsa for a flavor that work’s great too!
  • If you’re not a cilantro fan, try parsley, chives, thyme or even rosemary.

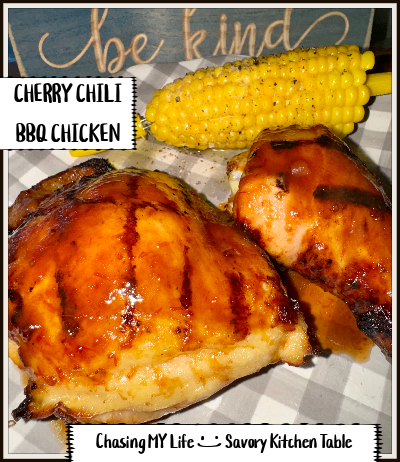
CHERRY CHILI BBQ CHICKEN ~ BLOG 366.306

I LOVE BBQ anything, but when I’m making chicken I especially love doing legs and thighs. The dark meat and relative same sizes makes for some seriously juicy pieces. But, for this it’s the SAUCE that makes it so special!

CHERRY PEPSI BBQ CHICKEN LEGS

BBQ SAUCE
1 can cherry PEPSI
1/2 cup Heinz chili sauce
2 tablespoons champagne vinegar
1 tablespoon sugar

  • In a large saucepan combine PEPSI, chili sauce, vinegar and sugar.
  • Heat over medium high heat and bring to a SLOW boil.
  • Reduce heat and cook 10-15 minutes, stirring occasionally until thickened and reduced to 3/4 cup.
  • Transfer to a bowl and allow to cool.

2-3 pounds plump chicken drumsticks or plump thighs
1 teaspoon garlic powder
FRESH ground sea salt and black pepper

  • Prepare grill for direct AND indirect medium heat.
  • Oil grill REALLY well.
  • Season chicken pieces with garlic powder, FRESH ground sea salt and black pepper.
  • Add drumsticks to direct heat for 4-5 minutes.
  • Turn and move to indirect heat.
  • Cover and grill 20 minutes until cooked through. Brush with sauce regularly during this time.

CRANBERRY BBQ CHICKEN WINGS ~ BLOG 366.214

CRANBERRY BBQ CHICKEN WINGS

DIP
1 LARGE lemon
1/2 cup sour cream
1/3 cup mayonnaise
2 green onions, chopped
2 tablespoons chopped FRESH parsley

  • Stir together the sour cream and mayonnaise until smooth.
  • Whisk in lemon juice until smooth.
  • Fold in green onions and parsley.
  • Cover and chill until needed.

WINGS
1 can cranberry sauce (whole berry)
1 package Lipton onion soup mix
1 cup Catalina dressing
2 tablespoons QUALITY honey
3 pounds chicken wings (tips removed)

  • Stir together the cranberry sauce, soup mix and Catalina dressing in a LARGE bowl.
  • Reserve 1/2 cup of marinade.
  • Add wings to large bowl, tossing to coat wings well in marinade.
  • Cover or transfer to a large ziploc bag.
  • Chill for at least 2 hours!


  • Heat oven to 425°.
  • Line baking sheet with foil and spray with non-stick baking spray.
  • Spread wings in a single layer on baking sheet.
  • Bake 30-35 minutes until cooked through and juices run clear brushing with reserved marinade during the final 5-10 minutes of baking time.
  • Transfer to platter and serve with dip.

BBQ BEEF PATTIES & ASPARAGUS RICE ~ BLOG 366.156

I found both of these recipes in one of the several old recipe boxes I found during a recent antique store expedition. They were quite good, after bringing them forward 50 years or so 😀

BBQ BEEF PATTIES

BEEF PATTIES
1 cup bread crumbs
1 1/2 cup whole milk
FRESH ground sea salt and black pepper
2 cloves garlic, FINELY minced
2 teaspoons Worcestershire sauce
3/4 pound LEAN ground beef
1/4 pound QUALITY ground pork

  • Preheat oven to 375.
  • In a large bowl pour milk over bread crumbs and let set 5 minutes.
  • Add garlic, onion, beef, pork and Worcestershire, minimally mixing until well blended.
  • Shape into 6 patties and place in large baking dish.
  • Pour sauce AROUND the patties.
  • Bake uncovered 45 minutes.

SAUCE
1/4 cup apple cider vinegar
2 tablespoons sugar
1/2 cup jalapeño ketchup
1/2 cup chicken broth
1/2 cup chopped green onion

  • Combine all the ingredients in a small sauce pan, stirring to blend.
  • Heat until sugar is dissolved and sauce is heated through, but do NOT boil.

ASPARAGUS RICE PILAF

1 1/2 cups uncooked rice
3 1/4 cups homemade chicken broth
3/4 pound asparagus, trimmed
2 tablespoons butter
3-4 LARGE green onions, minced
FRESH ground sea salt and black pepper
1/2 cup FRESHLY grated Parmesan cheese
FRESH thyme leaves

  • Blanch asparagus in boiling water for 2 minutes.
  • Drain and rinse in cold water until cool.
  • Cut spears into small bite size pieces.
  • Melt butter over medium heat in sauté pan.
  • Add onion, sautéing until softened.
  • Add rice, thyme leaves, FRESH ground salt and pepper. Bring to a boil.
  • Reduce heat to low, cover and cook 15-20 minutes until rice is tender and moisture is completely absorbed.
  • Remove from heat and fold in asparagus and Parmesan cheese.
  • Serve immediately.

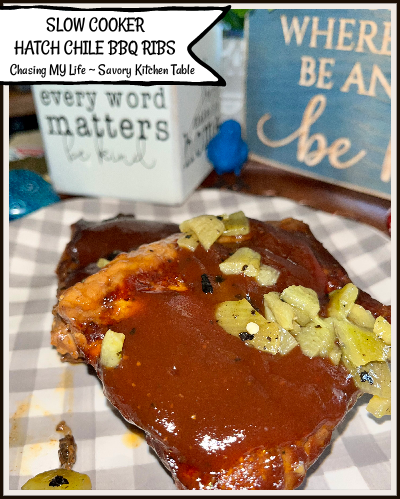
SLOW COOKER HATCH CHILE BBQ RIBS ~ BLOG 365.237

SLOW COOKER HATCH CHILE BBQ RIBS

The best part of this slow cooker recipe is that it does all the work! All you have to do is come home to a prepared dinner of sticky, fall apart, melt-in-your-mouth incredible ribs!

2 cups barbecue sauce
2 tablespoons brown sugar
3 tablespoons minced garlic
2 teaspoons Worcestershire sauce
1/4 cup apple cider vinegar

1/4 cup diced FRESH roasted Hatch chiles
4 pounds baby back pork ribs
FRESH ground sea salt and black pepper, to taste

  • Spray inside of a 6-quart slow cooker with cooking spray.
  • Remove and discard the inner membrane from the ribs and cut into slabs that will fit into your slow cooker.
  • Generously season the ribs with a good amount of salt and pepper.
  • Combine BBQ sauce, brown sugar, garlic, Worcestershire sauce, vinegar and chiles in a small bowl, mixing well to combine.
  • Completely cover the ribs with half of the sauce. 

  • Cover with lid and cook on low setting for 7-9 hours or high setting for 3-5 hours (see notes).
  • Refrigerate remaining sauce to use later.

  • When ribs are tender and falling apart, transfer onto a baking sheet lined with parchment paper. (Lift them carefully as the meat will be very tender and falling off the bone). 

  • Pour half of the juices from the slow cooker bowl into the remaining sauce.
  • Baste ribs with half of the sauce and broil in preheated oven at 400° for 5-10 minutes or until beginning to char and crisp on the edges. 

  • Serve ribs with remaining sauce.


NOTES:

  • Cook times seriously depend on the desired results you are looking for:
  • Ribs that are soft but stay on the bone = LOW: 5-6 HOURS / HIGH: 3 HOURS.
  • Tender, fall apart ribs that melt in your mouth like butter = LOW: 7-8 HOURS / HIGH: 4-5 HOURS.

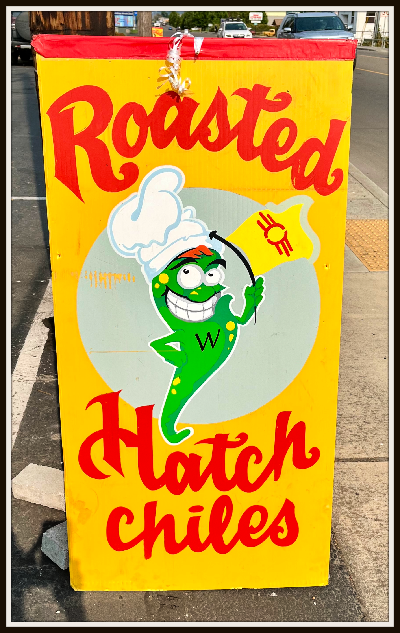
HATCH CHILES are my favorite green chile. They are similar to their cousin the Anaheim green chile, but is specific to the Hatch Valley in southern New Mexico. Hatch chiles only come from Hatch, New Mexico. The HATCH green chile is especially popular throughout all of New Mexico, as well as Texas and Southern California.

They have a balanced, smoky heat that enhances both savory and sweet dishes. You can buy a canned version of roasted Hatch chiles, but nothing beats a FRESH roasted one. August and September are the BEST times to find them.

True Parmesan cheese only comes from the Reggio Emilia and Parma region, champagne only comes from the champagne wine region of France and similarily Hatch chiles from the Hatch Valley are like grapes coming from the Napa Valley.

Hatch chiles are extremely versatile. I add them to stews, sauces, dips, dressings, salsa and even desserts. Some of my favorite sandwich cookies in the world (Sweet Lime chile) come from the HEB grocery chain in Texas. Try adding some FRESH roasted chopped chiles to your apple pie or on top of a burger or your slice of pizza.

Green and red Hatch chiles are the same pepper just picked at different times. They do each offer distinct flavors though. I LOVE them best in August when they offer a smoky flavor. But, in September when the turn red they offer a sweeter flavor better suited for the sweeter recipes.

Right now there is a local food truck specializing in Roasted Hatch Chiles in our little town and I have been taking full advantage of buying them FRESH roasted and preparing them for the freezer so I’ll have them all year long.

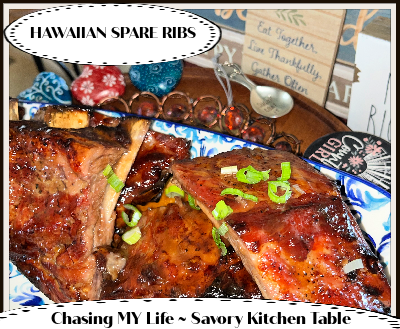
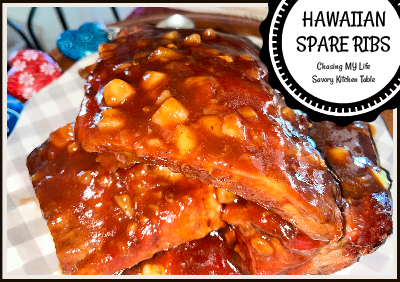
HAWAIIAN SPARE RIBS ~ BLOG 365.194

HAWAIIAN SPARE RIBS
1-2 racks pork spare ribs, fat layer removed
FRESH ground sea salt and black pepper
1 cup PACKED brown sugar
6 ounce can pineapple juice
2 tablespoons apple cider vinegar
1/4 teaspoon ground ginger
1 can crushed pineapple
1-2 tablespoons corn starch

  • Preheat oven to 350°.
  • Line baking sheet with foil.
  • Remove fat layer on back of rack.
  • GENEROUSLY season both sides of pork.
  • Place rack on baking sheet meet side up and cover with foil tightly.
  • Bake covered for 90 minutes without peeking.
  • Cut racks into 3-4 rib sections.
  • Add rib sections to slow cooker.
  • In a small bowl stir together the brown sugar, pineapple juice, ground giner and apple cider vinegar.
  • Pour sauce over ribs, cover and cook on low 2 hours.
  • Ladle out 1/2-1 cup of sauce and whisk in cornstarch.
  • Add pineapple to cornstarch mixture.
  • Stir pineapple mixture into sauce, recover and cook another 1/2-1 hour until ribs are tender and well coated.

SATURDAY NIGHT BAKED BEANS aka COWBOY BEANS ~ BLOG 365.174

SATURDAY NIGHT BAKED BEANS aka COWBOY BEANS

1 1/2 pounds dried beans (I use a combination of navy, pinto and black beans)
1 smoked ham hock
2 tablespoons salt
8 cups HOMEMADE stock
1 pound QUALITY ground beef
1 LARGE Vidalia onion, small diced
1/2 pound salt pork, cut into small cubes
1/2 bacon, diced
1 can hominy, chopped small
1/2 cup molasses
1/2 cup PURE maple syrup
1/2 cup apple cider vinegar
1/2 cup jalapeño ketchup

1 tablespoon Coleman’s dry mustard (optional)
FRESH ground sea salt and black pepper
2 cups dark brown sugar

  • Soak beans overnight, sort out the bad ones and then drain off the water.


  • In a large dutch oven cover the ham hock with 8 cups HOMEMADE chicken stock. Simmer 1-2 hours until meat is falling from the bone and liquid has cooked down to about half. Add meat to the slow cooker.
  • Cover the beans and chopped hominy with the ham hock broth in a large dutch oven. Add 2 tablespoons salt and bring to a boil. Reduce heat to a simmer. Cook 25-30 minutes until softened. Drain (but reserve liquid) and add beans to slow cooker.
  • Whisk together the molasses, maple syrup, apple cider vinegar, brown sugar, salt and pepper, jalapeno ketchup and mustard if using. Pour into slow cooker.
  • While beans are simmering brown the ground beef with the onion pieces. Drain and add to slow cooker.
  • In the same skillet brown the bacon and salt pork until JUST crisp. Drain off grease and add to slow cooker.
  • Stir everything together until well mixed. Add enough of the reserved ham hock liquid to just cover the beans, stirring to combine.
  • Cook on high for 1-2 hours and then on low for 5-6 hours. Stir occasionally, adding just enough water to keep beans from drying out.

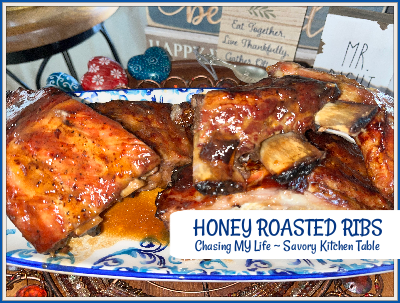
HONEY ROASTED BABY BACK RIBS ~ BLOG 365.173

HONEY ROASTED RIBS adapted from Cook’s Country

Cut the racks into thirds to allow them to fit into the plastic bags while they marinate. The used marinade is then boiled and transformed into a glaze for the ribs.

This recipe turns the humble into the extraordinary and perfectly tender, meaty, crusty, sticky, honey glazed, finger licking great ribs that leaves your family reaching for more ribs until the plate is empty so be sure and make plenty.

5 – 6 pounds baby back ribs (2 racks, 2 1/2- to 3-pounds each), trimmed, membranes removed, each rack cut into 3 equal pieces

1 1/4 cup QUALITY honey
5 tablespoons Bragg’s Liquid Aminos
¼ cup apple cider vinegar
¼ cup Dijon mustard, optional
1 bunch green onions, white parts minced, green parts sliced thin
4 garlic cloves, FINELY crushed
FRESH ground sea salt and black pepper
¼ teaspoon cayenne pepper

  • Divide ribs between two 1-gallon zipper-lock bags.
  • Whisk honey, liquid aminos, vinegar, mustard (if using), scallion whites, garlic, salt, pepper, and cayenne together in bowl.
  • Divide marinade between bags, seal, and turn to coat ribs evenly with marinade. Refrigerate for at least 1 hour or up to 24 hours, turning bags ­occasionally.
  • Adjust oven rack to middle position and heat oven to 325.
  • Line rimmed baking sheet with aluminum foil and set wire rack in sheet.
  • Add enough warm tap water to cover entire bottom of sheet (about 2 cups). The water gives off extra steam keeping the ribs extra moist and prevents the drippings from burning.
  • Transfer ribs, meaty side up, to prepared wire rack; reserve marinade in refrigerator.
  • Tent ribs loosely with foil and bake for 1¼ hours.
  • Uncover ribs and continue cooking until just tender, about 1 hour longer.
  • Bring reserved marinade to boil in large dutch oven over medium-high heat and cook until thickened to glaze consistency, about 5 minutes.
  • Brush ribs with 1/3 cup glaze, return to oven, and continue to cook 15-30 minutes until glaze begins to bubble and ribs are brown.
  • Transfer ribs to cutting board (leave hot water and sheet in oven to cool), tent loosely with foil, and let rest for 10 minutes.
  • Cut ribs between bones, add to Dutch oven, and toss to coat with remaining glaze.
  • Transfer to platter and sprinkle with scallion greens and ½ teaspoon salt.
  • Serve.

GRILLED PINEAPPLE WHISKEY CHICKEN ~ BLOG 365.47

GRILLED PINEAPPLE WHISKEY CHICKEN – serves 4

Plan ahead to make this simply delicious and juicy BBQ chicken. Marinating for 24 hours or more is best for providing the most flavor.

¾ cup QUALITY whiskey
¾ cup pineapple juice
½ cup of your favorite BBQ sauce
4-5 garlic cloves, FINELY minced
2 tablespoons QUALITY Worcestershire sauce
FRESH ground sea salt and black pepper, to taste
4 chicken breasts

  • Whisk together whiskey, pineapple juice, BBQ sauce, garlic, Worcestershire sauce and pepper.
  • Pour over chicken and let marinate overnight (24 hours is best) in the refrigerator.
  • Remove chicken from marinade and grill for 12 to 15 minutes. (see notes)
  • Brush with additional BBQ sauce before removing from grill.

NOTES:

  • To prepare chicken inside instead of grilling, pan sear the chicken on both sides for 3 minutes. Place the chicken on a baking sheet, brush with BBQ sauce and bake for 5-10 minutes at 400º.
  • You can substitute Bourbon if you prefer.