Author: QuiltLady
RETIRING & SUNSET
It’s been such poor air quality here due to the Mountain Fire that I’ve been painting up a storm here. I can now also say that I am finally retiring my paint clothes.
As horrible as the fire is, it does make for some colorful sunsets. Unfortunately it is still only 10% contained. I could certainly live without the smoke and ash though.
BAKING PARTNERS – CHALLENGE #13 – LEMON CHIFFON CAKE
The chiffon cake was created by Harry Baker, a Los Angeles insurance agent, in 1927. Baker carefully guarded his secret technique for almost two decades, only selling his cakes to celebrities and the famous Brown Derby restaurant. The popularity of his cakes grew quickly, and he eventually sold the recipe to General Mills in 1947.
Now, Mr. Baker had two big secrets with his chiffon cake recipe. The first is that chiffon cakes use oil instead of butter, which aides in the airy quality of the cake. It is also nice because the cake can be refrigerated without firming up. The second secret of the chiffon cake is to whip the egg whites separately from the yolks and to fold them ever so gently into the batter. If done correctly, the results are divine. If not, you can end up with an oozy-gooey mess in your pans. Saraswathi of Sara’s kitchen suggested this Lemon Glow Chiffon cake.
Prep time: 30 minutes
- Preheat your oven to 325 degrees.
- Use a 10-inch tube pan with a detachable bottom, but do not grease it as the batter needs to climb up the sides OR line two 9 inch baking pan with wax paper and do not grease the pan. Place a ramekin in middle of the pan.
- In a large mixing bowl, combine 1 1/2 cups of the sugar and the lemon zest.
- With your fingertips, work the zest and sugar together until the sugar is grainy and very aromatic.
- Add the cake flour, baking soda and salt to the bowl.
- If using a stand mixer, use the beater attachment and beat on low until the ingredients are well incorporated. You can also do this by hand with a whisk.
- Make a well in the center of the ingredients and add the oil, egg yolks, water, lemon juice and vanilla.
- Mix for about one minute on medium speed until the batter is smooth and there are no lumps.
- In a second large mixing bowl, beat the egg whites until they are foamy.
- Add the cream of tartar and continue to beat on medium speed until they reach soft peak stage. You will know your egg whites have reached this stage when the beaters start to leave a trail or when the peaks fall over when the beaters are raised.
- Add the remaining 2 tablespoons of sugar, and continue to beat the egg whites until they form stiff peaks when the beaters are raised.
- Using a slotted spoon or balloon whisk, add 1/3 of egg whites to your cake batter and gently stir them until they are incorporated.
- Add the remaining egg whites to the batter and very gently fold them into the batter until they are incorporated and no traces of egg whites remain.
- Pour the batter into the ungreased pan and run a small metal spatula or knife through the batter to prevent air pockets.
- Bake for 50 to 55 minutes or until the cake bounces back when lightly pressed in the center.
- Once cooked, take the cake out of the oven and immediately turn it upside down over a bottle* or similar to it until it is completely cool, which can take up to 90 minutes.
- Using an up and down motion, use a palette knife to loosen the sides of the cake away from the tin.
- Pull out the cake and use the palette knife around the bottom of the cake to release it from the base.
- Turn it over so that the base becomes the top (I didn’t because I like the rustic look of my funky pan) and sprinkle with a dusting of icing sugar to serve. I used a bourbon lemon glaze.
HAPPY BIRTHDAY BAKING PARTNERS – CHALLENGE #13 – LEMON CHIFFON CAKE
It’s our birthday! Our group is turning 1 year old.
Happy Birthday BAKING PARTNERS!!!!
Chiffon cakes are foamy and airy cakes in texture and combine the richness of a butter cake with lightness of a sponge cake. They are leavened primarily with beaten egg whites, just like Angel foot cakes are. In fact, they are very similar in appearance to angel food cakes and are usually baked in the same type of tube pan. Chiffon cakes, unlike angel food cakes, contain both egg yolks and vegetable oil. These two ingredients keep the cake moist, soft and tender and result in a cake that tastes great and keeps well. Even refrigerated, the oil in the cake remains soft and makes it much more tender and contain less sugar than an Angel food cake.
Prep time: 30 minutes
Baking time: 50 to 55 minutes
Makes: 1 ungreased two piece 10 inch tube pan OR can be halved and baked in 9 inch tube pan or 10 inch round cake pan or 8 inch round cake pan + 6 inch cake pan.
Adapted from The Cake Bible by Rose Levy Beranbaum
For Meringue
1 1/4 teaspoon cream of tartar
2 tablespoons sugar
7 large egg whites
- Preheat your oven to 325 degrees.
- Use a 10-inch tube pan with a detachable bottom, but do not grease it as the batter needs to climb up the sides OR line two 9 inch baking pan with wax paper and do not grease the pan. Place a ramekin in middle of the pan.
- In a large mixing bowl, combine 1 1/2 cups of the sugar and the lemon zest.
- With your fingertips, work the zest and sugar together until the sugar is grainy and very aromatic.
- Add the cake flour, baking soda and salt to the bowl.
- If using a stand mixer, use the beater attachment and beat on low until the ingredients are well incorporated. You can also do this by hand with a whisk.
- Make a well in the center of the ingredients and add the oil, egg yolks, water, lemon juice and vanilla.
- Mix for about one minute on medium speed until the batter is smooth and there are no lumps.
- In a second large mixing bowl, beat the egg whites until they are foamy.
- Add the cream of tartar and continue to beat on medium speed until they reach soft peak stage. You will know your egg whites have reached this stage when the beaters start to leave a trail or when the peaks fall over when the beaters are raised.
- Add the remaining 2 tablespoons of sugar, and continue to beat the egg whites until they form stiff peaks when the beaters are raised.
- Using a slotted spoon or balloon whisk, add 1/3 of egg whites to your cake batter and gently stir them until they are incorporated.
- Add the remaining egg whites to the batter and very gently fold them into the batter until they are incorporated and no traces of egg whites remain.
- Pour the batter into the ungreased pan and run a small metal spatula or knife through the batter to prevent air pockets.
- Bake for 50 to 55 minutes or until the cake bounces back when lightly pressed in the center.
- Once cooked, take the cake out of the oven and immediately turn it upside down over a bottle* or similar to it until it is completely cool, which can take up to 90 minutes.
- Using an up and down motion, use a palette knife to loosen the sides of the cake away from the tin.
- Pull out the cake and use the palette knife around the bottom of the cake to release it from the base.
- Turn it over so that the base becomes the top (I didn’t because I like the rustic look of my funky pan) and sprinkle with a dusting of icing sugar to serve. I used a bourbon lemon glaze.
Cake will stay fresh for 3 days in room temperature, 10 days refrigerated or 2 months frozen.
document.write('
BBQ HERBED CHICKEN
It was another scorcher here today of 112 degrees and monsoony humid weather so we stayed inside and painted the bathroom and a bedroom. I’m exhausted though so decided to make this simple recipe for the grill. It was made even simpler by having the lime juice in the freezer. I buy the fruit and then squeeze it all at once making it into cubes for future recipes. And then even simpler yet by converting the fresh herbs into dry measurements and using a mortar & pestle to revive them. This was a substitute for tonight, but I highly recommend using the fresh when you can.
HERBED BBQ CHICKEN
1/2 cup vegetable oil
1/2 cup lime juice
2 tablespoons fresh chopped basil
2 tablespoons fresh chopped oregano
1 teaspoon onion powder
1/4 teaspoon lemon pepper
4 chicken thighs, about 1 pound*
4 chicken drumsticks, about 1 pound*
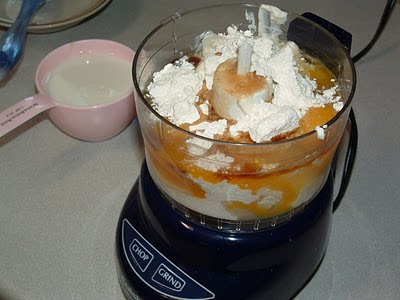
- In a small food processor mix together everything except the chicken.
Wash and dry the chicken pieces.
- Pour herb mixture into a large ziploc bag and add chicken pieces. Marinate chciken for 30 minutes to 24 hours.
- Heat grill and spray with PAM for grilling especially if using skin free pieces.
Place chicken pieces on grill, reserving the marinade.
- Cook on one side and then turning to other side. Time will vary drastically based on type of chicken pieces you are using.
- Pour reserved marinade into a small saucepan. Bring to a boil over a medium-high heat and then remove from heat.
- Brush over chicken pieces.
*I use whatever I have on hand – breasts, tenders, etc….
AN OLD FASHIONED RECIPE FOR COMFORT FOOD ~ APPLESAUCE, HOMEMADE, THE ONLY WAY
In today’s world there are more conveinence foods than the average person can count. Every can, jar, bottle, tube or frozen container is full of preservatives, additives or some form of chemical. As most of you know I DO NOT do any of the above. Our entire meals are made from scratch, a fact that according to my oncologist saved my life. So it’s no wonder I love simple, old recipes! This picture does NOT do this recipe justice!
HOMEMADE APPLESAUCE
10 Honey Crisp apples, washed, peeled, cored and chopped
1 1/2 cups sugar
1 1/2 tablespoons pumpkin pie spice
2 lemons, juiced
2 tablespoons butter
- Combine all ingredients in a stock pot*.
- Bring to a slow simmer.
- Simmer 2 hours +/- stirring regularly.
- Simmer until apples are translucent.
I like the applesauce warm, but it’s great warm or cold!
*I like to use a large, but shirt stock pot so more of the applesauce touches the pan.
FLASHBACK FRIDAY ~ rewind
FLASHBACK FRIDAY @ SEASIDE SIMPLICITY
I am playing along with Martha at Seaside Simplicity with the meme Flashback Friday. Come join in on the fun and link up your photo.
All our lives Jenn and I loved gathering shells on Galveston Island. This trip was no exception. We were literally getting blown away, but had so much fun that day!! I’m pretty sure this was March 1998. This is the last picture of us all together having fun so I keep rewinding to stay in the moment.
PEANUT PORK & NOODLES SALAD AND A CHAT
Seems like a VERY long time since I’ve sat and chatted here on my blog. The past 2+ years have been such a jumble of care taking others, the BIG “C”, multiple medical appointments, VA red tape and just plain messed up events that it seems life has gone on without me.
Well, I’m here to tell you I’m taking my life back! I do have one more surgery to get through, but it is trivial in comparison to the past couple years. Fortunately my mom’s winter place is empty for the summer and near my doctors so we are here and able to get it spruced up for her before winter while we deal with everything else. The pool has also been a godsend for me to get some exercise and try to get my strength back. All the anesthesia has taken a toll on me! Right now we’re painting. The house is 5 years old and had never been painted other than by the builder so boy is it soaking up the new paint!
If a messy kitchen truly is a sign of happiness, I must be freaking delirious! We are taking a break tonight and enjoying a new recipe for Peanut Pork and Noodles salad while we watch the Nascar race. I hope everyone had a great 4th and long weekend!
PEANUT PORK AND NOODLES SALAD
DRESSING
1/4 cup rice wine vinegar
1/4 cup creamy peanut butter
3 tablespoons soy sauce
3 tablespoons water
2 tablespoons honey
1 tablespoon minced garlic
1 tablespoon garlic chili paste
SALAD
1/2 pound boneless pork chops
2-3 ounce bundles ramen noodles
8 ounces snow peas, trimmed and cleaned
8 ounces bok choy, trimmed, cleaned and sliced
1 sweet red pepper, cored, seeded
1/8 teaspoon salt
3 tablespoons dry roasted unsalted peanuts (optional)
- In a small food processor combine dressing ingredients and blend until smooth.
- In a large ziploc bag combine pork chops and half of the dressing. Marinade for 15 minutes minimum.
- While chops are grilling bring a pot of water to a boil.
- Add ramen noodles for 2 minutes.
- Add peas and bok choy, boiling for 1 minute more.
- Drain and rinse in cold water.
- Place in large salad bowl.
- Heat grill to medium high.
- Grill chops and red pepper just until done, turning half way through.
- Transfer to a cutting board and thinly slice both chops and pepper.
- Toss salad with remaining dressing and salt.
- Scatter pork and peppers over salad.
- Top with peanuts. (optional)
- Serve immediately.
Leftovers (minus the bok choy) chill well and would make a perfect lunch to go. Just don’t add the bok choy, which in my opinion can be left out and double the peas for my taste.
APPLE BLACKBERRY COBBLER ~ A TASTEBUD TANTILIZER
What better way to celebrate the fourth than with a good old fashioned apple pie? Nope, the perfect combination is apples and blackberries – sweet and tangy. Your taste buds will be in HEAVEN.
1 cup blackberries, halved
2 apples peeled and sliced thin (I use Pink Ladies)
1 cup whole milk
1 cup self-rising flour
1/2 cup butter + 2 tablespoons, both melted separately
3/4 cup fine sugar
1/4 cup packed brown sugar
- Pre-heat oven to 350 degrees.
- Mix together the fine sugar and flour.
- Whisk in the milk.
- Whisk in 1/2 cup melted butter.
- Pour into well greased bowls or baking dish.
- Distribute alternately apples and berries evenly on top of batter.
- Mix 2 tablespoons melted butter with brown sugar until crumbly.
- Sprinkle on tops.
- Bake 45-60 minutes until golden and toothpick comes out clean.
HAPPY INDEPENDENCE DAY
BAKING PARTNERS CHALLENGE #11 CHOCOLATE ECLAIRS
This month baking partner’s challenge we are going to learn, Pate a choux pastry, a French pastry, which is used in sweet and savory items. The recipe came from Thomas Keller’s Bouchon Bakery book. I have to admit my first batch turned out wrong, but it was all my fault working too fast. Batch #2 was delicious and perfect. There is also a recipe of chocolate éclairs recipe from Food network’s Alton brown.
Pate a choux for Eclairs
1 ¼ cups All purpose flour
2 tablespoons+ 2 teaspoons Sugar
1 cup Water
4.2 ounces Unsalted butter at room temperature
¾ + 1/8 teaspoon Kosher salt
4 Eggs (use one more if needed)
- Get your
kitchen aid stand mixer ready with the paddle tool, if you don’t have kitchen aid use your hand mixer. - Sift the flour and mix with the sugar, set aside.
- Combine water, butter and salt n a medium sauce pan. Place it over medium low heat and stir until butter is melted.
- When butter is melted turn the heat up and bring it to a simmer, then remove from heat.
- Add the flour/sugar mix and stir until well combined and the mixture has a paste like consistency.
- Then place over medium heat and stir rapidly until the dough pulls away from the sides and the bottom of the pan is clean.
- Immediately transfer the dough to the mixer bowl and mix on low for 1 min to release little of the steam and heat.
- Start adding the eggs, one at a time, beating until every egg is completely absorbed
- After all the eggs are added, beat on medium for 2 min.
- When the paddle is lifted the dough should form a bird’s beak – It should hold its shape and turn down over itself.
- Transfer the dough to a pastry bag and chill until completely cold.
- Preheat the oven to 375°.
- Make a piping
template by drawing six 15 cm/6 inch lines, 5 cm apart on parchment paper. Then place the template under the parchment paper you will pipe on. - With a large star tip pipe the éclairs, following the lines on the template.
- When the pastry is reaching its 15 cm/6inch, begin to lessen the pressure, and then stop it as you bring the dough back over itself, leaving a little curl at the end.
- Wet your finger and gently press down the tip of the curls.
- Spray the éclairs lightly with water.
- Place in the hot oven and immediately turn the heat down to350°.
- Bake for 40 min, rotating the pan half way through.
- Lower the temp to 325° and bake for additional 20 min.
- Lower the temperature to 300° and bake for 10 more minutes.
- Your puffs should now be light brown, light and hollow.
Chocolate pastry cream
5.8 ounces 70% chocolate chopped
.8 ounce 100% unsweetened chocolate chopped
2 tablespoon + 2 teaspoon Custard powder or all purpose flour
1/4cup + 1 tablespoon Unsweetened cocoa powder
2 Egg yolks (1/4cup)
1/4 cup+ 3 tablespoons sugar
1.8 ounces Unsalted butter at room temperature
- Melt two chocolate together in double boiler and set aside
- Combine the custard powder or all purpose flour and cocoa powder in a small bowl.
- In a bowl add some ice and water and set aside. This is our ice bath.
- Whisk in egg yolks and sugar by gradually adding sugar and to this add custard powder or flour mixtures then add milk and combined very well.
- Heat the above egg-sugar-flours-milk mixture over medium heat until it begins to thicken with constant string.
- Pour the pastry cream over the strainer and pressing gently to push the thickened cream through. Whisk for about 1 minute to cool. Then add butter in 2 additions and mix in well. Then add melted chocolate and mix in very well until everything is combined well.
- Transfer to air tight container and line with plastic wrap on the top to prevent the film from forming, refrigerate for at least 1 hour and you can keep this chocolate cream for about 4 days.
- When you are ready to use the cream transfer to bowl and stir gently until it has creamy consistency.
Orange Custard
1 1/4 cups Whole milk
1 tablespoon Orange zest (from about 2 oranges)
3 Egg Yolks
1/4 cup Sugar
1 tablespoon flour
2.5 tbs cornstarch
1 tablespoon Grand Mariner (optional)
- In a small saucepan, warm the milk and orange zest over low heat until it is just hot enough to steam.
- While the milk is warming, whisk together the egg yolks, sugar, flour, and cornstarch until the mixture is completely smooth.
- Temper the eggs by adding a little bit of the warm milk and whisk constantly. Add little at a time until you have added half of the milk.
- Then pour the eggs/milk mix into the pan with the remaining hot milk.
- Heat it over medium heat and stir constantly until the mixture reaches 170° and is very thick.
- Remove from heat and stir in Grand Mariner.
- Chill before piping into the Éclairs.
How to fill the Éclairs
- Use a 0.4-0.6 cm plane tip.
- Poke 2 holes, 1/2 inch from each end, into the bottom of each éclair. (I made mini ones-about 2 inches long) so only poked from one end to fill them)
- Fill a pastry bag with custard of your choice.
- Place the tip of the pastry bag into one of the holes and begin filling the éclair.
- Pipe cream as needed into the second hole or until the éclair feels heavy.
- You should use 1/4 cup of cream.