Fire Day Friday: Grilled Thai Style Green Beans

I love preparing green beans on the grill.  Honestly, it’s my favorite way to enjoy them.  But, I don’t usually get too creative with them when preparing them….So when I saw Mary at One Perfect Bite post her recipe for Thai Style Green Beans, I knew I was going to have to work on jazzing my grilled green beans up.

This is a simple little dish that can be made in the oven or on the stove, but really…. you just gotta try them on the grill.  You may never want them another way again.  Serve these along side my Vietnamese Spiced Pork Chops and Sweet Chili Sauce and you have got yourself a fantastic summer meal!
Grilled Thai Style Green Beans
Adapted from One Perfect Bite

Printable Recipe 
Ingredients:
1/4-1/2 pound green beans
1 teaspoon low sodium soy sauce
1 teaspoon hoisin
1 teaspoon creamy peanut butter
1 teaspoon water
1 teaspoon sweet chili sauce
salt and pepper

Directions:
Preheat grill to 375 degrees F.  Place the green beans in a large bowl.  Mix together all remaining ingredients until well combined.  Pour over green beans and toss to coat.

Fold a 36×18-inch piece of heavy foil in half to make an 18-inch square.  Spray square with non-stick cooking spray.  Place green beans in the middle of the foil and bring together two opposite edges of foil; seal with a double fold.  Fold remaining edges together and enclose beans, leaving space for steam to build up.  Place packet on preheated grill and grill for 15-20 minutes, flipping packet over once.  Carefully remove from grill and foil packet.  Enjoy!

BANANA BLUEBERRY CRUNCH

I usually make everything from scratch, but this recipe is too good to mess with much. I have reduced the fat a bit and altered the ingredients to meet my family’s likes, but other than that this recipe is fantastic as is. The key is to remember to layer exactly as listed! It is great in a pinch since most ingredients are always in the cupboard or freezer. The original recipe called for the butter before the nuts and coconut, but I changed that. By putting it last, the nuts and coconut toast up fantastically.

BANANA BLUEBERRY CRUNCH
1 large can crushed pineapple, undrained
2-3 cups frozen blueberries
1-3 ripe banana(s), sliced thin
1 cup sugar
1 box yellow cake mix, dry
1/2-1 cup minced walnuts
1/2-1 cup flaked coconut
1 1/2 -2 sticks butter, melted

  • Preheat oven to 350 degrees
  • Layer exactly as listed in even layers
  • Bake 45-60 minutes until it tests done


IT’S TAILGATING TIME AGAIN!

This week on Thursday, September 8th, NFL football season officially begins. You know what that means don’t you? Yes, it’s time for the second annual season of Tailgating Time!
It doesn’t matter if you are a football fan or not, great party food is always a good thing. Bring over your grilled goods, chips and dips, appetizers, chili and chowders, cocktails, or any recipes that would be great for the football party buffet!
We have decided to make a change this year in the way Tailgating Time will work. Instead of a new linky for each week we will be using the same linky to keep all the great recipes in one place. This will provide easy access to the recipes and create one big awesome recipe index collection. There is no limit to how many you add – of course we hope you will add a new recipe each and every week! Tailgating Time will generally be posted each week on Sundays at noon.

If any of you would like to host along with us you can click –> get the InLinkz code to add the linky to your blog too. You can post it once in awhile or every week during football season, that’s up to you. The only thing we ask is that you leave a comment here to let us know you are co-hosting, and that you visit and comment on as many of the participants as you can. 

We are opening the linky today to get things rolling. I can’t wait to see what you will bring to the party. Let the games begin. Whoo-hoo!

CHICKEN “FRIED RICE”

Chicken “Fried Rice”
1-1/2 pounds chicken breast, diced
Stir fry vegetables
3-4 cloves of garlic, minced
1/2 onion, sliced
2 cups bulgur wheat
4 cups water
2-3 tablespoons olive oil
1 egg
1/4 cup teriyaki sauce (to taste)
Here’s what you’ll need:
 
Disregard the soy sauce, sesame seed oil, rice wine vinegar.  I was going to use it to make a sauce but I could never get it to taste right so I just went with teriyaki.

Cook bulgur wheat according to directions.  It is a 2:1 ratio so I used 4 cups of water and 2 cups of bulgur.  I minced 3-4 cloves of garlic and sliced up 1/2 of an onion.

Dice up the chicken into bite-sized cubes.
Put the bulgur on to boil and let it boil for 10-15 minutes.
Saute the onions and garlic in 2-3 tablespoons of olive oil in either a wok or a hot skillet.
Add the chicken.
Once most of the water has cooked out of the wheat, pour it over into the pan with chicken, onions, and garlic.  Move all of it over to one side and crack the egg.  Scramble it up and mix it in with the rest of the mixture.
Add the vegetables.  If you use canned, make sure to drain.  I used frozen.  After letting the veggies cook for a couple of minutes, I poured about 1/4 cup of teriyaki sauce and mix it together.

I really wanted to have the wheat crisp up like a fried rice so I pushed it all down into the skillet and let it cook for 2-3 minutes.  I then scooped it all around and pressed it all down again and let it cook for another 3-4 minutes.  This really gave the wheat some crispiness.

This is what you’ll end up with:
This dish was so good and so healthy.  If you dont’ know anything about bulgur wheat and you are trying to eat more healthfully, I encourage you to do some research on it.  I love it.

I am really glad that I pushed the wheat down into the skillet to really let it crisp up.  It gave it the crispiness of Chinese fried rice and even Kanin really liked it.  He ate 3 helpings!!

BTW, the broccoli was great with the earthiness of the wheat.  I should have just added a whole bag of broccoli but I also added peas, carrots, and corn.
This pan was full if it gives you any indication of how much everyone liked it. 
Hope you enjoy!
April

Fire Day Friday: Slow Smoked Spare Ribs

Normally I try to keep my Fire Day Friday posts to short grilling recipes but since it is Labor Day Weekend, I want to post how I like to smoke pork spare ribs. The process is written for 1 rack of ribs, multiply as needed. 
Slow Smoked Spare Ribs
1 rack pork spare ribs trimmed St. Louis style and membrane removed from back
1 Tablespoon peanut oil
2 teaspoon black pepper, coarse ground
¼ cup BBQ dry rub
1/2 cup brown sugar
2 “long squirt” Squeeze Parkay (See instructions)
1/2 cup BBQ sauce
2 Tablespoons honey
1.5 teaspoons BBQ dry rub
Rub rib on both sides with the oil. Sprinkle both sides with black pepper. Sprinkle both sides evenly with BBQ rub. [Rub note: There are a lot of good BBQ dry rubs available on the market now. If you can’t find one or want to make your own, try the dry rub from this recipe from Chris Lilly on Grilling.com.]
The St Louis style trim gives you even portions and quicker cooking.
Build an indirect fire in your grill at 250f. If you are using a charcoal smoker or grill, mix several fist sized chunks of wood in with the coal. If you are using a gas grill here are some options for you from Grill Master, John Dawson of Patio Daddio.
I like hickory wood for flavor and cherry wood for coloring the meat.
Smoke the ribs bone side down in a covered grill for 3 hours, replenishing coals and wood as needed to maintain the temperature. 
Remove the ribs from the smoker/grill. Fold a 3 foot piece of foil in half. Place half the brown sugar and Tiger Sauce on the foil. Squirt one “rib length” squirt of the Parkay on top. Place the rib meat side down on top. 
 
Place the rest of the brown sugar, Tiger Sauce, and another squirt of the Parkay on top. Parkay sounds weird I know. But a LOT of the pros on the competition BBQ circuit use this trick.
Wrap the foil tightly around the rib rack and seal tightly. Place back on the grill/smoker for another hour.
Remove the ribs from the grill. CAREFULLY open the foil with tongs and oven mitts. Take the ribs out of the foil but keep the juice.
Whisk together the BBQ sauce, honey, and BBQ rub. Add 2 Tablespoons of the juice from the foil pack and whisk into the glaze.
Glaze both sides of the rack of ribs and return to the grill for another hour. The ribs are done when they bend easily like this but don’t fall apart.
If you want “fall off the bone” ribs (which are technically overdone), leave them in the foil for an extra 30 minutes during the foiled portion.
Slice and serve with the leftover BBQ glaze. 
I hope you all fire up your grills and enjoy this holiday weekend!

BUFFALO CHICKEN SLOPPY JOES ~ BLOG 366.

BUFFALO CHICKEN SLOPPY JOES adapted from Rachel Ray
1-1 1/2 pounds ground chicken
3/4-1 cup Frank’s original Buffalo Wing Sauce
3/4-1 cup homemade ranch dressing
1 carrot, FINELY diced
2 celery stalks, FINELY diced
1 SMALL Vidalia onion FINELY diced
1/4 cup of brown sugar
Hawaiian or Egg Buns
Bleu cheese crumbles, optional

  • In a large skillet melt 1 tablespoon avocado oil.
  • Add carrots, celery and onion, sauteing 3-5 minutes.
  • Add chicken, cooking until browned and veggies are softened.
  • Add in wing sauce and ranch dressing stirring to blend flavors.
  • Add in brown sugar. If sauce is too spicy, add another 1/4 cup 😀
  • Serve on a bun with crumbles if desired.
  • Add extra ranch as needed.

NOTE: Bleu cheese dressing substitutes well for the ranch if you prefer.

ORIGINALLY POSTED JULY 31, 2011, updated for content and photo


CHEESY CHIMICHANGAS

Cheese!  Cheese! Cheese! 
I don’t often indulge in cheese. Even though I do so love it.  I usually feel that you need a LOT of cheese in order for it to really taste good.  I don’t usually indulge in that many calories, I usually choose to flavor my food in other ways.
However, one does have to have cheese sometimes, right?? 
I tasted this before adding the cheese and after and it was delicious with the cheese.  It still has a lot of flavor and the cheese brings it out even more! 
These were plenty flavorful on their own but I used some of my tomatillo green salsa to put on it.  This made it even better!  Seriously, this was a fantastic meal!  Loved the leftovers the next day too!
Cheesy Chimichangas
Adapted from Food Snob

1 pound ground turkey
1 onion, diced
3 cloves garlic, minced
11/2 tablespoon cumin
1 can green chiles, 4 oz.
2 teaspoons oregano
1 can Rotel tomatoes with green chiles
1 can tomato sauce, 15 oz. (I only used about 3/4 of it)
1 1/2 cups of cheddar cheese, 6 oz.
10 – 100 calorie whole wheat tortillas

  • Cook the ground turkey and the onions together.  
  • When the ground turkey is done, add spices, chiles and tomatoes.  Let simmer for 10 minutes or until thickened.  
  • Turn off heat and add cheese and stir until melted. 
  • Put 1/2 cup of turkey mixture onto tortilla and roll and place seam side down in a pan. 
  • Spray tops with cooking spray and bake in oven for about 25 minutes at 400 degrees. 

Total calories = 2569 calories
10 servings = 257 calories per chimichanga

2 Cheesy Chimichangas = 514 calorie dinner

Rocky Road meets the Black Forest Brownies

ROCKY ROAD MEETS THE BLACK FOREST BROWNIES
1 1/2 sticks butter, softened
2 squares Baker’s semi-sweet chocolate
3/4 cup marshmallow cream
2 teaspoons PURE vanilla
1-2 teaspoons cherry extract
1 1/4 cup sugar
3 JUMBO eggs
1/2 cup walnuts, chopped
1/2 cup milk chocolate chips, chopped
1/3 cup chopped maraschino cherries
1/2 cup all purpose flour
1/4 cup cake flour
1/2 teaspoon baking powder
1/2 teaspoon salt

  • Preheat oven to 350 degrees.
  • Grease (really well) a 9×9 baking pan. I like to use my stoneware for nice even baking.
  • Melt butter and chopped unsweetened chocolate in a double boiler until smooth and consistent. Set aside to cool.
  • Sift together the flours, baking powder and salt. Set aside.
  • Toss chocolate chip pieces and walnuts with a bit of the flour mixture and set aside.
  • In a large mixing bowl beat the eggs and vanilla until smooth and consistent.
  • Add cooled chocolate mixture into the eggs and blend well.
  • By hand stir in the flour mixture just until well blended – DO NOT over mix!
  • Fold in the chocolate pieces, cherry pieces and walnuts just until well blended.
  • Warm the marshmallow cream for 15-20 seconds in the microwave (just enough to make it spreadable) and spread it over the chocolate batter in the mixing bowl.
  • With a knife gently and slightly swirl it lightly into the chocolate batter. If you swirl too much it will just become part of the batter instead of clumps of marshmallow.
  • Gently pour the batter into the prepared ban and bake 40-45 minutes or until edges pull away from the sides of the pan.
  • Cool the cake in the pan until completely cooled.

SPAGHETTI SALAD

Spaghetti Salad adapted from Pam’s Midwest Kitchen Korner
1 pound thin spaghetti
10 slices bacon
1/2 cup chopped celery
1 large red onion, chopped
1 green bell pepper, diced
1 (2 ounce) can sliced black olives, drained
2 tomatoes, diced
1 cucumber, diced
1/4 cup salad seasoning mix*
½ teaspoon lemon zest
3 tablespoons fresh lemon juice
¼ cup extra virgin olive oil
3 garlic cloves, minced
1/2 cup grated Parmesan cheese, optional


Directions:  Bring a large pot of lightly salted water to a boil.  Add pasta and cook for 8 to 10 minutes or until al dente; drain. In a large skillet over medium heat, cook bacon until crisp. Drain and crumble.


In a large bowl combine cooked spaghetti, celery, onion, bell pepper, olives, tomatoes, cucumbers and salad seasoning.  In a small bowl, whisk lemon zest, lemon juice and minced garlic with olive oil.  Pour over spaghetti mixture and toss.  Add crumbled bacon and lightly toss.  Sprinkle with Parmesan cheese, if desired.


Chill until serving.


8-10 servings


Home-made Salad Supreme Seasoning – Makes ½ cup
3 teaspoons sesame seeds
2 teaspoons paprika
1½ teaspoon salt
1 teaspoon poppy seeds
1 teaspoon celery seeds
½ teaspoon garlic powder
2 dashes cayenne pepper
4 tablespoons Parmesan cheese or Romano (fresh is best)


Directions:  Combine all ingredients and mix well.  Store in a covered container in the refrigerator.
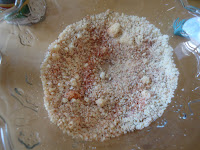
Mix all of the ingredients of the Homemade Salad Supreme Seasoning and set it to the side.

Chop up the celery.
Chop up the red onion.
Chop up the green pepper.
Put celery, onion, and pepper in a bowl.  
Drain the can of black olives and add to the mix.
Chop up the tomato.  Add to the other veggies.
Cut up the cucumber.  Add to the other veggies.
Throw the spaghetti on to cook.


Add the seasoning mix to the veggies. Fry the bacon.

Zest the lemon and squeeze the lemon juice into a small bowl.
Mince the garlic cloves.

Whisk the olive oil and garlic in with the lemon.

Drain the spaghetti and add it to the veggies.
Add the garlic lemon oil.
Chop up the bacon and sprinkle Parmesan cheese on top.

Here’s what you’ll end up with:

 Our Thoughts:

Ok, I want you to go to the store, buy all of these ingredients, and make this dish.  It was SO GOOD.  Perfect for a family get together.


All of the flavors came out in this dish from the lemon zest to the garlic to the tomato juice from the tomatoes.  The black olives and cucumbers gave it a Mediterranean taste and I kind of wished that I would have had feta cheese instead of the Parmesan even though the Parm was delicious, too.


If I could change one thing about this recipe, I would use penne pasta instead of spaghetti.  The spaghetti did kind of overwhelm the vegetables but nothing a spatula couldn’t get around.  I also don’t think that the bacon was needed.  You could also add some grilled chicken to the dish.   


Bottom line, it was great!!
Hope you enjoy!
April

Fire Day Friday; Grilled Shrimp Po’ Boy

Ok, ok… so I didn’t fill the bun up with enough shrimp before I took the picture… BUT.. just because it might not be the best picture does not mean that it wasn’t the best grilled shrimp po’ boy I’ve ever had.  Oh, no!  These sandwiches were downright DEE-licious.  And, let’s not forget simple.  You don’t have do to too much to make this really stand out.  I kept this very simple, but feel free to jazz it up if you want.  I know that traditional po’ boys are usually made by frying shrimp or oysters or whatever you have on there, but honestly, I like to try to keep things as healthy as I can, so I went for the grilling method.  Who needs all the bread any, right?  I mean you’ve got all the bread you need in the bun 🙂  Plus…you get to use your grill if you make them this way!!

Grilled Shrimp Po’ Boy
Created by Jenn’s Food Journey
Printable Recipe 
Ingredients:
36-48 large frozen shrimp, thawed and tails removed
1-2 Tablespoon basil olive oil (you can use extra virgin olive oil)
salt and pepper
shredded lettuce or cabbage (I used coleslaw mix)
cherry tomatoes, quartered (I used about 1/2 cup)
hoagie buns or French sandwich rolls or even hot dog buns
fiery remoulade – recipe to follow
metal or wooden skewers (please soak wooden skewers in water for at least 30 minutes)

Directions:
In a large bowl, add the shrimp and toss with olive oil and salt and pepper.  Allow to marinate for 1 hour.  Thread shrimp onto skewers.

Preheat grill to 375 degrees.  Place the skewered shrimp directly over the fire and grill for 3-5 minutes per side or until shrimp is cooked through.  Carefully remove from grill and allow to rest for 5 minutes.  Carefully remove shrimp from skewers.

To build your po’ boy – add a butt load of shrimp and top with cabbage/lettuce and tomatoes.  Drizzle on fiery remoulade.  Enjoy!

Fiery Remoulade
Created by Jenn’s Food Journey
Ingredients:
1/4 cup mayonnaise
1 Tablespoon chili paste
1 teaspoon Sriracha
1 teaspoon lemon juice 

Directions:
Mix all ingredients together in a small bowl until well combined.  Cover and refrigerate until ready to use.  Enjoy!


Rotini with Eggplant Tomato Sauce

I don’t eat a lot of pasta.  But I LOVE roasting vegetables!
I also don’t cook with a lot of eggplant but I picked some up at the farmers market and this sounded excellent!
The vegetables smelled SO GOOD roasting in the oven.  I swear, I should just roast vegetables every day to make my house smell good.  Luckily I chose a cooler day so the house didn’t heat up to much.
This turned out so good!  I have a fairly small food processor so I was a bit afraid it wouldn’t all fit but it did.  It didn’t really take up too much room. 
I also chose to puree the pine nuts in the sauce rather than just sprinkle them on top. Either way works. 
The only thing I would do different would be to add a bit of onion. I just love onion and it just seemed like it needed to be there.
Rotini with Eggplant Tomato Sauce

1 medium eggplant, mine was just under 1 pound, cut into 1 inch cubes
1 pint cherry tomatoes
4 cloves of garlic
1 tablespoon olive oil
1 teaspoon salt
1 teaspoon pepper
1 teaspoon red pepper flakes
1/4 cup toasted pine nuts
Pasta, I used Barilla Plus Rotini, 14.5 oz.
1/4 cup torn fresh mint leaves, I used less
1/2 cup grated Parmesan cheese

  • In a large bowl, combine the eggplant, cherry tomatoes, garlic, olive oil, salt, pepper and red pepper flakes. 
  • Spread the vegetables out in an even layer on a baking sheet sprayed with cooking spray. Roast in the oven at 400 until veggies are tender and eggplant is golden, about 35 minutes. 
  • While the veggies are roasting, place the pine nuts in a small baking dish.  Place in the oven on the rack below the vegetables.  Roast until golden, about 8 minutes.
  • Remove from the oven and reserve. 
  • Meanwhile, cook pasta according to directions.  Pour pasta into a large bowl. Reserve about 1 1/2 cup of the pasta cooking liquid.
  • Transfer the roasted veggies to a food processor. Add the torn mint leaves.  Puree the vegetables, mint leaves and pine nuts. Transfer the pureed vegetables to the bowl of pasta and add the parmesan.  Stir to combine, adding the pasta cooking liquid 1/2 cup at a time until the pasta and sauce is saucy. 

Total calories = 2218 calories
6 servings = 370 calories per serving

Pasta Rotini with Eggplant Tomato Puree = 370 calorie dinner**

COKE CAKE – SAVE ROOM FOR DESSERT

This recipe has been a family favorite for many years now and always puts a smile on my face when I think of grams. She didn’t hesitate to try any strange or new recipe and always made them work whether it was potato chip cookies or this cake.

BEFORE & AFTER ICING

COKE CAKE
1 cup flour
1 cup sugar
3/4 cup miniature marshmallows
1/4 cup shortening
1/4 cup butter, softened
2 scant tablespoons cocoa
1 Jumbo egg, beaten
1/2 cup Coca-cola
1/4 cup buttermilk
1/2 teaspoon baking soda

  • Preheat oven to 350 degrees.
  • In a large mixing bowl sift together the flour and sugar. Stir in marshmallows and set aside.
  • In a medium saucepan melt the butter and shortening together. Add the cocoa and coke, mixing well.
  • Pour over the flour mixture. Add the buttermilk, egg and baking soda, mixing well.
  • Pour into a greased 8×8 pan and bake 30-40 minutes or until cake center springs back.

ICING
1/4 cup butter, softened
3 tablespoons coke
2 scant tablespoons cocoa
2 cups powdered sugar

  • Bring butter, cocoa and coke to a boil.
  • When smooth, remove from heat and mix in sugar to desired consistency.
  • YUM ~ Enjoy

Hubby gave it 2 thumbs up!