QUESDAILLAS

Yum!  It may not look extra-pretty, but these quesadillas were delicious and healthy.
All you need is flour tortillas, shredded chicken breast, 2 % shredded cheese, mushrooms, and some salsa to dip them in.
Using a flat grill or skillet on medium heat on your stove top, brown each tortilla on one side.  When you flip the tortilla over, add your ingredients.  Place another tortilla on top and continue to grill until browned on the other side.  Carefully turn the entire tortilla over to brown on the last side.  Serve warm!  Use a tomato-based salsa for dipping, and you’re good to go!  You can add any type of vegetables you like instead of or in addition to the mushrooms. Some good choices include grilled onions, bell peppers, and tomatoes.
Each tortilla has approximately 110 calories and 3 grams of fat.
1//2 cup of chicken breast  has 116 calories and 3 grams of fat.
1/8 cup (about 2 tablespoons) of 2% shredded cheddar has 79 calories and 6 grams of fat.
The calories and fat in fresh mushrooms, tomatoes, bell peppers, and onions is negligible, so add plenty of those!  Same with the salsa!

We’re all going Krazy… to OUR KrAzY kitchen that is…

If you like to try new recipes (and who doesn’t?!), we have the gig for you! Our Krazy Kitchen is looking for hosts for the 1st Wednesday of each month. Haven’t been to Our Krazy Kitchen lately? Then it’s time for a visit!  You know you want to.  We’d love to have you join our staff!
Martha and I started Our Krazy Kitchen almost two years ago. It’s turned into a great foodie blog with some seventeen awesome rotating hosts – some post weekly, some bi-weekly, some once a month, and some for fill ins and guest posts.

I currently host the Classic Good Eats theme on Thursdays. In the past I have hosted Simply Delicious Sunday and various fill in posts. As you can see we are always open to new themes and ideas.

We’d love to have you join us!

If you are interested in being part of Our Krazy Kitchen just leave me a comment and I’ll get back with you as soon as possible. Come on and get KrAzY with us!

A SAVORY PAPAYA DISH? – BELIEVE IT! – TRY A NEW RECIPE

When you think Papaya, you think fruit, sweet, desert, right? Well think again it can also be a savory dish. I was quite exited to find this recipe and couldn’t wait to try it…..
Papayas both green and ripe are used in a variety of ways in Caribbean cuisine. Green papayas is frequently used in soups and stews and as a side dish as well.
SAVORY PAPAYA
2 medium sized green Papayas
1 large green onion, chopped
1 tablespoon parsley, chopped
1 tablespoon Chives, finely chopped
5 cloves of garlic, minced
Dash Worcestershire sauce
1 teaspoon black pepper
1 egg beaten
1/4 cup flour
1 cup Gouda cheese, grated
1/2 plain bread crumbs
1 tablespoon butter

I needed to get my hands on a green papaya, all the supermarkets had ripe ones, the market… ripe ones. I bought one that seemed green but when I cut into it, it was 70% ripe.
Then when I’d just about given up and put the cookbook back on my shelf, I found green papayas at the supermarket!!!!
This is what the inside of a green papaya looks like

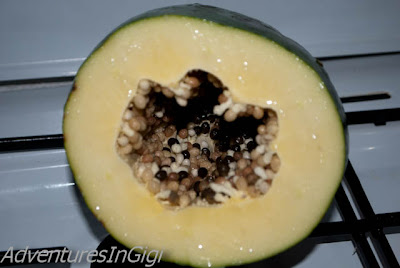
This is it next to the one I’d bought the week before that was now fully ripe, and no good for this recipe.
I got to work, peeling, slicing and grating. Discarding the seeds of course. The ripe fruit for snacking and smoothies. The grated green papaya for salads (wonderful with a simple french vinaigrette).

All of a sudden there were tons of papaya in the house!
I got the rest of my ingredients together and it was time to get to work.

Preparation
I boiled the green papaya in enough water to cover them for 15-20 mn until tender.
Drained well.
And mashed with a fork, the fruit retains quite a bit of water, do not drain again at this stage.
I added all the seasonings.
Let cool a bit before adding the egg and flour.
Here it is mixed and in a greased baking dish.
Top with Cheese.
Then bread crumbs.
Dot with butter.
Bake in a preheated 375F degree over for 20 minutes until golden brown.

This was my first time trying this recipe, it’s pretty easy, once you get your hands on the green papaya that is.
I have to admit I was a bit concerned about the fact that the recipe didn’t call for any salt at all, I thought it would have turned out bland, but it wasn’t at all. It was absolutely delicious.
I had mine with baked chicken but this dish would go well as side to a variety of dishes. I do hope you try it and let me know what you think.
Bon Appetit!

A to Z Blogging Challenge

I recently did the the A to Z Blogging Challenge and had a lot of fun.  Elizabeth created this cute little badge for us and I have to share it with you – I just love zebras – especially laughing zebras!

HOLY COW CAKE ~ Save Room for Dessert

Crazy name, huh?  It’s an adaptation of the Holy Cow cake from the Cake Mix Doctor cookbook.  The original recipe calls for a chocolate cake mix, which I think would be divine, but I was making this cake for the husband, who, unbelievably, is not a chocolate lover.  I thought this version was good, but if I made it again, I’d definitely use a chocolate cake mix.  I sprinkled on crushed Butterfinger candy on 1/3 of the cake, chopped Peanut Butter Snickers on 1/3, and I drizzled on extra caramel sauce on the remaining 1/3.  I had many opinions about which was better, and honestly, all three tasted delicious.  So, whichever you choose, be sure to save room for dessert…

Holy Cow Cake
1 package yellow or devil’s food cake mix
1 1/3 cups water
1/2 cup vegetable oil
2 teaspoons vanilla
3 large eggs

  • Preheat oven to 350 degrees.
  • Spray or butter a 13×9 baking pan, and set aside.
  • Combine cake mix, water, vegetable oil, vanilla, and eggs; beat for 1 minute, scraping down sides.  Continue to beat for 2-3 minutes, or until well-mixed. 
  • Pour into prepared pan.
  • Bake cake for 35 – 38 minutes.
  • Remove from oven and with a chopstick or wooden skewer, poke holes into cake.
  • Pour caramel mixture over hot cake, slowly, so that mixture is absorbed into cake.
  • Spread cool whip mixture over cake and sprinkle on crushed Butterfingers, if using, or drizzle on extra caramel topping.
  • Chill in refrigerator for 30 minutes before cutting into squares.

Caramel Mixture and Cream Cheese Topping
8 ounces caramel topping, plus additional for garnish
1 can (14-oz) sweetened condensed milk
4 Butterfinger bars, crushed – optional
12 ounces Cool Whip, defrosted
8 ounces cream cream, softened

  • Stir caramel topping and sweetened condensed milk together; set aside until cake is done.
  • In another bowl, combine the Cool Whip and cream cheese, beat together until smooth.

CREAMY CHICKEN RICE with VEGGIES

Creamy Chicken Rice with Veggies Recipe
4 Chicken Breasts
1 can cream of chicken
3/4 cup of water
1 teaspoon garlic salt
1 teaspoon onion salt
1 teaspoon paprika
1/2-3/4 bag of frozen mixed veggies
1 small can of mushrooms stems and pieces
1 1/2-2 cups of colby jock or your fav cheese
3/4 cup of White or Brown Long Grain Rice (Not Instant)
2 chicken bouillon cubes

  • Preheat 375. 
  • Measure just over 3/4 cup of water and drop in 2 bouillon cubes in water and microwave for 2-2 1/2 minutes. 
  • Spray a 9×13 baking dish with cooking spray or olive oil 13×9 inch dish. 
  • Mix cream of chicken soup, water, garlic salt, onion salt, veggies, mushrooms and rice and put in baking dish. 
  • Top with Chicken (cut into pieces to speed up cooking time). 
  • Sprinkle chicken with paprika or any other herb mixture you prefer. 
  • Bake uncovered at 375 for about 45 min or until chicken is to 165 degrees. 
  • Top with cheese and stick back in oven for about 5 more minutes to melt.

Modifications:

-I think that you could probably add a onion soup mixture to the cream of chicken soup and cut out the garlic salt and onion salt.
-You could trade out chicken stock for the bouillon cubes.

Here’s what you’ll need:
Preheat oven to 375 degrees.
Place 2 chicken bouillon cubes in 3/4 cups of water.  
Pop it in the microwave for 2 1/2 minutes.
Spray down a 9×13 glass baking dish with cooking spray.
Next, place all of the ingredients into a bowl . . .
1 can of cream of mushroom soup
1 can of mushrooms stems and pieces
about 3/4 of a bag of frozen vegetables
3/4 cup of brown rice (not instant)
paprika
garlic salt and onion salt
Next, add the chicken bouillon stock and stir.
Put everything into the baking dish.
 
Place 4 chicken breasts on top of the mixture.
Top the chicken with some Home Seasoning.
Cover it with foil and pop it in the oven for 45 minutes.
After 45 minutes, top each piece of chicken with some cheese.
Here’s what you’ll end up with:

CHICKEN QUESADILLAS


Place a Tortilla Shell on Microwave Safe Plate
Add~
Refried Beans
Cooked Chicken
Shredded Cheese
Place Another Tortilla Shell on Top
Cook on High for 40 Seconds
Cook on High for Another 30 Seconds or Until Cheese is Melted

Cut Into Slices With Knife or Pizza Cutter

Serve With Chips, Corn, Chilli and Your Favorite Toppings

Happy Eating…

TROPICAL GLAZED PORK TENDERLOIN

MOTHER’S DAY IN STYLE
TROPICAL GLAZED PORK TENDERLOIN

2-3 pound pork tenderloin
1 cup apricot pineapple preserves
1 1/2 cup brown sugar
1/2 cup pineapple juice

  • Preheat oven to 425 degrees.
  • Whisk together brown sugar and pineapple juice.
  • Blend in preserves.
  • generously salt and pepper the pork loin.
  • Spread a small layer of the glaze on the bottom of the roasting pan.
  • Lay the pork loin on top and spread the remaining glaze on top and along the sides.
  • Baste as necessary
  • Bake 45-60 minutes or until meat thermometer reads 170 degrees.

ANGEL BISCUIT DOUGH & WAYS TO USE IT!

You know you have a good cookbook when it is no longer pretty, most likely has a food drip/stain on the jacket cover and probably has handwritten notes on how you want to make a recipe again. That is this book.

I call a book like this beautiful, because it is used and appreciated. Tattooed if you will, with the living of life in a busy kitchen, while helping to feed the family and friends that drop by.

This book contains some great recipes including our favorite Banana Bread.

Angel Biscuits came before dairy case biscuit dough in a tube. These biscuits are baked from a dough made up ahead of time and stored in the refrigerator. Just like tube biscuits, only homemade, with your choice of ingredients. Think Monkey Bread, biscuit dough pizza, biscuit topping for pot pie or fruit cobbler. If you can make it with tubes of biscuit dough, you can make it with Angel Biscuit dough. The finished dough can be stored for up to 7 days, and frozen for up to 1 month.

Angel Biscuits Adapted/made from: The Wooden Spoon Bread Book

the intro:  Angel Biscuits are a Southern Specialty. The dough, risen by both yeast and quick leaveners, produces a very light biscuit. The mixing can be done ahead of of the baking to suit your schedule. 

To soften yeast, in a small container combine,
3 tablespoons warm water
1 scant tablespoons (or 1 packet) active dry yeast

let yeast stand while preparing the dry ingredients.

In a large bowl, whisk together:
5 cups unbleached flour
1 tablespoon baking powder
1 teaspoon baking soda
1 1/2 teaspoon salt
1/4 cup sugar

and then to cut the butter into small pieces, drop it into the flour mixture, one piece at a time. Process on low until the butter has been worked into the flour mixture.
OR

with a pastry blender or two knives, cut into the dry ingredients,

1 cup butter or shortening of choice

make a well in the center of the dry ingredients. Into that well pour the,

softened yeast
2 cups buttermilk

Gently mix with a wooden spoon just until dry ingredients are moistened. Just a few turns of the paddle mixer did the trick.

Dough will be soft. Scrape down sides of bowl.
Cover with waxed paper and then a china plate.
Chill for at least 1 hour or longer.

When ready to bake remove enough dough to make desired numbered biscuits. On a lightly floured surface, knead gently two or three times. Roll to 1/2 inch thickness. Cut as desired and bake in preheated 400 degree oven, 12 – 15 minutes or until golden brown. Serve warm.

To substitute this dough for tube biscuits in your favorite recipes, divide the dough into 4 parts. Each part will be approximately one tube of biscuit dough.

Now that you have dough, what will you make with it? Having Angel Biscuit dough ready to go is very convenient. The bowl sits quietly in the refrigerator, until you have need to use it. Like I said, convenient! For a quick meal last week, we had Easter Ham bone soup and dinner scones

I make scones, because I am a lazy biscuit baker! The rolling and cutting and re-rolling of the dough, phooey! I prefer to pat the dough out, cut into the number of scones I need/want and bake. Done and done.

To make scones, preheat oven to 425.


Remove dough from refrigerator, score dough into 4 parts. Note:  Each part will be about the same as a tube of dairy case biscuits for those recipes you want to adapt to Angel Biscuit Dough.


Using one part, knead dough 3 – 5 times on a “floured” surface, I use oat bran. It keeps any dough from sticking and does not leave a floury finish. Pat into a circle approximately 1/2 inch thick. Cut into desired number of scones, place circle in a prepared baking pan. Bake 20 – 25 minutes or until done in your oven. Enjoy!

And now lets make Monkey Bread Ring.

Monkey Bread Ring
350 degree oven

1 portion of Angel Biscuit dough

1/2 cup brown sugar
1/2 teaspoon cinnamon
1/2 teaspoon nutmeg

1/4 cup melted butter

1/4 cup real maple syrup
1/4 cup broken pecan pieces

Combine brown sugar with cinnamon and nutmeg, set aside. Using one portion of the Angel Biscuit dough, knead 3-5 times on a “floured” surface. Flatten to a rectangle. and cut into 24 pieces.


Roll each portion of dough into a ball, coat in melted butter, roll in brown sugar mixture and arrange in baking pan.

It is safe to use a jelly jar for the center support, just remember it will get very hot in the oven. To prevent the jar from over heating, add a small amount of water to the inside of the jar before placing in oven.


When all dough has been used, scatter pecans over top of dough balls, pour maple syrup over and finally use up the butter and the brown sugar mixture by scattering over the top of the dough balls. Bake 25 minutes.

Remove from oven, cool 5 – 10 minutes, carefully remove jelly jar from center and set aside to cool (do not place in a sink of water, it will break, please do not ask me how I know this!) the jar is very hot.

The Monkey Bread is delicious, even the next day, moist and it reheats well.

Now that you have the basics, what will you make with your Angel dough?

For more great recipes and ideas visit Mom’s Sunday Cafe.
As always thanks for taking a moment to stop by.

I appreciate your visits and your comments!

Fire Day Friday: Steak Sandwiches with Chimichurri Mayo

Sometimes I get so caught up in trying to find exciting new recipes that I forget about the simpler things in life….like sandwiches.  Sandwiches are so versatile and simple.  What’s not to love about that?  With a busy schedule and less and less time in the kitchen this week, I wanted to make something that would be filling and yet still make it seem like I worked hard to create a fantastic dinner 🙂  Enter the steak sandwich.  Simple, true, but add a little chimichurri mayo and, well, suddenly your steak sandwich is anything but simple.  It’s flavorful, it’s a tiny bit spicy, and it’s fresh tasting.  Definitely a great alternative to your usual sandwich spread.

I kept the steak marinade very simple, I knew the mayo would have a great flavor and I didn’t want that to be over shadowed.  You can marinate your steak in anything you want though, or even just drizzle with olive oil and season with salt and pepper, steaks don’t usually need much, they are usually so flavorful in themselves.
Steak Sandwiches with Chimichurri Mayo
Adapted from America’s Test Kitchen 30-Minute Suppers
Ingredients:
1 lbs. top sirloin (or any steak really)
1/2 cup beer (I used Bud Light)
1 Tablespoon Worcestershire sauce
1 Tablespoon Sambal Oelek (chili paste)
5 Tablespoons mayonnaise
1 Tablespoon red wine vinegar
1 garlic clove, finely minced
1 teaspoon dried oregano
1/2 teaspoon red pepper flakes
1/4 cup fresh parsley, finely chopped
4 hoagie buns, french rolls, or thick cut crusty bread
Lettuce (optional)
Tomato (optional)
Cucumber (optional)

Directions:
In a bowl, mix together the beer, Worcestershire, and Sambal Oelek.  Place steak in a resealable bag and pour marinade over it.  Let marinate for at least 4 hours.

Meanwhile, in a small bowl, mix together the mayonnaise, vinegar, garlic, oregano, and red pepper flakes until smooth.  Add the parsley and stir to combine. Cover and place in refrigerator until ready to use. 

Preheat grill to 400 degrees.  Place the steak directly on the grill grates and grill until cooked to your liking.  I prefer medium rare so I put my steak on for about 5-6 minutes per side, depending on thickness.  Remove from grill and allow to sit for 5 minutes before slicing thin against the grain.   Slather some of the chimichurri mayo on the bread (I toasted my buns first..yum!!), arrange steak on bun and top with lettuce, tomato, and/or cucumber.  Enjoy!

SOUTH WESTERN CHICKEN CASSEROLE

SOUTH WESTERN CHICKEN CASSEROLE
3-6 boneless, skinless chicken breasts
3 cups frozen hash brown potates
1 large can Durkee’s french fried onions, divided
1 can Old El Paso green enchilada sauce
1 can Rotel tomatoes, drained
1 can white niblets corn, drained
1 cup grated sharp white cheddar, divided
3 tablespoons butter
3 tablespoons flour
1/4 teaspoon salt
1 cup milk
salt and pepper to taste
PURE

  • Preheat oven to 375 degrees.
  • Spray large casserole dish with PURE.
  • Spread potatoes along the bottom.
  • Top with first half of french fried onions.
  • Top with first half of cheese.
  • Salt and pepper chicken breasts layering them over cheese seasoned side down.
  •  Salt and pepper top sides of chicken.
  • Layer corn and tomatoes over top of the chicken.
  • Melt the butter in heavy saucepan. 
  • Blend in flour and salt. Cook until bubbly. 
  • Remove from heat and gradually stir or whisk in liquid. 
  • Return to heat and cook, constantly stirring until smooth and thickened.
  • Whisk in enchilada sauce.
  • Pour over corn and tomato layer.
  • Top with remaining cheese.
  • Ring French fried onions around the edge.
  • Bake 30-45 minutes covered.
  • Bake another 15-30 minutes uncovered.
  • Let stand 5-10 minutes.

 These were our wonderful potato leftovers below and they tasted better and more full of flavor on day 2 and 3.

Save Room for Dessert…White Chocolate-Strawberry-Cranberry Cookies

Earlier in the school year, the PTA at Andrew’s school had an Otis Spunkmeyer cookie drive.  The strawberry shortcake cookie was my absolute favorite, and after I baked the last of the cookies from the 3-lb bucket, I knew I’d have to recreate the recipe since there wouldn’t be another cookie drive until the fall.  Using my basic white chocolate chip cookie recipe, I added dried strawberries and cranberries.  After a few tries, I finally came up with my favorite ratio of strawberries to cranberries.  I like these slightly underbaked, so they stay soft and chewy, but if you prefer a crisp cookie, allow them to bake the entire 10 minutes. 
For a delicious dessert treat, place a slightly warm cookie on a plate, then add a scoop of vanilla ice cream and a drizzle of dark chocolate syrup….be sure to save room for dessert…
White Chocolate Strawberry Cranberry Cookies
1 1/2 cups all purpose flour
1/2 teaspoon baking soda
1/8 teaspoon salt
1/2 cup unsalted butter, softened
1/2 cup packed brown sugar
1/2 cup granulated sugar
1 large egg
1 teaspoon vanilla
1 cup white chocolate chips
1 1/2 cups dried strawberries
3/4 cup dried cranberries
Preheat oven to 375 degrees.
Line baking sheet with parchment or spray with non-sticking cooking spray.
In a small bowl, whisk flour, baking soda, and salt together; set aside.
In a large bowl, cream together butter, brown & granulated sugars, and vanilla until smooth.
Beat in egg.
Stir flour mixture into sugar mixture.
Mix in the white chocolate chips, cranberries, and strawberries.
Using a cookie scoop, portion dough onto prepared baking sheet.
Bake at 375 degrees for 8 to 10 minutes.
Allow cookies to cool for 2 minutes on baking sheet before removing to a wire rack to cool completely.
 If you look closely, you’ll see a white paw trying to steal part of a cookie…
Success on her 2nd attempt…