How To Make Your Own Smoked Cheese Without A Smoker

It’s time for Fire Day Friday when we take Our Krazy Kitchen outdoors and experiment with live fire (grilling, smoking, roasting, baking using flame).

Today we are going MacGyver! I (Chris from Nibble Me This) am going to show you how to cold smoke your own cheese by using just a cardboard box, a soldering iron, a tin can, and a few miscellaneous items. This is a fun project that you can use to involve the non-foodies in your house.

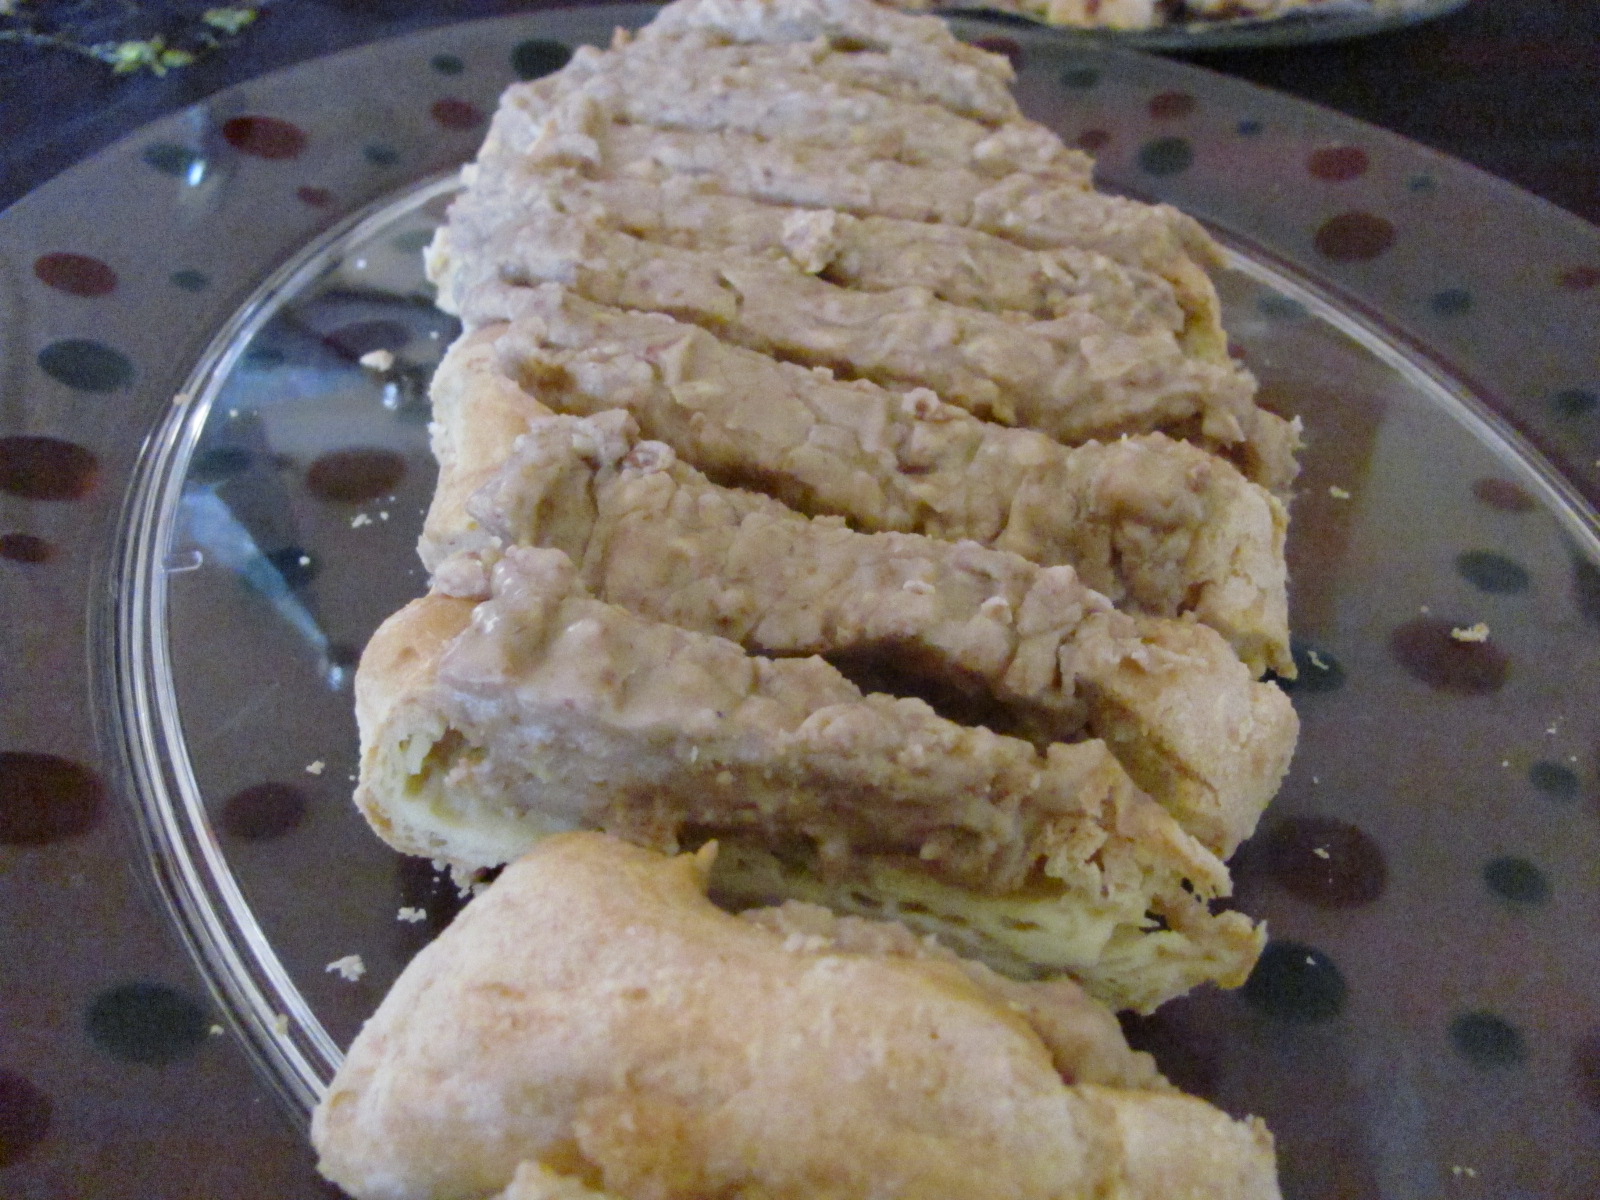
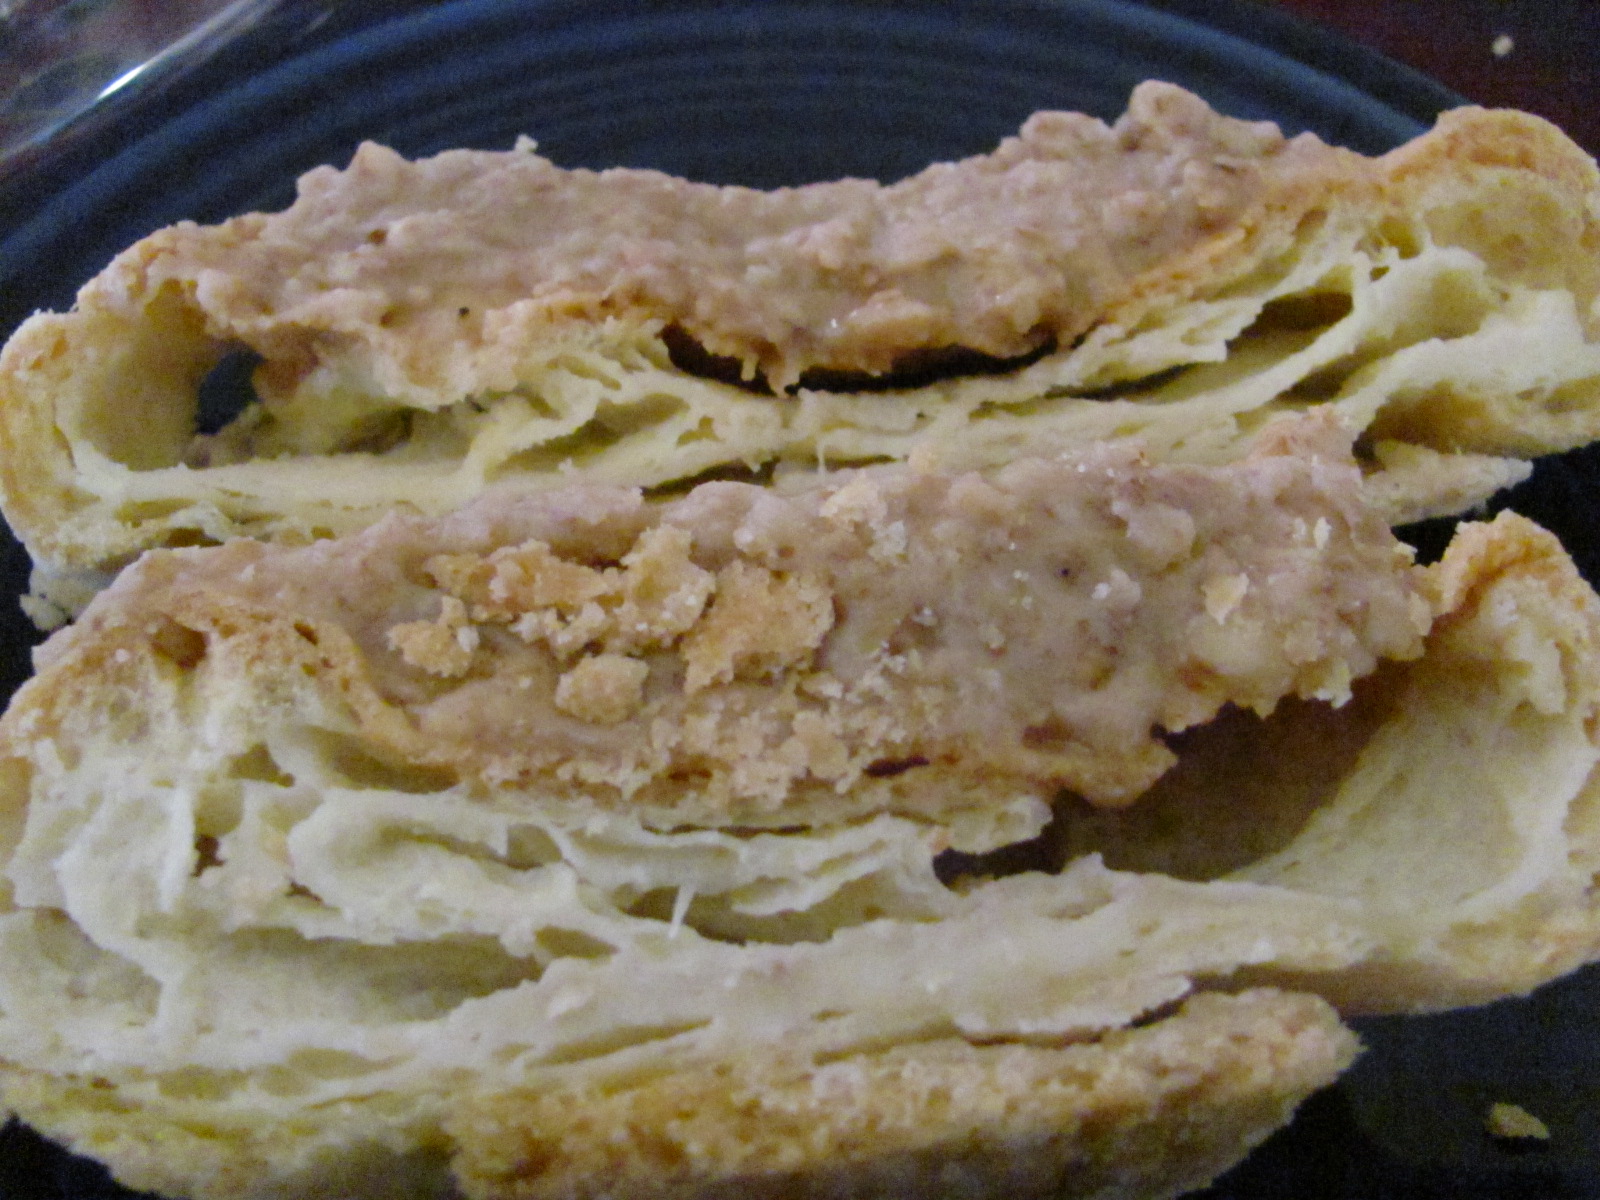
You can turn this…..

Into this….. (I think this is the first officially licensed OKK product)

But first, the Legal Department here at OKK “asked” (okay….they locked me in a dungeon and force fed me Brussels sprouts until I agreed) to post the following Safety Notice:


For this project you will need:

  • A medium sized box slightly narrower than the racks you will use
  • 1 unused soldering iron without the tip ($14)
  • 1 tin can (burn out the inside with a torch or grill if it has a bpa lining)
  • a rack or two of some sort. I used two resting racks that were slightly larger than the box. You could use the rack out of your toaster oven.
  • Several blocks of various cheeses
  • 1 cup of hardwood or fruit wood chips (you can buy these at many grocery stores and hardware stores these days by their grilling/coal section)
I was using two resting racks so I measured down three inches and 6 inches from the top on the side. I cut slits at both marks on both sides. Work one end of your rack(s) through the slit on one side and then back through the other side like this so the slits are supporting the rack. The rack should stick out a little on each side.

Drill several 1/8″ holes on one side of the can (which will become the “top” side of the can) and a hole in the base of the tin can large enough to accommodate the base of the soldering iron like this:

Add the wood chips around the soldering iron like this. TIP: Use the smallest chips in the bag, you want to maximize surface contact with the iron.

Cut your cheeses into 1″ x 1″ rectangles (however long the length is doesn’t matter) and place them on the racks with room between the pieces.

Place the smoke generator on a trivet or other heat resistant, non-conductive surface in the bottom of the smoke box.


Plug in the soldering iron and wait for the first wisps of smoke (3-5 minutes)…..

Then close the box and tape it shut. You might be tempted to try to seal all the seams of the box for an air tight fit. DON’T. You want the little air gaps and a slight airflow. If you have an airtight fit, the wood won’t be able to smolder and the cheese would sit in stale smoke for an hour. You will have smoke escaping the box like this:

This generator should give you 90 minutes of smoke time, perfect for cheeses. After the 90 minutes, remove the cheeses. They won’t look too different and they may or may not smell very smoky (Your smoke smeller will probably be overloaded at this point). Don’t bother tasting or smelling a piece at this point. IT HAS TO AGE AND MELLOW!!!!!

Vacuum seal the cheeses and refrigerate for two weeks. If you don’t have access to a vacuum seal, double wrap them in plastic wrap and then seal them in a zip top back. This is partially to help them mellow but mostly to keep your fridge from smelling like smoke!


Here are some quick tips I can think of

  1. Bacteria spoils cheese. Make sure your hands, cutting boards, and knives are all sanitized during every step of this process.
  2. Cold smoke. The inside of the container has to remain below the melting point of your cheeses (roughly 70-80f). The smoke generator will raise the temp of your box by 10-15 degrees (the smaller the box, the greater the temp increase). So do this in the shade on a day when the air temps are 45f or less. Don’t you just love the high tech digital control panel of the OKK Smokerator 3000?
  3. Packaging – If packing the cheese for gift packs, pick cheeses that alternate in color and can be cut into roughly the same size pieces.
  4. Experiment with a variety of cheeses – my favorites have been gouda, cheddars, pepper jack, and monterey jack. It occurs to me that I’ve never smoked a blue cheese….and can’t imagine doing so but whatever floats your boat.
  5. Experiment with a variety of woods – my favorites have been hickory, cherry, and a mix of the two.
  6. Soft cheeses take on smoke more readily, hard cheeses take longer.
  7. Use as natural of a cheese that you can. Cheeses with a lot of flavorings and preservatives don’t seem to fare as well.
  8. Use the best quality cheese that you can.
  9. Smoked cheeses are great simply with crackers. But when used as an ingredient with sauces, sandwiches, soups and casseroles, it adds a nice subtle layer of flavor.
  10. Once you have smoked your own cheese, you probably won’t enjoy “smoked” cheese bought at a store because a lot of them just use “smoke flavorings”.
  11. Once you have tried smoking cheese, try smoking nuts, salts, and peppers.
On that note, I wish you all a Merry Christmas and Happy Holidays. May your stockings be full of high quality, natural hardwood lump charcoal…..

POLYNESIAN CHICKEN & ITALIAN FARRO & GORGONZOLA GARLIC DIPPING SAUCE

I also love to research foods we’ve never tried before as well as try old, old recipes or just plain make things up.  I also take requests if anyone would like me to test out a recipe for them.
Today we’re making Polynesian chicken (the cheating way) and Italian Farro with Gorgonzola garlic dipping sauce.  I saw a package of Pedon Italian Farro  at the grocery store the other day and it looked interesting (reminded me of rich looking barley) – so the impulse buy won and here we are.
Here’s the history lesson first:  Grano Farro has a long and glorious history: it is the original grain from which all others derive, and fed the Mediterranean and Near Eastern populations for thousands of years; somewhat more recently it was the standard ration of the Roman Legions that expanded throughout the Western World. Ground into a paste and cooked, it was also the primary ingredient in puls, the polenta eaten for centuries by the Roman poor. Important as it was, however, it was difficult to work and produced low yields. In the centuries following the fall of the Empire, higher-yielding grains were developed and farro’s cultivation dwindled: By the turn of the century in Italy there were a few hundreds of acres of fields scattered over the regions of Lazio, Umbria, the Marches and Tuscany.

Farro would probably still be an extremely local specialty had the farmers of the French Haute Savoie not begun to supply it to elegant restaurants that used it in hearty vegetable soups and other dishes. Their success sparked renewed interest in farro among gastronomes, and now the grain is enjoying a resurgence in popularity in Italy as well, especially among trendy health-conscious cooks.  

POLYNESIAN CHICKEN
4 Boneless, Skinless chicken breasts
1 stick butter, divided in half
1 cup Frank’s Sweet Chili hot sauce
1 package Knorr Vegetable Soup Mix
1/4 cup flour
  • Preheat oven to 350 degrees.
  • Using a small food processor,  grind the Knorr soup mix into a fine dust.
  • Add the vegetable soup dust to the flour in a large plastic bag and mix well.
  • Dredge chicken breasts in soup and flour mixture.
  • In a large skillet over medium high heat, melt one half of the butter.
  • While that is melting, melt the remaining butter in a 2 cup measuring cup in the microwave.
  • Add the hot sauce to the measuring cup and heat an additional 20 seconds. Mix well. Set aside to cool.
  • In the skillet brown the chicken breasts on both sides until almost done. 
  • Spray a small cookie sheet with PURE.
  • Coat each piece of chicken with hot sauce mixture and lay on cookie sheet.
ITALIAN FARRO

small bag PEDON farro

2 tablespoons Frank’s Sweet Chili hot sauce
  • Bring a 2 quart pan of water to a boil.
  • Add the Farro and simmer, 10-12 minutes.
  • Drain thoroughly.
  • Add hot sauce and toss to coat.
  • Serve immediately.

GORGONZOLA GARLIC DIPPING SAUCE
1/4 cup gorgonzola crumbles
1/3 cup mayonnaise
3 cloves garlic
2 tablespoons buttermilk
salt and pepper to taste
  • In a small food processor, process the crumbles until finely ground.
  • Add garlic, mayonnaise, salt and pepper.  Mix until well blended.
  • Add buttermilk.  Add a bit more if you would like a thinner sauce.

POLYNESIAN CHICKEN & ITALIAN FARRO & GORGONZOLA GARLIC DIPPING SAUCE

Today we would like to introduce our brand new theme day, Classic Good Eats. 
Tamy here and I’ll be moving in over here on Thursdays.  You can normally find me at my home blogs 3 Sides of Crazy. Always Eat On The Good China, on Saturdays at THE Motivation Station and now on Thursdays here at OUR KrAzY kitchen.  I love to cook and I love to experiment with foods.  Fortunately I also have a wonderful husband who is the best “guinea” pig around.  LOL Really, I have never met a more tolerant man.
I also love to research foods we’ve never tried before as well as try old, old recipes or just plain make things up.  I also take requests if anyone would like me to test out a recipe for them.
Today we’re making Polynesian chicken (the cheating way) and Italian Farro with Gorgonzola garlic dipping sauce.  I saw a package of Pedon Italian Farro  at the grocery store the other day and it looked interesting (reminded me of rich looking barley) – so the impulse buy won and here we are.
Here’s the history lesson first:  Grano Farro has a long and glorious history: it is the original grain from which all others derive, and fed the Mediterranean and Near Eastern populations for thousands of years; somewhat more recently it was the standard ration of the Roman Legions that expanded throughout the Western World. Ground into a paste and cooked, it was also the primary ingredient in puls, the polenta eaten for centuries by the Roman poor. Important as it was, however, it was difficult to work and produced low yields. In the centuries following the fall of the Empire, higher-yielding grains were developed and farro’s cultivation dwindled: By the turn of the century in Italy there were a few hundreds of acres of fields scattered over the regions of Lazio, Umbria, the Marches and Tuscany.

Farro would probably still be an extremely local specialty had the farmers of the French Haute Savoie not begun to supply it to elegant restaurants that used it in hearty vegetable soups and other dishes. Their success sparked renewed interest in farro among gastronomes, and now the grain is enjoying a resurgence in popularity in Italy as well, especially among trendy health-conscious cooks.  

POLYNESIAN CHICKEN
4 Boneless, Skinless chicken breasts
1 stick butter, divided in half
1 cup Frank’s Sweet Chili hot sauce
1 package Knorr Vegetable Soup Mix
1/4 cup flour
  • Preheat oven to 350 degrees.
  • Using a small food processor,  grind the Knorr soup mix into a fine dust.
  • Add the vegetable soup dust to the flour in a large plastic bag and mix well.
  • Dredge chicken breasts in soup and flour mixture.
  • In a large skillet over medium high heat, melt one half of the butter.
  • While that is melting, melt the remaining butter in a 2 cup measuring cup in the microwave.
  • Add the hot sauce to the measuring cup and heat an additional 20 seconds. Mix well. Set aside to cool.
  • In the skillet brown the chicken breasts on both sides until almost done. 
  • Spray a small cookie sheet with PURE.
  • Coat each piece of chicken with hot sauce mixture and lay on cookie sheet.
ITALIAN FARRO

small bag PEDON farro

2 tablespoons Frank’s Sweet Chili hot sauce
  • Bring a 2 quart pan of water to a boil.
  • Add the Farro and simmer, 10-12 minutes.
  • Drain thoroughly.
  • Add hot sauce and toss to coat.
  • Serve immediately.

GORGONZOLA GARLIC DIPPING SAUCE
1/4 cup gorgonzola crumbles
1/3 cup mayonnaise
3 cloves garlic
2 tablespoons buttermilk
salt and pepper to taste
  • In a small food processor, process the crumbles until finely ground.
  • Add garlic, mayonnaise, salt and pepper.  Mix until well blended.
  • Add buttermilk.  Add a bit more if you would like a thinner sauce.
We are looking for an avid foodie to host a couple of anecdotal/tutorial posts with pictures the 1st & 2nd Sundays of the month.   If you are interested, please leave a comment on this post and Martha or I will get back to you ASAP.

    Save Room for Dessert…Pecan Kringle

    We hosted my husband’s family Christmas party on Saturday night.  It was an appetizer potluck, with everyone contributing a favorite appetizer.  I decided to make mini muffalettas, along with a few desserts, one of which is today’s post.  There’s a New Orleans bakery that makes a Cajun Kringle, and it is outstanding!  I needed something a bit quicker, though, so I searched about in all of my magazines and cookbooks and came across this little wonder in a small publication by Land o’Lakes.  The taste is quite similar to the Cajun Kringle, so I think it’s fantastic, and best of all, the recipe makes two!  I did tweak it the recipe, as I used vanilla extract instead of maple, and I used my own brown sugar icing, but I’ll provide you with the Land o’Lakes icing, as well.  If you’re still working on your Christmas dessert menu,  this is a great recipe to try! 

    Pecan Kringle
    Pastry
    1 cup flour

    1/2 cup butter, slightly softened
    1/8 teaspoon salt
    2-4 tablespoons water
    Filling
    1 cup water
    1/2 cup butter
    1 teaspoon vanilla extract or 1 teaspoon maple extract
    1 cup flour
    3 large eggs
    Brown Sugar Icing
    1/2 cup butter
    1 cup brown sugar, packed
    1/4 cup heavy cream
    2 cups powdered sugar
    2 cups pecans, toasted & chopped
    1 teaspoon vanilla
    Land o’Lakes Glaze
    1 1/2 cups powdered sugar
    2 tablespoons butter, softened
    1 teaspoon maple extract
    2 tablespoons milk
    1/4 cup chopped pecans

    Pastry
    Heat oven to 350 degrees.
    Line a baking sheet with parchment and set aside.
    Combine flour and salt; using a pastry cutter, cut butter into flour, until mixture is crumbly.
    Stir in 2 tablespoons water to make a pastry that holds together when pressed, if necessary, add the remaining water, 1 teaspoons at a time until desired consistency is reached.
    Divide mixture in half, pressing each piece into a 12×3-inch rectangle about 3 inches apart on prepared baking sheet; set aside while making filling.
    Filling
    Combine 1 cup water and 1/2 cup butter in 2-quart saucepan.
    Cook until mixture comes to a boil and butter melts.
    Remove from heat and add in vanilla (or maple extract).
    Stir in 1 cup of flour.
    Return to stove over low heat.
    Cook, stirring constantly, until mixture forms a ball (about 1 minute). Remove from heat.
    Beat in eggs, one at a time, with wire whisk or wooden spoon until smooth and glossy.
    Divide egg mixture between two pastry rectangles.
    Bake at 350 degrees for 55 minutes.
    Cool for 30 minutes – the topping will shrink as it cools, creating the custard filling.
    While pastry is cooling, make Brown Sugar Icing or Land o’Lakes glaze.
    Brown Sugar Icing
    Measure powdered sugar into a large bowl; set aside.
    Combine brown sugar and 1/2 cup of butter in a saucepan.
    Cook over medium heat, stirring constantly, until butter melts.
    Add cream and bring mixture to a boil.
    Remove from heat, stir in vanilla, and pour over the powdered sugar.
    Using a mixer, beat together for 3-4 minutes, then add pecans, beating an additional 30 seconds.
    Pour over pastries while still icing is warm.
    Allow icing to set before slicing.
    Land o’Lakes Glaze
    Combine all glaze ingredients in small bowl.
    Beat at low speed 1 minute.
    Beat at high speed until smooth and creamy, adding additional milk, 1 teaspoon at a time, until desired glazing consistency.
    Spread glaze over pastries.
    Sprinkle with nuts. 

    CHICKEN with VERDE SAUCE

    • Spray casserole dish with PURE
    • Lay chicken pieces in bottom.
    • Generously salt and pepper chicken.
    • Cover with Fire Roasted Salsa Verde
    • Place a generous dollop of sour cream on top of each chciken piece.
    • Cover with grated Monterey Jack cheese.
    • Sprinkle with diced tomatoes and chopped cilantro.
    • Bake 45 minutes at 350 degrees.

    Fire Roasted Salsa Verde 

    My Source for awesome homemade verde sauce =  Chris the wonderful cook, griller, photographer and Big Green Egg enthusiast. Check out his blog at www.nibblemethis.com 
    His Source = Adapted from Steven Raichlen’s Planet Barbecue! 

    1 pound tomatillos, husks removed
    1 Serrano pepper
    1 jalapeno pepper
    1 Anaheim pepper
    1 large onion, peeled and sliced into thirds
    3 cloves garlic, peeled and skewered together with a toothpick
    ½ cup cilantro, chopped
    1 tablespoon bacon fat
    3 ounces chicken stock
    ½ teaspoon sugar
    Salt and pepper to taste

    • Get your grill cooking at about 450f. 
    • Place the peppers and tomatillos on and sear them until all sides are blackened. 
    • This should take a few minutes per side. Remove and place them into a plastic bag for 5 minutes. 
    • Meanwhile, grill the onion and garlic until browned (about 4 minutes a side for the onion, 1-2 for the garlic) and remove from heat. 
    • Skin, seed, and dice the peppers. 
    • Skin and quarter the tomatillos. Don’t be super picky about getting all the charred skin off, you want a little in there for flavor. 
    • Quarter the grilled onions. 
    • Place them all in a food processor and pulse them until you get a salsa like texture. 
    • Heat the bacon fat over medium high heat and then add the tomatillo mixture for 3-5 minutes. You’ll get some thick “pops” as the thick liquid heats but keep stirring. 
    • Mix in the chicken stock and bring to a simmer. Cook for 5 minutes, letting the flavors get happy together. 
    • Season with salt and pepper to your taste.

    Note: Chris is a wonderful cook, griller, photographer and Big Green Egg enthusiast. Check out his blog at www.nibblemethis.com

    ARE YOU READY FOR SOME MORE FOOTBALL??

    Here at OUR KrAzY kitchen, we’re HUGE football fans!  Football season seems like it just started! and yet it is already way too many weeks old (where does the time go?) and that means it’s time for tailgating again, serious football food and game day buffets.  Bring over your best appetizers and your biggest appetite and oh don’t forget the Brewskis to go with it all.  

    Tailgating Time will be posted every Sunday at noon and open all week for you to add your football favorites. We’ll play each and every week until Superbowl Sunday. I can’t wait to see what you’ll be bringing!  We’ll host a big Superbowl party here at OUR KrAzY kitchen.
    It’s Tailgating Time!
    HOSTED BY: 

    Tamy at 3 sides of Crazy 

    Lyndsey at Tiny Skillet
     
    Martha at Seaside Simplicity

    & THE TEAM at OUR KrAzY kitchen 

    Would you like to be a host of Tailgating Time too? 

    Leave us a comment here with your email, with Tamy at 3 Sides of Crazy or with Martha over at Seaside Simplicity so we can send you the code and add you to the host list – more exposure, more links, more football food!

    ARE YOU READY FOR SOME MORE FOOTBALL??

    We’re HUGE football fans!  Football season seems like it just started! and yet it is already way too many weeks old (where does the time go?) and that means it’s time for tailgating again, serious football food and game day buffets.  Bring over your best appetizers and your biggest appetite and oh don’t forget the Brewskis to go with it all.  I like mine really cold please with a side of lime!

    Tailgating Time will be posted every Sunday at noon and open all week for you to add your football favorites. We’ll play each and every week until Superbowl Sunday. I can’t wait to see what you’ll be bringing!
    It’s Tailgating Time!
    HOSTED BY: 

    Tamy at 3 sides of Crazy 

    Lyndsey at Tiny Skillet
     
    Martha at Seaside Simplicity

    & OUR KrAzY kitchen 

    Would you like to be a host of Tailgating Time too? 
    Leave me a comment here with your email, at OUR KrAzY kitchen or with Martha over at Seaside Simplicity so we can send you the code and add you to the host list – more exposure, more links, more football food!

    Granola: Make extra to give as a gift!

    Not only is granola super easy to make and fun to customize, it can also be a great gift! (Not that anyone still has shopping to do, I’m sure).
    The cookbook More With Less provides a great template for making your own granola.
    Step 1: Choose 7 cups of dry ingredients, including at least 2-3 cups of dry oats plus your choice of the following, and combine:
    • wheat germ
    • whole wheat f lour
    • wheat bran
    • wheat grits
    • cornmeal
    • soy flour, grits, or roasted beans
    • grape nuts
    • uncooked cereals
    • sunflower seeds
    • sesame seeds
    • pumpkin seeds
    • coconut
    • dry milk solids
    • nuts (chopped)
    • spices such as cinnamon, nutmeg
    Step 2: In a separate bowl, combine 1 C of liquids of your choice. Ideas:
    • honey
    • maple syrup
    • molasses
    • oil
    • brown sugar
    • oil
    • melted margarine
    • peanut oil
    • coconut oil
    • milk or cream
    Step 3: Mix well and bake in large greased baking pans at 300F for 30-60 minutes, stirring often.
    Step 4: Add dried fruit and nuts as desired. Or even chocolate chips!
    For more from-scratch recipes, visit my blog at http://thelocalcook.com

    MAGIC MIDDLES & HOLIDAY WREATHS

    I have been BAKING a ton of lately. When I stopped by to see Natalie and saw these cookies over at What’s for Supper which she had seen over at Recipe Girl I knew they were next on my list to make. Who doesn’t love chocolate and peanut butter? It’s hubby’s favorite combo. I experimented a little with caramels and marshmallows too.

    MAGIC IN THE MIDDLE
    DOUGH:
    1½ cups (6¼ ounces) unbleached all-purpose flour
    ½ cup (1½ ounces) unsweetened cocoa powder
    ½ tsp baking soda
    ¼ tsp salt
    ½ cup (3½ ounces) granulated sugar (plus extra for dipping)
    ½ cup (4 ounces) brown sugar, packed
    ½ cup (4 ounces or 1 stick) unsalted butter
    ¼ cup (2 3/8 ounces) smooth peanut butter
    1 tsp vanilla extract
    1 large egg

    FILLING:
    ¾ cup (7 1/8 ounces) smooth peanut butter
    ¾ cup (3 ounces) powdered sugar

    DIRECTIONS:

    • Preheat oven to 375°F. Lightly grease (or line with parchment) two baking sheets.
    • Prepare dough: In a medium bowl, whisk together flour, cocoa, baking soda and salt. In another medium bowl, beat together sugars, butter, and peanut butter until light and fluffy. Add vanilla and egg, beating to combine, then stir in dry ingredients, blending well.
    • Prepare filling: In a small bowl, stir together peanut butter and powdered sugar until smooth. With floured hands, roll the filling into 26 one-inch balls.
    • Shape cookies: Break off about 1 Tbsp. of the dough, make an indentation in the center with your finger, and press one of the peanut butter balls into the indentation. Bring the dough up and over the filling, pressing it closed; roll the cookie in the palms of your hand to smooth it out. Repeat with remaining dough and filling.
    • Dip the top of each cookie in granulated sugar and place on prepared baking sheets about 2 inches apart. Grease the bottom of a drinking glass and use it to flatten each cookie to about ½-inch-thick.
    • Bake cookies for 9-11 minutes, until they’re set.
    • Remove them from the oven and cool on a rack.

    Yield: About 30 cookies

    Cooking Tips

    *These cookies freeze well. They would travel well too.


    My great aunt who I only got to see a couple times a year used to make these every year special for me and I would wait out on the steps for her arrive just to see them. She always made them soooooooooo pretty and perfect!

    HOLIDAY WREATHS
    (these are better when they are made a few days ahead)
    30 large marshmallows (or 1 jar marshmallow cream)
    1/2 cup butter
    1 teaspoon vanilla
    2 teaspoon green food color
    3 1/2 cups cornflakes
    Red Hots

    • Combine marshmallows, butter, vanilla and food color in top of double boiler. Heat and stir frequently until well blended.
    • Gradually stir in cornflakes until well blended.
    • Drop onto wax paper and arrange into wreath shapes. I plop them onto the wax paper and then push out from the center to form the wreaths.
    • Decorate with red hots.
    • Let cool.
    • If your house is warm – chill in refrigerator until set.

    Fire Day Friday: Two Sides To Every Story

    It has been a wintry week here in Knoxville.


    After snow and highs below freezing for several days, last night we got hit with an ice storm too. The canopy over my outdoor kitchen was frozen solid and had icicles like this all the way around it.

    So naturally, I was cooking inside, right? Kind of.

    I still cooked my main course outside (Wood Fire Roasted Chicken Wings) after clearing an ice free path to our grills, but I wimped out and cooked my two side dishes inside.

    Easy Saffron Rice

    1 1/2 cups chicken stock
    1/4 tsp turmeric
    1/4 tsp saffron threads (don’t sweat it if you don’t have them)
    1/4 tsp red pepper flakes
    1 ea small clove garlic, minced
    1 1/2 tsp fish sauce
    1 cup jasmine rice
    1/4 cup frozen green peas

    Bring all ingredients except rice to a boil over medium high heat. Add rice and peas. Cook for 15-18 minutes (or until done according to rice package directions).

    Roasted Chickpeas

    1 can chickpeas (aka garbanzo beans), rinsed and drained
    1 Tbsp oil
    1/2 tsp kosher salt
    1/2 tsp garlic powder
    1 tsp Tony Chachere’s creole seasoning

    Toss beans in oil and seasonings. Roast for 30-40 minutes at 350f, stirring every 10 minutes.

    The chickpeas make for a great snack too! Kind of like “Corn Nuts” without the culinary guilt.

    ALL DAY MEATBALLS

    Hi, Tamy here filling in for Diana and I thought I’d bring you one of our favorites for this busy time of year. You know, when you just want to walk in the door and grab dinner without actually having to prepare it.
    If you are anything like me, you have a drawer or a box full of recipes from newspapers, magazines, old maiden aunts, grandmothers, friends and every potluck you ever went to and said I have to have that recipe! Now while I usually keep the combination of spices and seasonings somewhat intact, I do make changes that make it more palatable to my family. So I always keep a list of likes, dislikes and allergies and am constantly altering recipes to fly by the seat of my pants.These recipes have been floating around so long in the box that I have no idea where they actually originated, but one looks like a page from an old, and I mean OLD magazine and the other is handwritten. I have them stapled together with a note to combine them together. I’m like that – whatever works for my family. I had a girlfriend in college who loved fashion but was on such a strict budget there wasn’t room for the things she eyed. I remember Julie borrowing a fancy designer dress from a Joann, a girlfriend of ours for an event and then later that night she took it apart, made a pattern and made her own dress before putting Joanns dress back together. To my knowledge Joann never knew. Now I can’t do that with recipes literally, but I do do it in my mind as I’m eating a particularly tasty tidbit. Some days I feel like an archaeologist unearthing pieces to make a whole from.

    OLD FASHIONED ALL DAY MEATBALLS
    2 pounds ground beef
    3/4 cup quick cooking oats
    1 cup whole milk
    1/4 cup Parmesan cheese
    1/4 cup garlic salt
    1 teaspoon white pepper
    1 small Vidalia onion, chopped fine
    2 eggs
    3 tablespoons vinegar
    1 teaspoon Worcestershire sauce
    1/4 cup raspberry jam
    1/4 cup brown sugar
    1 1/2 cup ketchup
    • In a large bowl combine the quick cooking oats, milk, eggs, onion and garlic salt.
    • Crumble the beef over top and then mix in well.
    • Shape into 1-2 inch balls.
    • Place in slow cooker.
    • Mix together the ketchup, vinegar, Worcestershire, raspberry jam and brown sugar.
    • Pour over meatballs.
    • Cover and cook on low for 6-7 hours or until the meat is no longer pink.
    With this recipe I found two other old scraps of recipes (Chicken with Tarragon Sauce and Baked Tomatoes with Broccoli stuffing) that had been torn from old cook booklets, one was even handwritten it was so old. The Brussel Sprouts and carrots were my addition for texture and color. They begged me to put them together and make this dish:
    serves 4.

    FINISHING SALTS ~ 1ST CHOICE NOT LAST

    Need a gift for the cook in your life?  Consider giving a nice collection of Salt.
    There are numerous different varieties of salt and each contributes a different flavor to a dish.  The variances are subtle but they are there and to an educated palate the differences can be quite strikinG.
    On the list of salt that you can choose to use in your recipes iodized table salt should be the last edible choice, not the first.  The additives and iodine change the flavor and make it harsh and bitter.  What should you use?
    Some Currently Common Salt Varieties and Their Uses

    Kosher Salt

    Kosher salt is the perfect, all purpose salt. It is flavorful without being harsh and the larger crystals allow the flavor to be more distinct from the food. Kosher salt comes in two types of crystals, fine and coarse. The large surface area of the salt crystals allows kosher salt to season meat to perfection without over salting. Kosher salt can be used at the table as well as in cooking and baking. Some of the more common uses for kosher salt are:
    • Breads
    • Pretzels
    • Seasoning meat and poultry
    • Table salt

    Sea Salt

    Sea salt is another type of salt that has iodine. The difference between sea salt and regular table salt is that the iodine in the sea salt occurs naturally. There are hundreds of different brands of sea salt and all are made in much the same way and derived from an ocean or sea. Sea salt is harvested by channeling sea water into large bins made of pure clay. The water is allowed to evaporate leaving just the salt crystals. Since sea salt is not as refined as some of the other types it commonly contains minerals like:
    • Iron
    • Zinc
    • Calcium
    • Iodine
    • Potassium
    There are other trace minerals in sea salt as well. Sea salt has a delicate flavor and makes a good all purpose table salt. It normally comes in three grinds, from fine to course.

    Italian Sea Salt

    Italian sea salt is produced off the coast of Sicily. It is Interesting to note that the Italian sea salt has less sodium chloride than table salt.
    The salt is gathered in the same way as regular sea salt. Its delicate flavor lends itself best to use as a finishing salt, to be added once a dish is complete. It is wonderful in salads, on sliced sun ripe tomatoes
    with a little olive oil, or sprinkled on to meat just before serving.

    Celtic Sea Salt

    Celtic salt is harvested from the Atlantic Ocean off the coast of Brittany, France. The salt is harvested as it has been for centuries, with wooden rakes. Traditionally no metal is supposed to come in contact with the salt to maintain the purest and most delicate flavor.

    Grey Sea Salt

    Grey sea salt is a salt that is collected in the same way as Celtic sea salt and from the same area. It is a purplish gray color. This color comes from the inclusion of clay that is found in the salt flats where the salt is collected.
    Grey salt is one of the best quality finishing salts available. It is wonderful on salads, sprinkled on flavored butters, or used on vegetables.

    Fleur de Sel

    Literally “flower of the sea” Fleur de Sel salt is made up of salt crystals that form naturally on the surface of the salt evaporation ponds. These crystals must be harvested under specific conditions. Most Fleur de Sel comes from Guerande , France. The flavor is unusual and delicate. It is a finishing salt used in salads, vegetables and grilled meats as well as to top some desserts such as caramels.

    Black Salt

    Black salt has a sulfuric flavor and is used primarily in Indian cooking. The flavor is reminiscent of eggs and is sometimes used by vegans to add an eggy taste to salads and tofu dishes. In traditional Indian dishes it is used in fruit salads, chutneys, and raitas.
    Black salt is not a sea derived salt but is mined from the earth. It should not be used as an all purpose salt because of the flavor.

    Hawaiian Red Sea Salt

    Hawaiian Red salt is colored with natural iron oxide which imparts a subtle flavor to this salt. It is a finishing salt that is perfect for grilled meats. The iron oxide caused the salt to be any color from red to pink, depending on the amount of the mineral in the salt.

    Smoked Sea Salt

    Smoked sea salt is exactly that. It is sea salt that has been smoked in various ways to add an additional layer of flavor.

    Himalayan Pink Salt

    Although Himalayan Pink salt is harvested from the foothills of the Himalaya Mountains it is technically a sea salt. It is a marine fossil salt formed eons ago. It carries numerous trace minerals and is a delicious and beautiful finishing salt.

    aprons 3