

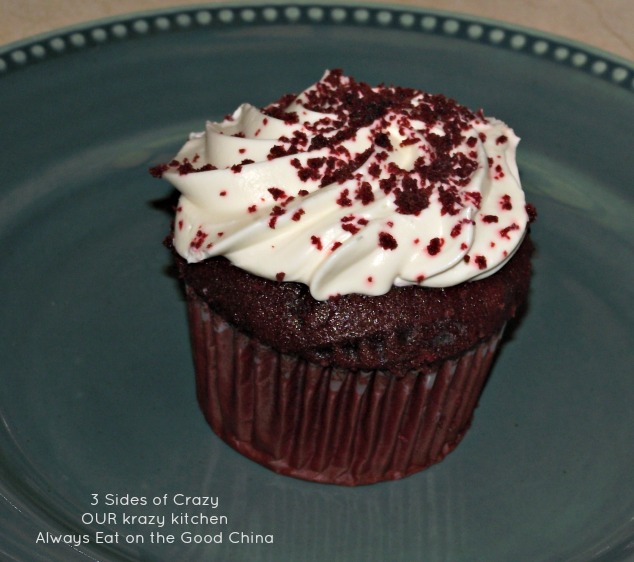
Red Velvet Cupcakes
Yields 12 delicious cupcakes
1 1/3 cups all-purpose flour
3 tablespoons cocoa powder
1/2 teaspoon baking soda
3/4 cup salted butter, firm but not cold – just beginning to soften
1 cup + 2 tablespoons granulated sugar
2 large eggs
1 tablespoon red food coloring
2 teaspoons vanilla extract
1/2 cup whole milk
1 teaspoon white vinegar
- Preheat oven to 350˚.
- In a mixing bowl, whisk together flour, cocoa powder and baking soda, set aside.
- In a separate large mixing bowl, using an electric mixer, cream together the butter and sugar until pale and fluffy, about 4 -5 minutes.
- Add in eggs one at a time stirring after each addition.
- Now stand back and add red food coloring and vanilla extract and mix until combine.
- In a small bowl combine milk and vinegar.
- Add milk mixture and flour mixture to cupcake mixture, alternating in two separate batches, mixing until combined after each addition.
- Divide batter evenly among 12 paper lined muffin cups, filling each cup about 2/3 full.
- Bake in preheated oven 20-23 minutes until toothpick inserted into center of cupcake comes out clean.
- Remove from oven and allow to cool about 2 minutes in muffin tin, then transfer to wire rack to cool for 10 minutes, then transfer to an airtight container to cool completely (this just helps them retain more moisture).
- Once cooled completely, spread generously with Cream Cheese Frosting
Cream Cheese Frosting
1/2 cup salted butter, firm but not cold (if using unsalted add 1/8 tsp salt)
6 ounces cream cheese, softened
1/2 teaspoon vanilla extract
3 1/2 cups powdered sugar
- In a large mixing bowl, using and electric mixer, cream together butter and cream cheese until pale and fluffy (about 1 minute on high speed, then 3-4 minutes on medium high speed).
- Mix in vanilla extract.
- Add powdered sugar and beat until smooth.
- Frost and go wild – add nuts, sprinkles or cookie crumbs.
THANKS – HOPE YOU ENJOY THE CUPCAKES!
Your red velvet cupcakes looks very moist and delicious. Its good look makes your China looks very good too…
Your blog is fantastic… now following you 😀