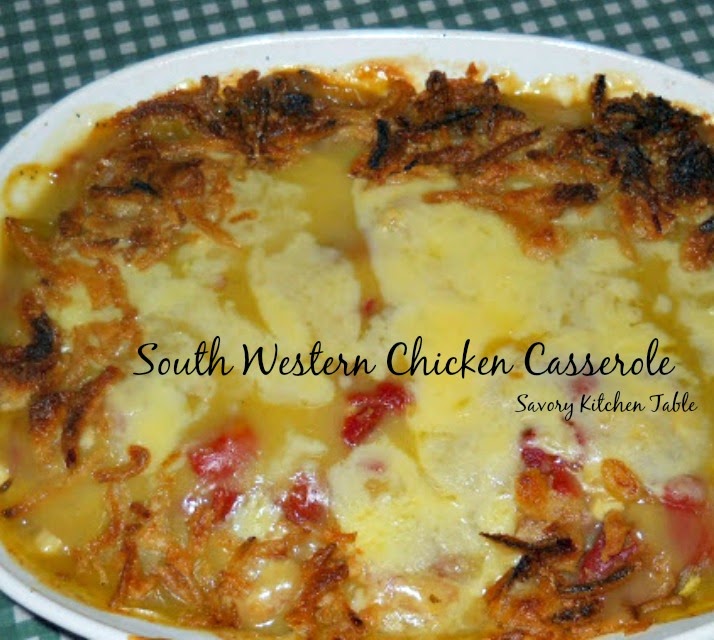
You too can learn to Preserve

One thing that many of you don’t know about me is that I love to cook (LOL) AND to preserve. To me there is nothing that says I love you more than preparing those special meals and treats for my family. Canning is easy, but it is time consuming and you do have to follow sterile rules to make it safe. You can be a plain or as inventive as you want.

Hubby pointed out this would be a good time to share my award pictures that I began to scrapbook about before the move and have yet to finish. I always thought it a little ironic that I was ‘preserving’ my preserving ribbons. Here are a few pictures.


How I got started on entering the county fair is actually a cute story. I was still working for a major phone company and I make a Spiced Pear jam that really is awesome. We had a cafeteria in the building I worked in and the engineers would stop by my desk to buy a jar of jam before their coffee break so they could put it on the pancakes and waffles. I loved making it and only charged them enough to actually cover my expenses so I could make more.

My boss kept trying to get me to enter it into competition, but I was reluctant as I really didn’t think I had what it took to compete against women who had been doing it all their life (one woman had an entire 4×8 foot wall with just her entries and had been winning 1st and 2nd place awards for over 20 years) because I was a self-taught newbie and ‘shy’. Unbeknownst to me, one of the guys entered me in the upcoming county fair. He knew I went every year to drool over the jams and jellies and crafty items in the home building. You have to picture my jaw actually dropping to the floor on this particular year when I see my name, my jam and an actual 3rd place ribbon attached to it! I was literally speechless especially since I hadn’t entered the fair. Long story short I will always be eternally grateful to him for giving me the courage and confidence to enter each and every year after that for 10 years until I moved away. I have also been published in several of their cookbooks the years I won first place. I hope to start again soon.
 
Over the next few days I’m going to post several of my recipes and hope you enjoy them.

SMOKEY NAVY BEAN SOUP – CROCK POT STYLE

The weather took a serious turn towards fall early last year.  But, I was ready!  One of my favorite things about fall is fun food for tailgating or just watching football at home.  This soup recipe is no exception.
Whether you serve it in a bread bowl (which is my favorite way) or just in a bowl, the flavor is smokey, deep and intense – perfect for warming you from the inside out. AND it is super easy in the crock pot!

SMOKEY NAVY BEAN SOUP – CROCK POT STYLE
1 pound navy beans, soaked overnight
1 large onion, chopped
6 cups water
1 KNORR vegetable gel tub
1 large onion, chopped
2-3 cloves garlic, minced
3 ribs celery, sliced
3 carrots, sliced
1 can petite diced tomatoes (I use Chipotle & jalapeno flavored)
1/2 teaspoon dried thyme
salt and pepper to taste (I use 1 t. Himalayan pink salt and 1/4 t. white pepper)
1 ham steak, chopped (about 2 cups)
1/2 pound bacon, crisp and bacon
grated cheese

  • Spray slow cooker with PAM.
  • Drains beans of soaking water and add to slow cooker along with onions, garlic, celery, tomatoes and carrots.
  • Whisk together the water, KNORR gel tub, thyme, salt and pepper until well blended. Add to the slow cooker.
  • Cook on low 4-6 hours.
  • Add ham pieces.
  • Cook another 2-3 hours.
  • Garnish with cheese and bacon before serving.
  • Enjoy!

BRUSCHETTA CHICKEN BAKE

BRUSCHETTA CHICKEN BAKE
1 1/2 pounds chicken breasts, cut into bite sized pieces
1 can diced tomatoes with garlic & herbs, undrained
1 package Chicken Stove Top Stuffing
1 KNORR chicken bouillon gel tub
1 cup hot water
2 cloves garlic, minced
1 tablespoon Gourmet Garden Basil paste
4 slices or 1 cup grated  mozzarella cheese
  • Preheat oven to 375°.
  • Whisk together hot water, bouillon tub, garlic and basil paste until well blended.
  • In a mixing bowl mix together the stuffing mix, tomatoes and bouillon mixture until stuffing is moistened.
  • In a 9×9 baking dish sprayed with PAM, layer evenly first the chicken, then the cheese and topped with the stuffing mixture.
  • Bake 45 minutes – chicken will be cooked through and stuffing will be beginning to crust.
  • Cut it like a lasagna and serve with salad.

BEEF STEW

BEEF STEW

1 pound lean beef stew eat, cut into cubes
1/2 pound baby carrots, halved
1 large Vidalia onion, peeled and quartered
1 clove garlic, minced
1/2 teaspoon celery seeds
1/2 teaspoon dried thyme
1 teaspoon sea salt
1/2 teaspoon pepper
Knorr Spring Vegetable Recipe Mix
1 cup V8 juice*
1/4 cup white zinfandel wine*
2 tablespoons brown sugar*
1 tablespoons tapioca*

  • Spray bottom of slow cooker lightly with PURE!
  • Place the beef cubes in the bottom of the slow cooker.
  • Layer onions over top of beef.
  • In a mortar and pestle, grind all the seasonings together to reactivate their properties.
  • Add to Knorr Spring vegetable mix and blend well.
  • Sprinkle over the meat and onions.
  • Add carrots.
  • Whisk together the wine, V8 juice, brown sugar and tapioca until sugar and tapioca is completely dissolved.
  • Pour this over meat and vegetables.
  • Cover and cook on low 5 hours, undisturbed.
  • DO NOT CHECK ON IT!
  • Serve Immediately over mashed potatoes.
*The tapioca, wine and brown sugar make a really nice thick gravy consistency with robust flavor when mixed with the V8.

BLACKBERRY SOUFFLES

They serve up great for a Sunday brunch buffet.

BLACKBERRY SOUFFLES
6 eggs, beaten
2 tablespoons water
1/2 teaspoon salt
3 tablespoons brown sugar
2 ounces cream cheese, cut into eight 2 inch cubes
2 cups sliced blackberries

  • Preheat oven to 375 degrees.
  • Spray 8 ramekins with PURE.
  • Beat together eggs, water, and salt.
  • Fill ramekins 2/3 full with egg mixture.
  • Top each one with a cream cheese cube.
  • Evenly sprinkle brown sugar on top of each ramekin.
  • Top each one with blackberries.
  • Bake 15 minutes or until brown sugar is melted and eggs are set.
  • Slide out of ramekins (if you want), dust with powdered sugar and the rest of the blackberries.

APRICOT PINEAPPLE MONKEY BREAD

APRICOT PINEAPPLE MONKEY BREAD*
BREAD
1 cup scalded milk
1/2 cup shortening
1/2 cup sugar
1teaspoon salt
1/2 cup golden raisins
1/4 cup rum
1/2 cup minced walnuts
2 packages dry yeast
1/2 cup warm water
2 Jumbo eggs, beaten
4 1/2 – 5 cups flour
TOPPING
20 ounce can crushed pineapple, drained well
4 tablespoons butter
1/2 cup light brown sugar, super firmly packed
1/2 cup apricot pineapple preserves**
1/2 teaspoon almond extract
1/2+ teaspoon cinnamon
1/2 cup golden raisins*
1/4 cup rum*

  • Soften the yeast in the warm water.
  • Stir together the sugar and cinnamon and set aside.
  • Soak the raisins in the rum until needed. Drain before adding to the bread.
  • Combine the milk, shortening, sugar and salt. Cool to lukewarm.
  • Add yeast to milk mixture and then the eggs, the raisins and nuts.
  • Add the flour. Mix to a soft dough.
  • Knead on a lightly floured surface until smooth and elastic. Place in a greased bowl. Turn over once, cover with a cheesecloth and let rise until double in size.
  • Punch down and let stand ten minutes.
  • Prepare the topping while the dough is standing.
  • Melt the butter in a saucepan.
  • Add the preserves, brown sugar, cinnamon and almond extract. Cook until smooth and fairly thin.
  • Add the pineapple (and raisins if you’re using refrigerator rolls) and heat through.
  • Roll into many small balls about the size of golf balls.
  • Grease a Bundt cake pan. (I like to use my pineapple upside down cake pan.
  • Arrange a layer of the balls haphazardly in the cake pan.
  • Dribble about half the topping loosely over them.
  • Arrange the other half of the dough balls.
  • Pour remaining sauce over top.
  • Allow to rise until double in size (about 1 1/4-1 1/2 hours)
  • Bake at 350 degrees for 35-45 minutes.
  • Enjoy
*You can cheat and use 3 cans of refrigerator biscuits instead if you’re in a hurry. If you still want the raisins you can add them to the topping instead.
**You can use pretty much any flavor you want – I also use raspberry, peach and blackberry depending on my mood. A lot of times I combine the peach and blackberry half and half.

Good Cast Iron really makes the best non-stick pan… and SMOTHERED CHOPPED STEAKS taste best made in that pan.

After a really good seasoning, these pans are awesome and produce super tasty recipes!  

How to Season Cast Iron Cookware


Cast iron lasts nearly forever if you take care of it. Seasoning cast iron cookware is necessary to ensure a non-stick surface and to prevent the pot or pan from rusting. If seasoned correctly your cookware can last a lifetime and more.
  1. For crusty cast ironware that you inherited or picked up at a garage sale: Your cookware may have some combination of rust and thick crackly black crud. It can be restored fairly easily to good as new condition! First place the cookware in a self-cleaning oven and run one cycle OR place in a campfire or directly on a hot charcoal fire for 1/2 hour, until dull red. The crust will be flaking, falling and turning to white ash. Then, after allowing to cool a bit to avoid cracking your cast iron,use the following steps. If you have more rust than crust, try using steel wool to sand it off.
  2. Wash your cast iron cookware with warm water and soap using a scouring pad. If you have purchased your cast iron cookware as new then it will be coated in oil or a similar coating to prevent rust. This will need to be removed before seasoning so this step is essential.
  3. Dry the cookware thoroughly, it helps to put the pan in the oven for a few minutes to make sure it’s really dry. Oil needs to be able to soak into the metal for a good seasoning and oil and water don’t mix.
  4. Coat the pot or pan inside and out with lard, Crisco, bacon fat, or corn oil. Ensure that the lid is also coated.
  5. Place both the lid and the pot or pan upside down in your oven at 300F for at least an hour to bake on a “seasoning” that protects the pan from rust and provides a stick-resistant surface.
  6. For best results repeat steps three, four and five.
  7. Ongoing care: Every time you wash your pan, you must season it. Place it on the stove and pour in about 3/4 tsp. corn oil or other cooking fat. Wad up a paper towel and spread the oil across the cooking surface, any bare iron surfaces, and the bottom of the pan. Turn on the burner and heat until smoke starts to appear. Cover pan and turn heat off.

Alternate Method
  1. First, if you find your cast iron needs to be stripped down and re-seasoned do not fear. All you have to do is place the utensil in your Self Cleaning Oven on the shortest cleaning cycle (usually 3 hrs. on most models), and it will come out looking like the day it came out of the mold. Allow it to cool overnight. Wash the residue off with WATER ONLY in the sink using a stiff abrasive pad. Make certain NO DISH SOAP comes in contact with the utensil during this procedure. If it does you will have to start over!!! Dry the cast iron utensil off with a paper towel, and IMMEDIATELY place BACK in the oven at 350 degrees Fahrenheit for 10 minutes or so.
  2. Next, take the utensil out of the oven after the 10 minute drying time is complete, and lightly brush the utensil with a paper towel coated with Crisco or other solid cooking oil. Liquid vegetable oil will do in a pinch, but it’s better to save the liquids until AFTER your initial seasoning. It is important in this step only to lightly coat the cast iron with a light, thin coat of oil until it only glistens. Do not allow any puddles or pools of liquid as this will cause problems at a later time.
  3. Then, place the Cast Iron in the oven set to 500 to 550 degrees Fahrenheit with the COOKING SIDE FACING THE BOTTOM OF THE OVEN. This allows for any excess oil to drain off to the sides, and prevents pooling during the seasoning process. The higher heating temps allows for the oil to truly ‘cook’ as it should as opposed to just ‘gumming up’ at lower temps. Cook undisturbed for 1 hour.
Please note: During the previous step it will be best to turn off any smoke alarms in the immediate area as it may smoke quite a lot. Ceiling fans also aid in ventilation.
Finally, after your cast iron is finished seasoning for 1 hour or so, take it out of the oven and IMMEDIATELY wipe it down with another extra – light coat of Crisco. Allow it to completely cool.

TIPS

  • If food burns, just heat a little water in the pan, and scrape with a flat metal spatula. It may mean that re-seasoning is necessary.
  • If you’re washing the cast iron too aggressively (for instance with a scouring pad), you will regularly scrub off the seasoning. Wash more gently or repeat oven-seasoning method regularly.
  • If your pan develops a thick crust, you’re not washing it aggressively enough. Follow “crusty pan” instructions.
  • If storing your Cast Iron Dutch oven for any length of time, it is always best to place one or two paper towels in between the lid and the oven to allow for air flow.
  • Also, after cleaning after each use it is always best to place it back in the oven on 350 degrees for 10 minutes or so to ensure all water has vaporized and left the surface of the cast iron.
WARNINGS
  •  Do not cook tomatoes and other acidic foods in your cast iron cookware unless it has been well seasoned.
  •  Washing pans with detergent after they have been seasoned will break down the seasoning. Either wash without detergent (if you’re cooking similar foods with the pan, this is fine) or repeatedly oven-season your cookware.

SMOTHERED CHOPPED STEAKS

2 pounds ground sirloin
1 sleeve Keebler club crackers, crushed
1/2 teaspoon sea salt
1/2 teaspoon white pepper
1 tablespoon Worcestershire sauce
1/2 cup finely chopped onion
2 Jumbo eggs
1 tablespoon liquid Smoke – MYSTERY ingredient
3 tablespoons butter
2 cloves garlic, minced
1 large heirloom tomato, chopped,
1 large Vidalia onion, sliced thin
large shred cheddar cheese
  • Combine all the hamburger steak ingredients until well mixed. Form six steaks.
  • In a well seasoned cast iron grill, sear steaks on both sides.  About 4-5 minutes each side should leave you with medium steaks.
  • In a large skillet melt the butter. Saute the onions and garlic until fragrant and caramelized.
  • Top steaks with onions, tomatoes and cheese.

SWEET & ZESTY MEATBALLS for your next party

These are a great recipe for a potluck or buffet. I always make too much on purpose because the leftovers freeze so well.
MEATBALLS*

2 pounds ground beef
1 large onion, finely minced
1/2 sleeve saltine crackers, crushed
1 teaspoon minced garlic from the jar
1/2 teaspoon white pepper
1 jumbo egg, beaten

  • Preheat oven to 375 degrees.
  • In a large bowl, combine all the meatball ingredients and blend well.
  • Shape into 1 inch balls.
  • Place meatballs on un-greased cookie sheet.
  • Bake 25-30 minutes until browned and baked through.
  • For frozen meatballs, put the sauce in the crock pot first and then stir in frozen meatballs. They’ll be ready in 3-4 hours.

*I sometimes cheat and buy the bags of meatballs from Costco or Sam’s Club

SAUCE
3/4 cup Welch’s grape jelly
3 tablespoons white vinegar
1 3/4 cups Heinz chili sauce
1 medium red bell pepper, cut into thin slivers

  • In a large saucepan combine jelly, chili sauce and vinegar.
  • Bring to a soft boil and simmer 5 minutes stirring constantly to prevent scorching.
  • Layer meatballs, peppers and spicy sauce in crock pot.
  • Warm meatballs in sauce for 3-4 hours before serving.

You can put all the leftovers in the freezer together. Be sure to thaw them thoroughly before reheating.

KICK IT ON UP! MEATLOAF

MEATLOAF with  a KICK!
2 pounds hamburger
4 ounces Gorgonzola Cheese Crumbles
1 bunch green onions, sliced thin
2 cloves garlic, minced
1 jumbo egg
1/4 cup chili sauce
1 tablespoon Better than Bouillon Beef Base
1 tablespoon creamy horseradish
1 sleeve Townhouse crackers, crushed
1 teaspoon sea salt
1/2 teaspoon white pepper
  • Mix all ingredients together thoroughly
  • Use a tall loaf pan
  • Bake 45 minutes at 350 degrees or until edges are browned and crisp
  • Immediately pour off excess grease
  • Enjoy

APPLE BLACKBERRY COBBLER

1 cup blackberries, halved
2 apples peeled and sliced thin (I use Pink Ladies)
1 cup whole milk
1 cup self-rising flour*
1/2 cup butter + 2 tablespoons, both melted separately
3/4 cup fine sugar
1/4 cup packed brown sugar

  • Pre-heat oven to 350 degrees.
  • Mix together the fine sugar and flour.
  • Whisk in the milk.
  • Whisk in 1/2 cup melted butter.
  • Pour into well greased bowls or baking dish.
  • Distribute alternately apples and berries evenly on top of batter.
  • Mix 2 tablespoons melted butter with brown sugar until crumbly.
  • Sprinkle on tops.
  • Bake 45-60 minutes until golden and toothpick comes out clean.

CHOCOLATE PINEAPPLE CREAM CHEESE PASTRIES

CHOCOLATE PINEAPPLE CREAM CHEESE PASTRIES
1 package Puff Pastry Sheets (2 sheets)
1/2 cup milk chocolate chips
1 egg, beaten
4 ounces Philadelphia cream cheese, softened
1/2 cup sugar
1-8 ounce can crushed pineapple, well drained
2 tablespoons butter
1 cup confectioners’ sugar
2 tablespoons hot water

  • Thaw the pastry sheets at room temperature until they’re easy to handle (about 45 minutes).
  • Pre-heat the oven to 375°.
  • Line baking sheet with silicone mat or parchment paper.
  • Beat together the softened cream cheese, sugar and pineapple.
  • Unfold pastry sheet on a lightly floured surface. Roll the pastry sheet into a 10-inch square. Cut the pastry sheet into 4 (5-inch) squares. Repeat with the remaining pastry sheet.
  • Spread 1 tablespoon of cream cheese mixture in the center of each pastry square.
  • Sprinkle 1 tablespoon of chocolate chips on top of cream cheese mixture.
  • Brush the edges of the pastry squares with the egg.
  • Fold each pastry in half over the cream cheese mixture and chocolate chips and press the edges to seal.
  • Place the filled pastries onto the baking sheets.
  • Brush the tops of the pastries with the egg.
  • Bake for 15-20 minutes or until the pastries are golden. Let cool on the baking sheets for 2 minutes. Remove the pastries to a wire rack and let cool.
  • Place the remaining chocolate chips and the butter into a small microwave-safe bowl. Microwave on HIGH for 30 seconds or until the chocolate is starting to melt. Stir until the chocolate mixture is smooth. Stir in the confectioners’ sugar. Stir in the water, adding additional water, if necessary, until the icing is the desired consistency.
  • Drizzle the icing over the pastries.