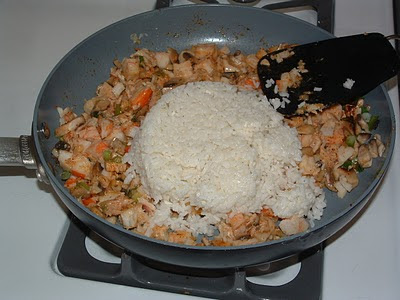
SEAFOOD CASSEROLE EXTRAODINAIRE

Hi everyone, Tamy here filling in for Dave.  You can normally find me at my home blogs 3 Sides of Crazy, Always Eat On The Good China, on Sundays here at OUR KrAzY kitchen and on Saturdays over at THE Motivation Station, but covering today for Dave.  I made this a while back for Magazines Mondays.  The guys loved it and it’s perfect for Dave’s theme, I CAN COOK THAT!
I really intended to stick with this recipe as it was written, really I did! But, as I read it more closely I felt some changes coming on. You know that feeling you get when you realize hubby won’t like ingredient 5 or your son would hate ingredient x, etc… The more I messed with the recipe the further it got from what the intended.

So here is their recipe as written:


BLEND IN THE BAYOU
8 ounces cream cheese
4 tablespoons butter, divided
1 large onion, chopped
2 celery ribs, chopped
1 large green pepper, chopped
1 pound cooked medium shrimp, peeled and deveined
2 – 6 ounce cans crabmeat, drained and flaked
1 can cream of mushroom soup
3/4 cup cooked rice, prepared
4 1/2 ounce jar sliced mushrooms, drained
1 teaspoon garlic salt
3/4 teaspoon hot pepper sauce
1/2 teaspoon cayenne pepper
3/4 cup shredded cheddar cheese
1/2 cup crushed butter-flavored crackers
  • In a small saucepan, cook and stir the cream cheese and 2 tablespoons butter over low heat until melted and smooth. Set aside.
  • In a large skillet, saute the onion, celery and green pepper in remaining butter until tender.
  • Stir in the shrimp, crab, soup, rice, mushrooms, garlic salt, pepper sauce, cayenne and cream cheese mixture.
  • Transfer to a greased 2 quart baking dish.
  • Combine crackers crumbs and cheese. Sprinkle over top.
  • Bake, uncovered 25 minutes or until bubbly.
and here is the new recipe as made and enjoyed and savored as the plates were licked clean!


SEAFOOD CASSEROLE EXTRAODINAIRE
inspired by Taste of Home’s Blend in the Bayou

8 ounces cream cheese
3 tablespoons butter, divided
1 large bunch green onions, chopped

4 large mushrooms, chopped 2 cloves garlic, minced

1 – 8 ounce package crabmeat, chopped & flaked
2 – 6 ounce cans white albacore tuna, drained and flaked
1 can cream of celery soup
3/4 cup cooked rice, prepared
1 teaspoon sea salt
1 teaspoon hot pepper sauce
1/2 teaspoon chili pepper
3/4 cup shredded cheddar/jack cheese
1/2 sleeve crushed butter-flavored crackers ( I used Keebler herb and butter)
  • Preheat oven to 350 degrees.
  • In a small saucepan, cook and stir the cream cheese, soup and 2 tablespoons butter over low heat until melted and smooth. Set aside.
  • In a large skillet, saute the onion, mushrooms and garlic in remaining 1 tablespoon butter until tender.
  • Stir in the tuna, crab, soup, rice, mushrooms, salt, pepper sauce, chili powder and cream cheese mixture.
  • Transfer to a greased 2 quart baking dish.
  • Sprinkle crackers over top.
  • Bake, uncovered 25 minutes or until bubbly.
  • Sprinkle with cheese and bake 5 minutes more.

aprons 3

QUICK & EASY CHICKEN CHILI

Hi everyone, Tamy here filling in for Min.  You can normally find me at my home blogs 3 Sides of Crazy, Always Eat On The Good China, on Sundays here at OUR KrAzY kitchen and on Saturdays over at THE Motivation Station, but today Min asked to fill in for her while she goes through the excruciating withdrawal of no computer and she waits for her new one to be delivered.  I made up this recipe a couple of weeks ago when I was home without a car and the pantry was all but bare.  Good thing I did, the guys loved it and it’s perfect for Min’s theme, Try  A New Recipe Day!

QUICK & EASY CHICKEN CHILI
3 skinless, boneless chicken breasts, frozen
2 cups homemade chicken broth, frozen
1 can cream of potato soup
1 jar dried beef, chopped
1 Williams chili mix package
1 can chopped green chilies
  • Place frozen chicken breasts on the bottom.
  • Pour green chilies over chicken pieces.
  • Top with cream of potato soup.
  • Top with frozen broth.
  • Sprinkle chili seasoning mix on top of chicken broth.
  • Top with beef pieces.
  • Slow cook on high for 2 hours. Reduce to low for 6 hours. Or cook on low 10 hours.
Don’t forget to visit Min at The Bad Girl’s Kitchen for more fabulous recipes!

    Try a New Recipe: Sourdough Starter + Bread

    If you’ve ever wanted to try making sourdough, now is the perfect time to get “started!” OuR KrAzY KiTcHeN is holding the 3rd Annual Need to Knead Bread Roundup, and if you “start” now, you can have some fabulous sourdough bread to enter in the roundup!
    This recipe came from one of my Taste & Create partners last year: Grace of A Southern Grace. (If you’d like to sign up and participate in November, go here by Nov. 8!)

    As I was looking around Grace’s blog last year, I kept seeing all the fabulous things Grace does with her precious Ebenezer, her sourdough starter.

    And I thought:

    Exactly what kind of cowgirl doesn’t have a jar of sourdough starter?

    Can I actually claim to be a cowgirl, having never made a loaf of bread from my own starter?

    Does Grace have a recipe for sourdough starter?

    Will this sourdough starter really, truly be hard to kill, as Grace alleges?
    Please let it be hard to kill, and easy to maintain.

    What should I name it??

    And I made a list for Number One and sent him off to the store.

    Sourdough Starter
    1 cup warm water
    1/2 cup sugar
    1 package (2-1/4 teaspoons) dry yeast
    3 tablespoons instant potato flakes

    To make starter:
    Mix water, sugar, yeast, and potato flakes. Let ferment on counter for two days. Then feed with starter feeder and continue with the instructions found in the bread recipe and/or links below.

    Starter Feeder
    Mix together:
    ½ c sugar
    3 T potato flakes
    1 c warm water

    Add to jar of starter, (I mixed mine a little with a wooden spoon) and let sit on the counter for around 8 hours.

    Grace says: Eb lives in the fridge until feeding time, which can be anywhere from 3 to 14 days after his last meal. (I’ve actually gone longer than two weeks without feeding him and he still did fine.) Upon feeding, he sits on the counter for about 8 hours, and then he’s ready to go.

    After sourdough has been on the counter for 8 hours, proceed with any number of sourdough recipes. (Click this link to see all the things I’ve made with sourdough starter!)

    The sourdough starter went off without a hitch. It sat and fermented and bubbled and stewed on the counter. I added the starter feeder, and it bubbled away some more. I decided to name it Virgil, which means “growing.”

    When it was time, I decided to go ahead with the most basic recipe, Sourdough Bread. I followed Grace’s recipe to the letter. 12 hours later, the dough had risen, but certainly wasn’t overflowing out of my bowl like Grace’s was out of her trifle bowl. Perhaps my bowl was bigger, or something?

    I decided I’d make just two loaves instead of three loaves like Grace made. I left the loaves in the oven for 8 hours, just like Grace recommends.
    My bread turned out lovely! Perfectly risen, (see above!) golden brown on the outside. The very middle was just a bit doughy, so next time I will preheat the oven to 350 before I start the timer! I think that will take care of that little problem. But, this bread is delicious and easy, and I started baking more of my own bread! I also tried some other sourdough recipes, and I even got my neighbor started with some starter of her very own!
    I am sold and converted. Now I’m a real, live cowgirl with real, live sourdough starter in the fridge. Howdy, Virgil. Thanks for coming into my life! I know we’ll make some beautiful things together.
    Grace’s Sourdough Bread
    1/2 cup oil
    1 cup sourdough starter
    1 teaspoon salt
    1 1/2 cups warm water
    1/2 cup sugar
    5 cups bread flour
    1 cup whole wheat flour
    3 tablespoons wheat germ

    Combine all ingredients in a large non-metal bowl. Stir everything together, adding more bread flour as necessary to create dough that’s no longer sticky. Transfer the dough into a second non-metal greased bowl.

    Roll it around so the entire ball becomes glorious, set it in a warm place, cover it with sprayed aluminum foil…and watch it grow for about 12 hours.

    After 12 hours, punch down the dough once, right in its middle. Turn it out of the bowl onto a floured surface and knead it a few times.

    (Although Grace divided her dough into three, I only felt like I had enough for two loaves this time).

    Divide the dough into two or three even hunks, and knead each a bit more. Place the dough into greased loaf pans.

    Place the pans in the oven, cover with sprayed foil, and leave to rise again for around 8 hours.

    Grace says: Just FYI, the pans are put into the oven to rise so they don’t have to be moved later and risk collapsing.

    After the second rise, remove the foil and bake the dough at 350 degrees for about 25 minutes. Preheat the oven before you start the timer!
    Don’t forget to visit me at The Bad Girl’s Kitchen for more fabulous recipes!

    GLAZED SESAME CHICKEN STIR FRY

    Food around here has been a little bland and colorless recently.  So, I wanted to spice things up a bit and this recipe did the trick.  Everyone dug in and had seconds too.

    GLAZED SESAME CHICKEN STIR FRY
    1 pound chicken breasts, poached and shredded
    1 red pepper, diced
    3 green onions, sliced thin
    2 cloves garlic, minced
    2 cups broccoli florets, blanched 2-3 minutes
    1 cup pineapple juice
    1/2 cup hoisin sauce
    1 tablespoon sesame oil
    2 tablespoons cornstarch
    2 tablespoons soy sauce
    1/2 pound spaghetti noodles, prepared al dente’

    • Heat wok or skillet to medium high. 
    • Add oil and coat pan well.
    • Add bell pepper and garlic and cook until pepper is tender.
    • Whisk together the pineapple juice, soy sauce, hoisin sauce and cornstarch.
    • Add to the wok. Cook 2-3 minutes, stirring well.
    • Add chicken.
    • Add broccoli tossing well.
    • Cook until sauce is slightly thickened.
    • Add noodles and toss well.

    HOT WING SALAD aka VOODOO CHICKEN SALAD

    Do you facebook?  I have to admit I did until this.  But, I digress, I played a few of the games while sitting on hold or watching TV late at night.  One of the things that came to mind on CAFEWORLD was, “are these real recipes?”  I did find a recipe for VOODOO CHICKEN SALAD, but it was nothing like I expected so I am making my own!


    HOT WING SALAD aka VOODOO CHICKEN SALAD
    Romaine Lettuce, torn and washed
    1 large Heirloom tomato, diced
    1 small red onion, sliced thin
    4 boneless, skinless chicken breasts, cut into bite sized pieces 

    2 cups Flour
    1 teaspoon salt
    1 teaspoon pepper
    hidden valley ranch dressing mix (DRY) OR Good Seasons Italian dressing mix (DRY)

    1 teaspoon lime juice
    2 teaspoons lemon juice
    1/2 cup crumbled Bleu Cheese
    • I prepare the chicken breasts the same as you would HOT WINGS
    • Preheat oven to 350 degrees
    • Wash and dry the chicken pieces.
    • Mix together the flour and seasonings in a plastic ziploc bag. Using a ziploc bag makes it easy to throw away the whole mess after dredging all the chicken pieces and it helps you coat every possible spot of the chicken pieces.
    • Add chicken a few pieces at a time and coat them well. Set chicken pieces aside.
    • While you’re doing this, have the butter melting in the pan. Start with 4 tablespoons and add as necessary, but make sure you don’t run out dry.
    • Once all the chicken has been dredged start frying. After you have the pan full pepper the pieces again. Don’t turn the chicken until you can see blood. You only need to turn the chicken one time. Brown evenly and then set aside on paper towels until all pieces have been fried.
    • As the last batch is frying melt 4 tablespoons of butter in a flat bowl. To that add 1/2 cup of Frank’s hot sauce.  Whisk them together well.
    • Spray a cookie sheet with PURE.
    • Dip each piece of chicken into the hot sauce mixture and put on cookie sheet.
    • After you’re all done and if you have hot sauce & butter mixture left, pour a little over the top of each wing.
    • Bake for 30 minutes.
    • Toss the torn lettuce, onion and tomatoes with the lemon and lime juice.
    • Add cooled chicken pieces and bleu cheese crumbles.
    • Pour on the desired amount of dressing and toss well.
    • Enjoy!

    PORK CHOPS with RED PEPPER SAUCE

    Hi Tamy here just filling for Simple Saturday.

    Roasted Red Pepper Sauce
    1 tablespoon olive oil
    1/2 medium Vidalia onion, finely diced
    3-4 cloves garlic, minced
    1 1/2 cups roasted red peppers
    1/2 cup fresh basil
    1/4 cup white wine
    1 tablespoon butter
    1 tablespoon  flour
     3/4 cup whole milk
    1 cup Gruyere cheese
    grated Parmesan cheese and basil for topping
    salt and pepper to taste
    • In a medium sauce pan, heat olive oil over medium heat.  Add onions and garlic and cook until onions are translucent and garlic is fragrant, 5-7 minutes.  Add in red peppers and basil, continuing to cook until peppers are heated through.  Stir in white wine and continue to cook for one more minute.  Remove from heat and let cool for a few minutes.  Carefully pour into a food processor.  Turn on food processor and let run until pepper mix is creamy and only has small lumps.  Set aside.
    • Rinse out the medium sauce pan and add in the butter over medium heat.  Once butter has melted, whisk in flour and continue to cook for 1-2 minutes.  Whisk in milk, stir constantly, and continue to cook until the sauce begins to thicken.  Remove from heat and stir in cheese, continually stirring until cheese has melted.  Stir in pepper mixture and return to stove stop.  Over medium low heat, return sauce to a warm temperature to serve.
    • To serve, pour over your choice of pasta and top with the Parmesan cheese and more fresh basil.
    Tonight I sliced a few potatoes into a pan.  Salt and peppered them well, Tossed a few pieces of white American cheese over the potatoes.  Topped them with browned some pork chops.  Poured the sauce over top and baked at 350 degrees for an hour.  The guys all but licked their plates!

      Try a New Recipe: Min’s Pork Chile Verde

      For a while, we had a Schwan’s delivery guy who said he used to be chef. He said he was “Irish-Mexican” and that his dream job would be cooking on a ranch like ours. He was large, round, friendly and nice, and we talked quite a bit about food. He shared the ingredients for his “secret” Green Chile, and I wrote them down. I didn’t write down the technique, amounts, or anything else, so the first time I made this, I winged it. For a last-minute dinner for 14 hungry cowboys. Everyone loved it!

      This is a nice, filling stew, perfect for a fall day.
      Just so you know, here are all the notes I started with:
      Green Chile
      chicken stock
      roasted green chiles
      chicken bouillon
      cumin
      mexican oregano
      pork sirloins or chicken
      cornstarch to thicken (don’t if freezing)
      pureed tomatoes
      And that’s all I got. He said that green chile is “peasant food” or something to that effect, and that he used to make and serve it in a restaurant where he cooked. He also said something about feeling okay to share the “recipe” with me because I live in the middle of nowhere, basically “who are you going to tell?” Ahem.
      But, you know, I made this up as I went along, and I also added more ingredients, and completely improvised the method. So it’s not really like I divulged any big secrets here. I don’t think, anyway, given the end result.
      I pulled a 5-pound package of pork loin ribs out of the freezer, but didn’t realize that they were not boneless, but that’s all I had. That’s okay, since I was cutting the meat up anyway, I just had an extra step of removing all the bones. Incidentally, the slab of meat wouldn’t fit into our microwave for defrosting, so I did it a different way: I stuck it into the biggest frying pan I have (it didn’t all fit, some was sticking over the edge), put a cup of water in the pan and perched the lid on top of the meat. I turned it on medium to sort of “steam-thaw” it until I could get the ribs apart and cut them into bite-size pieces. It worked pretty well, I just tried not to cook the meat very much in the process. It would be much easier with advance notice (instead of, “Do you think you could make dinner for us tonight? There are 14 of us”) and having meat that was thawed.
      Yesterday, I used boneless country pork ribs that I had already thawed, so I didn’t have any pork “broth.” I just used all chicken broth instead.
      And although this started out to be a somewhat “authentic” Chile Verde, it ended up being something quite different. I embraced the “peasant food” label and ran with it, boiling and straining the pork rib bones for broth, adding ingredients that we had in the pantry to extend the recipe when I didn’t think it looked like enough to feed 14.
      It was a bit too spicy for the kids…If you’re concerned about it being too spicy, just leave out the can of jalapeños and reduce the cumin.

      Don’t forget, this recipe serves 14 with some leftover. You can half the amounts of everything if you wish, although it’s sooooo good, I don’t know why you would. Also, I always always forget to add the tomatoes at the end. I’m going to go ahead and call them “optional.” =)

      Min’s Pork Chile Verde Stew
      serves about 14
      Butter
      Olive oil
      5 pounds boneless pork ribs
      1 cup flour
      1 1/2 yellow onions, diced (about 2 cups)
      2 carrots, peeled and cut in 1/4-inch dice
      4 cans chicken broth (2 cans if using pork “broth”)
      7 cubes chicken bouillon
      4 4-ounce cans fire-roasted diced green chiles
      1 4-ounce can fire-roasted diced jalapeños
      6 to 8 red potatoes, washed and cut in 1/4-inch dice
      1 can garbanzo beans
      1 can whole kernel corn
      1 tablespoon cumin (or to taste)
      2 teaspoons Mexican oregano, crushed
      1 can diced tomatoes (optional)
      Kosher salt and freshly ground pepper to taste
      Pour flour into a large ziploc bag. Cut pork into 1/2-inch pieces, add to ziploc bag, seal and shake to coat. Starting with two tablespoon each, add butter and olive oil to a large soup pot over medium heat. Remove pork from flour with a slotted spoon, and fry in butter and oil until golden brown and cooked through, stirring occasionally. Remove cooked pork to a plate, and repeat until all pork is cooked and on a plate, using more butter and oil as necessary in equal amounts.
      Add diced onions to the pan, along with an additional tablespoon each of butter and olive oil, if necessary. Saute over medium-low heat until onions are translucent. Add carrots, stirring in and cooking for a few minutes. Add chicken and pork broth, and chicken bouillon cubes. Return pork to the pot.
      Add everything else except tomatoes, salt and pepper, and stir well. Reduce heat to low, and simmer until potatoes are tender. Stir in tomatoes and warm through. Taste and adjust for spices, add salt and pepper if needed.
      Serve with tortillas or crusty bread on the side and plenty of Corona.
      Don’t forget to visit me at The Bad Girl’s Kitchen for more fabulous recipes!

      THE DIFFERENCE BETWEEN ANTI VIRUS & INTERNET PROTECTION aka drink your OJ or take antibiotics & HOW FACEBOOK COST ME OVER $200 & DECADENT CHOCOLATE BROWNIES to make it all better!

      I originally wrote this post for a sister blog, THE Motivation Station, but thought it should be repeated to help make more people aware.  In the end it turns out that the virus was still transmitted via email via facebook from an unwitting family member (they don’t even know who they are).  There are some ugly computer viruses going on right now and they can cost you serious time and money.  I was without a computer and even a telephone since I use a VOIP for over 10 days total.  I lost data and peace of mind.  Knowing that I ran a top of the line internet security protection suite was of little solace in the end.  Knowing that large corporations are also being hit with the same virus only increased my sense of vulnerability.  Don’t take these things for granted and check your own system regularly.  Run daily scans and DO NOT OPEN anything remotely questionable whether you know who it came from or not – trust your gut.  I have yet to return to facebook on my computer and probably won’t, just not worth the risk.

      So did you know there was a difference?  Yep, there is a difference.  Do you know what it is?  You’re not alone if you don’t, most people don’t.  I recently took my OLD computer into Best Buy for a check up and optimization.  After the diagnostic, they told me all I needed was an optimization to clean up old temporary internet files and “stuff” to help speed it up.  I run a top of the line anti-virus/internet security suite protection that the Geek Squad told me was working well.  They also told me the optimization would take an hour.  It took 7.  Then just a week later I was back.  My operating system had frozen up.  Now Best Buy and I have come to an agreement as of just this morning, but I was promised a computer on Wednesday mid-afternoon.  I picked it up Friday morning.  It was a comedy of errors that almost had a tragic ending and all because the particular members of this particular Best Buy’s Geek squad have the communication skills of a gnat and the integrity of the dirt on the gnat’s feet, but I digress.  My conversation after the initial diagnosis went something like this:

      **He told me, “You have a virus.  Looks like it’s from a gaming site.”
      I said, “I don’t visit gaming sites.”
      He asked, “Do you use facebook?.”
      I said, “Well sure, doesn’t everybody?”
      He said, “Probably, but do you play their games, or watch you tubes?”
      I said, “A few when I’m on hold or late at night watching TV.
      He said, “That’ll do it.”
      I said, “But isn’t facebook safe?”
      He said, “For the most part, but the games and videos are separate entities, not always related to facebook,”
      I said, “Why didn’t my virus scan catch it?”
      He said, “You should also be running internet security.”
      I said, “I thought I was.” “In fact I am.”
      He said, “Yeah I see that now, top of the line too.  In that case I don’t know why it didn’t catch it.”
      I asked, “How long will it take?”
      He said, “Somewhere between 2-24 hours.  It’ll be ready tomorrow afternoon”

      They promised to call and let me know when it would be ready on Wednesday morning.  Late Wednesday afternoon, I called them.  I was told the guy from the previous day didn’t understand the “scope” of the problem and it would be a few more hours, but she’d call me and let me know when I could pick it up.  Wednesday night came and went.  Thursday morning came and went.  I was trying to be patient!  But by Thursday evening my patience was worn thin and I showed up at their counter.  Now the guy I spoke with on Thursday evening was very sincere, nice and honest.  He also called me several hours later to keep me informed, but I still went home without my computer because it had several more hours to go.

      My big problem is with the **guy who came out while we were talking, who listened to everything that I was saying and never once offered up that he was the guy I spoke with on the phone on Tuesday that set all the errors in motion, henceforth now known as the “problem child with no integrity”.  I also have a problem with the girl whose defense was that she emailed me the progress.  HELLO?? anyone home in there?  How did she expect me to check that email?  And why do they ask for a primary number to contact you at if they have no intention of using it?

      When I picked up the computer, the Geek Squad supervisor happened to be on duty and we had a nice long chat.  Let’s just say he agreed with everything I had to say about their communication skills and integrity and he even took notes.  He then also split the difference on the very expensive repair and thanked me for giving him the necessary information he needed for better training and dealing with a “problem child” on his crew. He also told me that there are many new viruses that are piggy backing many otherwise reputable sites.  The biggest culprits are:

      • You Tube videos
      • Face Book, games especially! So be careful all you farmville fans!
      • Yahoo! search engines
      • and even Google search engines
      The best way to understand it:
      • Antivirus software detects and cleans out virus infected files while Internet Security is a suite of applications that aims to protect users against threats from the internet while visitng internet sites.
      • Internet Security suites usually include an antivirus application among their other programs.
      • Internet security suites commonly includes a firewall, anti malware, anti spyware, and email protection programs.
      • Internet Security suites often cost more than stand-alone antivirus applications. So spend the money, it will be well spent!
      • Read more details here TREND MICRO.
      Or for the simple analogy:  anti-virus is an antibiotic after you get the disease whereas Internet security is the multiple healthy steps to prevent the disease to begin with. 

      And for those of you who are thinking what about using a MAC.  I also looked into MAC ‘cuz everyone keeps telling me they don’t get viruses which is a misnomer from what I read.  They should just add a big YET onto the end of that sentence.  The virus programmers just haven’t become proficient yet in writing for MAC.  There are MAC viruses out there.

      Now for the good stuff:

      DECADENT CHOCOLATE BROWNIES (make 4 ramekins)
      2 Tablespoons butter + 1 Tablespoon butter
      1 ounce Baker’s Bittersweet Chocolate
      1 ounce Baker’s Semi-Sweet Chocolate
      1 1/4 ounce Baker’s sweet German chocolate
      1 Tablespoon + 1 teaspoon flour
      1/8 scant teaspoon baking powder
      1/8 scant teaspoon salt
      1 egg
      1/4 cup sugar

      Melt 2 tablespoons butter in microwave safe ramekin for 30 seconds, add the bittersweet & semi-sweet chocolate and microwave in 30 second increments until you can stir it smooth. Set aside to cool slightly. Sift together the flour, salt and baking powder. Mix together the egg and sugar and beat on high with a hand mixer until slightly thick and turns a dull yellow. Lower speed and add chocolate mixture to egg mixture. By hand stir in the flour mixture until consistent in color. Spoon into ramekins and bake on cookie sheet for 25 minutes or until centers are set. Just after you put these in, prepare the topping. Melt the other tablespoon of butter and then add the German sweet chocolate and melt until you can stir smooth. Just after the brownies come out of the oven, pour the topping over.
      WARNING: THESE ARE RICH & DECADENT!

      aprons 3

      CHICKEN FRIED CHICKEN with PEPPER GRAVY & FAMILY FAVORITE MASHED POTATOES

      CHICKEN FRIED CHICKEN
      2 large boneless chicken breasts
      1 cup buttermilk
      1 cup flour
      1 teaspoon salt
      1 teaspoon pepper
      2-4 tablespoons butter (enough to keep chicken from burning~add as necessary)
      • Rinse and pat dry the chicken breasts.
      • In a shallow glass pan, pour buttermilk over chicken 1-2 hours prior to cooking.
      • Make sure to coat chicken well and turn at least once during soaking.
      • Drain, but do NOT rinse the buttermilk off.
      • In a medium sized skillet melt the butter over medium heat. As butter melts and begins to very slightly sizzle, prepare breasts.
      • In a small ziploc bag mix together the flour, salt and pepper.
      • One at a time, put each chicken breast in bag and coat well with flour mix and then into sizzling butter.
      • Cook on one side until edges begin to bleed and then turn.
      • About 6 minutes each side depending on plumpness.
      • Keep chicken warm.
      PEPPERED GRAVY
      3 tablespoons butter
      5 tablespoons Wondra flour
      1 1/4 cups whole milk
      3/4 cup whipping cream
      3/4 teaspoon salt
      1/2 teaspoon Black pepper + (to taste)
      • Melt butter into bottom of pan you just cooked the chicken in.
      • Scrape up any of the chicken pieces and mix into new butter.
      • Add flour slowly, stirring until absorbed by butter and golden brown.
      • Slowly add first the milk and then the cream.
      • Stir constantly until thickens.
      • If necessary sprinkle in more Wondra until desired thickness is reached.
      • Serve over chicken and mashed potatoes.
      FAMILY FAVORITE MASHED POTATOES
      4 large Yukon potatoes, peeled & quartered
      4 ounces Philadelphia Cream Cheese, softened

      1 small bunch green onions, sliced thin

      1/4 + buttermilk
      4 tablespoons butter
      salt & pepper to taste
      • Boil potatoes in salted water until fork tender.
      • Drain.
      • Mash all together, salt and peppering to taste as you go. 

      MEXICAN SWISS STEAK

      Hi Tamy here filling in for Min today which works well with her theme, Try a New Recipe.  This recipe is the perfect Try A New Recipe.

      I recently had a thrift store find beyond belief.  An old recipe box full of old hand written recipes.  I estimate they are from the 50-60’s era when women passed around recipes at morning coffee, tupperware parties and PTA meetings.

      This recipe called for either a can of diced tomatoes OR a can of cream of chicken soup for a creamy version.  I decided to amp it up a bit and added a can of Rotel diced tomatoes with green chiles and changed the soup from chicken to celery.  What resulted was an extremely tender and spicy round steak in its own gravy.
      MEXICAN SWISS STEAK
      2 pounds round or swiss steak, 3/4 inches thick
      1 large Vidalia onion, thinly sliced
      1 pound can tomatoes OR 1 can cream of chicken soup
      1 can ROTEL tomatoes with green chiles
      1 can cream of celery soup
      salt & pepper to taste
      • Salt and pepper each piece of meat.
      • Cut meat into serving size pieces
      • Whisk together the soup and tomatoes until well blended.
      • Layer meat, onion rings and soup several times in crock pot.
      • Cook on low 8-10 hours.

      I served it with Potato casserole and the guys wolfed it ALL down!

      DON’T FORGET!
      It’s PARTY time here at OUR KrAzY kitchen.
      LUAU badge
      Be sure to link up on the sidebar to join the party.

      PEACH BBQ RIBS

      3 pounds cut spareribs
      1 can Peach Comstock*
      1 cup Sweet Baby Ray’s hickory smoke BBQ sauce**
      Juice of 1 lemon
      salt and pepper 
      1 tablespoon Frank’s hot sauce

      • Sprinkle ribs with salt and pepper; rub well. 
      • Place in baking dish and top tightly with foil, shiny side in.
      • Bake at 400 degrees for 1 hour, reduce heat to 375 degrees for an additional 30 minutes. 
      • Pour off any excess liquid. 
      • In the meantime pour peach Comstock into a food processor and puree.
      • Add BBQ sauce, hot sauce and lemon juice. Pulse until well blended.
      • Remove from oven, brush meat with sauce, turn, brush sauce on other side. 
      • Bake at 375 degrees with foil loose and open 30 minutes.

      *Cherry works great too!

      **or any other favorite brown sugar based sauce – I’m allergic to mustard so Sweet Baby Ray’s is about the only prepared sauce on the market I can use.  I really prepare to make sauce fresh.

      HOMEMADE DING DONGS, HO~HO’S or what we like to call CHOCOLATE HEAVENS

      3 squares unsweetened chocolate

      1 1/2 cups sugar
      1 teaspoon ground cinnamon
      1 teaspoon baking soda
      1/2 cup butter, softened
      2 Jumbo eggs
      1 cup whole milk
      1/2 cup apple juice
      2 teaspoons orange juice
      2 cups flour
      1 jar marshmallow cream
      1 cup heavy whipping cream
      1 bag milk chocolate chips
      • Heat oven to 325 degrees.
      • Generously grease a 9×13 pan.
      • Melt the chocolate in the microwave. Then add 1/2 cup of the sugar, the cinnamon and 1/2 cup of the apple juice, stirring until the sugar is dissolved. Cool.
      • Mix the baking soda into 2 teaspoons of orange juice.
      • In a large mixing bowl cream the butter with 1 cup sugar. Add eggs one at a time, beating well after each.
      • Alternate the milk and flour, sifting the flour into the cream mixture and blend until smooth.
      • Add the baking soda mixture and blend well.
      • Add the cooled chocolate mixture and blend well.
      • Pour the batter into the prepared pan.
      • Level pan by dropping on counter top to remove air bubbles.
      • Bake until springy 55-60 minutes.
      • Cool thoroughly and then invert onto platter.
      • Cut into desired shapes and sizes.
      • Slice each in half.
      • Spread marshmallow cream over bottom half and replace tops.
      • In a small sauce pan melt chocolate.
      • Whisk in heavy cream and heat until thickened.
      • Pour over tops of cakes.
      • Cool.