Now for some  really fun news.  OUR KrAzY kitchen turns one year old in just 3 weeks on June 27th.  We would love for you to join us as we throw ourselves a birthday bash.  On Simply Delicious Sunday we will have a link for you to add your favorite recipe for birthday cake or whatever.  The KrAzIeR the better.  Be sure to join us and celebrate!

aprons 3

Chicken and Onions in White Wine Cream Sauce

4 boneless, skinless chicken breasts
1/3 cup flour
1/2 teaspoon salt
1/2 teaspoon white pepper
1/4 cup butter
2 tablespoons olive oil
1 small white onion, sliced and split into rings
1/3 cup white wine
2 tablespoons dried parsley
3/4 cup whipping cream

In a shallow bowl sift together the flour, salt and pepper. Coat chicken with flour mixture and pat firm caking the flour into all the crevices. In a large skillet heat together the butter and olive oil. Saute’ the onion rings until browned and beginning to caramelize. Add the chicken and cook until brown on both sides and cooked through. Remove the chicken and onions and set aside. Add the wine and cook for 2 minutes until heated through. Add the parsley and whipping cream, cooking over low heat until sauce thickens. Serve over chicken and mashed potatoes. Top with the onions.
Now for the really fun news.  OUR KrAzY kitchen turns one year old in just 3 weeks on June 27th.  We would love for you to join us as we throw ourselves a birthday bash.  Right here on Simply Delicious Sunday we will have a link for you to add your favorite recipe for birthday cake or whatever.  The KrAzIeR the better.  Be sure to join us and celebrate!

Basil and Pine Nut Pesto

If you could bottle up the smell of summer.  Save it for one of those rainy days in the middle of winter.  When nothing seems to be going right and seasonal affective disorder has officially sunk in.  What scent would you choose?

Me personally?  I would want basil pesto.  I would want it to ooze out of my every pore so that I could smell nothing else for days.

I would want to be able to pull out a jar of it.  Open it up.  And be instantly hit with the smell of sweet basil laced with garlic.

And I wouldn’t stop there.  I would want to taste it, because isn’t taste linked to your sense of memory as well?  Pesto and tortellini salad with tomatoes, fresh mozzarella, and black olives.  Pesto, tomato, and grilled cheese panini.  Pesto pizza.  Pesto on a spoon.  Eaten just because.  Just so.  Just.

Pesto.

Pesto is probably one of the simplest sauces you can make and also one of the most versatile.  You can make it with basil and pine nuts.  A classic.

Or you can go slightly insane.  As I have.  Many a time.  And mix and match your herbs and nuts.  Just about anything goes.  Basil and pistachio.  Basil and walnuts. Cilantro and pine nuts.  Rosemary and walnuts.

Just keep the ratios about the same.  And go wild.

Do a little dance.  Make a little love.  Get down tonight.

Basil and Pine Nut Pesto
1 large tub basil (I would say about 2-3 cups)
4 cloves garlic
1/4 cup pine nuts
1/2 cup parmesan cheese
2 tbsp olive oil
salt and pepper to taste

Combine all ingredients in a food processor.  Process until smooth.  Add salt and pepper to taste.

NOTE – this freezes incredibly well.  Just omit the parmesan cheese and you’re good to go!

Beans Don’t Burn In The Kitchen, Beans Don’t Burn on The Grill

Barbecue baked beans are as common a visitor to the summer picnic table as ants are. Of course, the beans are more welcome.

Trevor was helping smoke some spare ribs last weekend on his offset smoker, so I thought I’d make some beans to go with them.


There are an infinite number of BBQ baked bean recipes but this is the quick and easy version my mother taught me eons ago.

Easy BBQ Baked Beans
My momma

1 28 oz can Bush’s Baked Beans (Homestyle)
1/2 cup sweet BBQ sauce (I prefer Blues Hog brand for this)
1/4 cup yellow mustard
1/4 cup brown sugar
1/2 ea onion, diced (or in this case, a boiler onion sliced into rings)
1 Tbs BBQ rub (Whatever your favorite one is)
1 TBS Worchestershire sauce
1/2 cup chopped BBQ pork or brisket

Mix all ingredients in a small casserole dish and bake for 1 hour at 350f.


Like I said, quick and EASY.

For me, I have to have meat in my beans, it just isn’t the same with out it. I also like more of a spicy kick but the one I listed here is very mild for my family.

What do you like to put in your baked beans?

Seafood Enchiladas Ala My Year on the Grill


It’s been 3 weeks in the making, but today I am finally going to finish telling the tale of my Mexican influenced meal of Spanish Rice, Fresh Caribbean Tomato Salsa and these beauties… Cheesy, Spicy, Rich Seafood Enchiladas…


While it has taken 3 weeks to explain the single meal, I am learning that cooking is not about following a recipe, it is about building on the skills and knowledge you have.  Without being able to make chicken stock, I could not have made the Spanish Rice as rich.  Without making my own herb mixture of not your Grandmother’s HERBES de PROVENCE, my Caribbean Tomato Salsa would not have such a depth of flavors.


And if I did not make my own Cajun Spiced Rub Mix, I could not make the Blackened Tilapia that I used to stuff the enchiladas with.  It sounds all complicated and time consuming.  Click on all of those blue lettered links and you will see hours worth prep time and many dollars worth of ingredients.  But my Herbe and Cajun mixtures, as well as my chicken stock are all made in advance (and are all multi recipe ingredients, so having them on hand for months cuts the prep time per recipe down considerably.  The salsa can be cut up while the rice is boiling, and the tilapia cooks so fast, it practically cooks itself.  Everything comes together in a complicated sounding recipe, when in reality, a series of small easy steps makes an outstanding meal…


But I am ahead of myself… 


First the seafood stuffing…


Click HERE for the details of how I make Blackened Tilapia.  


Fried in butter, with seared spices makes this a flavorful fish.  The cooking method insures a moist tender fish. Overcooked rubbery fish is my personal buggaboo.  By cooking a thin piece of Tilapia, it takes only 5 minutes start to finish to make this.  Once it is done, remove the fish, but add some of the small salad size popcorn shrimp to the remaining butter sauce to add another taste to the enchiladas.


Cut the fish into small pieces (about the same size as the shrimp).


While that is cooling, I worked on the cream sauce…


In the same pan that I blackened the fish in (don’t want to waste the spiced butter in the pan), add…


1 cup Heavy Cream
1 cup Whole Milk
1 cup White Cheddar Cheese
2 TBS not your Grandmother’s HERBES de PROVENCE
1 cup Caribbean Tomato Salsa


Heat the Cream and Milk, add the cheese and stir till well mixed and the cheese is melted.  Add the Salsa and spices.


And now we are ready to assemble our enchiladas (finally)…

  1. Take a 9X12 baking dish, spray with Pam
  2. Set up an assembly line of Tortillas. Spanish Rice, mixture of the fish and shrimp, and some of the Caribbean Tomato Salsa.
  3. Lay out a tortilla, add 1/2 cup of the fish, 1/4 cup each of the rice and salsa.
  4. Roll up the tortilla and place in the pan
  5. Repeat and make 8 tortillas, stuffed into the pan side to side
  6. Pour all of the sauce over the tortillas… it will sink into the bottom of the pan, coating as it sinks.
  7. Top the enchiladas with a cup of grated yellow Cheddar Cheese and 1/4 cup of the Caribbean Tomato Salsa.
  8. Bake in pre-heated oven, 350 degrees for 30 minutes.


It sounds so much more complicated than it is.  Remember, a series of small steps to make something better than the pieces.


Well worth the effort!


Dave here from MY YEAR ON THE GRILL. Plan ahead, be a cook and you to can say…  

 … I CAN COOK THAT! 

And so can you!


Serve the whole meal (Seafood Enchiladas, Spanish Rice and Caribbean Salsa with a Pina Colada…


Come visit my site for an amazing recipe for this classic…


The Greatest Brownies EVER – Save Room for Dessert

Hello, everyone! Welcome to yet another trip to the land where all things are sweet…Save Room for Dessert!

Today I bring you a brownie recipe that fulfills what are, for me, the two most important rules for brownies:

1) Easy to make
2) Fudgy as all get-out

Yep, these brownies fit the bill and then some. 

The recipe is a snap!

You’ll need:

  • 1 cup (2 sticks) butter, melted
  • 3 cups white sugar
  • 1 tablespoon vanilla extract
  • 4 eggs
  • 1 1/2 cups flour
  • 1 cup cocoa powder
  • 1 teaspoon salt
  • 1 cup semisweet chocolate chips

First, preheat your oven to 350 degrees and grease a 9×13 pan.

Microwave the butter in a large bowl and add the sugar, stirring well to combine.

Add the eggs, one at a time, stirring well after each addition.  Once all the eggs are added, stir in the vanilla.

In another bowl, stir together the dry ingredients.  Then add the dry ingredients to the wet.

Time to break out the old elbow grease, my friends.  Unless you’re smarter than me and you use your stand mixer, if you have one.  I didn’t use mine.  And as we all know, brownie batter is thick!!

Finally, time for the best part:

Mmmmm…a cup of semisweet chocolate chips.

Just use them.  It’s your duty.  You’ll thank me later.

All of this gets spread around your pan…

And gets baked for 35-40 minutes.  I lean towards 35 because I love the fudginess – but it’s up to you!

Either way you’ll end up with gooey, yummy, decadent, fragrant and all-around wonderful brownies.  They’re pretty much to die for.  I’m serious.

Try them yourself!

BALSAMIC BERRY SAUCE

It’s shortcake season and I thought I would change it up a bit with this awesome BALSAMIC BERRY SAUCE.  I hope you like it.

1 tablespoon butter
1 cup fresh blackberries, pureed large
8 ounce can crushed pineapple, drained slightly
1/3 cup sugar
1 tablespoon balsamic vinegar

  • Melt butter in a large skillet over medium heat. Add the berries, pineapple, sugar, and balsamic vinegar.
  • Cook until the strawberries are heated through and darkened to a deep purple.
  • Spoon berries over shortcake or ice cream and serve.

aprons 3

Simple Saturday – Tabbouleh

Hello foodie friends! Martha here bringing you a simple Mediterranean salad this week. Have you ever had Tabbouleh Salad? It’s definitely a must try and it’s very easy to make. It’s a perfect light, cool, flavorful salad in the warm summer months.

Just combine about 2 cups diced tomatoes, 2 cups seeded and diced cucumber, 1 cup chopped parsley, 1/2 cup cooked bulgar wheat, (chopped onion is common in this salad but optional). Squeeze the juice of 1-2 lemons over veggies, add salt and pepper to taste. Mix all ingredients together, cover and refrigerate for several hours.

This is a great salad to serve with falafel or wonderful served with hummus and pita for a nice light meal. I always feel healthy and refreshed after eating this, it’s one of my favorites. Give it a try!

Don’t forget to visit me at my food blog Seaside Simplicity and every Monday at The Motivation Station.

Have a great weekend, and please don’t forget to observe the real meaning of Memorial Day this weekend!

FDF – Grilled Fajita Chicken Stuffed Burritos

It’s Fire Day Friday on Memorial Day Weekend so I hope everybody is breaking out their grills!
Want to do something easy but different on your grill? Try taking your favorite burrito recipe and finish it on the grill. It’s way better than Taco Bell’s grilled stuffed burritos, I can promise you that. It’s also flexible because you can put whatever you want in yours.

The one I made last night was simply some grilled fajita chicken, rice, onions, cheese, and smashed kidney beans. Here’s the easy fajita chicken recipe if you want to try it. I only used two of the breasts for a total of 5 burritos.

Grilled Fajita Chicken
Serves 4

4 ea chicken breasts, boneless, skin on
1 cup beer
1 cup Herdez Salsa Casera (you can substitute Rotel)
1/4 cup lime juice
1/4 cup vegetable oil
2 cloves garlic, minced
1/4 tsp black pepper
1/4 tsp cumin

Mix all of the ingredients (except chicken) for your marinade.

Marinate the chicken in a gallon zip bag for 4 – 6 hours.

Grill over a 350f fire, flipping every 5 minutes until the breast hit an internal temp of 160f. For me, this takes right at 20 minutes.

Slice and serve.

Like I said, use whatever fillings you want for your burrito. But for me, I do like to mix all of my ingredients up together and then put them in my burrito. You can build it in layers if you like, but I don’t like when I bite into one part of a burrito and get just beans and then bite another part and get just cheese. That’s just a personal preference.

To roll the burrito…

Fold 1 down.
Fold 2 up.
Lift 3 and fold over the mixture, tucking ends in.
Roll to the end 4.

What? You’re flour tortillas don’t come with dotted lines on them? 🙂

Make sure that your grill grate is very clean, you don’t want icky black stuff on your burritos. You could also just do this on a flat top griddle or a hot cast iron pan.

Place the burrito seam side down on the hot griddle. Give it a slight press with a spatula to flatten it just a touch. If you just cooked the chicken at 350f, your griddle plate should be just the right temperature.

Cook for 2 minutes, just until the burrito gets crispy like this.

Flip and cook another two minutes on the other side.

Serve with pico de gallo or guacamole and enjoy!

I think the toasting of the tortilla makes grilled stuffed burritos just a little more flavorful and it adds texture to an otherwise boring tortilla.

Caribbean Salsa – Eat better, eat healthier, Eat fresher, Eat tastier

Everybody paying attention?  In the spirit of my chosen OKK assignment, I CAN COOK THAT, last week I gave you a cooking… truth.  Menu planning is much more than a long shopping list for a week.  In fact, menu planning should be more about using what you buy for the best tasting, freshest tasting, healthiest for you and your family; food on your table week after week, without wasting a gram of food.  Nothing goes into the trash till you have extracted everything possible from what you buy.  Like last week…and the week before… When I bought a rotisserie chicken, ddn’t throw the bones away, but made a fresh Chicken Stock that I used to make an incredibly rich and flavorful 
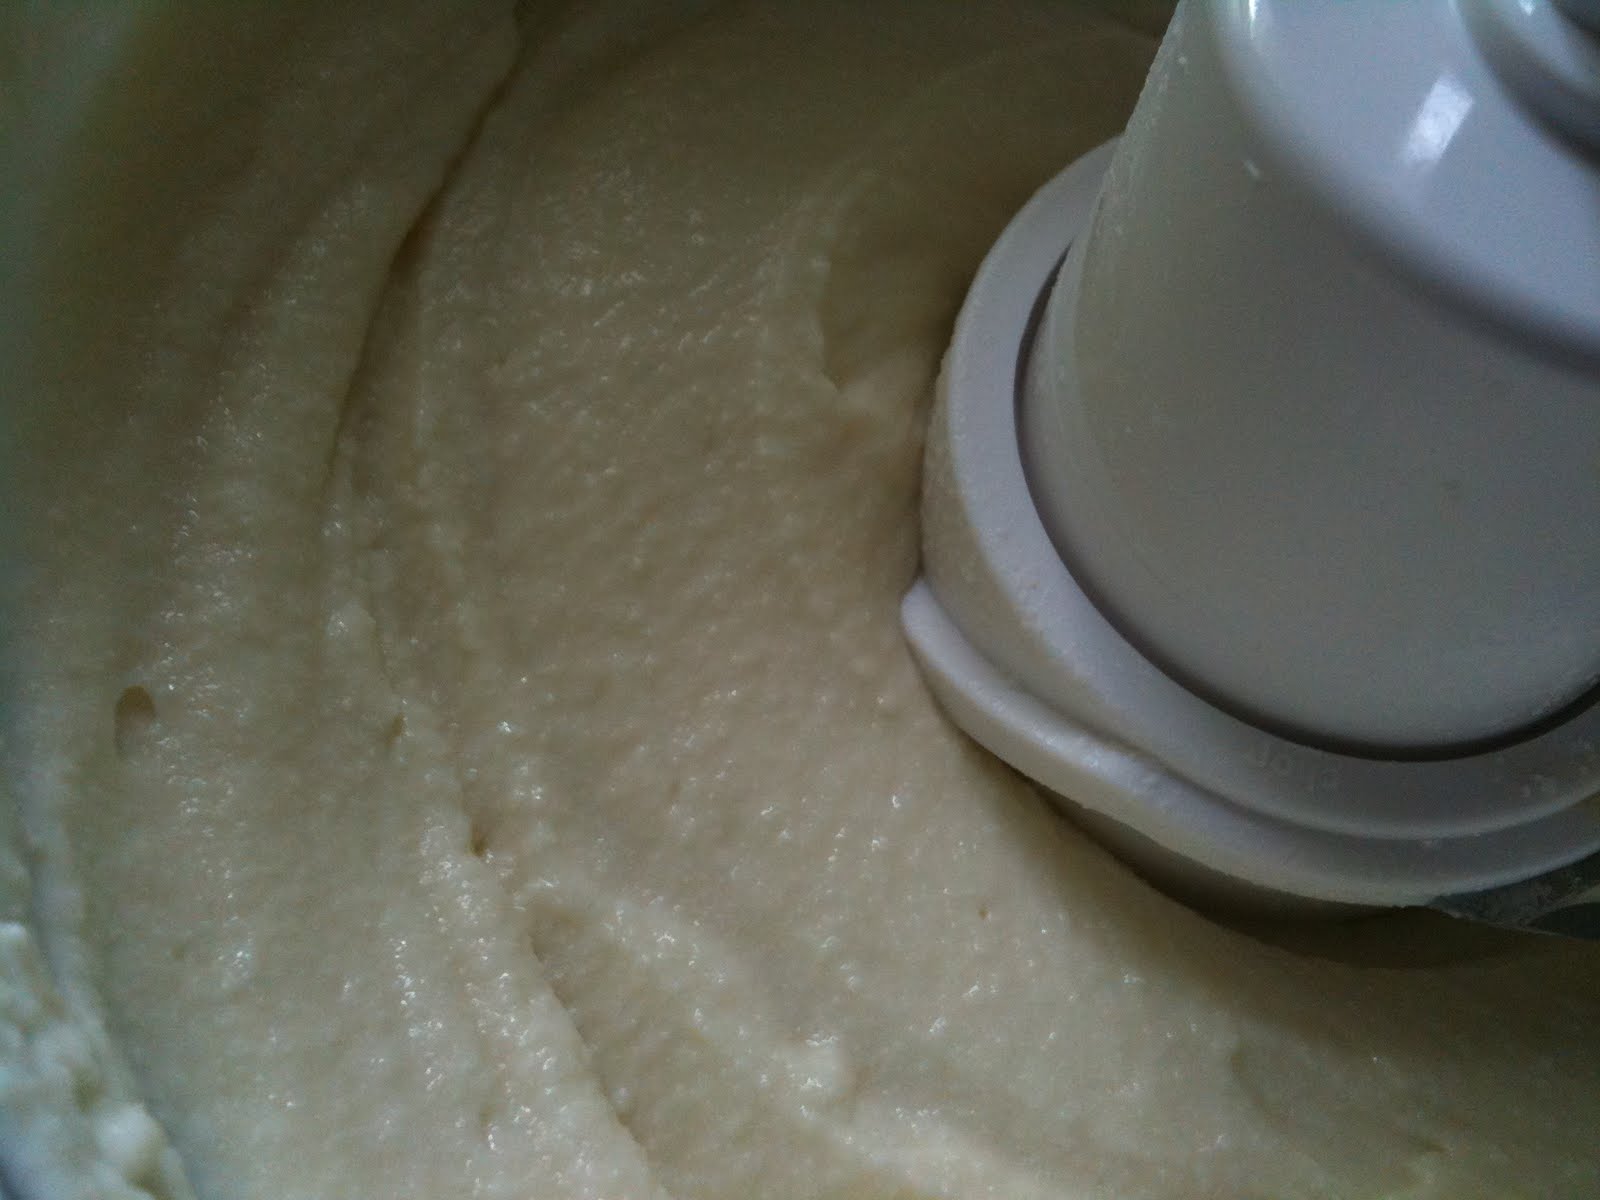
Spanish Rice.  In order to make Spanish Rice, I needed to buy onions and red peppers.  I could buy onions and red peppers cheaper if I buy 2 or 3 of each prepackaged by the store.  Sure, these are usually on the far side of still fresh, but close to borderline; and sure, these usually have a bad spot or two hidden by the packaging you don’t see till you get home; BUT, these are to be diced up and cooked same day you buy them.  Cut around the bad spot and dice away… and use up everything you buy.

And SALSA!  what a great way to use up veggies.  Make your own, it is very fast, and much healthier than the stuff you buy in the jars.  Read the ingredient list… why is there sugar in a salsa???  and what are those preservatives for… why artificial coloring???  Why all those words with more syllables than there are letters in O-N-I-O-N???  And salt… don’t get me started on salt…  More often than not, salsa is offered to be scooped up by SALTED chips.  You don’t need all that salt.  I know I don’t.
But if not with chips, how about a nice side of fresh salsa (without chips, it can be called a diced tomato side dish if you like), served with Spanish rice and a seafood enchilada…

And while we are using up the red pepper and onion that you bought to flavor the Spanish Rice you were making because you had extra fresh made chicken stock, let’s make this a Caribbean Salsa by using up that pineapple that you bought in order to garnish your wife’s rum drink.
Here’s what I did…

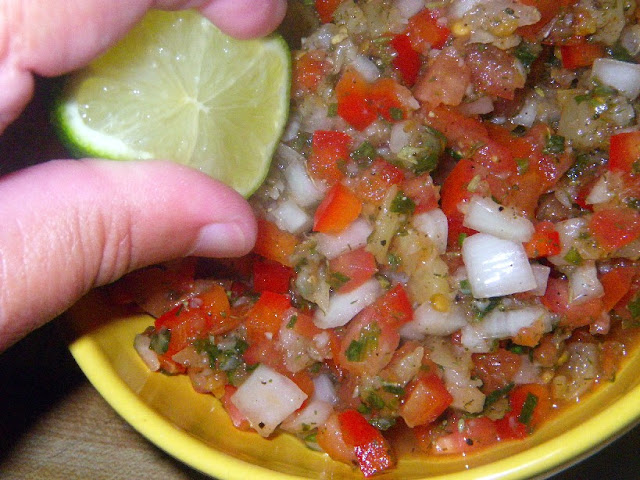
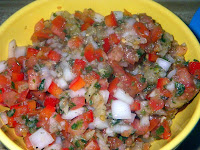
My salsa recipe is a matter of proportions.  You don’t have to measure accurately to the smallest gram weight.  If you have a little more onion, fine, if you have a little less pineapple, fine, but here’s how to make it in what ever quantities you need…
1 part (either 1 cup, 2 cups, or 1 TBS) of diced Onion
1 part (either 1 cup, 2 cups, or 1 TBS) of diced Red Bell Pepper
1 part (either 1 cup, 2 cups, or 1 TBS) of diced Pineapple
2 part (either 2 cup, 4 cups, or 2 TBS) of diced Roma Tomatoes
A NOTE ABOUT DICING – try to dice everything the same size
1/2 part (either 1/2 cup, 1 cups, or 1/2 TBS) of minced Parsley
1/2 part (either 1/2 cup, 1 cups, or 1/2 TBS) of not your Grandmother’s HERBES de PROVENCE
Juice of 1 lime


And if you like a runny salsa, more dip-able, take 1/4 part of additional tomatoes and run them through a mini chopper till they are liquefied.

Mix it all together, and you have fresh made salsa!

Use what you buy, eat better tasting food, eat healthier food, think about what is in your fridge and what you can do with it.

By the way, I LOVE making up a batch of not your Grandmother’s HERBES de PROVENCE.  It is a GREAT way to always have an herb mixture on hand.  I make up about 2 months worth at a time, and my not your Grandmother’s HERBES de PROVENCE is far fresher than what you find in those little packages you buy in the store pre-assembled.  Here’s my formula…

I use this almost anytime a recipe calls for a mixture of two or three herb spices.  It tastes great on a focaccia bread, add to oil and balsamic for a great bread dipping oil.  I add to fish and chicken for a light taste accent. It is just great to have sitting around… ready

5 TBS dried Tarragon
5 TBS dried Oregano
5 TBS dried Dill
5 TBS dried Thyme
5 TBS dried Rosemary
5 TBS dried Garlic Flakes
2 TBS Sea Salt
2 TBS Fresh ground Pepper
1 TBS dried Lemon Zest

Store in a sealed plastic ziplock bag, airtight in a dark drawer, and stays fresh for 6 months or more.  

Better tasting and it will save you money in the long run!

Come back next week when I finally get around to the main course… A wonderful seafood enchilada!


Dave here from MY YEAR ON THE GRILL. It really is just this easy!  


 … I CAN COOK THAT! 


And so can you!

Low-Fat Cannoli – Save Room for Dessert

Hello, friends! Did you have a good weekend? Well I hope you saved room for dessert!
Recently my husband and I discussed the idea of healthier, or at least less unhealthy, desserts.  And I guess he has a point.  If I have to make a dessert a week, they should probably not all be totally disgusting and artery clogging. 
And they can still be tasty!
So I bring you today’s offering: Low-fat cannoli!
It’s pretty simple, really.  The most time-consuming part of draining the ricotta – you want it to be dry so it’s not runny and messy when you pipe it into the cannoli shell.  I used a knee high stocking to drain, but that’s only because I never see cheesecloth in the story when I’m actually thinking about it.  So I buy new knee highs and voila! 🙂
I dumped all 2 lbs of part-skim ricotta into my mixer.  After whipping for a bit, though, I knew it was going to keep its grainy texture so I moved everything to the food processor.  I’m sure the blender would work just as well, of course!  When it was in the mixer bowl, I added…

2 tsp of vanilla extract

And 1 cup of powdered sugar.  I’m sure this is all “to taste” – maybe if you like a little liqueur flavor you could add that as well.  I know there’s all sorts of things you can add but I like to keep it simple.  And from what I understand from my husband, aka The Cannoli King, the taste is pretty much spot-on.
Whir it around and around until it’s smooth.

Then fold in 1/2 cup of mini chocolate chips.  This is the good stuff here, people.

This filling went into my Pampered Chef decorator with the biggest tip I could find – those mini chips can clog up a piping tip, let me tell ya.
And once the shells were filled (you can find them at just about any grocery store), I sprinkled more chips on the ends.
The texture is still a liiiiiittle off of your normal cannoli, but then you’re trading texture for a lower amount of fat.  And that’s not a bad thing, right?
Enjoy!