KNOW YOUR ARTICHOKE

One of the many things I miss most about the west coast is all of the available produce and the ability to grill ANY time of year without getting hypothermia while doing it!! I just can’t wait until we’re back home. In the meantime I’m taking advantage of ANY and all produce I can get.

A lot of people find artichokes intimidating. When artichokes are prepared well they are to die for. I even had a cream of Artichoke soup at a little cafe in Carmel a year or so ago that was excellent. I’m still trying to duplicate it.

There are more than 50 varieties of Artichokes. The most common type in the United States is the Green Globe. The mini versions you may see, known as baby artichokes are ideal for sautes and stir frying AND are as flavorful, if not more so than the larger ones. The size difference is due to where they grow on the stalk. The higher on the stalk, the bigger the artichoke.

Choosing an Artichoke:

  • You want an artichoke with a large heart and tender leaves.
  • Artichokes tend to have larger hearts if they are rounder.
  • They also have more tender leaves the smaller they get.
  • Look for deep-green, tight-leafed globes that feels heavy for its size.
  • When you squeeze the artichoke’s leaves together and it squeaks, it’s a fresh one.
  • Discoloration, bruising or split leaves are signs of age. Fresh artichokes may have purple-tinged leaves in late summer and fall.
  • It’s best to choose the smallest and roundest artichoke you can find.
  • I personally find large (grapefruit sized) Artichokes to be less tender and more fibrous. The small (egg sized) and medium (orange sized) ones are much more tender and easier to work with.

There are a few key secrets to preparing a great Artichoke:

  • Wash your Artichoke in cold running water and leave upside down to drain a few minutes.
  • Artichokes cannot be rushed – allow enough time for proper preparation. If you are going to be short on time, plan to prepare it the day before and then reheat.
  • You MUST trim the bottom stem and top leaves. Trimming the bottom rough part of the stem allows flavor to flow into the artichoke as it cooks. Trimming the top leaves (about 3/4 – 1 inch) does the same thing as well as removing the sticker part that WILL cut you if you’re not careful. Depending on how they look trim the very bottom leaves off the stem. Don’t be afraid to trim the tops as necessary. Remember that only about the bottom third of each leaf is actually edible.
  • Immediately rub any cut surface with lemon juice to prevent browning. You can also use flavored vinegars, but lemon juice is the most neutral.
  • Don’t forget even the stems are edible.
  • Never use a cast iron or aluminum pot to cook them in! The will discolor the pot AND the artichoke too! Use enamel or stainless steel.

Preparing your Artichoke:
There are as many ways to prepare an Artichoke as you have imagination. I’ll just list a few of the basic ones. Remember too that your seasoning and liquid all add flavor, so be creative. For example trade the water for chicken broth or add a touch of olive oil and garlic or flavored vinegars or juices…

You can also buy one of those baskets to stand your Artichoke in, but I prefer to use thick sliced onion rings in order to add a bit of flavor and have less mess when it’s all done. Despite most instructions you can cook an artichoke upside down too. I like this if I’m using many flavors. The flavors are being infused into the leaves and then the leaves are constantly draining back down into the base. This works much the same way as the drip knobs on the lid of a roasting pan. The onion rings work also either way.

  • Boiling: This is done with plain old water with a bit of salt. It has been determined that this is the least healthy way to prepare most vegetables since you are boiling the nutrients out of the vegetable itself. You add the Artichokes to rapidly boiling water. They take between 25-40 minutes until tender based on size.
  • Braising: This is the best method for using your flavored oils, vinegars and seasonings. Prepare your flavor combo and then add 2 cups water. Bring the mixture to a boil and reduce to a simmer before adding the onion rings and Artichokes. Cover tightly and simmer 25-40 minutes until tender.
  • DeepFrying: This is good for the hearts only.Dip them in the batter of your choice and fry until golden.
  • Grilling: Yep, you read right. Artichokes can be grilled and are EXCELLENT done that way. You do need to pre-cook them by steaming or microwaving until tender, but then it’s up to you. I then cut them right down the middle so I’ll have a flat side for the grill. I then like to soak them overnight in a lemon juice and garlic butter mixture before grilling. A Tupperware marinader that can be turned frequently without leaking works well. They don’t take long on the grill so just before you meat is finished grilling add the artichokes, turning frequently to prevent burning until the desired charring has been reached. Hubby has been known to add BBQ sauce and they are pretty tastey.
  • Microwaving: This is the fastest way, but not necessarily the tastiest. Stand Artichoke in a microwave safe bowl and add 1-2 inches of water. Cover bowl with a plate. Cooking on high a medium Artichoke will take 7-10 minutes while a large Artichoke will take 12-15 minutes. If cooking more than one at a time, you will need to add 2-3 minutes per additional each Artichoke. Let stand for 5 minutes in the covered bowl before serving.
  • Roasting: Roasting Artichokes will bring out their nutty flavor. This method also requires pre-cooking but reduce the precooking method time by 10 minutes. I like to dip each leaf into a combination of olive oil and garlic rice wine vinegar. I then let them drain a bit on a paper towel. Arrange the leaves on a stainless steel cookie sheet coated with a thin layer of PURE. Sprinkle lightly with salt. Roast in a 425 degree oven for about 10 minutes or until tender and and edges are just crisp. Start with the concave side of leaf down and turn mid way.
  • Sauteing: This method is also just for the hearts. Season with your favorite seasoning and then saute’ 3-5 minutes in your favorite oil.
  • Steaming: This is the most ideal method for maintaining the nutrients. Stand the Artichoke in the basket or onion rings. Add enough liquid that the pan won’t boil dry (you might have to add water so keep an eye on it), but make sure the Artichoke is above the water level. Cover and steam over the rapidly boiling water for 30-50 minutes until Artichokes are tender. Time depends on size.
  • Stuffed and Baked: This is one of my very most favorite ways to prepare an Artichoke. Pre-cook but reduce the precooking method time by 10 minutes. Halve the Artichokes. Mix together olive oil, Parmesan cheese, salt and pepper with a clove of garlic. Pulse into a thick paste. Using a spoon coat the inside of each leaf. Place on a stainless steel baking sheet sprayed with a thin layer of PURE. Bake at 400 degrees until tender. Drizzle with fresh lemon juice and butter immediately out of the oven. Serve with roast chicken or pork chops. YUMMY!

TACO RING

A lot of people have asked about this recipe of late, so I thought it was time to share it. It is so simple and looks so good too. It’s great for Super Bowl parties, potlucks, etc… Kids really love it too.

1 1/2 pounds ground beef  
taco seasoning

1 large onion, chopped small
4 oz. can chopped green chiles, not drained

1 package refrigerator crescent rolls

1 large tomato, chopped
1 bunch green onions, sliced

3 cups shredded lettuce
1 package Sargento Mexican blend fine shredded cheese

sour cream

  • Preheat oven to 350 degrees.
  • In a skillet brown the ground beef and onion. Drain.
  • Add taco seasoning and green chiles.
  • Simmer 5-10 minutes. Drain again so there is no excess moisture.
  • I use my stoneware pizza stone. Lightly spray it with PURE.
  • Unroll the crescent rolls and separate them.
  • Arrange the rolls (wide edges inward with the thin corner edge slightly hanging off the pizza stone) in a circular pattern around the pizza stone with the corners slightly touching.
  • Arrange the meat mixture in a circular pattern covering the large end portion of the crescent rolls. Sprinkle 1/3 -1/2 of the cheese over the meat.
  • Pull the small pointed end up over the meat mixture and pinch into large portion creating a ring that resembles a wreath. You will have an open area with meat showing through.
  • Bake according to the biscuit directions and golden.
  • I also serve it on the stoneware. Arrange the shredded lettuce, green onions and tomatoes in the center and edges. For just us, I just put it directly on the plate.
  • Garnish with sour cream and remaining cheese.
  • Serve immediately.

CHOCOLATE GLAZED CHEESECAKE GINGER BARS

I tried a new cooking method and wasn’t happy with it so these are not great pictures this week, but that sure doesn’t affect the taste. Hubby has already eaten half of them. I wrote the recipe here like I normally do it.

CRUST
2 1/2 cups ginger snap crumbs
2 Tablespoons sugar
1/4 cup butter, melted
PURE
FILLING
2 large eggs
2~8 ounce softened cream cheese
2 envelopes unflavored gelatin
1/3 cup whole milk
1/2 teaspoon salt
1 can sweetened condensed milk
optional: 3 Tablespoons dutch cocoa~using this makes them very rich!
GLAZE
6 tablespoons butter
1 cup milk chocolate chips

  • Preheat oven to 325 degrees.
  • Generously spray 9×13 pan with PURE
  • Finely grind gingersnaps in food processor. Add melted butter and pulse until evenly mixed. Press into bottom of pan. Bake 1 minutes and then cool 5 minutes before filling.
  • Sprinkle gelatin over milk and mix well. Beat together softened cream cheese, eggs, salt and gelatin mixture at medium speed until smooth.
  • Pour sweetened condensed milk into a tall bowl and microwave for 3 minutes in 3 minute increments. Allow to cool slightly. Fold in sweetened condensed milk until smooth.
  • Pour over cooled crust.
  • Bake 45 minutes or until center is set.
  • Cool on rack 2 hours.
  • After 2 hours, melt butter and chocolate chips together until smooth. Pour over cheesecake layer. Chill overnight before serving.

With a thin knife cut into squares. Be sure and wipe knife clean after each cut.

CARROT CAKE PANCAKES & CREAM CHEESE SYRUP

I love carrot cake.  If you asked me what I wanted for my birthday cake I would say Carrot Cake!  So when we found this cute little diner, Babycakes Cafe, recently and they had carrot cake pancakes on the menu I had to give them a try.  And then I had to duplicate them.  YUMMY!!!!!!!!! 
So I started with my basic pancake recipe and added lots of carrots and spices. Their cream cheese syrup at the restaurant was really more like a glaze, so I used maple syrup as my liquid ingredient to make an actual syrup and like it even better!

The carrot cake pancakes were easy to make and tasted great! And it is always nice to have dessert for breakfast!

CARROT CAKE PANCAKES & CREAM CHEESE SYRUP
1 cups whole wheat flour
1 cup all purpose flour
2 teaspoons baking powder
1 tablespoon cinnamon
1 teaspoon ginger
1/2 teaspoon nutmeg
2 cups buttermilk
2 JUMBO eggs
1/3 cup brown sugar
1 cup carrot (very finely grated)
4 ounces cream cheese (room temperature)
4-6 tablespoons maple syrup (use enough for desired consistency)
powdered sugar to taste
crushed pecans or walnuts

  • Sift the flour, baking powder, cinnamon, ginger and nutmeg together in a large bowl.
  • Whisk together the milk, egg, sugar and carrot in another bowl.
  • Mix together the wet and dry ingredients making sure to not over mix them.
  • Heat a griddle and melt some butter on it to coat.
  • Pour 1/3-1/4 cup of the mixture onto the griddle for each pancake and heat until the surface starts to bubble and the bottom is golden brown, about 2-3 minutes.
  • Flip the pancakes and cook the other side until the bottom is golden brown, about 1-2 minutes.
  • Blend together the cream cheese and maple syrup and add  powdered sugar to get desired sweetness.
  • Pour the cream cheese onto the pancakes.
  • Sprinkle with crushed nuts.

BOEUF FLAMANDE

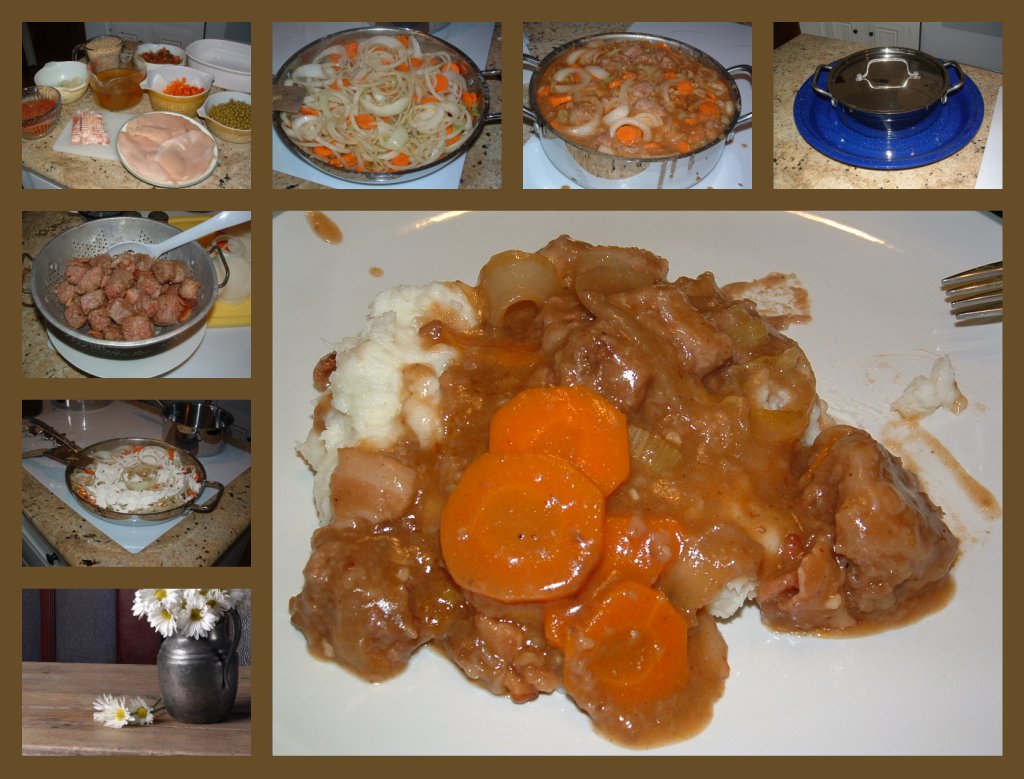
I found this recipe in the bottom of grams pile of magazine/book clippings to try one day.  It just screamed, “try me for the guys”.  BOEUF FLAMANDE translates into ‘Beef Stew in a rich sauce made with beer’. But I don’t like dark beer so I adjusted the recipe and it worked really well. The guys we’re asking when we’re doing the leftovers.  This will be perfect on a cold winter’s night!

BOEUF FLAMANDE
1/2 pound bacon, cut into 1/4″ cubes
3 pounds beef stew meat, cut into bite size pieces (I used brisket)
1 teaspoon sea salt
1/2 teaspoon white pepper
3 tablespoons butter
3 cloves garlic, minced
2 large Vidalia onions, cut into thin slices
2 large carrots, sliced
1/2 cup flour + dredging flour
1/2 cup Country Bob’s All Purpose Sauce
3/4 cup Dr. Pepper (yep you read that right)
3 cups boiling water
3 tablespoons Better than Beef Bouillon
1/2 teaspoon thyme
2 teaspoons sugar
1 tablespoon Worcestershire sauce
3 tablespoons champagne vinegar
fresh parsley sprigs

  • Preheat oven 325 degrees.
  • Place the flour into a plastic bag.
  • Brown bacon pieces until crisp.  With a slotted spoon remove to drain.
  • Dredge beef pieces in the flour mixture.
  • Brown beef pieces in bacon fat*.  With a slotted spoon remove beef pieces to a colander to drain.
  • Add butter to saute pan. 
  • Saute’ carrots for several minutes.
  • Add the onions and garlic until fragrant and translucent.
  • Stir in 1/2 cup flour, salt, pepper and thyme.
  • Whisk together the hot water, sugar and bouillon. 
  • Add Country Bob’s sauce, Worcestershire sauce, champagne vinegar and Dr. Pepper until well blended. 
  • Add to veggies.
  • Bring to a fast boil.
  • Lower heat to a simmer for 5 minutes.
  • Spray a casserole with PURE.
  • Add browned meat to the casserole.
  • Top with onions and carrots.
  • Pour sauce over top and blend well.
  • Bake for 2 1/2 hours or until meat is tender.
  • Serve over Parmesan Potatoes.

*May have to add a bit of butter or oil if not enough bacon grease.

SOUR CREAM MEATLOAF, COUNTRY BOB’S INCREDIBLE EDIBLE FUDGE and an Original Country Bob’s All Purpose Sauce Product Review

Back in 2009 I was contacted by a nice man from Country Bob’s All Purpose Sauce and asked if I would be interested in doing a product review. I said I’d love to. In just 2 days time a box was on my stoop with bottles of sauce and recipe brochures. I had this little niggling in my brain though. I could not figure out why the name of this sauce sounded so familiar. I tried to find the sauce locally and failed until I finally found it at a Walmart store 30 miles away. You have to remember I live rurally for the moment. That is when it occurred to me where I had heard the name before. I had won a cookbook awhile back over at Forgetfulone, but was never able to prepare any of the recipes because I couldn’t find the sauce.
As you can see from all the slips of paper sticking out of the top of the book I had marked a multitude of recipes to try and now I finally can. I found 2 meatloaf recipes, 1 from the brochure which is extremely similar to hubby’s favorite one that I have made for years and years and a sour cream recipe from the book that I decided to try. In the end the recipe I made was a combination of both recipes and hubby all but licked his plate. He kept telling me to find out where to get more of this sauce. He even put it on his mashed potatoes and thought that was just scrumptious. Normally he would use ketchup on his meatloaf, but tonight he used Country Bob’s All Purpose Sauce. He decided Country Bob’s All Purpose Sauce is our new ketchup.

The true test came when I made dessert with the sauce. It was the most unusual group of ingredients I had ever mixed together. I have to admit I had my doubts that we were going to like this recipe, but I also thought it would be a good test of the versatility of an all purpose sauce.
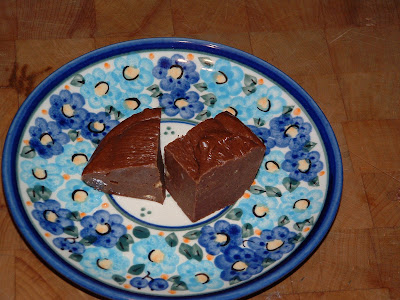
All I can say is that I was sooooooooooooooooo pleasantly surprised by the flavor. Hubby can’t say anything, he’s too busy licking the bowl. You have to try Country Bob’s All Purpose Sauce and start with this fudge recipe.
Justify Full

One of the greatest things about this recipe besides the awesome flavor is the consistency. How many times have you made fudge and weren’t sure it would set up okay or it turned out dry? That will never happen with this recipe. This recipe is truly foolproof.

COUNTRY BOB’S INCREDIBLE FUDGE
12 ounces Velveeta cheese*
2 sticks butter
6 ounces unsweetened chocolate
2 tablespoons Country Bob’s All Purpose Sauce
2 pounds powdered sugar
1 teaspoon vanilla extract
1 1/2 cups chopped pecans (optional)**

  • In a microwave safe bowl combine the Velveeta, butter, Country Bob’s All Purpose Sauce and chocolate. Microwave on high 2-4 minutes, stirring every minute until mixture is smooth and well blended.
  • Pour the powdered sugar into a large mixing bowl. Add the chocolate mixture gradaully while beating with an electric mixture until well blended.
  • Beat in the vanilla.
  • Stir in the nuts.
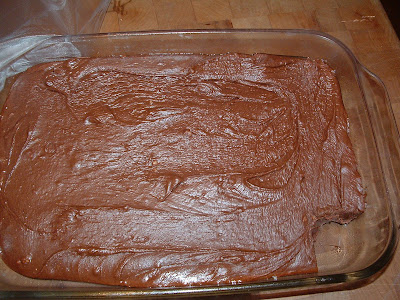
  • Pour into a greased 9×13 pan.
  • Cover and chill until firm.
  • Store in the refrigerator.

*When I made a second batch of this recipe. it worked better cubed before microwaving
**I exchanged this for Heath Bar bits and loved it

COUNTRY BOB’S SOUR CREAM MEATLOAF ala TAMY
3 pounds ground beef
1 bunch green onions, sliced thin
1/2 cup + Country Bob’s All Purpose Sauce
1 sleeve crushed saltines
3/4 cup sour cream
1/4 cup milk
2 eggs, beaten
1 1/2 teaspoons sea salt
1 teaspoon white pepper

  • Mix all together.
  • Pour additional sauce over the top.
  • Bake 1 1/2 hours.
  • Pour off any excess moisture.
  • Let stand 5-10 minutes.
  • Serve.
♥♥final blog signature. ♥♥

TWISTED PEPPER STEAK IN GRAVY


1-2 tablespoons avocado oil
2 pounds round steak, trimmed of fat and cut into 3 inch slices
1 medium onion, chopped
1 red pepper, sliced into thin strips
1/3 cup soy sauce
2 cloves garlic, minced
1/2 teaspoon sea salt
1/2 teaspoon white pepper
1 tablespoon brown sugar
1 can diced tomatoes with juice
1 can beef consomme or
a scant 2 cups hot water with 2 teaspoons beef granules
Roux

  • In a large skillet heat olive oil
  • When hot, brown the beef slices, drain and transfer to the slow cooker
  • In the same pan combine the consomme, onions, tomatoes and juice, brown sugar, salt, pepper, garlic and soy sauce.
  • Bring to a slow boil.
  • Pour over beef.
  • Cover and cook on high for 1 hour
  • Reduce the heat to low and cook 3-4 hours until beef is tender
  • Add the red pepper
  • Cook 1 more hour
  • Return heat to high
  • Using a large pasta claw remove the meat and peppers to serving bowl
  • Add Roux
  • Stir into the gravy and cook until desired thickness
  • Pour over meat in serving bowl and toss to coat
  • Serve over white rice or noodles

OATNUT SOURDOUGH HERB DRESSING

Many Thanksgiving’s ago I stood in my childhood kitchen watching my dad prepare the stuffing for dinner.  Daddy never stuffed the Turkey, but instead made the “stuffing” like a big casserole.  The stuffing was always my favorite part topped with daddy’s giblet gravy – YUMMY.  I can taste it like it was always those years ago again.

Several years ago my brother asked me to try and reproduce the recipe and VOILA’ I did it!


OATNUT SOURDOUGH HERB DRESSING
10 slices Brownberry or Oroweat OATNUT bread, cut into bite size chunks
1/2 loaf sourdough French bread, cut into bite size chunks
1 large sweet onion, chopped fine
1 small bunch celery (leaves and all), chopped fine
1/2 bag baby carrots, chopped fine
1 box mushrooms, chopped fine
1 tablespoon sea salt
1 tablespoon white pepper
2 sticks unsalted butter
4 cups hot water
2 tablespoons Better than Bouillon Chicken base
2 tablespoons Buttery Herb & Garlic Mix (I believe McCormick makes it)
4 teaspoons minced garlic, Jar


  • Cut bread into bite sized chunks and spread out in a thin layer over cookie sheets.
  • Bake at 200 degrees for 3-4 hours until pieces are actually hard.
  • Chop all the vegetables.
  • In a large cast iron pan melt 1/4 cup of the butter.
  • Add the onions and saute until translucent. The add the celery and carrots and continue sauteing until crisp tender. Add the garlic last as it will burn first.
  • Whisk together the water, better than bouillon chicken base and all of the seasonings.
  • Add the melted butter.
  • In a large pan toss the bread slices together.
  • Add the sauteed vegetables and toss again.
  • Add the liquid mixture and toss again until well absorbed.
  • Fold entire mixture into at least a 9×13 baking dish.
  • Bake uncovered 1 hour.
  • At this point I use a small portion for our dinner that night and freeze the rest.
  • When it’s time to cook it again, I defrost it, put it back in the same baking dish and bake it again, but this time covered with foil until the last 15 minutes so it doesn’t dry out. We like it crisp on top so I remove the foil the last 15 minutes.

CHEESY AU GRATIN POTATOES

1/2 cup butter
16 oz. whipping cream
5 large russet potatoes
1 teaspoon salt
1/2 teaspoon paprika
1/2 teaspoon Dijon mustard
1/2 teaspoon white pepper
1 teaspoon minced garlic (jar) or 1 clove
2 cups grated 4 white cheese mix (Gruyere, Muenster, etc…)
2 cups rates sharp cheddar
Wondra Flour

  • Preheat oven to 350 degrees.
  • Peel and thinly slice potatoes.
  • Grease 9×13 baking dish.
  • In a large sauce pan, melt the butter.
  • Gradually add the whipping cream and spices. Blend well.
  • Gradually add the flour until the mixture thickens, but it is still pourable!
  • Mix the cheeses all together.
  • Layer the potatoes, cheese and cream mixture ending with cheese on top.
  • Bake 45 minutes or until potatoes are tender and golden brown.

I developed this recipe for a request from our youngest and it quickly became a family favorite.

JAMBALAYA

JAMBALAYA

3 tablespoons avocado oil
1 large bunch green onions, diced
3-5 cloves garlic, minced
2 cups diced cooked ham
1 beef sausage, diced
1/2 cup white wine
1 cup chicken stock
1 teaspoon dried thyme
1 teaspoon dried basil
1 teaspoon paprika
1 teaspoon sea salt
1 teaspoon white pepper
1 teaspoon cayenne pepper
1 teaspoon Worcestershire sauce
3/4 cup long grain rice

  • Heat the oil in a dutch oven. Add the green onions and garlic and sauté until fragrant and tender.
  • Mix in remaining ingredients except for the rice and bring to a boil.
  • Add rice and reduce the heat. Simmer until rice is tender and the liquid has been absorbed, about 25 minutes.

BAKED EGG & HAM CUPS

BAKED EGG & HAM CUPS

PER PERSON
4 slices deli ham
2 eggs
grated cheddar cheese
salt and pepper to taste
  • Preheat oven 400 degrees.
  • Spray a muffin pan with PURE.
  • Place pan in oven to heat.
  • Line each muffin slot with 2 slices of ham.
  • Crack an egg into each ham cup.
  • Salt and pepper.
  • Bake 10 minutes.
  • Top with cheese.
  • Bake 5 more minutes.

BAKED WHITE FISH

2 teaspoons peanut OR avocado oil    
1 small bunch green onions, sliced thin
1 teaspoon paprika
2 small kiwis, cleaned and sliced thin
2-4 white fish, cleaned and scaled, 2 pounds each
salt & pepper to taste   
3 tablespoons white wine    
3 tablespoons CHAMPAGNE DRESSING (or substitute fish or chicken stock)  
2 tablespoons butter, melted
1 lemon, sliced

  • This will work with other whole lean fish and cuts or ‘roasts’ of halibut or pink salmon.
  • Adjust the cooking time according to the thickness and density of the fish.
  • Preheat oven to 400 degrees F.
  • Spray baking dish well with PURE.
  • Rinse the fish well inside and out, pat dry, season lightly with salt, pepper and paprika and lay side by side in a shallow baking dish.
  • Layer lemon slices loosely over fish and season again.
  • Pour  the stock, dressing and ending with the butter over each filet.
  • Make a loose tent of foil over the tail of the fish and place in the oven.
  • Bake, rotating the pan once halfway through the cooking time, until a skewer easily enters the thickest part of the fish, 25 to 30 minutes.
  • Taste for seasoning and adjust if necessary.