LEMONS

The exact origin of the lemon has remained a mystery, though it is widely presumed that lemons first grew in India, northern Burma, and China. In South and South East Asia, lemons are known for its antiseptic properties and it was used as an antidote for various poisons.

The lemon is a small evergreen tree (Citrus limon) originally native to Asia, and is also the name of the tree’s oval yellow fruit. The fruit is used for culinary and non-culinary purposes throughout the world – primarily for its juice, though the pulp and rind (zest) are also used, mainly in cooking and baking. Lemon juice is about 5% citric acid, which gives lemons a sour taste, and a low pH. This makes lemon juice an inexpensive, readily available acid for use in educational science experiments. Because of the sour flavor, many lemon-flavored drinks and candies are available, including lemonade.

Culinary uses: Lemons are used to make lemonade and as a garnish for many drinks. Lemon zest has many uses. Many mixed drinks, soft drinks, iced tea, and water are often served with a wedge or slice of lemon in the glass or on the rim. The average lemon contains approximately 3 tablespoons of juice. Allowing lemons to come to room temperature before squeezing (or heating them briefly in a microwave) makes the juice easier to extract.

Lemons left unrefrigerated for long periods of time are susceptible to mold.

Fish are marinated in lemon juice to neutralize the odor.

Lemon juice, alone or in combination with other ingredients, is used to marinate meat before cooking: the acid provided by the juice partially hydrolyzes the tough collagen fibers in the meat (tenderizing the meat), though the juice does not have any antibiotic effects.

Lemons, alone or with oranges, are used to make marmalade. The grated rind of the lemon, called lemon zest, is used to add flavor to baked goods, puddings, rice and other dishes.

Pickled lemons are a Moroccan delicacy. Numerous lemon liqueurs are made from lemon rind.

When lemon juice is sprinkled on certain foods that tend to oxidize and turn brown after being sliced, such as apples, bananas and avocados, the acid acts as a short-term preservative by denaturing the enzymes that cause browning and degradation.

VARIETIES

‘Armstrong’ (‘Armstrong Seedless’)–a sport discovered in a private grove at Riverside, California, about 1909. Patented in 1936 by Armstrong Nurseries. Resembles ‘Eureka’ except that it usually bears seedless or near-seedless fruits. If planted among other lemon trees will occasionally have a few seeds.
‘Avon’–first noticed as a budded tree in Arcadia, Florida. A budded tree propagated from the original specimen around 1934 was planted in the Alpine Grove in Avon Park; it produced heavy crops of fruits highly suitable for frozen concentrate. It, therefore, became the source of budwood for commercial propagation by Ward’s Nursery beginning in 1940.
‘Bearss’ (‘Sicily’, but not the original introduction by Gen. Sanford in 1875, which has disappeared)–a seedling believed to have been planted in 1892, discovered in the Bearss grove near Lutz, Florida, about 1952. Closely resembles ‘Lisbon’. It is highly susceptible to scab and greasy spot and oil spotting. The tree is vigorous and tends to produce too many water sprouts. Nevertheless, it has been propagated commercially by Libby, McNeill & Libby since 1953 because the peel is rich in oil. It constitutes 20% of Brazil’s lemon/lime crop. ,
‘Berna’ (‘Bernia’, ‘Vema’, ‘Vernia’)–oval to broad-elliptic, with pronounced nipple, short neck; peel somewhat rough, medium-thick, becoming thinner in summer, tightly clinging. Seeds generally few or absent. Ripens mostly in winter; fruits keep well on tree until summer but become too large. Tree is vigorous, large, prolific. This is the leading cultivar of Spain and important in Algeria and Morocco. It is too much like the ‘Lisbon’ to be of value in California. In Florida, it has been found deficient in acid, low in juice, and too subject to scab.
‘Eureka’–originated from seed taken from an Italian lemon (probably the ‘Lunario’) and planted in Los Angeles in 1858; selected in 1877 and budwood propagated by Thomas Garey who named it ‘Garey’s Eureka’. The fruit is elliptic to oblong or rarely obovate, with moderately protruding nipple at apex, a low collar at the base; peel yellow, longitudinally ridged, slightly rough because of sunken oil glands, medium-thick, tightly clinging; pulp greenish-yellow, in about 10 segments, fine-grained, tender, juicy, very acid. Fruits often borne in large terminal clusters unprotected by the foliage. Bears all year but mostly late winter, spring and early summer when the demand for lemons is high. Tree of medium size, almost thornless, early-bearing, prolific; not especially vigorous, cold-sensitive, not insect-resistant; relatively short-lived. Not suitable for Florida. Grown commercially in Israel. One of the 2 leading cultivars of California, though now being superseded by clonal selections with more vigor, e.g., ‘Allen’, ‘Cascade’, ‘Cook’, and ‘Ross’. ‘Lambert Eureka’ is a chance seedling found in 1940 on the property of Horace Lambert in New South Wales. It is vigorous and productive.
‘Femminello Ovale’–one of the oldest Italian varieties; short-elliptic with low, blunt nipple; slightly necked or rounded at base; of medium size; peel yellow, finely pitted, medium-smooth, medium-thick, tightly clinging; pulp in about 10 segments, tender, juicy, very acid, of excellent quality, with few, mostly undeveloped, seeds. Fruits all year but mainly in late winter and spring; ships and stores well. The tree is almost thornless, medium-to very-vigorous, but highly susceptible to mal secco disease. This is the leading cultivar in Italy, accounting for 3/4 of the total lemon production, and 1/5 of the crop is processed as single-strength juice.
‘Genoa’–introduced into California from Genoa, Italy, in 1875. Almost identical to ‘Eureka’; ovoid or ovate-oblong with blunt nipple at apex; base rounded or slightly narrowed; of medium size; peel yellow, medium-thick, tightly clinging; pulp in 10-12 segments, melting, medium-juicy, with 29 to 51 seeds which are light-brown within. Tree is shrubby, nearly trunk-less, spreading, very thorny, cold-hardy. Grown commercially in India, Chile and Argentina.
‘Harvey’–of unknown parentage; was found by Harvey Smith on the property of George James in Clearwater, Florida. Fruit much like ‘Eureka’. Tree highly cold-tolerant, compatible with several rootstocks. Commercially propagated by Glen St. Mary Nurseries Company, near Jacksonville, Florida, since 1943.
‘Interdonato’ (‘Special’)–a lemon X citron hybrid that originated on property of a Colonel Interdonato, Sicily, around 1875; oblong, cylindrical, with conical, pointed nipple at apex, short neck or collar at base; large; peel yellow, smooth, glossy, thin, tightly clinging; pulp greenish-yellow, in 8 or 9 segments, crisp, juicy, very acid, faintly bitter. Very few seeds. Earliest in season; mostly fall and early winter. Tree vigorous, usually thornless, medium-resistant to mal secco; of medium yield; accounts for 5% of Italy’s crop.
‘Lisbon’ (perhaps the same as ‘Portugal’ in Morocco and Algeria)–originated in Portugal, possibly as a selection of ‘Gallego’; reached Australia in 1824; first catalogued in Massachusetts in 1843; introduced into California about 1849 and catalogued there in 1853; introduced into California from Australia in 1874 and again in 1875. Fruit almost identical to ‘Eureka’; elliptical to oblong, prominently nippled at apex, base faintly necked; peel yellow, barely rough, faintly pitted, sometimes slightly ribbed, medium-thick, tightly clinging; pulp pale greenish-yellow, in about 10 segments, fine-grained, tender, juicy, very acid, with few or no seeds. Main crop in February, second crop in May. Fruit is borne inside the canopy, sheltered from extremes of heat and cold. Tree large, vigorous, thorny, prolific, resistant to cold, heat, wind. Not well adapted to Florida. It is low-yielding and short-lived in India. Surpasses ‘Eureka’ in California. Has given rise to a number of clonal selections, particularly ‘Frost’, originated by H. B. Frost at the Citrus Research Station, Riverside, California in .1917 and released about 1950; also ‘Prior Lisbon’ and the more vigorous ‘Monroe Lisbon’.
‘Meyer’–a hybrid, possibly lemon X mandarin orange; introduced into the United States as S.P.I. #23028, by the agricultural explorer, Frank N. Meyer, who found it growing as an ornamental pot-plant near Peking, China, in 1908; obovate, elliptical or oblong, round at the base, occasionally faintly necked and furrowed or lobed; apex rounded or with short nipple; of medium size, 2 1/4 to 3 in (5.7-7.5 cm) wide and 2 1/2 to 3 1/2 in (6.25-9 cm) high; peel light-orange with numerous small oil glands, 1/8 to 1/4 in (3-6 mm) thick; pulp pale orange-yellow, usually in 10 segments with tender walls, melting, juicy, moderately acid with medium lemon flavor; seeds small, 8 to 12. Tends to be everbearing but fruits mostly from December to April. Tree small, with few thorns, prolific, cold-resistant; produces few water sprouts, and is only moderately subject to greasy spot and oil spotting. It is easily and commonly grown from cuttings. Does well on sweet orange and rough lemon rootstocks; is not grafted onto sour orange because it is a carrier of a virulent strain of tristeza. Grown for home use in California; in Florida, both for home use and to some extent commercially for concentrate though the product must be enhanced by the addition of peel oil from true lemons, since that from ‘Meyer’ peel is deficient in flavoring properties. Has been fairly extensively planted in Texas and in Queensland, Australia, and New Zealand.
‘Monachello’ (Moscatello’)–suspected of being a lemon X citron hybrid; elliptical, with small nipple and no neck, merely tapered at apex and base; medium-small; peel yellow, smooth except for large, sunken oil glands, thin, clinging very tightly; pulp in 10 segments, tender, not very juicy, not sharply acid. Bears all year but mainly winter and spring. Tree not vigorous, slow-growing, almost thornless, with abundant, large leaves; bears medium-well, resistant to mal secco, and has been extensively planted in Italy in areas where the disease is common.
‘Nepali Oblong’ (Assam’, ‘Pat Nebu’)–originated in Assam; fruit resembles citron in some aspects; long-elliptic to oblong-obovate, with wide, short nipple; medium-large; peel greenish-yellow, smooth, glossy, medium-thick; pulp greenish-yellow in 11 segments, fine-grained, very juicy, of medium acidity, with few or no seeds. Everbearing. Tree large, vigorous, spreading, medium-thorny, prolific; foliage resembles that of the citron. Commercial in India.
‘Nepali Round’–of Indian origin; round, without distinct nipple; juicy; seedless. Tree large, vigorous, compact, nearly thornless, medium-prolific. Successfully cultivated in South India.
‘Perrine’–a Mexican lime X ‘Genoa’ lemon hybrid created by Dr. Walter Swingle and colleagues in 1909, but still a fairly typical lemon; it is lemon-shaped, with small nipple at apex, necked at base; of medium size; peel pale lemon-yellow, smooth, slightly ridged, thin, tough; pulp pale greenish-yellow, in 10 to 12 segments having thin walls; tender, very juicy, with slightly lime-like flavor but acidity more like lemon; seeds usually 4 to 6, occasionally as many as 12, long-pointed. Everbearing. Tree cold-sensitive but less so than the lime; resistant to wither tip and scab but prone to gummosis and other bark diseases. In the early 1930’s, was extensively planted in southern Florida on rough lemon rootstock, but no longer grown.
‘Ponderosa’ (‘Wonder’; ‘American Wonder’)–a chance seedling, possibly of lemon/citron parentage, grown by George Bowman, Hagerstown, Maryland around 1886 or 1887; appeared in nursery catalogs in 1900 and 1902; obovate, lumpy and faintly ribbed, slightly necked at base; large, 3 1/2 to 4 1/8 in (9-11 cm) wide, 3 1/2 to 4 3/4 in (9-12 cm) high; peel light orange-yellow, with medium-large oil glands, flush or slightly depressed; 3/8 to 1/2 in (1-1.25 cm) thick; pulp pale-green, in 10 to 13 segments with thick walls; juicy, acid; seeds of medium size, 30 to 40 or more, brown within. Everbearing. Tree small, moderately thorny; buds and flowers white or barely tinged with red-purple. More sensitive to cold than true lemons. Grown for home use and as a curiosity in California and Florida and in small-scale commercial plantings since 1948. Rather widely cultivated as an indoor potted plant in temperate regions.
‘Rosenberger’–a clone found in a grove of ‘Lisbon’ and ‘Villafranca’ trees at Upland, California; was planted in the Rosenberger orchard and gained recognition as a superior cultivar. Tree closely resembles that of ‘Villafranca’. Fruit is somewhat like ‘Lisbon’ but is shorter and broader and less tapered at base. Tree vigorous and prolific. Became popular in California in the 1960’s.
‘Rough Lemon’ (‘Florida Rough’; French’; ‘Mazoe’; Jamberi’)–perhaps a lemon X citron hybrid, but has been given the botanical name of C. jambhiri Lush. Believed to have originated in northern India, where it grows wild; carried in 1498 or later by Portuguese explorers to southeastern Africa where it became naturalized along the Mazoe River; soon taken to Europe, and brought by Spaniards to the New World; is naturalized in the West Indies and Florida; oblate, rounded or oval, base flat to distinctly necked, apex rounded with a more or less sunken nipple; of medium size, averaging 2 3/4 in,(7 cm) wide, 2 1/2 (6.25 cm) high; peel lemon-yellow to orange-yellow, rough and irregular, with large oil glands, often ribbed; 3/16 to 3/8 in (5-10 mm) thick; pulp lemon-yellow, usually in 10 segments, medium-juicy, medium-acid, with moderate lemon odor and flavor; seeds small, 10 to 15, brownish within. Reproduces true from seeds, which are 96% to 100% nucellar. Tree large, very thorny; new growth slightly tinged with red; buds and flowers with red-purple. The scant pulp and juice limit the rough lemon to home use. It is appreciated as a dooryard fruit tree in Hawaii and in other tropical and subtropical areas where better lemons are not available. The tree has been of great importance as a rootstock for the sweet orange, mandarin orange and grapefruit. It is not now used as a rootstock for lemon in Florida because of its susceptibility to “blight” (young tree decline). It is also prone to Alternaria leaf spot (A1ternaria citri) in the nursery, to foot rot (Phytophthora parasitica). Incidence varies with the clone and certain clones show significant resistance. In trials at Lake Alfred, 3 atypical clones showed immunity to leaf spot, while a typical rough lemon clone, ‘Nelspruit 15’, from South African seed, proved highly resistant to leaf spot and also extremely cold tolerant.
‘Santa Teresa’–an old tree discovered to be disease-free in a ‘Fermminello Ovale’ orchard in Italy that had been devastated by mal secco. Budded trees from the original specimen were being commonly planted in the 1960’s wherever the disease was prevalent in Italy.
Sweet Lemon (C. limetta Risso)a general name for certain non-acid lemons or limettas, favored in the Mediterranean region, In India, they are grown in the Nilgiris, Malabar and other areas. The fruits are usually insipid, occasionally subacid or acid. The seeds are white within and the tree is large, resembling that of the orange. One cultivar, called ‘Dorshapo’ after the plant explorers, Dorsett, Shamel and Popenoe, who introduced it from Brazil in 1914, resembles the ‘Eureka’ in most respects except for the lack of acidity. Another, called ‘Millsweet’, apparently was introduced into California from Mexico and planted in a mission garden. It was reproduced at the old University of California Experiment Station at Pomona. Neither is of any commercial value.
‘Villafranca’–believed to have originated in Sicily; introduced into Sanford, Florida, from Europe around 1875 and later into California. Closely resembles ‘Eureka’; of medium size. Tree is more vigorous, larger, more densely foliaged, and more thorny than ‘Eureka’ but becomes thornless with age. One strain is everbearing; another fruits heavily in summer. This was the leading lemon cultivar in Florida for many years; is cultivated commercially in Israel; is low-yielding and short-lived in India. It is little grown in California but has given rise to certain selections that are of importance, particularly ‘Galligan Lisbon’ and ‘Corona Foothill Eureka’.

ALL ABOUT CARIBBEAN FOOD

Bahama Breeze has a great section, All about Caribbean Food that explains about the local cuisine and I have listed below for you as well as many wonderful menus. Go check out those menus for some new recipe ideas They’re awesome.

WHAT IS CARIBBEAN FOOD?

Caribbean food includes ALL of your favorites… seafood, chicken and steak… prepared with the flavorful and colorful ingredients of the islands. Some popular dishes are coconut shrimp, jerk chicken pasta, chicken kabobs, ribs with guava BBQ sauce and Key Lime Pie.

ORIGINS OF CARIBBEAN FOOD
Food plays a central role in family life and traditions in the islands. Cooks spend days preparing menu offerings for holidays, festivals, and special family gatherings. The cuisine of the Caribbean is like a cultural patchwork quilt. Each “patch” or dish represents the plentiful bounty of the islands’ lush tropical vegetation, combined with the one or more diverse groups of people that have lived there, including the original Carib and Arawak Indians, followed by the Spanish, British, French, and Dutch settlers, as well as Africans, who have had a profound influence on the food and cultural traditions of the islands. Later followed Indian and Chinese settlers, and travelers from the United States.
 
CARIBBEAN FOOD GLOSSARY
Here are some terms you might come across when perusing our menu. Each part makes up the whole of the delicious Caribbean culinary adventure:

Ackee This reddish-yellow fruit of an evergreen tree was introduced into Jamaica from West Africa. Ackee, aptly named “vegetable brains”, lies inside the innermost chamber of the exotic red fruit. The yellow flesh tastes like scrambled eggs, and is popular served with saltfish, hot peppers and onions.
Asopao Means “soupy” in Spanish. Very popular in Puerto Rico, asopao is a soupy stew which contains chicken, meat or seafood and rice, plus ingredients such as tomato, onion, bell pepper, ham, peas, olives, and capers.
Boniato A white semi-sweet potato.
Calabaza A sweet, pumpkin-like squash, somewhat like butternut squash. It is often used in the Caribbean as the base for pumpkin soups and in vegetable dishes.
Carambola Known as the “star fruit” because of it’s shape when cut cross-ways. It is crisp, juicy and golden in color, and is used in desserts or salads.
Ceviche Seafood “cooked” by the acids of citrus juices, seasoned with onions and fresh herbs.
Chayote A member of the squash and melon families, it is also known as Cho-cho or Christophene. It is a green pear-shaped fruit used as a vegetable in salads or cooked in a variety of ways.
Chutney A blend of cooked tropical fruits and vegetables flavored with peppers and spices. Mango chutney is a traditional accompaniment to curries.
Coconut A fresh coconut has liquid inside, so shake it before you buy it! To open a coconut, puncture two of its “eyes” – the darker dots on one end – with a small sharp knife or an ice pick. Drain all the liquid from the coconut, then tap the whole surface of the shell lightly with a hammer. Now give the shell a sharp blow with the hammer. This will open the coconut, and the meat will now come away from the shell.
Curry Curries are highly seasoned gravy-based dishes originating from India. They are prevalent on islands such as Jamaica, Trinidad, and Tobago, where indentured servants from India settled in the mid-19th century. Many Caribbean cooks use prepared spice mixtures that include coriander, cumin, turmeric, black and cayenne peppers, and fenugreek, among others. Caribbean cooks also commonly add allspice to their curries.
Escabeche Also called Escovitch by the Jamaicans. Seafood that has been pan fried or poached, then marinated in citrus (or vinegar) and herbs.
Guava A bright orange to red tropical fruit about the size of a small lemon. Used in compotes, pastes and jellies. Guava pastes from the Hispanic islands are intensely flavored and are delicious served with cream cheese and spread on cassava or other crisp breads or crackers.
Jerk The words “Jerk” and “jerky” originally referred to the process of rubbing spices and acidic hot peppers onto strips of meat in order to tenderize and preserve them. In Jamaica, Trindidad, Barbados and Tobago, an entire culinary art grew up around “jerk”. There are many jerk seasoning combination in the Islands, most of which call for scallions, thyme, allspice, hot peppers, onions and garlic. Some jerks use citrus juice or vinegar to add tartness, or molasses to add sweetness. Typically used on chicken or pork, jerk also complements fish dishes.
Jicama A root vegetable that looks like a large brown turnip with white sweet crisp flesh.
Mango A tropical fruit with thick skin varying in color from green to bright red. Its flesh is yellow, firm and sweet, and can be eaten raw or as part of many marinades, sauces, ice creams and sorbets. Green mangoes are a main constituent of the best chutneys and are used in down-island stews as a vegetable.
Mauby (or Mawby) Mauby is the bark of a tropical tree. It is boiled with spices to make a Caribbean drink of the same name, reputed to lower blood cholesterol.
Mojito Cuban cocktail made with rum, lime and soda water.
Okra This green pod-like fruit was introduced to the Caribbean region by African slaves, and is cooked as a vegetable on the islands. Often used as a thickening agent in soups and stews.
Paella Of Spanish origin, paella generally consists of rice topped with chicken, pork, chorizo sausage, shrimp, clams, mussels, and peas in a chicken saffron stock. However, paellas do not have a set list of ingredients, and are as varied as the chefs who create them.
Papaya Also known as PawPaw, this is a large melon with sweet yellow-orange flesh. It can range in weight from 8 ounces to 20 pounds, and ranges in shape from round to pear-like to long and thin. Very popular ingredient in drinks, salads, and desserts.
Pick-a-Peppa Sauce A mango-tamarind based spicy pepper sauce from Jamaica.
Plantain Plantains, or cooking bananas, are a staple across the Caribbean. They must be cooked to be edible; however, they need not be ripe. Green plantains and ripe plantains are often sliced, cooked in a seasoned batter and deep fried for fritters. Ripe plantains taste like a cross between a sweet potato and a banana. Tostones are green plantains sliced and fried, pounded flat and refried to form crispy chips.
Ropa Vieja Shredded beef in a spicy sauce. Means “old clothes” in Spanish.
Roti Exemplifies the heavy influence Indian cuisine has had on Caribbean cuisine. It begins with a round, Indian flat bread called a “roti” or “paratha” that is wrapped around a big dollop of curried goat, chicken, shrimp, pork or vegetables.
Salsas Intensely flavored “little dishes” halfway between a condiment and a side dish. These varied combinations of fruits, vegetables, spices, herbs and chili peppers add an intense flavor “kick” to any meal, and are simply and healthfully prepared.
Saltfish Saltwater fish which is salted and dried. Most often it is made with cod, but can be made with mackerel, herring or haddock. Served with Ackee as a specialty in Jamaica. Referred to as Bacalao on the Spanish-speaking islands, and Morue on the French-speaking islands. Bujol is a salted codfish salad made with onions and peppers.
Sofrito The basic components of this seasoning mixture are cilantro, bell peppers, onion, garlic, tomato, and sometimes chilies, additional herbs and salt pork colored with annatto. Sofrito is an important component of Asopao and numerous other Puerto Rican soups, stews and vegetable dishes.
Sorrel A tropical flower grown throughout the islands, it is boiled with other ingredients such as cloves, orange zest, and ginger, and then sweetened to make drinks, jams and jellies. The spicy-tart beverage is a beautiful raspberry-grape color, and is a Christmas tradition throughout the English-speaking islands.
Soursop A large, dark green heart-shaped fruit covered with soft spines. Widely grown on the islands for its refreshing sour juice used in drinks, sorbets and ice creams.
Stamp and Go Codfish patties fried in heavy batter which has been flavored with onions, annatto, and chiles. Popular in Jamaica. “Stamp and Go” was a command given to 17th century English sailors when they had a task to do, like pulling on a rope.
Tamarind The fruit of a very large tree, it is a brown pod about 3-4 inches long which grows in bunches. Used in chutneys, curries and Worcestershire sauce.
Yuca Also known as cassava, or manioc, it can be eaten boiled, baked or fried. It is a long, slim tuber (like a long potato) with bark-like skin and very starchy flesh that becomes nearly translucent when cooked. It is used to make casareep, a bittersweet syrup, and tapioca, a common thickening agent. It is also ground into meal to make bread.

ANGEL FOOD CAKE & LEMON CAKE SQUARES with ITALIAN BUTTERCREAM & ROASTED COCONUT

I think grams got this recipe originally from the side of a Swan’s Down cake flour bag.
ANGEL FOOD CAKE
1 1/4 cups sifted Swans Down cake flour
1/2 cup + 1 1/3 cups sugar sifted sugar
1 1/2 cups +/- 12 room temperature egg whites,
1/4 teaspoon salt
1 1/4 teaspoon cream of tartar
1 teaspoon PURE vanilla
1/4 teaspoon almond extract

NOTE:For chocolate angel food, substitute 1/4 cup cocoa for 1/4 cup cake flour and omit for chocolate angel food

  • Sift flour* once, measure and add 1/2 cup sugar and sift together several more times.
  • Combine egg whites, salt, cream of tartar, and flavorings in large mixing bowl. Whisk continuously until the whites form soft peaks that are moist and glossy.
  • Then add the rest of the sugar very gradually over the whites and beating until sugar is blended, about 25 beating strokes per time.
  • Add flour and sugar mixture very gradually, sifting it over the egg whites. Fold in each addition turning bowl gradually. Use 15 complete fold over strokes each time. After last addition. use 10 to 12 additional fold over strokes.
  • Gently pour into a 10″ ungreased tube pan.
  • Bake at 375 degrees for about 35 to 40 minutes.
  • Frost and sprinkle with toasted coconut.

*and cocoa when making chocolate angel food

LEMON SPONGE CAKE
6 eggs
1 cup sugar
2 tablespoons freshly squeezed lemon juice + rind of 1 lemon
1 cup flour
1/4 teaspoon salt
1/2 cup chopped walnuts, optional

  • Preheat oven to 325 degrees.
  • Beat yolks of eggs until thick and lemon colored.
  • Whisk egg whites until stiff peaks form. Set aside.
  • Gradually beat in the sugar, grated lemon rind, and juice.
  • Fold in half of the stiffly beaten egg whites.
  • Cut in sifted flour and salt, add nuts if desired, and remaining egg whites.
  • Bake in a slow oven for about one hour or until toothpick inserted in center of cake comes out nearly clean.
  • Frost and sprinkle with toasted coconut.
  • Chill overnight or several hours.

ITALIAN BUTTERCREAM
3/4 cup white sugar
1/3 cup corn syrup
1/3 cup water
3 egg whites
1 1/2 cups unsalted butter, chilled and cubed
2 teaspoons vanilla extract

  • In a saucepan, combine the sugar, corn syrup and water.
  • Bring to a boil over medium-high heat, stirring just enough to dissolve the sugar. Heat to between 223 and 234 degrees F., or until a small amount of syrup dripped from a spoon forms a soft thread. It should take 1 or 2 minutes.
  • When the sugar mixture has reached the thread stage, remove it from the heat and set aside to cool.
  • Whip the egg whites in a large bowl with an electric mixer. When the whites can hold a stiff peak, pour in the sugar syrup in a thin stream while continuing to whip at medium speed. Be careful not to pour too quickly, or it will all just end up at the bottom of the bowl. When the syrup is incorporated, continue to mix for 10 more minutes to allow it to cool. The egg whites will be fluffy and glossy.
  • Add pieces of cold butter one at a time to the egg whites and continue to whip at medium or low speed.

TOASTED COCONUT
1 16 ounce bag coconut
4 tablespoons butter melted

  • Preheat oven to 350 degrees.
  • Toss coconut in melted butter until well coated.
  • Spread evenly on a jelly roll pan.
  • Bake for fifteen minutes and then flip coconut and bake another 15 minutes until golden brown.

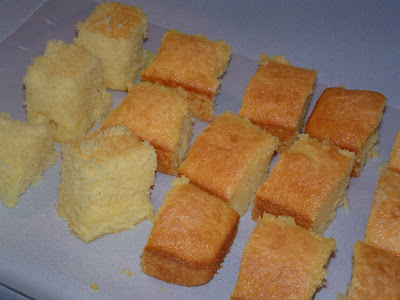
Another wonderful use for my new brownie pan! Individual cakes for the BBQ.

 
We had a casualty that the dogs loved!

I think grams got this recipe originally from the side of a Swan’s Down cake flour bag.
ANGEL FOOD CAKE

1 1/4 cups sifted Swans Down cake flour
1/2 cup + 1 1/3 cups sugar sifted sugar
1 1/2 cups +/- 12 room temperature egg whites,
1/4 teaspoon salt
1 1/4 teaspoon cream of tartar
1 teaspoon PURE vanilla
1/4 teaspoon almond extract

NOTE:For chocolate angel food, substitute 1/4 cup cocoa for 1/4 cup cake flour and omit for chocolate angel food

  • Sift flour* once, measure and add 1/2 cup sugar and sift together several more times.
  • Combine egg whites, salt, cream of tartar, and flavorings in large mixing bowl. Whisk continuously until the whites form soft peaks that are moist and glossy.
  • Then add the rest of the sugar very gradually over the whites and beating until sugar is blended, about 25 beating strokes per time.
  • Add flour and sugar mixture very gradually, sifting it over the egg whites. Fold in each addition turning bowl gradually. Use 15 complete fold over strokes each time. After last addition. use 10 to 12 additional fold over strokes.
  • Gently pour into a 10″ ungreased tube pan.
  • Bake at 375 degrees for about 35 to 40 minutes.
  • Frost and sprinkle with toasted coconut.

*and cocoa when making chocolate angel food

LEMON SPONGE CAKE
6 eggs
1 cup sugar
2 tablespoons freshly squeezed lemon juice + rind of 1 lemon
1 cup flour
1/4 teaspoon salt
1/2 cup chopped walnuts, optional

  • Preheat oven to 325 degrees.
  • Beat yolks of eggs until thick and lemon colored.
  • Whisk egg whites until stiff peaks form. Set aside.
  • Gradually beat in the sugar, grated lemon rind, and juice.
  • Fold in half of the stiffly beaten egg whites.
  • Cut in sifted flour and salt, add nuts if desired, and remaining egg whites.
  • Bake in a slow oven for about one hour or until toothpick inserted in center of cake comes out nearly clean.
  • Frost and sprinkle with toasted coconut.
  • Chill overnight or several hours.

ITALIAN BUTTERCREAM
3/4 cup white sugar
1/3 cup corn syrup
1/3 cup water
3 egg whites
1 1/2 cups unsalted butter, chilled and cubed
2 teaspoons vanilla extract

  • In a saucepan, combine the sugar, corn syrup and water.
  • Bring to a boil over medium-high heat, stirring just enough to dissolve the sugar. Heat to between 223 and 234 degrees F., or until a small amount of syrup dripped from a spoon forms a soft thread. It should take 1 or 2 minutes.
  • When the sugar mixture has reached the thread stage, remove it from the heat and set aside to cool.
  • Whip the egg whites in a large bowl with an electric mixer. When the whites can hold a stiff peak, pour in the sugar syrup in a thin stream while continuing to whip at medium speed. Be careful not to pour too quickly, or it will all just end up at the bottom of the bowl. When the syrup is incorporated, continue to mix for 10 more minutes to allow it to cool. The egg whites will be fluffy and glossy.
  • Add pieces of cold butter one at a time to the egg whites and continue to whip at medium or low speed.

TOASTED COCONUT
1 16 ounce bag coconut
4 tablespoons butter melted

  • Preheat oven to 350 degrees.
  • Toss coconut in melted butter until well coated.
  • Spread evenly on a jelly roll pan.
  • Bake for fifteen minutes and then flip coconut and bake another 15 minutes until golden brown.

PEACHES – it’s that time of year.

Source 1 Source 2

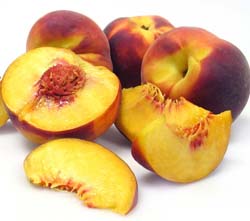
Peaches are believed to be native to China. They are cultivated throughout warm temperate and subtropical regions of the world. In the peach fruit, the stone is covered with a fleshy substance that is juicy, melting, and of fine flavor when matured and mellowed.

The popular division of fruit varieties into clingstones and freestones-referring to the relative tendency of the flesh to cling to the stone-is by no means accurate. These two classes merge in different varieties, and even the same variety may be freestone and clingstone in different seasons. The nearly 300 varieties of peaches grown in America have been classified into five races, each with outstanding characteristics, ripening season, and uses.The nectarine is a variety of peach.

The principal peach-growing state is California. World production totaled about 5.5 million metric tons annually; the United States and Italy were the leading producers.

How to Store:
To ripen peaches, store in a brown bag at room temperature. Ripe peaches can be stored in the crisper bin of your refrigerator for up to five or sixdays.

Nutritional Facts:
· Fat-free
· Saturated fat-free
· Sodium-free
· Cholesterol-free
· High in vitamin A
· A good source of vitamin C

August is National Peach Month. Here’s a round-up of facts about one of the world’s favorite fruits.

History Of The Peach

  • The peach originated in China and has been cultivated at least since 1000 B.C.E. It has special significance in Chinese culture: The peach tree is considered to be the tree of life and peaches are symbols of immortality and unity. Peach blossoms are carried by Chinese brides.
  • Peaches traveled west via the silk roads to Persia, earning them the botanical name Prunus persica. In Persia, peaches were discovered by Alexander the Great, who mentions half a dozen types, and who introduced them to the Greeks.
  • By 322 B.C.E. Greece enjoyed the peach, and by 50 to 20 B.C.E., Romans grew and sold them for the modern equivalent of $4.50. The Romans called the peach a Persian apple, and the name for peach in numerous languages is the name for Persia.* Once the Romans cultivated the fruit, they were able to transport it north and west to other countries of their European empire. *Pêche (French), Pfirsich (German), pesca (Italian), melocotón (Spanish), pêssego (Portuguese), fersken (Danish/Norwegian), persika (Swedish), persikka (Finnish), persik (Russian), brzoskwinia (Polish), breskva (Serbo-Croat), piersica (Romanian), praskova (Bulgarian), robakinon (Greek), seftali (Turkish), afarseq (Hebrew), khúkh (Arabic), hulu (Persian), arú (Hindi), tao (Chinese), momo (Japanese), persik (Indonesian).
  • Spaniards brought peaches to South America and the French introduced them to Louisiana. The English took them to their Jamestown and Massachusetts colonies. Columbus brought peach trees to America on his second and third voyages.
  • To this day China remains the largest world producer of peaches, with Italy second. Italy is the main exporter of peaches in the European Union; the regions of Campania and Emilia Romagna account for more than 50% of Italy’s annual production. California produces more than 50% of the peaches in the United States (and grows 175 different varieties). So many peaches are grown in Georgia that it became known as the Peach State.
  • True wild peaches are only found in China. Unlike the cultivated fruit, the wild fruit is small, sour and very fuzzy.

Peach Varieties

  • Peach varieties can be either clingstone, where the flesh of the fruit clings to the Clingstone Peachesstone, or freestone, where the stone readily twists away from the fruit. The former type is generally used for canning; the latter is generally found in supermarkets. Clingstone and freestone peaches are available in both white and yellow varieties. Giant yellow peaches. Available in season at Melissas.com.
  • Asians generally prefer the sweeter and less acidic white varieties of peach. The sweetness is due to the “honey gene,” a dominant gene that is found in all Chinese peach varieties. Europeans and Americans have typically cultivated the yellow-skin, yellow-flesh varieties, which have higher acid.
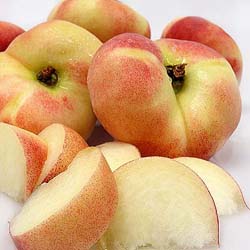
  • The downy skin of the peach is generally flushed with red coloring, in both yellow Saturn Peachand white varieties. The most widely-available peaches are round with a pointed end, but they can also be flat and disc-shaped. The donut peach, which is flat with rounded sides that draw in toward an indented center, like a doughnut without a hole, is a descendant of the flat Chinese peach. A flat-variety “Saturn” peach, so-called because it resembles the rings of Saturn. Available in season (June-August) at Melissas.com.
  • The finest peaches of all are considered to be the pêches de vigne, which are small, red-fleshed fruits grown in vineyards in France and generally found only there. Covered with grayish down, they are not particularly attractive, but the flavor is said to be superb.

Nutrition and Factoids

  • Peaches are a good source of vitamins A, B and C. A medium peach contains only 37 calories.
  • You can ripen peaches by placing them in a brown paper bag for two to three days. Sliced, fresh peaches should be tossed in lemon or lime juice to prevent browning.
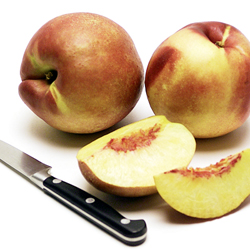
  • NectarinesNectarines are a variety of peach with a smooth skin, not a cross between a peach and a plum. At right: Honey Royale Nectarines, available in season from Melissas.com.
  • The juice from peaches makes a wonderful moisturizer, and it can be found in many brands of cosmetics.
  • A peach pit contains hydrocyanic acid, which is a poisonous substance.
  • Like the plum and the apricot, the peach is a member of the rose family (Rosaceae), distinguished by its velvety skin. It is classified as a drupe, a fruit with a hard stone.

Famous Peach Dishes

  • The Bellini: fresh peach purée and spumante, an Italian sparkling wine; Champagne or other sparkling wine can be used. The drink is said to have originated in the 1930s at Harry’s Bar in Venice, a favorite haunt of Ernest Hemingway, and is named for the 15th-century Venetian painter Giovanni Bellini. The peachy color of the cocktail reminded Cipriani of the color of the garments of St. Francis in a famous Bellini painting; Cipriani named the drink in Bellini’s honor.
  • Peach Melba: poached peaches, vanilla ice cream and raspberry purée. The dessert is named after Nellie Melba, the great Australian operatic soprano.
Peaches are a favorite fresh snacking fruit and cereal fruit, and make wonderful pies and jams. Peach ice cream is a summer favorite. Ripe peaches also freeze well for later use.

IT’S getting close to THAT TIME OF YEAR AGAIN!

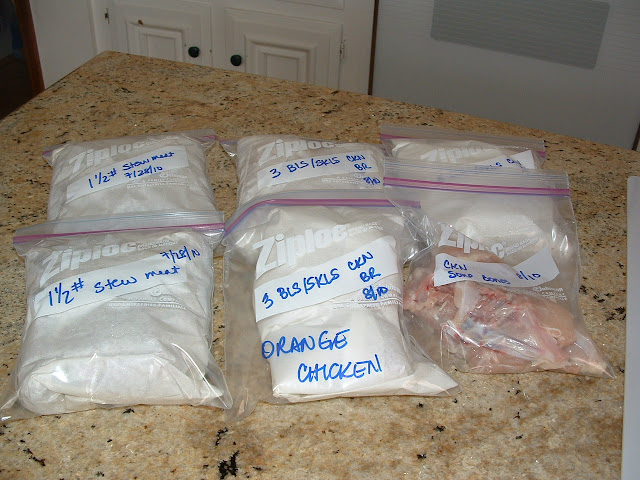
In the Fall I’m usually stocking up for winter in the wild and snowy north.  I start with LARGE bulk packs of meat.  I then break them down by size and meat right down to cutting certain recipes into bite sized pieces.  Then I wrap them in freezer paper because I really hate freezer burn!  And I package them into pre-labeled ziploc bags for the freezer.

I didn’t get a secondary picture, but I then wrap the center of each one with a strip of duct tape.  Yep, you read that right, duct tape.  Just a small strip.  Enough so when they’re stacked in the back of the freezer you can identify the meat.  I buy it in colors – red for beef, green for chicken and blue for pork.  It makes it soooooooo much easier when you’re searching in the freezer for the right meat.
Many times this prep includes rotisserie chickens.  My market at home has buy one, get one free on Tuesdays.  Can you figure out when I did my shopping? By the time I get home and put away the groceries, the rotisserie chickens are cool enough to pick off the bone.  The bowl below is the skin, congealed juices and bones I collected as I stripped 2 birds.
I think Martha (MM) and I met over some post about buying in bulk and we found a common ground – saving money!  Talk to your butcher.  Many times you can save even more than the advertised sale prices.  For example, recently my local market was running a sale on chuck roast.  None of the roasts were as large as I really needed for company so I asked the butcher if they had one the size I wanted and instead she offered up a manager’s daily sale (in the bulk section just a few feet away from the ones I was looking at) where I could buy twice as much for half as much saving me $8 over what I intended to spend and gave me enough for 3 meals.  I made ALL the chuck roast as Pot Roast & Veggies for company and then used the leftovers to make Ortega Chile Bake and Black Eyed Pea Chili.
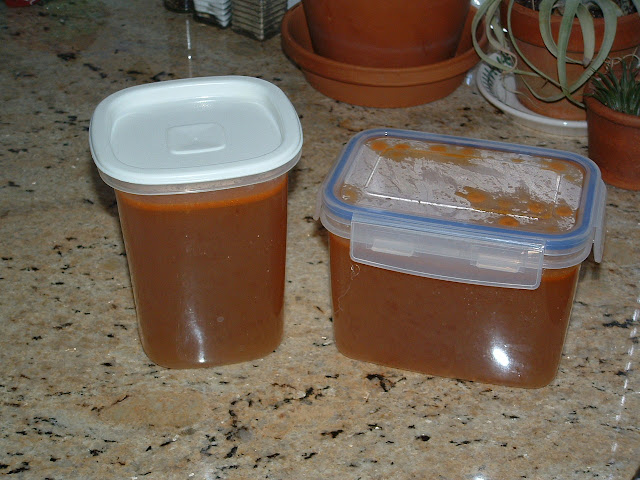
I then use a large stock pot and cover the “debris” with water.  I set it to simmer on a low temp and let it go for an hour or so.  I don’t add any seasonings since I’ve normally bought mesquite broiled or lemon herb, but adjust according to your tastes.

 Then I drain it into my large 8 cup measuring cup and allow it to cool.

I have several of these containers that I bought just for chicken stock in the freezer.  I haven’t bought chicken stock in over 10 years now.  It’s just so easy to make your own.  Even if I start with raw chicken and poach it for a recipe I add seasonings and by the time the chicken is done, there is several cups of broth ready for the freezer.

Today’s flavor was Mesquite broiled so it left us with a spicy red color also.

So what do you do to get ready for winter?  Have I motivated you to stock up? Have a wonderful Weekend! 

Can Number Conversions

Many old recipes call for an ingredient by the can size. I found these conversions in some vintage cook books. Many of my grandma’s old recipes called for a specific dollar amount of an ingredient. I wish I had a conversion table for 5 cents of hamburger or 10 cents of pork chops. I had to go to the library and try and convert from old grocery ads based on the approximate year.
  • No. 1 can = 1 1/3 cups
  • No. 1 tall = 2 cups
  • No. 2 can = 2 2/3 cups
  • No. 2 1/2 can = 3 3/5 cups
  • No. 3 can = 4 cups
  • No. 10 can = 12-13 cups
  • No. 303 = 2 cups

Good Cast Iron really makes the best non-stick pan… and SMOTHERED CHOPPED STEAKS taste best made in that pan.

After a really good seasoning, these pans are awesome and produce super tasty recipes!  

How to Season Cast Iron Cookware


Cast iron lasts nearly forever if you take care of it. Seasoning cast iron cookware is necessary to ensure a non-stick surface and to prevent the pot or pan from rusting. If seasoned correctly your cookware can last a lifetime and more.
  1. For crusty cast ironware that you inherited or picked up at a garage sale: Your cookware may have some combination of rust and thick crackly black crud. It can be restored fairly easily to good as new condition! First place the cookware in a self-cleaning oven and run one cycle OR place in a campfire or directly on a hot charcoal fire for 1/2 hour, until dull red. The crust will be flaking, falling and turning to white ash. Then, after allowing to cool a bit to avoid cracking your cast iron,use the following steps. If you have more rust than crust, try using steel wool to sand it off.
  2. Wash your cast iron cookware with warm water and soap using a scouring pad. If you have purchased your cast iron cookware as new then it will be coated in oil or a similar coating to prevent rust. This will need to be removed before seasoning so this step is essential.
  3. Dry the cookware thoroughly, it helps to put the pan in the oven for a few minutes to make sure it’s really dry. Oil needs to be able to soak into the metal for a good seasoning and oil and water don’t mix.
  4. Coat the pot or pan inside and out with lard, Crisco, bacon fat, or corn oil. Ensure that the lid is also coated.
  5. Place both the lid and the pot or pan upside down in your oven at 300F for at least an hour to bake on a “seasoning” that protects the pan from rust and provides a stick-resistant surface.
  6. For best results repeat steps three, four and five.
  7. Ongoing care: Every time you wash your pan, you must season it. Place it on the stove and pour in about 3/4 tsp. corn oil or other cooking fat. Wad up a paper towel and spread the oil across the cooking surface, any bare iron surfaces, and the bottom of the pan. Turn on the burner and heat until smoke starts to appear. Cover pan and turn heat off.

Alternate Method
  1. First, if you find your cast iron needs to be stripped down and re-seasoned do not fear. All you have to do is place the utensil in your Self Cleaning Oven on the shortest cleaning cycle (usually 3 hrs. on most models), and it will come out looking like the day it came out of the mold. Allow it to cool overnight. Wash the residue off with WATER ONLY in the sink using a stiff abrasive pad. Make certain NO DISH SOAP comes in contact with the utensil during this procedure. If it does you will have to start over!!! Dry the cast iron utensil off with a paper towel, and IMMEDIATELY place BACK in the oven at 350 degrees Fahrenheit for 10 minutes or so.
  2. Next, take the utensil out of the oven after the 10 minute drying time is complete, and lightly brush the utensil with a paper towel coated with Crisco or other solid cooking oil. Liquid vegetable oil will do in a pinch, but it’s better to save the liquids until AFTER your initial seasoning. It is important in this step only to lightly coat the cast iron with a light, thin coat of oil until it only glistens. Do not allow any puddles or pools of liquid as this will cause problems at a later time.
  3. Then, place the Cast Iron in the oven set to 500 to 550 degrees Fahrenheit with the COOKING SIDE FACING THE BOTTOM OF THE OVEN. This allows for any excess oil to drain off to the sides, and prevents pooling during the seasoning process. The higher heating temps allows for the oil to truly ‘cook’ as it should as opposed to just ‘gumming up’ at lower temps. Cook undisturbed for 1 hour.
Please note: During the previous step it will be best to turn off any smoke alarms in the immediate area as it may smoke quite a lot. Ceiling fans also aid in ventilation.
Finally, after your cast iron is finished seasoning for 1 hour or so, take it out of the oven and IMMEDIATELY wipe it down with another extra – light coat of Crisco. Allow it to completely cool.

TIPS

  • If food burns, just heat a little water in the pan, and scrape with a flat metal spatula. It may mean that re-seasoning is necessary.
  • If you’re washing the cast iron too aggressively (for instance with a scouring pad), you will regularly scrub off the seasoning. Wash more gently or repeat oven-seasoning method regularly.
  • If your pan develops a thick crust, you’re not washing it aggressively enough. Follow “crusty pan” instructions.
  • If storing your Cast Iron Dutch oven for any length of time, it is always best to place one or two paper towels in between the lid and the oven to allow for air flow.
  • Also, after cleaning after each use it is always best to place it back in the oven on 350 degrees for 10 minutes or so to ensure all water has vaporized and left the surface of the cast iron.
WARNINGS
  •  Do not cook tomatoes and other acidic foods in your cast iron cookware unless it has been well seasoned.
  •  Washing pans with detergent after they have been seasoned will break down the seasoning. Either wash without detergent (if you’re cooking similar foods with the pan, this is fine) or repeatedly oven-season your cookware.

SMOTHERED CHOPPED STEAKS

2 pounds ground sirloin
1 sleeve Keebler club crackers, crushed
1/2 teaspoon sea salt
1/2 teaspoon white pepper
1 tablespoon Worcestershire sauce
1/2 cup finely chopped onion
2 Jumbo eggs
1 tablespoon liquid Smoke – MYSTERY ingredient
3 tablespoons butter
2 cloves garlic, minced
1 large heirloom tomato, chopped,
1 large Vidalia onion, sliced thin
large shred cheddar cheese
  • Combine all the hamburger steak ingredients until well mixed. Form six steaks.
  • In a well seasoned cast iron grill, sear steaks on both sides.  About 4-5 minutes each side should leave you with medium steaks.
  • In a large skillet melt the butter. Saute the onions and garlic until fragrant and caramelized.
  • Top steaks with onions, tomatoes and cheese.

CARROT TUTORIAL

Carrots are an important vegetable, and although they were known to the ancient Greeks and Romans, they were not introduced to Europe until the Middle Ages.
The orange-colored taproot of the carrot contains a high concentration of beta-carotene. Beta-carotene is a substance that is converted to vitamin A in the human body. A 1/2 cup serving of cooked carrots contains four times the recommended daily intake of vitamin A in the form of protective beta-carotene.
Beta-carotene is also a powerful antioxidant effective in fighting against some forms of cancer, especially lung cancer. Current research suggests that it may also protect against stroke, and heart disease. Research also shows that the beta-carotene in vegetables supplies this protection, not vitamin supplements.
Carrots are also a very good source of dietary fiber, vitamin C, vitamin K, folate and manganese, and a good source of vitamin B6, pantothenic acid, iron, potassium and copper.
Carrots can be eaten raw or cooked, but to obtain maximum benefit it is best to eat them raw.

Health Benefits
Carotenes, the famous ingredient in carrots, is an anti-oxidant that has powerful healing virtues for many diseases. Drinking a glass of carrot juice daily will do much more for you than many bottles of supplement tablets. Here are some disorders that can be helped by drinking carrot juice regularly:
Acidosis: The vital organic alkaline elements in carrots help balance the blood acidity and blood sugar.
Acne: Its powerful cleansing properties are effective in detoxifying the liver, thus overall effective for acne which are caused by toxicity of the blood.
Anemia: Carrot’s molecules are closest to human’s hemoglobin molecules, making it very beneficial in blood-building.
Atherosclerosis: The highly cleansing power of this miracle juice scrubs away even the old build-up of arterial deposits, reducing the risks of heart diseases and stroke.
Asthma: The anti-oxidants effectively protects the respiratory system from infections and free-radical attacks.
Cancer: Studies show that adding one carrot per day in our diet significantly reduces cancer risks.
Cholesterol: Pectin in carrots lowers the serum cholesterol levels.
Congestion: Carrot juice is very effective in dispelling mucus from the ear, nose and throat area, easing nasal congestion, sinusitis, phlegm and mucus in the throat and other similar disorders.
Constipation: Take five parts of carrot juice with one part of spinach juice regularly to regulate chronic constipation problems.
Emphysema: If you smoke or are exposed to second-hand smoke, taking carrot juice regularly may well save your life.
Eyes: Beta-carotene, lutein and zeaxanthin are some of the finest nourishment that help keep the optic system in tip-top condition, with special protection against astigmatism, macular degeneration and cataracts.
Fertility: One of the reasons for infertility is lack of nutrients and enzymes in your dietary. Carrot juice taken regularly, is able to nourish your body back to fertility.
Inflammations: Its anti-inflammatory effect greatly helps reduce arthritis, rheumatism, gout and other inflammations.
Immune systems: It does wonders for boosting the immune system by increasing the production and performance of white blood cells; building resistant to various kinds of infections.
Nursing mothers: Carrot juice helps enhance the quality and quantity of a mother’s breast milk.
Pregnancy: Drinking carrot juice regularly during pregnancy, especially during the last few months, will reduce the chances of jaundice in baby. No, you won’t get an orange baby!
Skin problems: The high quality vitamin C and other rich nutrients in carrot juice efficiently nourish the skin, preventing dry skin, psoriasis and other skin blemishes.
Thread worms: One small cup of carrot juice in the morning taken daily for a week can help clear up thread worms in children.
Ulcers: The abundance of nutrient present in carrots help nourish cells that have been starved of nutrients which result in ulcers.
Water retention: Carrot juice is diuretic and helps to eliminate excess fluids from the body, reducing water retention, especially for women during their monthly menstruation cycle and in pregnant women.
Carrots that are no longer than 6 inches tend to be sweeter. So choose the shorter variety if you like it sweet or the longer one if you prefer it less sweet.
The most nutrients are concentrated just under the skin so try not to peel off the skin. To clean it, simply use a hard brush to brush the skin.
Cut them lengthwise to preserve the nutrients as when cut in small rounds, they easily lose their nutrients in water when you wash or cook them.
You may have heard of people “turning orange” from drinking carrot juice. It is not the carrot juice that is showing through the skin but is an overflow of materials which have been clogging the liver and are being eliminated with the consumption of carrot juice. This shows how effective carrot juice is at cleansing, a good sign that the system is getting a good clean-up. When this “turning orange” happens, continue to take your carrot juice and the color will eventually go off as it cleanses.

BROWN SUGAR CRUMB CAKE

BROWN SUGAR CRUMB CAKE
CAKE
1/2 cups flour, sifted
1/2 cup sugar
1 tablespoon baking powder
1/2 teaspoon sea salt
1 JUMBO egg
1/2 cup milk
1 teaspoon vanilla

  • Preheat oven to 350°.
  • Prepare baking dish with cooking spray and a light flour dusting.
  • Sift together dry ingredients in a mixing bowl.
  • In a large mixing bowl whisk together the milk, egg and vanilla until well blended.
  • Gradually fold the dry ingredients into the wet ingredients JUST until combined. DO NOT OVER MIX!
  • Spread batter into pan.

TOPPING
1 1/4 cup flour, sifted
1 cup packed dark brown sugar**
2 teaspoons cinnamon, sifted
1/2 cup unsalted butter, melted

  • In a medium bowl sift together the dry ingredients.
  • Pour melted butter over dry ingredients and stir gently until crumbs form.
  • Sprinkle the crumbs over the batter.
  • Use a knife to swirl some of the crumb mixture down into the cake.
  • Bake 25-30 minutes or until toothpick comes out clean.
**With the move coming up I’m not replacing food and I was OUT of brown sugar!  Then I remembered I had cut out an article on making your own brown sugar.  I have to say that in the future I may always make my own brown sugar – the flavor was so deep and rich.
HOMEMADE BROWN SUGAR
1 cup granulated sugar
1 tablespoon Grandma’s molasses for light brown sugar 
2 tablespoons Grandma’s molasses for dark brown sugar

Combine together in a large mixing bowl starting with a low speed and gradually increasing until well blended.  This can take as long as 10 minutes.

KNOW YOUR ARTICHOKE

One of the many things I miss most about the west coast is all of the available produce and the ability to grill ANY time of year without getting hypothermia while doing it!! I just can’t wait until we’re back home. In the meantime I’m taking advantage of ANY and all produce I can get.

A lot of people find artichokes intimidating. When artichokes are prepared well they are to die for. I even had a cream of Artichoke soup at a little cafe in Carmel a year or so ago that was excellent. I’m still trying to duplicate it.

There are more than 50 varieties of Artichokes. The most common type in the United States is the Green Globe. The mini versions you may see, known as baby artichokes are ideal for sautes and stir frying AND are as flavorful, if not more so than the larger ones. The size difference is due to where they grow on the stalk. The higher on the stalk, the bigger the artichoke.

Choosing an Artichoke:

  • You want an artichoke with a large heart and tender leaves.
  • Artichokes tend to have larger hearts if they are rounder.
  • They also have more tender leaves the smaller they get.
  • Look for deep-green, tight-leafed globes that feels heavy for its size.
  • When you squeeze the artichoke’s leaves together and it squeaks, it’s a fresh one.
  • Discoloration, bruising or split leaves are signs of age. Fresh artichokes may have purple-tinged leaves in late summer and fall.
  • It’s best to choose the smallest and roundest artichoke you can find.
  • I personally find large (grapefruit sized) Artichokes to be less tender and more fibrous. The small (egg sized) and medium (orange sized) ones are much more tender and easier to work with.

There are a few key secrets to preparing a great Artichoke:

  • Wash your Artichoke in cold running water and leave upside down to drain a few minutes.
  • Artichokes cannot be rushed – allow enough time for proper preparation. If you are going to be short on time, plan to prepare it the day before and then reheat.
  • You MUST trim the bottom stem and top leaves. Trimming the bottom rough part of the stem allows flavor to flow into the artichoke as it cooks. Trimming the top leaves (about 3/4 – 1 inch) does the same thing as well as removing the sticker part that WILL cut you if you’re not careful. Depending on how they look trim the very bottom leaves off the stem. Don’t be afraid to trim the tops as necessary. Remember that only about the bottom third of each leaf is actually edible.
  • Immediately rub any cut surface with lemon juice to prevent browning. You can also use flavored vinegars, but lemon juice is the most neutral.
  • Don’t forget even the stems are edible.
  • Never use a cast iron or aluminum pot to cook them in! The will discolor the pot AND the artichoke too! Use enamel or stainless steel.

Preparing your Artichoke:
There are as many ways to prepare an Artichoke as you have imagination. I’ll just list a few of the basic ones. Remember too that your seasoning and liquid all add flavor, so be creative. For example trade the water for chicken broth or add a touch of olive oil and garlic or flavored vinegars or juices…

You can also buy one of those baskets to stand your Artichoke in, but I prefer to use thick sliced onion rings in order to add a bit of flavor and have less mess when it’s all done. Despite most instructions you can cook an artichoke upside down too. I like this if I’m using many flavors. The flavors are being infused into the leaves and then the leaves are constantly draining back down into the base. This works much the same way as the drip knobs on the lid of a roasting pan. The onion rings work also either way.

  • Boiling: This is done with plain old water with a bit of salt. It has been determined that this is the least healthy way to prepare most vegetables since you are boiling the nutrients out of the vegetable itself. You add the Artichokes to rapidly boiling water. They take between 25-40 minutes until tender based on size.
  • Braising: This is the best method for using your flavored oils, vinegars and seasonings. Prepare your flavor combo and then add 2 cups water. Bring the mixture to a boil and reduce to a simmer before adding the onion rings and Artichokes. Cover tightly and simmer 25-40 minutes until tender.
  • DeepFrying: This is good for the hearts only.Dip them in the batter of your choice and fry until golden.
  • Grilling: Yep, you read right. Artichokes can be grilled and are EXCELLENT done that way. You do need to pre-cook them by steaming or microwaving until tender, but then it’s up to you. I then cut them right down the middle so I’ll have a flat side for the grill. I then like to soak them overnight in a lemon juice and garlic butter mixture before grilling. A Tupperware marinader that can be turned frequently without leaking works well. They don’t take long on the grill so just before you meat is finished grilling add the artichokes, turning frequently to prevent burning until the desired charring has been reached. Hubby has been known to add BBQ sauce and they are pretty tastey.
  • Microwaving: This is the fastest way, but not necessarily the tastiest. Stand Artichoke in a microwave safe bowl and add 1-2 inches of water. Cover bowl with a plate. Cooking on high a medium Artichoke will take 7-10 minutes while a large Artichoke will take 12-15 minutes. If cooking more than one at a time, you will need to add 2-3 minutes per additional each Artichoke. Let stand for 5 minutes in the covered bowl before serving.
  • Roasting: Roasting Artichokes will bring out their nutty flavor. This method also requires pre-cooking but reduce the precooking method time by 10 minutes. I like to dip each leaf into a combination of olive oil and garlic rice wine vinegar. I then let them drain a bit on a paper towel. Arrange the leaves on a stainless steel cookie sheet coated with a thin layer of PURE. Sprinkle lightly with salt. Roast in a 425 degree oven for about 10 minutes or until tender and and edges are just crisp. Start with the concave side of leaf down and turn mid way.
  • Sauteing: This method is also just for the hearts. Season with your favorite seasoning and then saute’ 3-5 minutes in your favorite oil.
  • Steaming: This is the most ideal method for maintaining the nutrients. Stand the Artichoke in the basket or onion rings. Add enough liquid that the pan won’t boil dry (you might have to add water so keep an eye on it), but make sure the Artichoke is above the water level. Cover and steam over the rapidly boiling water for 30-50 minutes until Artichokes are tender. Time depends on size.
  • Stuffed and Baked: This is one of my very most favorite ways to prepare an Artichoke. Pre-cook but reduce the precooking method time by 10 minutes. Halve the Artichokes. Mix together olive oil, Parmesan cheese, salt and pepper with a clove of garlic. Pulse into a thick paste. Using a spoon coat the inside of each leaf. Place on a stainless steel baking sheet sprayed with a thin layer of PURE. Bake at 400 degrees until tender. Drizzle with fresh lemon juice and butter immediately out of the oven. Serve with roast chicken or pork chops. YUMMY!

BROWN SUGAR CRUMB CAKE & HOW TO MAKE YOUR OWN BROWN SUGAR

BROWN SUGAR CRUMB CAKE
CAKE
1/2 cups flour, sifted
1/2 cup sugar
1 tablespoon baking powder
1/2 teaspoon sea salt
1 JUMBO egg
1/2 cup milk
1 teaspoon vanilla

  • Preheat oven to 350°.
  • Prepare baking dish with cooking spray and a light flour dusting.
  • Sift together dry ingredients in a mixing bowl.
  • In a large mixing bowl whisk together the milk, egg and vanilla until well blended.
  • Gradually fold the dry ingredients into the wet ingredients JUST until combined. DO NOT OVER MIX!
  • Spread batter into pan.

TOPPING
1 1/4 cup flour, sifted
1 cup packed dark brown sugar**
2 teaspoons cinnamon, sifted
1/2 cup unsalted butter, melted

  • In a medium bowl sift together the dry ingredients.
  • Pour melted butter over dry ingredients and stir gently until crumbs form.
  • Sprinkle the crumbs over the batter.
  • Use a knife to swirl some of the crumb mixture down into the cake.
  • Bake 25-30 minutes or until toothpick comes out clean.
**With the move coming up I’m not replacing food and I was OUT of brown sugar!  Then I remembered I had cut out an article on making your own brown sugar.  I have to say that in the future I may always make my own brown sugar – the flavor was so deep and rich.
HOMEMADE BROWN SUGAR
1 cup granulated sugar
1 tablespoon Grandma’s molasses for light brown sugar
2 tablespoons Grandma’s molasses for dark brown sugar
  • Combine together in a large mixing bowl starting with a low speed and gradually increasing until well blended.  This can take as long as 10 minutes.

Save

COOKING with KIDS

15% percent of children today are overweight and one of the many major reasons is their easy access to unhealthy food and the preconceived ideas that cooking is hard. Obesity, diabetes and liver disease are some of the consequences of kids not being comfortable in the kitchen.

The new Web seriesJr. Chefs of America” paves the way for kids to not just help in the kitchen but also to lead the cooking process. The program features confident teenagers giving live cooking demonstrations of their own recipes, showing that cooking is fun and easy — and one avenue to help stop the junk food epidemic.

Jr. Chefs” is both entertaining and educational for children — with delicious looking food and a catchy theme song.

My most recent personal experience of cooking with kids was with my girl scouts a few years ago on some simple tasks and the time with Amber a couple of summers ago. What readily comes to my mind though is my grandma teaching me way back when.

Grams would let me wear her apron which she so cleverly converted into a size that fit me pretty well. Then she would bring a kitchen chair over to the counter and let me climb up on it. She would let me help her do simple measurements or read her the recipe (that she already knew by heart, but wanted me to learn to understand) or stir pancake batter. When she taught me to measure it was EXACT, (though she didn’t herself and I grew into a by sight and feel cook myself). You used a table knife to level off the top of the measuring cup. She also taught me how to make the best cakes with double sifting. These days they say you don’t need to sift, but I feel I get a better texture and moister cake by still sifting.

No matter how old they are, kids want to help in the kitchen and we should be glad and always welcome their eagerness. Much of our life revolves around food and cooking in one way or another and boys as well as girls should learn at the very least, the basics. As Barbara pointed out, even finicky eaters become better eaters when they are a part of the process of making their own food.
 
You can include children of all ages in any food preparation. Just be aware of their capabilities and base their tasks on that. For example, every kid wants to wield the meat cleaver, but probably shouldn’t.
Start their tasks with simple ones like learning to measure correctly, snapping beans, washing vegetables, measuring rice, when to add the different ingredients and even simple things like cracking an egg which can certainly be messy, but every kid wants to do it! Grandma taught me to crack eggs into a separate bowl instead of directly into a recipe which turned out to be a very valuable lesson. You can always pick out egg shells if the only thing in the bowl is a single egg, but you don’t want to be doing it from a bowl with all your cookie makings in it. There was a point when I was using farm fresh eggs and let’s just say I was certainly glad I still used that separate bowl for eggs or my whole cookie batch would have needed to be tossed out. Kids can roll dough or meat into cookies or meatballs. They can use a fork to criss cross the tops of peanut butter cookies. Teaching them to clean up as they go will also be a benefit in so much of their life! If all goes well, this will also bleed over into cleaning up their toys and/or rooms.

As for that meat cleaver task at hand, you can take turns so that their tasks don’t involve the sharp implements, but yours do. Most importantly make it fun for you and them. The more fun they have, the more likely they are to want to learn more and more.