


Fire Day Friday: Steak Sandwiches with Chimichurri Mayo

Sometimes I get so caught up in trying to find exciting new recipes that I forget about the simpler things in life….like sandwiches. Sandwiches are so versatile and simple. What’s not to love about that? With a busy schedule and less and less time in the kitchen this week, I wanted to make something that would be filling and yet still make it seem like I worked hard to create a fantastic dinner 🙂 Enter the steak sandwich. Simple, true, but add a little chimichurri mayo and, well, suddenly your steak sandwich is anything but simple. It’s flavorful, it’s a tiny bit spicy, and it’s fresh tasting. Definitely a great alternative to your usual sandwich spread.
I kept the steak marinade very simple, I knew the mayo would have a great flavor and I didn’t want that to be over shadowed. You can marinate your steak in anything you want though, or even just drizzle with olive oil and season with salt and pepper, steaks don’t usually need much, they are usually so flavorful in themselves.

Steak Sandwiches with Chimichurri Mayo
Adapted from America’s Test Kitchen 30-Minute Suppers
Ingredients:
1 lbs. top sirloin (or any steak really)
1/2 cup beer (I used Bud Light)
1 Tablespoon Worcestershire sauce
1 Tablespoon Sambal Oelek (chili paste)
5 Tablespoons mayonnaise
1 Tablespoon red wine vinegar
1 garlic clove, finely minced
1 teaspoon dried oregano
1/2 teaspoon red pepper flakes
1/4 cup fresh parsley, finely chopped
4 hoagie buns, french rolls, or thick cut crusty bread
Lettuce (optional)
Tomato (optional)
Cucumber (optional)
Directions:
In a bowl, mix together the beer, Worcestershire, and Sambal Oelek. Place steak in a resealable bag and pour marinade over it. Let marinate for at least 4 hours.
Meanwhile, in a small bowl, mix together the mayonnaise, vinegar, garlic, oregano, and red pepper flakes until smooth. Add the parsley and stir to combine. Cover and place in refrigerator until ready to use.
Preheat grill to 400 degrees. Place the steak directly on the grill grates and grill until cooked to your liking. I prefer medium rare so I put my steak on for about 5-6 minutes per side, depending on thickness. Remove from grill and allow to sit for 5 minutes before slicing thin against the grain. Slather some of the chimichurri mayo on the bread (I toasted my buns first..yum!!), arrange steak on bun and top with lettuce, tomato, and/or cucumber. Enjoy!

IRL Meeting

SOUTH WESTERN CHICKEN CASSEROLE

SOUTH WESTERN CHICKEN CASSEROLE
3-6 boneless, skinless chicken breasts
3 cups frozen hash brown potates
1 large can Durkee’s french fried onions, divided
1 can Old El Paso green enchilada sauce
1 can Rotel tomatoes, drained
1 can white niblets corn, drained
1 cup grated sharp white cheddar, divided
3 tablespoons butter
3 tablespoons flour
1/4 teaspoon salt
1 cup milk
salt and pepper to taste
PURE
- Preheat oven to 375 degrees.
- Spray large casserole dish with PURE.
- Spread potatoes along the bottom.
- Top with first half of french fried onions.
- Top with first half of cheese.
- Salt and pepper chicken breasts layering them over cheese seasoned side down.


- Salt and pepper top sides of chicken.
- Layer corn and tomatoes over top of the chicken.

- Melt the butter in heavy saucepan.
- Blend in flour and salt. Cook until bubbly.
- Remove from heat and gradually stir or whisk in liquid.
- Return to heat and cook, constantly stirring until smooth and thickened.
- Whisk in enchilada sauce.
- Pour over corn and tomato layer.


- Top with remaining cheese.
- Ring French fried onions around the edge.
- Bake 30-45 minutes covered.
- Bake another 15-30 minutes uncovered.
- Let stand 5-10 minutes.

These were our wonderful potato leftovers below and they tasted better and more full of flavor on day 2 and 3.

TWEET TWEET
SIL PULLS THE WOOL OVER SON IN LAW’S EYES

My niece’s campsite was strung with yellow crime scene tape when we arrived at the campground. Apparently there had been a huge beehive in one of the trees. SIL then decided to pull a joke on her son-in-law and used some pancake powder to outline hubby’s body in the grass of their campsite. She then begged the grounds people to leave up the yellow tape until after their arrival. Let’s just say it was the joke of the year!
I’m ready

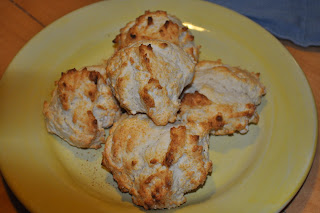
Save Room for Dessert…White Chocolate-Strawberry-Cranberry Cookies

Earlier in the school year, the PTA at Andrew’s school had an Otis Spunkmeyer cookie drive. The strawberry shortcake cookie was my absolute favorite, and after I baked the last of the cookies from the 3-lb bucket, I knew I’d have to recreate the recipe since there wouldn’t be another cookie drive until the fall. Using my basic white chocolate chip cookie recipe, I added dried strawberries and cranberries. After a few tries, I finally came up with my favorite ratio of strawberries to cranberries. I like these slightly underbaked, so they stay soft and chewy, but if you prefer a crisp cookie, allow them to bake the entire 10 minutes.
For a delicious dessert treat, place a slightly warm cookie on a plate, then add a scoop of vanilla ice cream and a drizzle of dark chocolate syrup….be sure to save room for dessert…
White Chocolate Strawberry Cranberry Cookies
1 1/2 cups all purpose flour
1/2 teaspoon baking soda
1/2 teaspoon baking soda
1/8 teaspoon salt
1/2 cup unsalted butter, softened
1/2 cup packed brown sugar
1/2 cup granulated sugar
1 large egg
1 teaspoon vanilla
1/2 cup unsalted butter, softened
1/2 cup packed brown sugar
1/2 cup granulated sugar
1 large egg
1 teaspoon vanilla
1 cup white chocolate chips
1 1/2 cups dried strawberries
3/4 cup dried cranberries
Preheat oven to 375 degrees.
Line baking sheet with parchment or spray with non-sticking cooking spray.
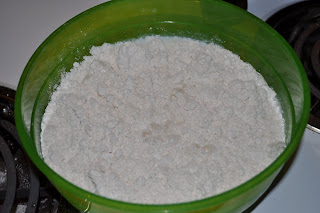
In a small bowl, whisk flour, baking soda, and salt together; set aside.
In a large bowl, cream together butter, brown & granulated sugars, and vanilla until smooth.
Beat in egg.
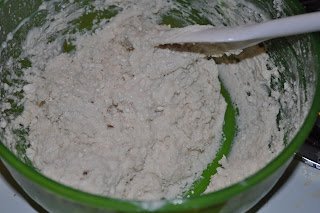
Stir flour mixture into sugar mixture.
Mix in the white chocolate chips, cranberries, and strawberries.
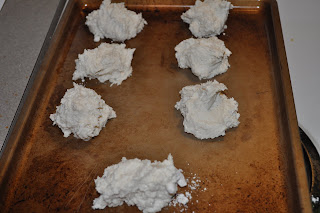
Using a cookie scoop, portion dough onto prepared baking sheet.
Bake at 375 degrees for 8 to 10 minutes.
Allow cookies to cool for 2 minutes on baking sheet before removing to a wire rack to cool completely.

If you look closely, you’ll see a white paw trying to steal part of a cookie…

Success on her 2nd attempt…
Playing with Pedro

PURPLE IS MY FAVORITE COLOR

Crockpot Upside Down Chicken Pot Pie
Crockpot Upside Down Chicken Pot Pie Recipe:
1 1/4 lbs of boneless, skinless chicken thighs
1 T dried, minced onion
1 bay leaf
1 jar chicken gravy
2 medium celery stalks, cut into 1/2 inch slices
1 bag frozen vegetables
2 1/4 cups Original Bisquick mix
2/3 cup milk
Directions:
Place chicken in slow cooker. Top with onion, bay leaf, pepper and chicken gravy. Place celery on gravy. Cover and cook on Low for 8 to 10 hours. About 30 minutes before serving, make and bake 8 biscuits usin biscuit mix and milk as directed on package. Gently stir frozen vegetables into chicken mixture. Increase setting to High and cook covered for 15 minutes. Remove bay leaf. For each serving, split biscuit and place in soup bowl or tart pan. Spoon about 3/4 cup chicken on mixture on top biscuit.
Modifications:
-Instead of using Bisquick, just use frozen biscuits.
-Add a bit more liquid, and eat as a soup.
Here’s what you’ll need:

Season the chicken. I used Home Seasoning.

Put the chicken thighs in a crockpot.

Add in the 1 Tablespoon of dried, minced onion.

Drop in the bay leaf and cover with the chicken gravy.

Chop up the celery.


Let it cook for 8-10 hours. The chicken will literally fall apart.

About 30 minutes before ready to eat, preheat the oven to 450 degrees and added the bag of frozen vegetables.


Time to make the biscuits . . .2 1/4 cups of the Bisquick.

Plus, 2/3 cups of milk.


Stir

Drop them on an ungreased cooksie sheet and bake for about 10 minutes.


Open a biscuit and pile on the chicken and vegetable mixture.

This was such an easy meal to make. If you like your pot pie to be a little runnier, you might want to add in an extra jar of gravy or half of a jar about an hour or so before you are going to eat.
Veggie Tales by Kris: Tapas!
When you go to Spain, except a lot of pork and cheese.
But the vegetables are bountiful!
The average french fry may not seem like a vegetable, but the Spanish Tapas classic “Bravas” is a must!
I just got back from Barcelona, and this dish was so delicious.
Puts the beloved French Fry to shame in my opinion (gasp!)
I’ve made Bravas before, but definitely learned a little secret across the pond!
PATATAS BRAVAS

3 large Idaho potatoes, cubed
grapeseed oil (you’ll need to fill your pot 1/2 with oil so that the potatoes are covered. Leave room for bubbling over!!! YIKES!)
Sweet and Hot Paprika Mixture (1 tbs)
salt and pepper to taste
Hot Sauce
Mayo (the secret!)
Peel and cube 3 large Idaho potatoes (these are the best for frying). You can put them in a large bowl of ice water to keep from browning and to get some of the starch out. Prep your fryer or a tall pot (not too wide) with grapeseed oil. Grapeseed oil is great for fring. You can use canola oil too but I think that shit is evil! Use a thermometer to test the oil. At about 350 it’s ready. Fry your potatoes a few at a time. When they are golden brown, put them on a plate with papertowel. Sprinkle salt, pepper and smoked paprika on each batch and keep them in a warm over (about 200) while you fry them all up. Drizzle hot sauce and mayo over the potatoes or mix them together and serve on the side.
MY BRAVAS in BARCELONA!

I originally served these potatoes with this sauce, but in Barcelona I had it with the hot sauce and mayo and I like that simplicity much better. After my time in Spain, when it comes to food, I’ve learned… SIMPLE IS BEST!
Happy Weekend!