Save Room For Dessert: Wedding Cookies!

Kris here from Behold the Metatron, The Motivation Station, The Writer’s Blog, Where to Vegan, AND Veggie Tales here at the crazy kitch! I don’t think I have enough time on my hands! Anyway… in the spirit of our love for all things dessert, here’s one of my favorites!
 

Wedding Cookies

Whether you call them Italian, Russian, Greek… these cookies are still the same delicious, powdery balls of nutty sweetness. And what better way to celebrate Wedding Season with a treat fit for a scrumptious reception!

Ingredients

1 1/2 cups unsalted butter
3/4 cup confectioners’ sugar
3/4 teaspoon salt
1 1/2 cups finely ground almonds (I used 1/2 pecan 1/2 almond)
4 1/2 teaspoons vanilla extract
3 cups sifted all-purpose flour
1/3 cup confectioners’ sugar for rolling

Directions

  1. Preheat oven to 325 degrees F (165 degrees C). 
  2. Cream butter or margarine in a bowl, gradually add confectioners’ sugar and salt. Beat until light and fluffy. Add almonds and vanilla. Blend in flour gradually and mix well.
  3. Shape into balls (or crescents) using about 1 teaspoon for each cookie. Place on ungreased cookie sheets, and bake for 15-20 min. Do not brown. Cool slightly, then roll in the extra confectioners’ sugar.


Now, this recipe is for up to 80 cookies. If you are not in the mood to make that many… just click here and the recipe adjuster will help you out!

BOEUF FLAMANDE aka BEEF IN DARK BEER, well sort of

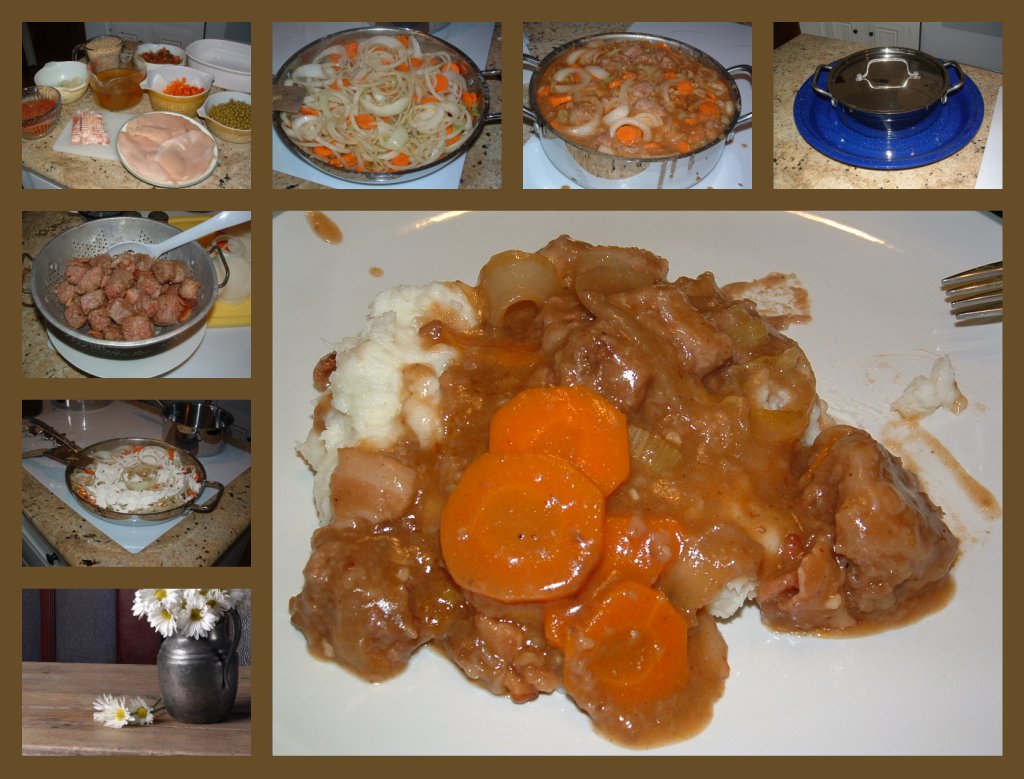
I found this recipe in the bottom of grams pile of magazine/book clippings to try one day.  It just screamed, “try me for the guys”.  BOEUF FLAMANDE translates into ‘Beef Stew in a rich sauce made with beer’. But I don’t like dark beer so I adjusted the recipe and it worked really well. The guys we’re asking when we’re doing the leftovers.  This will be perfect on a cold winter’s night!

BOEUF FLAMANDE
1/2 pound bacon, cut into 1/4″ cubes
3 pounds beef stew meat, cut into bite size pieces (I used brisket)
1 teaspoon sea salt
1/2 teaspoon white pepper
3 tablespoons butter
3 cloves garlic, minced
2 large Vidalia onions, cut into thin slices
2 large carrots, sliced
1/2 cup flour + dredging flour
1/2 cup Country Bob’s All Purpose Sauce
3/4 cup Dr. Pepper (yep you read that right)
3 cups boiling water
3 tablespoons Better than Beef Bouillon
1/2 teaspoon thyme
2 teaspoons sugar
1 tablespoon Worcestershire sauce
3 tablespoons champagne vinegar
fresh parsley sprigs

  • Preheat oven 325 degrees.
  • Place the flour into a plastic bag.
  • Brown bacon pieces until crisp.  With a slotted spoon remove to drain.
  • Dredge beef pieces in the flour mixture.
  • Brown beef pieces in bacon fat*.  With a slotted spoon remove beef pieces to a colander to drain.
  • Add butter to saute pan. 
  • Saute’ carrots for several minutes.
  • Add the onions and garlic until fragrant and translucent.
  • Stir in 1/2 cup flour, salt, pepper and thyme.
  • Whisk together the hot water, sugar and bouillon. 
  • Add Country Bob’s sauce, Worcestershire sauce, champagne vinegar and Dr. Pepper until well blended. 
  • Add to veggies.
  • Bring to a fast boil.
  • Lower heat to a simmer for 5 minutes.
  • Spray a casserole with PURE.
  • Add browned meat to the casserole.
  • Top with onions and carrots.
  • Pour sauce over top and blend well.
  • Bake for 2 1/2 hours or until meat is tender.
  • Serve over Parmesan Potatoes.

*May have to add a bit of butter or oil if not enough bacon grease.

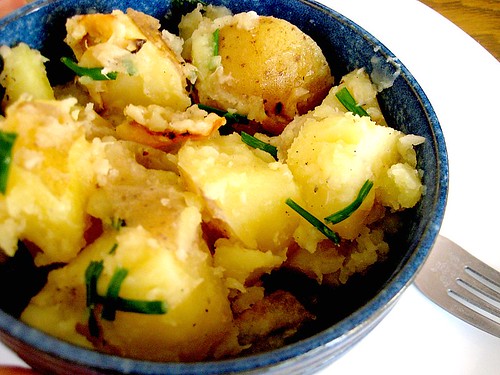
Garlic Smashed Potato Salad – Cooking The Italian Way

potato salad

You know how celebrities always have to be worried that the non-celebrities that they date are only dating them for their VIP status?  Or their money?  Or their looks?
Well.  That’s how I feel about this potato salad.
015
I served it to Sophie, my roommate, last summer.  And when she heard I was bringing it to my parents’ house for father’s day this year.  She insisted on coming too.
I just think it would be nice to spend time with your family!” she exclaimed when I questioned her about her motives.  
Um, yeah.  Sure.  I’ll bet you do, Soph.
potato salad
I’m kind of scared to think what will happen when I serve it to the next guy I date.
Better serve with caution.
Unless I’m absolutely sure that he’s the one I want to marry.
Then I’ll serve with reckless abandon.
potato salad
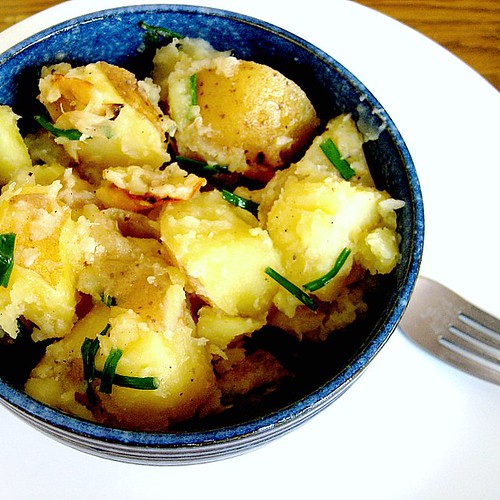
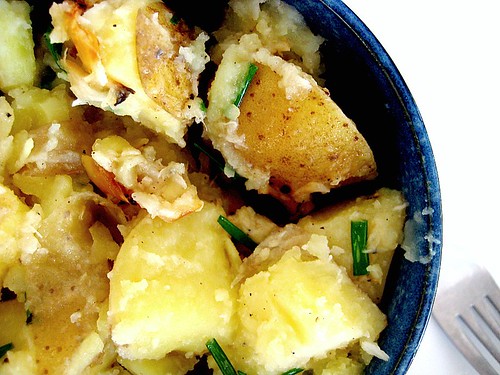
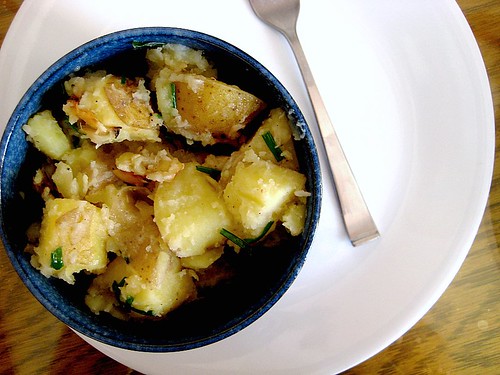
Garlic Smashed Potato Salad
Serves 5+, adapted from Sunset Magazine
2 1/2 lb potatoes
2 heads garlic
1/4 cup olive oil
3 tbsp white wine
1 1/2 tsp salt
1/2 tsp freshly ground black pepper
1/4 cup chives
1. Preheat oven to 400.  Cut garlic heads in half widthwise and wrap tightly in foil.  Bake until garlic is very soft and golden (45-60 minutes).  When garlic is cool enough to handle, squeeze cloves into a small bowl.  Add olive oil, wine, salt, and black pepper.  Mash until mixture is smooth.
2. Cut potatoes into quarters or small chunks.  Put in pot of water.  Bring to a boil and then cook until potatoes are fork-tender.  Drain and return to pot.
3. Add garlic mixture and chives to the potatoes.  Let cool and serve.
Happy 4th of July!
Joanne

Fire Day Friday: Burger Throwdown

It is the 4th of July weekend and grills will be firing up across the USA. One of the most popular items will be burgers because they easy, inexpensive, and traditional.
The July issue of Southern Living has an article for Top-Rated Burgers and I thought I’d cook two of the four, in a “burger throwdown”. One I’ll post here at Our Krazy Kitchen and one back over at Nibble Me This. Ah, here comes the ring announcer now.
And in this corner, weighing in at one quarter pound, wearing muenster colored shorts, the Southern Living Editors Choice…

Fig-Glazed Burgers with Red Onion Jam
Red Onion Jam
4 cups red onion, thinly sliced (about 2 medium)
1 tsp olive oil
1/4 cup sugar
1/4 cup red wine vinegar
3/4 tsp fresh thyme, chopped
Burger
1 1/2 lb ground beef (80/20 blend)
2 Tbsp fresh oregano, chopped
1 tsp salt
1/4 tsp garlic powder
3 Tbsp fig preserves
4 slices muenster cheese
4 buns, toasted
First make your onion jam. In a hot saute pan, add 1 tbsp of oil and saute the onions in a large non-stick skillet for about 10 minutes, stirring every now and then. Then reduce the head to med-low, add the thyme, sugar, and red wine vinegar. Mix together well, cover, and cook for 10 more minutes.
Next, mix together your beef, oregano, salt, and garlic powder. The recipe did not call for it but I found I needed one egg as well for a binding agent. When making burgers, the less mixing and crushing, the better. Just get it all tossed around. Shape into 4 patties.
Two tips for better cooking burgers: I put my patties back in the fridge for about 20 minutes to allow them to firm up. I hate when burgers get too warm and then when they hit the grate, they start to sink or “melt” into the grate before they get firm from cooking. I also like to poke a hole in the middle of the patty. This will keep the burger from shrinking inward into a ball shape while cooking. Don’t worry how it looks, the hole will go away during cooking.
Get your grill preheated to 350f-400f. Cook the burgers for 5 minutes per side. Top each burger with fig preserves and a slice of cheese. Cook for 2 more minutes, until the cheese is melted and the internal temp is 165f.
Serve on a bun and top with the Red Onion Fig Jam.
This was a different approach for cooking burgers for me, because I think “less is more” when it comes to burgers. But it’s fun to shake things up every now and then.
The burger cooked perfectly at the times and temps they gave. Wow, this is a sweet burger. Good flavor, just too much sweet for my tastes. The red onion jam had a great texture, like caramelized onions. The next time, I’d skip the fig glaze and use fig vinegar in the onions instead of red wine vinegar. That would cut the sweetness but still give the fig influence.
Check out my blog for the “challenger” burger, Spicy Cheddar Stuffed Burgers with Tex-Mex Secret Sauce.
So….what’s on your grill for this holiday weekend?

Rum Cake – Cause they don’t even serve nuts on the plane anymore

That’s a bold statement.  But I would be willing to enter my Upside Down Pineapple Rum Cake in any taste test.
And I did try.  I have made half a dozen different rum cakes in my quest to avoid processed foods. Unfortunately, none of them have the smoothness, creaminess of this pudding cake with a shot.  You see, in the ingredient list is a box mix of cake, AND a box mix of a pudding.  I am against it.  I prefer to avoid boxes, and to be honest, I believe this is the only recipe I have used this year with a box as the main ingredient… let alone two boxes.
But, here is is…
The cake collects on the bottom (well, the top actually, but then you turn it upside and the top becomes the bottom).  Anyway, the cake on the bottom (in the photograph, and the heavier pudding collects on the bottom (as it cooks, the top when you flip it upside down… understand???) makes a fabulous mixture of textures.
I always make this when we have stateside visitors.
Like these two…
Tradition, there are only half a dozen planes that land each day, but most people arrive on the last one… 8:40 PM.  Takes a bit to collect luggage, and the 10 mile trip up hills, over dales and around the corners takes 30 minutes.  So, our guests arrive tired and hungry (the airlines don’t feed you like they used to … in fact, American now CHARGES $3 for a bag of snacks… not even peanuts… but I digress).
So, tradition, I make one of these on the first night our guests arrive.  But the next morning when we have a slice for breakfast (hic), it does taste better.
And I am going to justify all the calories…

Since you need energy to partake in all the relaxing we do here in paradise.
Being the expert I am now, I have another tip for you… Allow this to relax in the fridge overnight before you serve it.
But I digress from the recipe…
The inspiration comes from a recipe that Marguerite (call her Mags) at Cajun Delight, posted ages and ages ago…
Here is her original recipe…

Cajun Pineapple Rum Cake

This heavenly cake is so simple to make and the flavor is so fabulous that you will have a hard time resisting a second piece, cher! Worth the calories, cher!! Cest bon! Bon appetit!

1/2 cup pineapple rum
1 pkg. yellow cake mix
1 pkg. French vanilla instant pudding and pie filling mix
4 eggs
1/2 cup pineapple juice
1/2 cup vegetable oil
1/2 cup chopped pecans

****************************************************************************************


Spray a bundt pan with “Baker’s Joy” baking spray. In large bowl, combine first six ingredients. beat at medium speed for two minutes. Stir in nuts, and pour into prepared pan. Bake at 325 degrees for 50 to 60 minutes. Cool and remove to cake plate. Make glaze and drizzle over cake.
*****************************************************************************************
Glaze
******
Melt 1/4 cup butter, in saucepan. Add 2tbs. pineapple juice and 1/4 cup sugar. Cook and stir, until sugar is melted. Boil gently for 5 minutes, stirring often. Remove from heat and slowly add 1/4 cup pineapple rum, until blended. Prick top of cake with a fork and drizzle glaze over warm cake. Divine!
*****************************************************************************************

Of course, I made a couple of changes… mainly that I dropped the bundt cake idea.  I do not have a bundt cake pan.  But I sure do like the idea of an upside down pineapple rum cake.  SO, I lined a rounded baking dish with pineapple slices.  I added some brown sugar to bring out the sweetness.

I was unable to find a simple yellow cake mix here.  So, I used a lemon mix and a lemon pudding mix.  I also did not have any pecans, so I left those out.
Other than those changes, I tried a little experiment…
I don’t have a photograph, but instead of putting the dish on the oven rack, I put the dish on a larger baking dish.  the dish had a 1 inch lip, about the same size as what did not brown on the cake below… make sense, can you picture it in your mind?  Remember this is an upside down cake, so when it was baking, the top was the bottom.
Alright, now that I have you completely confused, this method had an unexpected consequence…
The base (top while it was cooking, the part that was above the lip of the second baking dish) browned nicely.  It has a bit of a crunch and is almost all cake.
The top (bottom while it was baking, the part that was below the lip of the second baking dish) was only gently browned, and that was mostly the brown sugar and sugars in the pineapple rings caramelizing.  The “cake” part was much more pudding than cake.  If you look at the photo below, you will see the cake texture around the bottom (which, in an effort to REALLY confuse you is the top of the photo), while the top half (bottom of the photo) is more pudding texture.

I put the cake in the fridge overnight before cutting into it so it would set solid.
So, you now have two ways to get a slice of this cake…
Use the above recipe and make it yourself…
OR come visit the islands, you bring the sunscreen, I’ll bring the Rum Cake!
Dave here from MY YEAR ON THE GRILL. It really is just this easy!  

 … I CAN COOK THAT! 

And so can you!

Korean Pancakes

I don’t know if other foodie bloggers find themselves, looking for new recipes, rather than making old favorites. I do. I love to try new recipes and see what turns out. No matter what the recipe tells me is going to happen, I really never know what I am going to turn out with. By now, you know, I tend to make changes in recipes. Oh, I have good reasons, like not having a necessary ingredient, or I may not like a particular ingredient or time causes a change in the method. The fun is in the doing and meeting new challenges and seeing the results. This is one of those recipes. The final results are definitely not what Emeril had in mind and not what I had in mind. Despite this, the resulting dish was filled with flavor and had an unexpected texture.
Ingredients:
For the sauce:
3 teaspoons low sodium soy sauce – gluten-free
2 tablespoons rice vinegar
2 teaspoons honey
1 frozen chili cube
1 teaspoon garlic powder
2 teaspoons lightly toasted sesame seeds 
½ teaspoon sugar
pancakes:
9 teaspoons vegetable oil
1 bunch scallions, trimmed, quartered lengthwise, and cut into 2 inch lengths
4 ounces mushrooms, chopped
½ teaspoon salt
2 cups gluten-free flour mixture
1 ½ cups water
2 eggs
Method:
Make the sauce by combining the soy sauce, vinegar, honey, chili, garlic powder, sesame seeds and sugar in a small bowl, stirring until the sugar is dissolved. Set aside while you make the pancakes.
In a medium sauté pan over medium high heat, add 1 teaspoon of the vegetable oil.
Next, add the scallions and mushrooms and sauté until the mushrooms begin to wilt, about 3 minutes. Set aside and let cool.
In a mixing bowl, combine the flour, water, and eggs and mix gently until just combined.
Add the cooked scallions, mushrooms, and salt and fold together briefly just to combine.
Heat a large nonstick skillet over medium-high heat and, when hot, coat with 2 teaspoons of the vegetable oil.
Add ½ of the pancake batter and use a spoon to spread into a 6 to 8-inch circle, trying to get the filling ingredients as evenly spread out as possible.
Cook the pancake about 4 minutes.
Once the pancake has begun to set and is golden brown on the bottom, flip the pancake to the other side, pressing with a spatula to compress ingredients.
Cook until golden brown on the second side, about 2 minutes longer, transfer to a warm plate and cover loosely with foil to keep warm while you prepare the remaining pancakes.
Once all the pancakes have been cooked, cut into wedges and serve warm with the dipping sauce in small bowls for dipping.
Yield: 4 large pancakes or 10 appetizer servings 
Where I went wrong: Four minutes is a long time to cook a thin pancake and mine did not even change color at four minutes. I had this pale, emaciated pancake staring at me and telling me to cook it longer. I did. When it changed to a golden color, I turned it and cooked the other side until it became golden, also, longer than the prescribed two minutes. What happened, was those soft pancakes, hardened and became deliciously crisp. I know , this is not the way, they should be, but they were almost like a favorable cracker but not that crisp. The veggies were soft so I ended up with a crispy pancake with soft vegetables. Everyone ate them and my husband did his usual, mentioned that they were spicy. That was from the chili cube. Spicy is good in this recipe but if you are not a spicy lover, eliminate the chili flavoring. I am getting more and more used to spicy flavoring and like some of them. I have to say, my hubby was a doll, and took seconds. I am hoping, in time, he will adjust to a bit more spice, in his food. In the meanwhile, I modify, most times.
Please visit me at the Comfy Cook and My Sweet and Savory.
Don’t forget to link up to My Meatless Mondays.

Save Room for Dessert: S’mores Bars

Save Room for dessert new badge 
Hi there, Min from The Bad Girl’s Kitchen and Try A New Recipe filling in here today, with a DESSERT that everyone who has ever camped simply must try!
This recipe comes from Rebecca of Cooking With My Kid, who’s actually a friend of a friend of mine, and who is on a mission to make 365 recipes in 365 days, with her kid. Although I like cooking with my kids, I still think it’s an ambitious project.
When she posted this recipe, I knew I had to make these right away. Just Had To. After all, I’d bought all the ingredients for s’mores recently, but before we could make them someone ate all the Hershey’s bars. Someone else snuck half a bag of marshmallows. And who knows who ate most of the graham crackers. It’s just the way it works around here I guess.
Note: when opening a jar of marshmallow fluff at altitude, just for a “taste,” be prepared to immediately make your recipe because it will just keep expanding and you won’t be able to “taste” that much without making yourself sick. Just trust me on this.
I didn’t do the shopping yesterday, and to be honest my entire grocery list was this:
1 large jar marshmallow fluff
2 king-size Hershey’s Special Dark bars
1 box graham crackers
=)
I took Rebecca’s advice and planned to use dark chocolate from the start. So Number One brought home 4 bars of Hershey’s Special Dark, in two sizes. I’m guessing that the 4.25 ounce bar is the “king size,” but I didn’t come to that realization until I already had the “giant size” bars unwrapped and discovered they wouldn’t fit as neatly as Rebecca’s had in the pan. Oh well, we’ve got some extra dark chocolate to eat!
Now that I’m thinking about it, I can’t say I recall ever eating marshmallow fluff. I know that seems like blasphemy for a Midwestern girl like myself to admit, but I just don’t remember it in my life. Of course I’ve seen the jars around, and of course when someone took that little taste, it tasted like heaven, but it didn’t ring any bells. I didn’t remember the stickiness, or anything. I do love it though, so I think that makes up for my possibly faulty memory.


The verdict: These are very good, but dare I say it, with dark chocolate, I think you need to use MORE fluff. There, I said it. It really needs more fluff!! Next time, I will try it with milk chocolate, which is probably the more classic flavor, and maybe just a little extra fluff.

Let me know which chocolate YOU would use, and how you like them!

S’More Bars
Prep Time:15 minutes
Cooking Time: 30 to 35 minutes
Makes 16 squares
1 stick of butter, room temperature
1/4 cup brown sugar
1/2 cup sugar
1 large egg
1 teaspoon vanilla
1-1/3 cups all-purpose flour
3/4 cup graham cracker crumbs (~7 full-sized graham cracker sheets, processed until fine)
1 teaspoon baking powder
1/4 teaspoon salt
2 king-sized dark chocolate bars (*note: I believe “king-size” is 4.25 ounces. “giant-size” is too big, but will work if you use a little more than one bar. I know because we used “giant-size.”)
1-1/2 cups marshmallow creme/fluff
Preheat the oven to 350 degrees. Grease an 8-inch square baking pan. (I used butter). Use an electric mixer to cream together butter and sugars until light and fluffy. Beat in egg and vanilla. Set aside.
Meanwhile,whisk together flour, graham cracker crumbs, baking powder and salt. Slowly add flour mixture to the creamed butter mixture until combined. Divide dough in half and press half of dough into an even layer on the bottom of the prepared pan.
Place chocolate bars over dough. 2 king-sized Hershey’s bars should fit perfectly side by side.
Spread chocolate with marshmallow creme or fluff. Place remaining dough in a single layer on top of the fluff (most easily achieved by flattening the dough into small shingles and laying them together). Bake for 30 to 35 minutes, until lightly browned. Be sure to cool completely before cutting into 16 squares.
Don’t forget to visit me at The Bad Girl’s Kitchen for more fabulous recipes!

Veggie Tales: My Summer Medley

This is simple down to the core, or should I say corn? But the flavors are fantastic, and the vegetables are perfection. The next time you are craving chips and dip, make a veggie salsa salad like this one instead! It could almost be considered vegetable ceviche! Ole!

What you’ll need:
1 cucumber (skinned and diced)
1 can black beans (rinsed)
2-3 cups chopped heirloom tomatoes (mine were green)
1 red onion (diced)
1 can corn (rinsed)
1/4 cup Cilantro
2 limes (zest and juice)
2 tablespoons olive oil
salt and pepper to taste

What you’ll do:
Just throw all of the ingredients into a bowl and toss.
Then eat it of course!

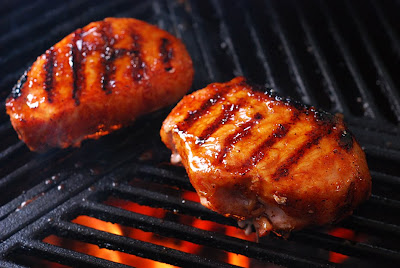
Honey Grilled Pork Chops

In almost any neighborhood on any given night during the summer, you can smell the aroma of one of your neighbors grilling out. That and soft green grass are two of my favorite things of summer.
One of my favorite things to grill on hot summer nights are honey grilled pork chops. They are a great change up from the usual burgers, dogs, and beef. Plus these are simple and quick to make.
Honey Grilled Pork Chops
2 ea boneless pork chops, at least 1″ thick
2-4 Tbsp pork chop rub (see recipe)
2 Tbsp creamed honey
When selecting pork chops, look for ones that deeper red in color as opposed to pale. Sure it’s “the other white meat” but you want chops with the most color. That’s a tip Chris Lilly gave at a recent cooking class and he knows his pork.
For the “creamed honey”, this is a specially crystallized honey. It’s not a mix of honey and cream. If you can’t find it locally, you can just use a good local honey.

Season all sides of the chops with the Pork Chop Rub. I made this rub specifically for pork chops following the section in Big Bob Gibson’s BBQ Book on creating your own dry rub. It will make about a cup and will keep for 6 months in an airtight container.
NMT Pork Chop Rub
1/4 c white sugar
1/4 c turninado sugar
1/4 c smoked paprika
2 T garlic salt
2 T kosher salt
1 t black pepper, smoked
1 t cayenne pepper
1 t cumin
1/4 t allspice
1/2 t dried thyme
Get your grill cooking with direct heat at 350 to 375f. Grill the chops on the first side for 2 minutes. Flip and grill the second side for two minutes (now at 4 minutes total cooking time).
Flip back to the first side and grill for two more minutes (6 minutes total). At the very end of those two minutes, glaze some of the creamed honey on both chops. Flip, glaze again, and let finish cooking for 2 minutes (8 minutes total at this point).

At two minutes check the internal temp and it should be around 140-145f. If so, pull and let rest for 10 minutes. If not, switch to indirect heat (move to the side of grill and roast it) until it hits 140-145f.
These are crispy and a little sticky on the outside and juicy & tender on the inside!

Have a great weekend everyone and try to stay cool!

Szechuan Beef FOR the faint of heart (and Jackie) and Szechuan Chicken for me!

I LOVE Szechuan anything.  Beef, chicken, fish… It is one of my “go to” items to order at the storefront Chinese takeout restaurants that seem to be on every other street corner.  My wife… Not so much.

By definition, Szechuan is …

a style of Chinese cuisine originating in Sichuan Province of southwestern China is famed for bold flavors, particularly the spiciness resulting from liberal use of chilies and “numb” or “tingling” flavor (Chinese: 麻) of the Sichuanhe  peppercorn (花椒)

WOW… just reading this definition is numbing my mouth!  And striking fear into my wife. Once again, the ugly divide between our taste buds rears its ugly head.  While in Kansas, ordering Chinese take-out is easy and inexpensive, and every one can order what they wish… Here in the paradise that is St Thomas (US Virgin Islands), there are no Chinese take-out joints (that I have found).  So, my dreams of numb tongue were to be put on hold… Until I saw this recipe from one of my favorite bloggers… ANGEL IN THE KITCHEN!
She advertises her recipe for Szechwan Beef as …

Szechwan dishes are typically on the spicier side, and although I’ve had my share that have made my eyes water and my nose run, this dish (which is from Better Homes and Gardens), is actually on the milder side. You can certainly increase the amount of crushed red pepper flakes, or even add some sriracha or other hot sauce, to amp up the heat.

OK… I can work with this.  First, DO NOT TELL JACKIE SHE IS EATING Szechwan Beef!  Just the words will scare her and prejudice her about liking the dish.  Next… I can pull her bit out, keep it warm, while I add and finagle it into something mouth numbing (yeah).
Here’s what Angel says to do..

Szechwan Beef
Serves 4

3 Tbsp. dry sherry
3 Tbsp. soy sauce
2 Tbsp. water
2 Tbsp. hoisin sauce
2 tsp. cornstarch
2 tsp. grated ginger
1 tsp. sugar
1/2 tsp. crushed red pepper flakes
1/4 tsp. black pepper
2 cloves garlic, minced.
1 lb. steak, thinly sliced
2 carrots, peeled and thinly sliced
2 green bell peppers, cut in cubes
1 Tbsp. vegetable or canola oil
Cooked rice, for serving

1. Combine the sherry, soy sauce, water, hoisin sauce, cornstarch, ginger, sugar, red pepper flakes, pepper, and garlic in a small bowl. Set aside.

2. Put oil in wok and heat over medium-high heat until hot.

3. Add carrots and stir-fry 2 minutes. Add peppers and stir-fry another 1-2 minutes.
4. Remove vegetables from pan and set aside.

5. Add beef and stir-fry 2-3 minutes, or until cooked.

6. Push beef away from center of wok, and add sauce. Reduce heat to medium, and cook and stir sauce until thick and bubbly.

7. Add veggies back to wok, and combine with beef and sauce.
8. Serve over rice.


Pretty much, just what I did…
Slice and dice… I did add Onions… Caused I like onions!
I used skirt steak… be sure to slice against the grain of the meat so that the bits are more tender.
I do not have a wok here, but my sauté pan worked fine.
As the Kitchen Angel advertised, it was WONDERFUL.  The little kick from the red pepper flakes was there.  but not overpowering.  I did happen to have a pepper grinder full of actual Sichuanhe peppercorns (god bless my “spice guy back in Kansas).  So, once I plated Jackie’s dish, I doctored mine up a bit.


We were both thrilled!

And next day for my lunch…

I made the same recipe with a bit of my beloved Rotisserie Chicken!

I doubled the red pepper flakes, and added some Sichuanhe peppercorns.  I served over some leftover garlic noodles!

NOW THIS WAS THE Szechuan that I know and love! so, thanks Angel.  Great recipe and a great menu item for me to add to my repertoire!


Take a minute and drop by ANGEL IN THE KITCHEN and thank her for me!

Dave here from MY YEAR ON THE GRILL. It really is just this easy!  

 … I CAN COOK THAT! 

And so can you!


Cheese Latkes

            For more recipes, join me at Comfy Cook and My Sweet and Savory

Cheese Latkes – This comes from the Holiday Series on My Sweet and Savory.  I was looking at some of the pancake recipes, I had posted on my blogs and saw cheese latkes and felt hunger pangs.  I decided to share with you since, I was not going to cook.
I happen to love cheese latkes. For those of you, who do not use the word latkes, try pancakes. There is something heartwarming about pancakes. It brings back memories of when my children were little and pancakes were a Sunday morning breakfast, particularly “puzzle pancakes.” There will be a photo below. That was the part of making pancakes that was fun, creating shapes that looked like animals or familiar objects. Sometimes, we didn’t know until the pancake was on the plate, what it turned out to be, if anything. The ones, below had no significance to me but if you find something in them, do share.
Although I found this recipe on Goldmine.com, it comes from one of my favorite cookbooks and chances are that I have made these, several times, over the years. The book is a big purple hard covered book which is well worn and it is called, Spice and Spirit, The Complete Kosher Cookbook. There are good solid recipes in the book and has been a go-to book up until I began my journey to learn how to cook gluten free. Then, I expanded and picked up a few gluten-free books to later find, I did better with regular cookbooks, making my own adjustments.
As a result, I built a new library (small but good for me) and attempted to get books by many of the cooks we bake or cook “with” online. Today, I got the best one, so far, Baking, from my home to yours, by Dorie Greenspan. I thought I would sit down and put a sticky on a few pages that caught my eye. I found that every page had a great recipe and that the sticky solution is not a solution, with this book. I think now, I will look at the recipes, that Tuesdays with Dorie has used, and make some of them.

Ingredients:
3 eggs
1 cup milk
1 cup cottage cheese, drained   (use Ricotta for a more refined taste)
1 1/2 cups all-purpose flour (I used a gluten-free mix)
1 teaspoon baking powder
1/2 teaspoon salt
5 tablespoons granulated sugar
1 teaspoon vanilla extract
1/2 cup oil for frying
Method:
Place all the ingredients except oil together in a large bowl. Mix until smooth.
Heat 1/4 cup oil in a skillet.
Using a large spoon, drop the batter into hot oil.
Fry 2 to 3 minutes on each side, until lightly browned.
Continue until the batter is used up, adding oil when necessary.  The latkes may be served topped with sour cream, applesauce or maple syrup. (I went for the maple syrup. Hubby ate them plain.)
These make a good weekend breakfast, a lunch dish, even a snack.

CREAM CHEESE PEPPERMINT COOKIES

Hi Tamy here filling in for Jen this morning.

Save Room for dessert new badge

Out of my grams archive I found this awesome little recipe that would be perfect for baby or bridal showers.  Grams notes on the side suggested using food color to alter the cookies for the appropriate event.  I also highly recommend keeping these cookies refrigerated as they will melt! Next time I will go a step farther and freeze them for an hour and then quick dip them in melted almond bark.
Using extracts you could also change the flavor to just about anything you wanted.  I’, curious what a blackberry almond combo would be like.

CREAM CHEESE PEPPERMINT COOKIES

8 ounces cream cheese softened
1/2 cup crisco shortening
1 teaspoon peppermint extract
1/2 teaspoon orange extract
8-9+ cups powdered sugar

  • Line your baking sheet with wax paper.
  • Using a stand mixer cream together the shortening and cream cheese.
  • Add extracts and beat until smooth.
  • Gradually add powdered sugar until dough is soft and elastic.
  • Roll into small balls.
  • Use a fork to hash mark the top and slightly flatten each cookie,
  • Cover and chill overnight.

I filled a few of the hash marks with some hot fudge I made recently and the guys loved them.