TODAY I AM A MAN – Bar Mitzvah Boy Cooks Julia Child Puff Pastry

Hello again… Dave here from MY YEAR ON THE GRILL! I am very excited to come back for a second week of I CAN COOK THAT! Real quick, if you missed last week, I am a novice. For the last 8 months, I have been handling almost all of the cooking duties. Prior to that, I was a great eater, but rarely cooked. I am learning as I go, and am constantly surprised when I discover that I CAN COOK THAT!

And this week, I am making PUFF PASTRY WITH BLUE CHEESE FILLING!

Go ahead, if you read my post last week, you are saying it to your self, “What’s that goof doing, bragging about making the same dish two posts in a row???”

Well, yes… and no. There is a big big difference in the picture above, and the little picture to the left of last week’s post. That difference, I did not buy the Pepperidge Farms prepackaged frozen (and expensive) Puff Pastry. Instead, today I feel I made a giant step towards becoming a less frightened cook. Today I made a Julia child recipe.

MAZALTAF… Today I am a man!

So, on the surface, it looks like I am repeating a recipe. But, in fact, the spirit of my series is to be amazed that in fact, I CAN COOK THAT. And much of learning to cook is to develop a skill, and then build on it. Trust me, there are so many layers to this recipe that I would never have attempted when I first took over the cooking duties in my household. It has taken me months of cooking every day to get to the point where I would be confident enough to try one of Julia’s recipes.

Be warned in advance that the entire process takes several hours. It is not hours and hours standing at a counter, but it is 5 minutes out of each hour. But, in the end… I could not have been more pleased…

Here’s what Julia says…

French puff pastry dough is paper-thin layers of dough separated by paper-thin layers of butter; when it goes into the oven, the dough layers puff and the pastry rises. Properly made, it is flaky, light as a feather, and tender. It is used for making patty shells, turnovers, puffed cases for various foods, Napoleons and other dessert pastries, and cookies.

(Note: Granular “instant-blending” all-purpose flour needs no sifting. To measure it for this recipe, dip a dry-measure cup into the bag of flour, shake cup to level flour even with lip of cup, and pour measured flour into mixing bowl.)

OK, let’s get to it… Here’s what I did…

First, as always, assemble your ingredients in advance…

For the pastry which Julia calls,

THE DETREMPE,

you need…

1/3 cup salad oil

3 cups granular “instant-blending” flour

A mixing bowl

2 tsp salt dissolved in ¾ cup cold water

2 or more Tb additional cold water if needed

2 sticks (1/2 pound total) unsalted butter

And her is how Julia tells us to make our own puff pastry (Her words are in red, my commentary is in black)…

With a rubber spatula, blend the oil into the flour in the mixing bowl. When mixed, blend in the salted water, pressing firmly with your spatula, then with your fingers. Add more water by droplets until you have a firm but pliable dough. Knead as briefly as possible into a cake 6 inches in diameter. Wrap in waxed paper and refrigerate for 1 hour.

THE DOUGH AND BUTTER PACKAGE

2 sticks (1/2 lb.) chilled, unsalted butter

Just before proceeding to next step, pound the butter with a rolling pin, then knead with the heel of the hand to smooth out butter and get out all lumps. Butter must be cold but malleable. Form it into a 5-inch square. I did this between sheets of waxed paper… worked very well, and was easy to clean up. Also, be sure that the butter is still mostly cold. If it is too soft, it will not work as well. Use your rolling pin and whack away.

Roll dough into a 10-inch circle, place the butter in the center of the dough-circle, then bring the edges of the circle up over the butter to enclose it completely. Do not stretch dough at sides of butter; press dough well together on top and seal by pressing with fingers.

FIRST TURN (“Premier Tour”)

Sprinkle board and top of dough lightly with granular flour, and roll dough rapidly and evenly into as perfect a rectangle as possible, about 6 by 16 inches. Keep lifting dough and sprinkling underside and top lightly with flour as necessary, to prevent sticking.

Then, as though you were folding a long sheet of letter paper, lift up the bottom (one of the small ends) of the dough and fold it over a third of the dough;

lift the top and fold it down to meet the bottom edge of the first fold, making three even layers of dough.

SECOND TURN

Turn dough so that the top edge of top layer is to your right; roll into a rectangle as before, and fold again in thirds. Wrap in a large sheet of waxed paper, then in a plastic bag or damp towel, and chill for 1 hour.

THIRD AND FOURTH TURNS

Make two more turns in the same manner: wrap and chill again for 1 hour.

FIFTH and SIXTH TURNS

Repeat with final two turns, then let dough rest for at least 2 hours or overnight before rolling or shaping. Dough will keep for several days in the refrigerator, or may be frozen.

(Notes: Work as rapidly as possible so butter does not soften; if dough softens and is hard to handle, stop where you are, and chill. Whenever dough seems rubbery and is hard to roll, or retracts after rolling, stop where you are; wrap and chill dough until it has relaxed. If dough is too cold, leave at room temperature until butter has again become malleable.)

And here’s the final product… Note the bundle in the wax paper above. The recipe makes a double batch. Like the Pepperidge Farm stuff, it freezes just fine. It sounds very time consuming, but honestly, it takes five minutes a “turn” or hour. Then pop it in the fridge and go about your chores, or sit and eat bon bons and watch Oprah reruns (I played Sit and Go on-line Poker games). While the entire process took about 6 hours, in fact, I probably only spent 20-30 minutes total at the counter. And Julia was absolutely right, the colder the dough is, the easier it is to work with. Once it starts sticking to the rolling pin, you will need to immediatly get it back in the fridge.

And, that’s all there is to it. I read this recipe a dozen times before trying it. I was actually surprised how easy it all came together. Of course, it takes a lot of time, and for the better part of a day, there is flour all over your kitchen counter top. It begs the question, would I do it again over just buying the pre-made stuff? Yep, in a heart beat. It is easy to make ahead of time, it is MUCH less expensive to make vrs buy. And, to be honest… The fact that I can cook a Julia Child recipe is just about as exciting as it gets.

OK, while I went into much more detail last week about how to make the cheese stuffing, here are Julia’s instructions…

FEUILETEE AU ROQUEFORT
( Roquefort Cheese Case)

( As a first course, or main-course luncheon dish)

For a 16-inch case serving 6 to 8 people

Puff pastry (1/2 the amount made in preceding recipe)

1/2 pound Roquefort cheese

About 2/3 cup thick cream sauce

Egg glaze (1 egg beaten with 1 tsp water)

Roll puff pastry into a rectangle 16 inches long and about 8 inches wide. Cut in half lengthwise and refrigerate one half until you are ready to use it. Roll out other half to widen it by 2 or 3 inches. (It should be about 1/16th inch thick.) Run cold water over a cookie sheet and shake off excess. Fold the widened strip in several places so you can lift it easily. Unfold it on the cookie sheet. Prick a 4-inch strip down the center at ¼-inch intervals with a fork, to keep bottom from rising when baked.

Cut the Roquefort cheese into slivers and place down the center of the dough strip, leaving a 1-inch margin all around. Cover with the cream sauce, then fold the margin of the dough up over the cheese filling on all four sides.

Paint the dough margin with cold water; cover rectangle completely with the second strip, and seal the 2 dough layers firmly by pressing with your fingers. Refrigerate for 1 hour. Just before baking, preheat oven to 425 degrees, paint top of case with egg glaze. Then draw the tines of a fork over the glaze. Bake for 20 minutes at 425 degrees; lower thermostat to 350 degrees and bake 30 minutes more.

Serve hot with a white burgundy wine or a rose. If it is to be used as a main course for luch or supper, serve a green or mixed vegetable salad

I have much more details about how to cook the Thick Cheese Sauce on last week’s post that you can read by clicking HERE. The knowledge and ability to make a roux, turn pastry dough and accent to create this dish were great learning opportunities for me. I was intimidated by all the procedures, but I researched the techniques, studied the recipe so I was prepared, learned from my previous attempts and got the results I was after!

So, now that I have puffed pastry in my repertoire, anyone have a puffed pastry recipe from their archives they want to share????

Banana Cream Cheesecake ~ Be SURE and Save Room for Dessert

Hi everyone, Tamy from 3 Sides of Crazy here filling in for Joy this morning. I’m not sure what she had planned, but I just made this scrumptious Banana Cream Cheesecake that I couldn’t resist sharing with you

BANANA CREAM CHEESECAKE

CRUST
20 vanilla cream-filled sandwich style cookies
1/4 cup butter, melted

FILLING
3-8 ounce packages cream cheese, softened
2/3 cup granulated sugar
2 tablespoons cornstarch
3 eggs
3/4 cup finely mashed banana (2 medium bananas)
1/2 cup whipping cream
1 teaspoon vanilla extract
1 teaspoon maple extract

  • Use a blender to finely chop the cookies.
  • Add butter and blend until they are well blended.
  • Press mixture into the bottom of a 10″ springform pan and smooth it out.
  • Refrigerate the crust while you make the filling.
  • Beat cream cheese until creamy.
  • Add in sugar and cornstarch followed by the eggs one at a time.
  • Beat in the bananas, whipping cream, and vanilla.
  • Pour mixture into crust.
  • Place pan on a cookie sheet and bake in a 350 degree oven for 15 minutes.
  • Reduce oven temperature to 200 degrees and bake an additional 75 minutes, or until center is almost set.
  • Allow to cool completely before removing sides. Before removing the pan, run warm water over a knife and slide a knife around the edge of the cake to separate the cake from the pan cleanly.
  • Refrigerate cheesecake, uncovered, at least 6 hours.
  • Serve with sliced fresh bananas, Caramel Sauce, Hot Fudge Sauce and fresh whipped cream.

I originally made this recipe for I CAN COOK THAT! and What Did You Bake Today? Be sure and stop back by for both.

I can Cook that! badge
hosted by Dave at OuR KrAzY KiTcHeN
hosted by Kristen at OuR kRaZy KiTcHeN

My favorite all time cheesecake is the Banana Cream at the Cheesecake factory with gooey hot fudge, caramel, fresh sliced bananas and fresh whipped cream. We recently took my mom for her birthday and I was reminded that I had yet to duplicate that recipe. Well it bugged me enough that I believe I have finally developed a recipe that compares with the Cheesecake Factory. I do like my square spring foam pan though – makes for easier slicing.
aprons 3

Crispy Potato Cakes

I just had to share these here because they are crispy on the outside and soft and creamy on the inside and are a delightful treat for the taste buds. They are also easy to make and can be used as a side dish or an appetizer.

Ingredients:
Five medium potatoes
1 cup cornmeal
1 egg beater
1/2 cup shredded Cheddar Cheese
1/2 cup chopped scallions
1/4 cup low fat sour cream
1/2 teaspoon garlic powder
pinch of black pepper or more to taste
salt to taste
Canola oil for frying

Method:

Peel and cut potatoes into small pieces.

Boil potatoes until soft enough to be mashed.
Shred cheese.
Cut scallions into small pieces.
In a large bowl, mash potatoes.
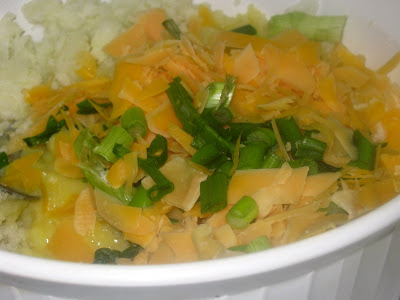
Add cornmeal, egg, cheese, seasonings and sour cream. Continue mashing until they are mixed together.

Add cornmeal.

Add cheese & scallions.

Add sour cream.
Form patties. I made them a few sizes until I found that the two inch size was good for my purpose. I also did not flatten them very much. I was tempted to make them in muffin tins and I am going to do so, in the future. I wanted little potato cakes and not patties. I got both.
In a large skillet, in oil that has been heated, drop in the shaped patties and cook on medium heat until browned.
Flip them over and cook other side until browned and crispy. (Not too dark.) (A few minutes on each side)
I served them plain since they had enough calories but they would be a delicious with some sour cream, on the side.

Texas Caviar ~ Simply Delicious Sunday

While researching black eyed peas (not an easy thing to do with a band by the same name) I ran across a reference to Texas Caviar. I read and read all those recipes and found the 2 consistent ingredients are black eyed peas and Italian dressing. So I started with those ingredients and from there added the ingredients I like most. We loved the results. We ate it for New Year’s day with fresh tortilla chips, prime rib and twice baked potatoes. Eating black-eyed peas on New Year’s Day is thought to bring prosperity. See what you think. I also found it ironic, at least in my case that since my family is from and for the majority in Texas that I had never heard of this before.

Texas Caviar

TEXAS CAVIAR
1 pound black eyed peas
2 cups Italian salad dressing
1 cup grape tomatoes, quartered
1 large shallot, chopped
1 bunch finely chopped green onions (tops too)
finely chopped jalapeno peppers to taste
3 cloves finely chopped garlic
Salt & hot pepper sauce to taste (I used Frank’s red pepper sauce)
Tortilla chips
  • Soak peas in enough water to cover overnight.
  • Drain well. Pick out bad beans.
  • Transfer peas to saucepan. Add enough fresh water to cover.
  • Over high heat bring to boil.
  • Let slow boil until tender, about an hour or so, but do not overcook.
  • While peas are cooking chop remaining ingredients and mix well with dressing.
  • Drain peas well.
  • Blend into dressing mixture and let cool.
  • Chill several hours.
  • Serve with tortilla chips.

Originally native to India, but widely grown in many countries in Asia, the black-eyed pea was introduced into the West Indies and from there to the Southern United States as early as the 1600s in Virginia. Most of the black-eye pea cultivation in the region, however, took firmer hold in Florida and the Carolinas during the 1700s, reaching Virginia in full force following the American Revolution. The crop would also eventually prove popular in Texas. Throughout the South, the black-eyed pea is still a widely used ingredient in soul food and various types of Southern U.S. cuisine. The planting of crops of black-eyed peas was promoted by George Washington Carver because, as a legume, it adds nitrogen to the soil and has high nutritional value. Black-eyed peas are an excellent source of calcium. Isn’t Wikipedia wonderful? I learn something every day!

Start your taste buds. We’re having a Superbowl Recipe Round-Up here at the KrAzY kitchen in honor of the Superbowl. Mr. Linky will go up 2/7/2010 to gather all your links.

Simple Saturday 2010

Welcome to Simple Saturday and Happy New Year to all!

There have been lots of changes here at Our Krazy Kitchen over the six months we have been in existence. We’ve had changes with our themes and memes, we’ve had to say goodbye to some great team members, but in the process have made some wonderful new friends who have become part of our team. With that I’d like to welcome our three newest members – Chaya, Min, and Dave, I know it’s going to be a great year here at Our Krazy Kitchen having all of you on board with us!

Me? I’m Martha, my main blog is Menagerie. I was the original host of Simple Supper Saturday here in the early days at Our Krazy Kitchen. I later took over Monday Munchies, but have now returned to Saturdays to host Simple Saturday – sorry about any confusion it may have caused.

Speaking on behalf of our team here at Our Krazy Kitchen, we want this to be a fun and exciting year! We want mix things up a little, offer contests, challenges, special features, maybe even some giveaways! We want you to get to know us more as individuals, and we want lots of participation and interaction with all of you! Just in case you missed it yesterday Kristen got us started with our first challenge! It should be a lot of fun, we hope you’ll play along!

~~~~~~~~~~~~~~~~~~~~~~~~

My goal for Simple Saturday is simply to bring you lots of easy but yummy dishes. My life is very hectic and very full. As much as I’d love spending my days in the kitchen it’s just not possible. I usually have to have meals on the table within 30 minutes or less. I am blessed with being happily married, and have three beautiful children – two boys 12 and 15, and a daughter 22. I work full time as a secretary at a high school, have my 82 year old mother that I care for, and also have the responsibilities of managing and maintaining both her household and my own. As you can see, not much time left for elaborate meals here on a regular basis, but there are always good homemade meals regardless.

I consider quick, easy and inexpensive dishes my specialty. I often cook a main course two or three times larger than what we need for a family dinner in order to intentionally have leftovers to creatively make all new meals over another day or two. I rarely use actual recipes, some ideas from recipes but from there fly by the seat of my pants! I will also admit to sometimes using some kitchen shortcuts to create half homemade meals. I generally do a cook and freeze day once every 4-6 weeks, am a menu planner to keep things simplified and organized, and a bulk food and sale shopper as well. I make sure nothing ever goes to waste in my home!

What you’ll find here at Simple Saturday may often be more of a process than an actual recipe, and as long as you can relate to things like a “handful” or a “splash” of this or that we’ll get along just fine 🙂

~~~~~~~~~~~~~~~~~~~~~~~

We’ve been having some behind the scenes fun recently here at Our Krazy Kitchen regarding brussels sprouts. In honor of Dave today I’m posting my favorite brussels sprouts (originally posted at Menagerie). The kids call them “The Awesomest Brussels Sprouts!”

At one time we didn’t even like brussels sprouts, not at all – I mean AT ALL! Last summer I was on a mission to revisit some foods we didn’t like and try making them different ways to give them another chance. Made like this brussels sprouts are now my family’s favorite green veggie!

Lightly trim the bottom of each of the brussels sprouts, cut in half, put in a bowl with a splash of olive oil, add a heaping spoon of fresh minced garlic, sprinkle with hot pepper flakes, lightly toss.

Heat a splash of olive oil in frying pan, add brussels sprouts flat side down and fry on med until bottoms are nice crispy browned (about 5 minutes). Transfer to an oven safe pan (or preferably have a large skillet that can go right in the oven). Cook on 400 for 12-15 minutes.

As soon as they come out of the oven, drizzle with balsamic vinegar, sea salt, fresh ground pepper, toss again and top with a sprinkling of fresh grated Parmesan cheese.

These really are the “awesomest!”

If you happen to have a great brussels sprouts recipe I’d love it if you would link it up here, no need for a brand new post, linking up an older post is fine. Of course if you don’t have a brussels sprouts recipe feel free to link up any simple dish – try to think green on this one!

Note – Mister Linky is having trouble today. If a Linky doesn’t appear below please leave your link in the comment section. I will link them manually later when Mister Linky is back up and running, thanks!

What Did You Bake This Month….a challenge

I thought I’d shake things up a little and offer you all a challenge. The holidays are over, the winter doldrums are about to descend. Why not join me in a little cooking/baking adventure?

During the month of January, I’d like you to think of a recipe using a certain ingredient that will be mentioned a few sentences from here. It can be one of your tried and true recipes, it can be a brand spanking new recipe that you make up, it can be a recipe that you have had sitting in your list of “I want to try that.” The only thing I ask is that you actually make it, write up a post about it and include a picture or two. In “What Did You Bake Today” on January 29, I’d like you to link up your recipe.

I will randomly pick one of the linker-uppers and will feature them the following week here and on my personal blog.

Now, for the mystery ingredient…..seeing it’s cold outside….and not much is really in season….it’s

OATMEAL
(you can make a main dish, a dessert, a breakfast item, bread, or whatever!!)
I can’t wait to see what you come up with.

Puff Pastry with Blue Cheese Filling – I CAN COOK THAT

Welcome to the first weekly posting of “I can cook that!”. My name is Dave, from My Year on the Grill. When I was first asked to become a weekly poster here, I had a couple of reactions…

First, I recalled watching Sesame Street with my children (nearly 25 years ago). There was a part of the show where viewers were asked to find the one that was not like the other…

Then, I was reminded of my own youth (nearly 50 years ago) when I would watch Gene Autry’s Melody Ranch. The Gene Autry Show was about a singing cowboy, and his deputy partner, Pat Buttram who ride the west to help kids, women, men, or other misfortune people and bring the outlaws to justice. Gene Autry was always the upright person, recognized by the fans who adored him, while his partner Pat Buttram was clumsy, and just plain careless. Together, they made a great team and a dynamic duo for western TV.

OK, This site is filled with “Gene Autry’s in cooking aprons”. Wonderful, upstanding well respected cooks whose advice you all would be wise to accept. While I am here to be the wacky sidekick.

And that, in fact is exactly what I am. I am not a cook, by training, nor by background. My sainted mother was one of those 9 to 5 secretaries before Dolly gave her a theme song. While most of you watched and learned as your mother made pie crust from scratch, I watched Mom open the original blue box of macaroni and cheese. While you were getting your basic training in your home economics classes, I was in basic training.

3 years ago, I retired. I floundered around for awhile trying to find a hobby that would keep me interested. After trying a few, I would always get bored. Once you make your first ship in a bottle, the next one isn’t as exciting. But, I discovered that making a 4 course dinner every night still carries the same thrill for me as when I first went off book, and altered the directions by adding just a few shakes of Tabasco sauce in that blue boxed Mac and Cheese. What I lack in knowledge and skill, I make up for in enthusiasm. I still get a thrill every day when I discover that…

I CAN COOK THAT !!!

And that is what this column is meant to be. A chance for you talented, experienced “Gene Autry in aprons cooks” to watch as this enthusiastic bumbling Pat Butram challenges the limits of his knowledge, skills and experiences. I will freely admit that many times when I begin a cooking project, I spend more time hunting techniques and possible alterations to a recipe than it takes to actually cook the meal. Wikipedia, YouTube and most of all, the more than 100 bloggers that I follow are teaching me to cook. And so, the Gene Autry’s of this site are giving me a day a week to pick out a recipe from a fellow blogger and see if my enthusiasm and research skills will get me beyond my limited cooking skills and basic knowledge.

I always wonder why people blog. I suspect that there are a few of you who secretly hope to be discovered ala Julie Powell, or Ree Drumand, the Pioneer Woman. While I admire every blogger willing to “hang it out there” for all the world to see and judge, honestly, I only see a few truly ready to make the leap from self published bloggers to someone the world would pay to read. For whatever my opinion is worth, I feel that Mary from ONE PERFECT BITE has in all but name only, made that jump to professional quality writing. Daily, I feel I am reading a page from her book more than a posting in a blog. She gives tested and proven recipe content, as well as back stories and histories to the ingredients or finished menu item. She is also a very generous “Gene Autry in an apron”. When I first saw her posting about Puff Pastry (click HERE to see that post), I had several questions which she took time from her life to answer. She went out of her way to give my “Pat Butram bungling” a chance to have a successful cook session.

Here is what Mary said to do…

Puff Pastry Pillow with Creamy Blue Cheese Filling…from the kitchen of One Perfect Bite

Ingredients: Thick Cream Sauce:

2 tablespoons butter
3 tablespoons flour
1 cup milk

1/4 teaspoon salt

Pastry Case:
1 (14-oz.) package thawed puff pastry sheets

Cheese Filling:
8-oz. blue or Roquefort cheese, crumbled

2/3 cup thick cream sauce

1 egg beaten with 1 teaspoon water

Directions:
1) Preheat oven to 425 degrees F.

2) To make cream sauce, melt butter over low heat in a heavy bottomed saucepan. Blend in flour and cook slowly, until butter and flour cook together for 2 minutes without turning color. Whisk in milk; blend until smooth. Cook, stirring, until mixture comes to a boil. Boil for 1 minutes. Add salt and pepper to taste. Set aside.

3) To make pastry case, lightly sprinkle work surface with flour. Roll one sheet of pastry to a rectangle that is 1/16-inch thick. Sprinkle cold water on a cookie sheet. Tap off excess. Transfer dough to cookie sheet. Roll out second sheet of dough. Let sit, covered, until needed. Prick center of dough at 1/4-inch intervals with a fork to keep dough flat while baking. Spread crumbled cheese down center of dough strip, leaving a 1-inch margin on all sides. Cover with cream sauce. Fold margins of dough up over filling on all four sides. Brush all margins with water. Cover with second strip of dough, trimming as required, and seal layers together, pressing firmly with fingers. Brush with egg wash. Bake for 20 minutes. Lower heat to 350 degrees F and bake 30 minutes longer. Serve hot. Yield: 6 servings.

And, here’s what I did…

One note, if you are not used to my blog, you will notice that I probably show more photos than any other blogger. When I do a post, I always assume I am talking to someone that knows even less than I do. Even though I use 998 words, I still think that those extra words that a photo is worth is needed… for those worse off than me.

As always, I assemble my ingredients. I have learned from bitter experience that if I do not do this, I will miss a dash of this or a pinch of that. By having everything in one spot, as I use the ingredients I return them to the pantry or fridge. If I am sliding the meal into the oven and I notice that there is still salt at the prep area, I know that it is left out. More than once, this habit has saved a dish from being less than the recipe.

I did alter Mary’s ingredient list just a bit. I used buttermilk instead of whole milk. No other reason than I like it, I have had very good results from substituting Buttermilk, and finally, I had just enough to use up and not have to pour it down the drain in a few days when it is beyond it’s expiration date.

I also cut the recipe in half. Life is good, but it is just my wife and I at home. No need to make a dish for six when a half portion would work.

Next, I got to use a skill I gained at cooking school when I recently vacationed in New Orleans…

“First you make a roux” is a pretty common expression when you make a Cajun dish. While this is certainly NOT Cajun, it is French cooking, which influenced Cajun cooking, which is why making a roux was explained to me when I was in “the Big Easy”. A roux is a pretty fancy cooking term for butter and flour.

It is still VERY exciting to me to whisk together the fat and flour, and slowly get that color change and the air fills with that nutty aroma. But in this case, Mary wanted a very light roux, so after two minutes, I added the buttermilk.

It didn’t take long at all for the roux to thicken up. Mary said to let the mixture come to a boil. Mine never did boil. I just didn’t have the confidence to let it get that hot, and risk burning the goo. If you double click the image to the left, the magic of the Internet will show that this had the consistency of thin icing. I was happy with the texture of the goo and when I dabbed a finger in, the taste was exactly right. So, I removed it from the heat and went to work on the puff pastry…

Merry Christmas to me…

My wife bought me a pastry rolling pin for Christmas. Prior to December 25th, I used a bottle of wine to roll out dough. I also got some tiny cookie cutters in the shape of Noah’s ark and animals.

I rolled out just one sheet of the puff pastry. I rolled it out, increasing the size, breaking in my new rolling pin… whoo whoo! I love using new toys!

And next I was ready to do a little cutting.

I made a set of the Noah’s Ark figures, and trimmed the remaining sheet to square the edges and cut that in half. Actually, I cut about 55%/45%. I wanted one sheet a little bigger than the other.

Next up is the layering…

I set out the smaller of the two sheets. I added a layer of crumbled blue cheese, leaving an inch all around the edges empty. The thick cream sauce was indeed very thick by this time. It was solid enough to plop onto the cheese, and it stayed in place as I folded the edges up to form a box.

Sorry I don’t have a picture of the cream sauce on top of the blue cheese, but I was working fast before it started oozing where I didn’t want it to be…

Next, I added the other half of the pastry. I brushed the edges with some of the egg, and folded the edges underneath the original pastry sheet.

I generously painted the sheet with the egg wash, and added some bling decoration in the form of wavy lines to look like ocean and the boat and a couple animals.

I also painted these figures with the egg.

I followed the cooking directions to a tea… and here is what I made…

I would like to say that this is exactly the way it came out of the oven…

It wasn’t…

My pastry had split at the top. But, as Julia Child says, “When you are alone in the kitchen, you can just reassemble and… Who’s to know?”

So, before I showed it to my wife, I scooped out just a bit of the goo, and shoved the pastry back together, and sure enough…

It looked just fine! Who’s to know???

When I served it, I cut along the split and it worked just fine… Next time, when I lower the temperature in the oven, I will add a few strategically placed slit marks to relieve some of the pressure.

I was thrilled! It looked great! And it tasted just as good as it sounds! The pastry was crispy and the goo was perfect. This was my first dish using puff pastry, and it was not perfect. But I learned quite a bit about puffed pastry and thick cream sauce. I will be able to expand on the knowledge I gained, and make the same dish better next time, or alter ingredients and techniques to make it my own recipe.

And HEY… I CAN COOK THIS!!!

So, that’s me in a nutshell. If you liked my writing style and blogging “feel”, click HERE and come see my regular blog, MY YEAR ON THE GRILL. I post fresh content daily. I only post recipes that i have actually made, and I think you will have a good time if you take the time to read me.

If you want to see what I think is among the best blogs on the internet, click HERE to get to ONE PERFECT BITE and say Hi to Mary for me.

Thanks Mary, my very first “Gene Autry in an apron”

Sweet & Sour Sticky Chicken ~ I Can Cook That!

On Thurday, Dave from My Year On The Grill will debut with a brand new meme, I CAN COOK THAT! at OuR kRaZy kItChEn. In keeping with the spirit of his meme I am digging deep into my recipes archives and will be trying a new recipe that I have never made before, but have been toying with the ingredients and drooling over.

Please forgive me I cannot find that we took a picture, but I’m still looking for it.

SWEET & SOUR STICKY CHICKEN

1 pound boneless, skinless chicken breast cut into bite sized pieces*
2 tablespoons sesame oil
1/2 cup honey
1/8 cup soy sauce
1/4 cup brandy
4 cloves REAL garlic, mashed
1 Jumbo egg white
1 tablespoon cornstarch
1-2 teaspoon garlic juice (1 clove minced and minced again)
1 tablespoon freshly grated ginger
2 Tablespoons sugar
1 large bunch green onions, sliced (greens also)
1 tablespoon sesame seeds

  • Whisk together the honey, soy sauce, brandy and garlic juice. Set aside.
  • Whisk together 1 egg white and 1 tablespoon of cornstarch. Add chicken pieces. Marinate the chicken pieces overnight.
  • Bring the meat out of the refrigerator 1/2 hour before your begin.
  • Drain meat.
  • Whisk together the honey, soy sauce, brandy and garlic juice. Set aside.
  • In a large skillet or Wok heat 2 tablespoons sesame oil until it is sizzling hot.
  • Add the garlic, ginger and green onions stirring until fragrant.
  • Add in chicken and sear then constantly stir fry.
  • Whisk together the sugar and marinade until sugar is dissolved.
  • Add to the wok and continue to cook on medium.
  • Once you have a rolling boil, cover and let it simmer over a small flame, until all the liquid has disappeared and the chicken is well done. The chicken should be caramelized and sizzling when served.
  • Sprinkle with sesame seeds.
  • Serve with rice. When cooking the rice I add 2 tablespoons soy sauce to the water to help flavor the rice.
aprons 3

Sausage Pasta Casserole ~ Cooking with Chaya

My husband said, this was interesting which meant to me, he did not like it, but then I watched him take three servings. He liked it. The truth is it is an interesting recipe because it is not a combination I have ever used and you, very likely, have not used, either. It worked though, it worked very well, blending flavors.

This has some of my favorite food, sausage, pasta, Brussels sprouts, and tomatoes. For me, it had to be good and it was. If you make this, you can substitute in every area. You could use chopped meat or meat balls instead of the sausage. You could use another vegetable in place of the sprouts, (green beans, broccoli, cauliflower or even spinach. I would leave the pasta and tomatoes in place but choose any pasta you want.

Sausage-Pasta Casserole (two servings)

Ingredients:
2 large sausages, cut into about 8 pieces each
1/2 pound pasta of choice – I used penne (gluten free)
10 ounces Brussels sprouts
1 medium onion, sliced
6 tomatoes, bigger than cherry tomatoes, smaller than a full size one, in eighths
1 red pepper, sliced
4 tablespoons crushed tomatoes (canned)
Spray cooking oil
Method:
Put up water to boil and while browning, cook the pasta according to directions.
Microwave or boil Brussels sprouts.
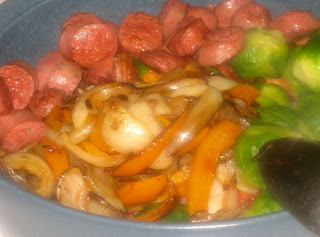
Spray a large skillet with cooking oil and fry sausages in it until they are lightly browned.
Remove sausage. Do not clean skillet.

Fry red pepper and onion until slightly browned.

Add fresh tomatoes.

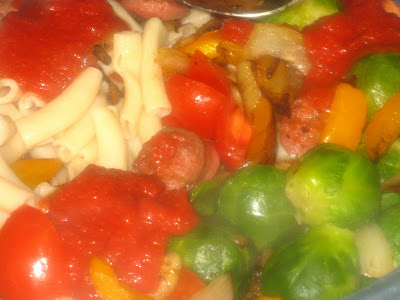
Add pasta and Brussels sprouts.

Add crushed tomatoes. If you need more crushed tomatoes, add what is necessary. There is also juice from the fresh tomatoes for the sauce.
Add salt and pepper to taste.
Mix all ingredients gently together. I put these in a casserole and heated them in the oven for twenty minutes on 300 degrees.

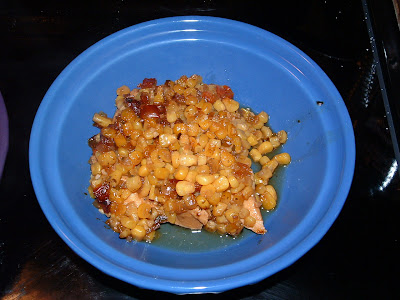
Italian BBQ Chicken & Corn Casserole

With the big move I was reaching for recipes that would work around the things I had on hand. I came up with this recipe and it was a huge hit and sooooooooo easy, not that I’ll let hubby know that LOL.


ITALIAN BBQ CHICKEN and CORN CASSEROLE
2 pounds chicken tenders
2 cans whole kernel corn, drained well
salt & pepper
1/4 cup butter
1/2 cup finely chopped Vidalia onion
1 teaspoon minced garlic, jar
1 teaspoon sea salt
1 teaspoon red pepper flakes
1 teaspoon Hungarian paprika
1/2 teaspoon fresh ground pepper
2/3 cups apple cider vinegar
1/2 cup water
1/2 cup dark brown sugar, packed
1 tablespoon Worcestershire sauce
1/4 cup molasses
1/2 cup Classico sun-dried tomato pesto

  • Preheat oven to 325 degrees.
  • Arrange chicken tenders in the bottom of a buttered glass baking dish.*
  • Salt and pepper well.
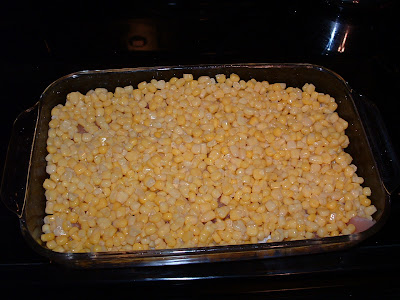
  • Spread corn over chicken.
  • In a saucepan, melt the butter until frothy.
  • Add the onion and garlic and cook a few minutes until translucent.
  • Whisk in the remaining ingredients and simmer over medium high heat until thickens.
  • Pour over the chicken and corn.
  • Bake 45-60 minutes.
  • Serve with Beer Bread for a yummy cold night meal.

*If you want to cut down baking time, brown the chicken first and decrease baking time by 30 minutes.

Leftovers – Simple Saturday

It’s not a recipe, but it really doesn’t get any better than those leftover turkey, stuffing and cranberry topped sandwiches. Serve some of your leftovers tonight on little rolls for a quick, easy, and super delicious meal or share with us what kind of yummy creations you make with your holiday leftovers!