CHICKEN SCALLOPINI IN BRANDY SAUCE

CHICKEN SCALLOPINI IN BRANDY SAUCE
For 4 People
4 boneless, skinless chicken breasts, sliced in 1/2 horizontally**
3+ tablespoons butter
½ cup brandy
Juice of 1 lemon
flour
salt and pepper

  • Wash and dry the slices after slicing them in half and removing any excess fat. 
  • Melt 2-3 tablespoons of butter in  large skillet.
  • Dredge the chicken slices and place in the pan.
  • Brown them, salt and peppering them generously.
  • Set aside, keeping warm. 
  • Add the remaining butter, brandy and juice of a lemon to the pan, scraping the bottom for any chicken pieces. Blend well. Let sauce start to thicken.
  • When sauce has just about reached desired thickness, return the chicken slices to the pan, covering well with the sauce.
  • Serve immediately.

** I used breast tenders this time and it was great!
Recipe Rundown
Taste: Both savory and sweet, tangy and rich.
Texture: Tender caramelized onions on top and fork tender. 
Ease: Super easy and quick.
Appearance: Appetizing and visually appealing.
Pros: Addicting and wonderful for entertaining.
Cons: None!
Would I make this again? Yes.

COD POCKETS

COD POCKETS adapted from The Magic Pumpkin
For 4 People
1 Pepperidge Farm Puff Pastry box = 3 POCKETS people
3 cod fillets
breadcrumbs
ground ginger
Juice of 1 lemon 
salt
white pepper 
sesame seeds
  • Unroll the pastry and divide into 3 wedges.*
  • Rinse and dry cod fillets gently. 
  • In a bowl put the bread crumbs, ginger, salt and pepper, blending well.  Pour into a shallow dish
  • Dredge the cod fillets in the seasoned bread crumbs making sure to coat them evenly.
  • Sprinkle each filet with a VERY small amount of lemon juice. 
  • Wrap the fillet and seal all edges.
  • Lay the packetson a baking sheet lined with parchment paper, sprinkle with sesame seeds. 
  • Use a beaten egg wash.
  • Bake at 200 degrees for 20 minutes.  Serve Warm
*What I actually ended up with was 2 big and 2 small portions.

CHICKEN SCALLOPINI IN BRANDY SAUCE

I was intrigued by the brandy sauce in this recipe, but don’t usually make veal so decided to give it a try on chicken.   I have to tell you there was nothing left, nada, so I know they loved every bite.  It didn’t hurt that they said I could make it again.  Next time I will add some thinly sliced green onions and mushrooms.

CHICKEN SCALLOPINI IN BRANDY SAUCE
For 4 People
4 boneless, skinless chicken breasts, sliced in 1/2 horizontally
3+ tablespoons butter
½ cup brandy
Juice of 1 lemon
flour
salt and pepper

  • Wash and dry the slices after slicing them in half and removing any excess fat. 
  • Melt 2-3 tablespoons of butter in  large skillet.
  • Dredge the chicken slices and place in the pan.
  • Brown them, salt and peppering them generously.
  • Set aside, keeping warm. 
  • Add the remaining butter, brandy and juice of a lemon to the pan, scraping the bottom for any chicken pieces. Blend well. Let sauce start to thicken.
  • When sauce has just about reached desired thickness, return the chicken slices to the pan, covering well with the sauce.
  • Serve immediately.

Recipe Rundown
Taste: Both savory and sweet, tangy and rich.
Texture: Tender caramelized onions on top and fork tender. 
Ease: Super easy and quick.
Appearance: Appetizing and visually appealing.
Pros: Addicting and wonderful for entertaining.
Cons: None!
Would I make this again? Yes.

Fire Day Friday: Dip and Flip Grilled Chicken

With Labor Day weekend coming soon, a lot of grills will be firing up for their last hoorahs of the summer. Here’s an easy way to grill chicken with the rich flavor of bbq sauce without burning the sauce while grilling. 


Dip and Flip Grilled Chicken
Source:  NibbleMeThis
4 chicken thighs, boneless, skinless
Rub
1 tsp smoked paprika
½ tsp Kosher salt
½ tsp black pepper, ground
½ tsp garlic powder

Dipping Sauce
½ cup bottled sweet BBQ sauce (Blues Hog, KC Masterpiece are our favorites)
½ cup apple cider vinegar
½ tsp salt
½ tsp black pepper
Mix rub ingredients together.  Mix dipping sauce ingredients together.
Sprinkle the rub on both sides of the chicken thighs.
Preheat your charcoal grill to 400f. Set the dipping sauce in a shallow pan on the grill.
Grill the chicken for 3 minutes. Then flip and grill another 3 minutes.
Now dip each piece into the dipping sauce and then flip back to the grill. 
Cook for another 6 minutes. During this time, continue dipping and flipping the chicken every 1-2 minutes. You are cooking the dipping sauce onto the chicken in layers.
Pull the thighs when the thicker parts reach 170f. Smaller parts might get there sooner, so just pull them to a cooler area of the grill like this.
Serve with your favorite BBQ sides. Tonight we served BBQ rice and Bush’s Honey Barbecue Beans.
This is more of a basic process than recipe. Have fun with it and make it your own. Add a signature spice to the rub, like maybe chipotle chili pepper. Or substitute beer for the vinegar in the dipping sauce. The point is to thin out a prepared bbq sauce and then layer it onto your food.
So are you already planning your Labor Day weekend cook out?

PASTRAMI BURGERS

These couldn’t have been much simpler and were super tasty!

PASTRAMI BURGERS
1/2 pound ground beef per person
1 slice BOAR’S HEAD pastrami per person
1 green onion, minced per person
1 clove garlic, minced per person
1 slice provolone cheese per person
1/3 cup bread crumbs per 4 burgers
1 JUMBO egg per 4 burgers
salt and pepper to taste

  • Mix all ingredients together except cheese.
  • Form burgers by hand.
  • Chill 2 hours.
  • Pan fry or grill.
  • Top with provolone cheese and serve.

HOMEMADE CHICKEN BROTH & STOCK UP TIPS

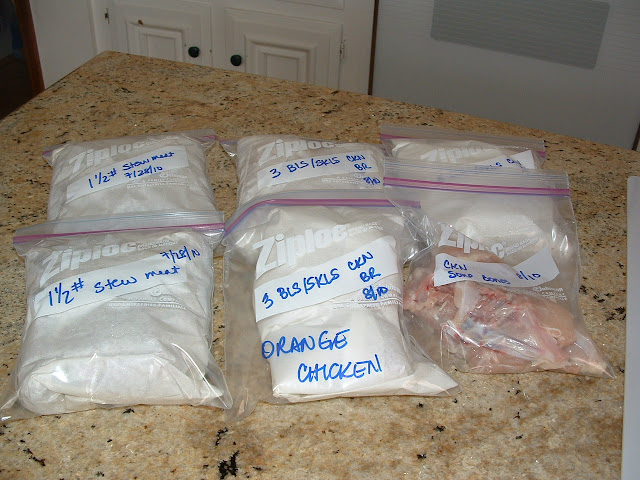
At this time of year, I’m usually stocking up for winter in the wild and snowy north.  I start with LARGE bulk packs of meat.  I then break them down by size and meat right down to cutting certain recipes into bite sized pieces.  Then I wrap them in freezer paper because I really hate freezer burn!  And I package them into pre-labeled ziploc bags for the freezer.

I didn’t get a secondary picture, but I then wrap the center of each one with a strip of duct tape.  Yep, you read that right, duct tape.  Just a small strip.  Enough so when they’re stacked in the back of the freezer you can identify the meat.  I buy it in colors – red for beef, green for chicken and blue for pork.  It makes it soooooooo much easier when you’re searching in the freezer for the right meat.
Many times this prep includes rotisserie chickens.  My market at home has buy one, get one free on Tuesdays.  Can you figure out when I did my shopping? By the time I get home and put away the groceries, the rotisserie chickens are cool enough to pick off the bone.  The bowl below is the skin, congealed juices and bones I collected as I stripped 2 birds.
I think Martha (MM) and I met over some post about buying in bulk and we found a common ground – saving money!  Talk to your butcher.  Many times you can save even more than the advertised sale prices.  For example, recently my local market was running a sale on chuck roast.  None of the roasts were as large as I really needed for company so I asked the butcher if they had one the size I wanted and instead she offered up a manager’s daily sale (in the bulk section just a few feet away from the ones I was looking at) where I could buy twice as much for half as much saving me $8 over what I intended to spend and gave me enough for 3 meals.  I made ALL the chuck roast as Pot Roast & Veggies for company and then used the leftovers to make Ortega Chile Bake and Beef Chili.
I then use a large stock pot and cover the “debris” with water.  I set it to simmer on a low temp and let it go for an hour or so.  I don’t add any seasonings since I’ve normally bought mesquite broiled or lemon herb, but adjust according to your tastes.

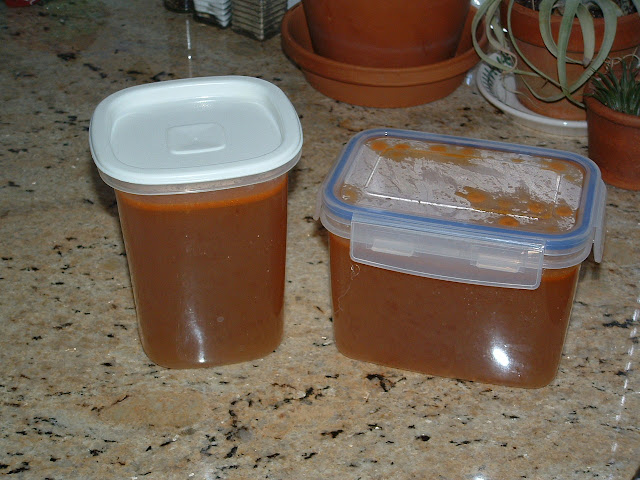
 Then I drain it into my large 8 cup measuring cup and allow it to cool.

I have several of these containers that I bought just for chicken stock in the freezer.  I haven’t bought chicken stock in over 10 years now.  It’s just so easy to make your own.  Even if I start with raw chicken and poach it for a recipe I add seasonings and by the time the chicken is done, there is several cups of broth ready for the freezer.

Today’s flavor was Mesquite broiled so it left us with a spicy red color also.

So what do you do to get ready for winter?  Have I motivated you to stock up?

Fire Day Friday: Grilled Shrimp with Grapefruit BBQ Sauce

I’ve been on quite the shrimp kick lately.  You see, there was a time where I was hesitant to purchase it, because, living in the desert, we can’t get a lot of fresh shrimp.  Well I had a bad experience with frozen shrimp once, hence the hesitation.  I broke through that though, and finally started cooking with shrimp again.  And boy am I thankful I did.  I adore shrimp… there is so much you can do with it.  And it’s at it’s best when grilled.  At least, that’s my opinion… and that counts for something, right??

This wasn’t the best concoction ever, but it was good.  Believe me, we ate the hell out of this…there were no leftovers 🙂  I liked the sauce, but surprisingly, I liked it much better on the shrimp than by itself… and that is an odd thing for me to say, trust me.  Nevertheless, this is definitely one to try!

Grilled Shrimp with Grapefruit BBQ Sauce
Adapted from Robin Miller
Printable Recipe 
Ingredients:
36 extra larges (31/40 count) shrimp, peeled and deveined
2 yellow bell peppers, cut into 1-inch chunks
10 cherry tomatoes
6 Tablespoons freshly squeezed grapefruit juice
2 Tablespoons ketchup
1 1/2 teaspoons Dijon mustard
1 1/2 teaspoons brown sugar
1/4 teaspoon ground cumin
1/2 teaspoon chili powder
1 teaspoon olive oil
1/2 – 1 teaspoon chipotle puree
wooden or metal skewers (if using wooden, soak in water for at least 30 minutes)

Directions:
In a bowl, mix together the grapefruit juice, ketchup, mustard, sugar, cumin, chili powder, olive oil and chipotle puree until well combined.  Reserve 2 tablespoons of the sauce.  Place the shrimp in a shallow dish and pour the remaining marinade over top of it.  Toss to make sure all shrimp are coated with marinade.  Cover and place in refrigerator for 2-4 hours. 

Preheat grill to 350 degrees F.  Thread the shrimp onto the skewers.  Thread the peppers and tomatoes on their own separate skewers, or thread them together with the shrimp, it’s up to you.  Place directly over the fire and grill until shrimp is pink and cooked through, about 3-5 minutes per side.  My tomatoes only sat on there for about 4 minutes all together and the peppers were done in about 8 minutes.  Baste the shrimp with sauce at least twice during the grilling time.  Remove from grill and serve over rice.  Enjoy!

Fire Day Friday: Thai Cashew Nut Pork

“If the only tool in your toolbox is a hammer, you’ll approach every problem as if it were a nail.”
That is why I like to use some unusual “tools” on my grill like my wok. It keeps my creativity fired up (I know, bad pun).
Woks may seem a bit unconventional for the grill but actually woks were originally designed for and used with fiery hot coals. You can do this recipe inside on your stove but I like to wok and roll on the grill. I call stir frying on the grill “stir firing”. 
Thai Cashew Nut Pork
Source:  Nibble Me This
1 pork tenderloin, silver skin removed
1 tsp sesame oil
2 tsp vegetable oil
1 onion, cut into 1/2” wedges
1 bell pepper, cut into slices (I like to use 1/3rd each of red, yellow and green just for color)
1 cayenne pepper, seeded and finely chopped (substitute a serrano, jalapeno, etc)
1 Tbsp ginger, peeled and finely diced
1 Tbsp garlic, peeled and finely diced
1 loosely packed cup of fresh basil leaves, stems removed and cut in half
2 Tbsp soy sauce
2 Tbsp fish sauce
¼ cup chicken stock
1 Tbsp sugar
2 Tbsp cold water
1 Tbsp corn starch
¼ cup unsalted roasted cashews
Slice the pork tenderloin into thin strips about 1” x 2” x 1/4” like this….
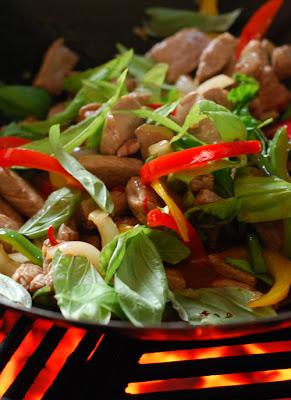
Prepare your grill to medium hot (400f) and preheat your wok. Then add the oils, let heat for another minute and “stir fire” the pork. You might need to do this in two small batches instead of one big batch to avoid over crowding the wok. (A crowded wok does not rock….it only steams and simmers.)
Cook for about 4-6 minutes until browned. Remove to a plate and tent with foil. Add the peppers and onions to the grill, “stir firing” 2 minutes.
Add the ginger, garlic and basil, tossing for another 1-2 minutes.
Stir in the soy sauce, fish sauce, stock, and sugar, cooking for another minute. While that is going on, whisk the water and starch together to form a slurry. Add to the wok.
Move the meat and veggies to the cooler sloped edges of the wok to let the liquids form a simmering hot tub in the center of the wok. Let simmer for 2 minutes or so until thickened. 
Add the cashews and toss the mix together again one last time. Serve with sweet jasamine rice.
There’s a lot of boisterous flavors in this dish but they all work together.  With the cashew only being added at the end, you might wonder why it gets named in the title.  It brings not only a taste to balance the spicy dish but also a crisp texture.

Fire Day Friday: Grilled Chicken with Orange Chipotle Glaze

I have a love affair with chipotles.  It’s true.  I don’t know if Chris knows about it or not, but I’m thinking he does not, as he never seems to question the numerous times chipotle shows up for dinner.  Either way, it’s not a love affair I am ready to give up yet, so let’s just keep this between us… ok?

At least I am willing to share my love with you all 🙂

The orange chipotle glaze was pretty spectacular.  The citrus and the smokiness of the chipotles blended so wonderfully together that I would swear they were meant to be together…. but I know that isn’t true as chipotle was meant for me ….and you of course!

Grilled Chicken with Orange Chipotle Glaze
Adapted from Cooking.com
– Serves 2 –
Printable Recipe 
Ingredients:
1/2 of a whole chicken
3 cups water
1 1/2 Tablespoons kosher salt
1 1/2 Tablespoons granulated sugar
1 teaspoon black pepper
1 Tablespoon minced garlic
1/4 cup frozen orange juice concentrate, thawed
2 Tablespoons chipotle puree
2 Tablespoons balsamic vinegar
2 teaspoons Dijon mustard
1 Tablespoon molasses

Directions:
Place the chicken in a large resealable bag or bowl.  Mix together the water, salt, sugar, pepper, and garlic until the sugar and salt has dissolved.  Pour mixture over chicken and allow to brine for at least 2 hours.  Remove chicken from brine and rinse thoroughly.  Pat dry with paper towel.

In a small bowl, mix together the orange juice concentrate, chipotle puree, balsamic, Dijon, and molasses until well combined.  Pour half of the glaze over the chicken and allow to rest in the refrigerator for 4 hours.

Preheat grill to 375 degrees F.  Oil grill grates.  Place the chicken, skin side down directly over the fire.  Grill for 10 minutes.  Move the chicken to indirect heat (no longer directly over the fire), and continue to grill another 10 minutes.  Move chicken back to direct heat and flip over.  Baste skin side of chicken with some of the remaining glaze and allow to grill for 10 minutes.  Baste again with any remaining glaze and continue grilling until the chicken is cooked through – 160F in the breast and 180F in the deep thigh.  Enjoy!

ITALIAN BAKED CHICKEN

ITALIAN BAKED CHICKEN Serves 8

1 1/2 pounds boneless, skinless chicken breasts (cut in halves)
salt and pepper to taste
provolone cheese slices
prosciutto slices
1 large bunch green onions, sliced
3 cloves garlic, minced
Juice of 1 lemon
fresh basil
1 cup white wine (I used zinfandel)
3 tablespoons butter

  • Preheat oven to 350 degrees.
  • Generously salt and pepper each piece of chicken.
  • In a large skillet melt butter until frothy.
  • Add chicken pieces, searing each side quickly.  Drain on a paper towel. Do not discard butter.
  • Warp each piece of chicken in a slice of prosciutto and then lay a slice of provolone on top.  
  • Arrange chicken pieces in a baking dish.
  • In the skillet add the garlic and green onions, sauteing until soft and fragrant.
  • Add the wine and lemon juice, simmering until starts to thicken.
  • Pour sauce over and around chicken pieces.
  • Bake 30 minutes.
  • Garnish with fresh basil and serve.

CHICKEN PUFFS

I’m not quite sure where I originally found this recipe, but we fell in love with it and it makes a wonderful presentation for company.  The pictures are from when I originally made it with whole chicken breasts, but I have since changed it to using bite sized pieces.  Using chicken tenders works best.  It bakes better and is much easier to eat!
CHICKEN PUFFS
2 pounds boneless, skinless chicken breasts or tenders
4 Pepperidge farm puff pastry sheets, defrosted
4 ounces cream cheese
1/2 pound bacon, cut into quarters
1 bunch green onions, chopped
1 handful flat leaf parsley
sea salt and white pepper to taste
1 large egg, beaten
PURE
  • Preheat oven to 400 degrees.
  • Add cream cheese, green onions, parsley, salt and pepper to a small food processor and process until well blended.  Set aside.
  • Cook bacon until crisp.  Drain on paper towels.
  • Cut chicken into bite size pieces.
  • In a large bowl, toss chicken pieces with cream cheese mixture until well coated.
  • On a large jelly roll pan that has been sprayed with PURE, lay out your puff pastry pieces and seal any stray seams.
  • Divide chicken evenly among the 4 sheets.
  • Top evenly with the bacon.
  • Pull up all four corners and give them a little twist in the center.
  • Brush with beaten egg.
  • Bake 30 minutes until golden brown.
  • Serve immediately.

Fire Day Friday: Grilled Chicken Sandwich with Manchalapeno sauce

Never heard of Manchapeno sauce before?

Me either until I made it up the other day when I made up this summery grilled chicken sandwich inspired by the Kentucky Hot Brown. Manchapeno sauce is a white sauce powered by a fire roasted jalapeno pepper and the salty nutty taste of manchego cheese.

The result was decadent. If it wasn’t for the sound of the crispy bacon as I bit into this, I think I would have been able to hear my taste buds sing.
Open Faced Grilled Chicken Sandwich with Manchapeno Sauce
3 large chicken thighs, boneless, skinless
Chicken Rub (see recipe)
3 sliced Italian bread
2 ea roma tomatoes, sliced in 1/4” pieces
6 slices bacon, cooked
Manchapeno Sauce (see recipe)
NMT Basic Chicken Rub
½ tsp kosher salt
¼ tsp black pepper
¼ tsp garlic powder
¼ tsp paprika
¼ tsp turbinado sugar
Manchapeno Sauce
1 Tbsp butter, unsalted
1 clove garlic, minced
1 Tbsp flour, all purpose
1 cup milk
1 cup manchego cheese
¼ tsp pepper
¼ tsp salt
1 jalapeno (red if possible), fire roasted, peeled and seeded
2 Tbsp parsley, finely diced
Season chicken with the chicken rub. Feel free to substitute a purchased chicken rub if you have it on hand.
Make the “manchapeno sauce”. Melt the butter and saute garlic over medium heat for 1-2 minutes. Add the flour and stir until well blended in (2-3 minutes), starting to form a roux.
Add in the milk and lightly simmer for 5-6 minutes. Stir in the cheese in small batches until all blended. Stir in the salt, pepper, jalapeno, and parsley. Keep warm on low, stirring occasionally.
Grill chicken over direct heat at 400f for 4 minutes. Flip can cook another 4 minutes.
Boneless thighs are thin and cook quick, keep an eye on them.
Flip again and cook 1-2 minutes. Flip last time and cook 1-2 minutes until chicken is an internal temp of 160f.
Toast both sides of the bread over the flames. 
Top each piece of bread with a piece of chicken, slices of tomato, and 2 slices of bacon. Then ladle the sauce over the sandwich and serve immediately.
Note: I used a red jalapeno from our front yard. Fire roasting the pepper gives it a smokiness like a “quickie chipotle”. Feel free to use a regular jalapeno or any other fire roasted chili. If you don’t like heat, you could use a roasted red bell pepper instead.