Aztec Chicken with Fresh Pico de Gallo

Oh yes, chicken again!!  Here’s a healthy meal full of fresh ingredients and tons of flavor!
 
I love finding new marinade for chicken.

Dress it up and you can have your chicken a million different ways!

I loved this way!

I devised this from several different recipes and it turned out really good!
I finally put my tomatoes and peppers to good use! I made a rockin’ pico de gallo!

I bought 2 tomato plants and 1 pepper plant this year. They have all been doing very well. But all I usually do with them is add them to quesadillas or salads.

This turned out great and I can’t wait to make it again!


Check out the Our Krazy Kitchen pals who have entries in Project Food Blog!  Please take a minute and vote for them!  Vote quick!  Polls close tomorrow the 23rd!

Dave – My Year on the Grill
Heather – Girlichef
Joanne – Eats Well With Others
Kristen – Frugal Antics of the Harried Homemaker
Min – The Bad Girl’s Kitchen

Aztec Chicken Recipe 

1 1/2 pounds boneless chicken
1 tablespoon oil
4 cloves of garlic
1 medium onion
3 tablespoon cilantro
1 tablespoon paprika
1 teaspoon cumin
1 teaspoon chili powder
1 teaspoon salt
1/2 teaspoon pepper

Combine oil, garlic, onion, cilantro, paprika, cumin, chili powder, salt and pepper in a food processor. Save a bit of the mixture for while cooking. Pour the rest into a large baggie with the chicken, mix and let marinade for a few hours.

Grill or pan fry chicken until done, brushing with reserved sauce. Serve with Pico de Gallo.

Rockin’ Pico de Gallo
1 pound tomatoes, chopped
1/2 cup onion, diced
1 jalapeno, diced
3-4 cloves garlic, minced or pressed
2 tablespoons lime juice
1/4 cup cilantro, chopped
Salt and pepper

Mix everything together and refrigerate until ready to use.

Total calories for chicken = 970 calories
Total calories for pico de gallo = 140 calories

6 servings = 185 calories per serving with pico de gallo

Aztec Chicken with Pico de gallo and Cilantro Rice = 456 calorie dinner

This makes a lot of Pico de gallo but I put a bunch on my rice too!

Check out the Cilantro Rice recipe on Debbi Does Dinner Healthy.

PORK CHOPS MARSALA

Remember when I researched scampi?  And decided that scampi is not just for shrimp? Well, I got to thinking about how we get into cooking/eating ruts.  Are you in a rut?  We are sometimes even with me always trying new recipes.  I started analyzing the flavors we like and those we don’t.  Then I started wondering how I was going to transfers those like into new recipes.  I realized I don’t really need “new” recipes, I just need to “trade” out some ingredients.  This eventually led to me thinking about Chicken Marsala, one of our very favorite flavor combos. Adn that Marsala is not just for chicken.
To get you started here is a little Marsala history.

Marsala Wine Information
Marsala is the west section of Sicily, the island near the foot end of Italy. In 1798 the Sicilians managed to substitute their own wines in place of the standard rum in an English naval shipment. In those seafaring days, something had to be done to wine to allow it to last the long ocean journeys. Brandy was added to allow the wine to last longer, and to be more resistant to temperature changes. These were called “fortified wines”.

Once the British had a taste of Marsala, demand grew quickly. In the United States during Prohibition, things became even more interesting. The typical Marsala bottles made the wine look like medicine. People found that getting Marsala was less risky than other types of wine. While not as popular now, it is still used quite frequently as a cooking wine in Italian dishes.

Marsala uses the following grapes: 

  • white skin/berry grapes: Grillo, Catarratto, Inzolia and Damaschino for golden and amber Marsala
  • dark red skin/berry grapes: Pignatello, Calabrese, Nerello Mascalese, Nero d’Avola for ruby red 
Marsala is made in the “solera” tradition – a melding of years. First, a keg is filled with wine from the current vintage of grapes. Subsequent years with similar tastes are placed in kegs above the first. When liquid is drawn out of the bottom (oldest) keg, it is refreshed with liquid from the next keg up, and so on. In this manner, the taste remains the same throughout the cycle, and every bottle you get has (potentially) some liquid from the very first vintage.

Types of Marsala

    * Fine: 17° alcohol, aged >1 yr
    * Superiore: 18° alcohol, aged >2 years
    * Superiore Riserva: 18° alcohol, aged 4 years
    * Vergine Soleras: 18° alcohol, aged 5 years

Marsala was traditionally served between the first and second courses. It is now also served, chilled, with Parmesan (stravecchio), Gorgonzola, Roquefort and other, spicy cheeses.

Marsala Substitutions
I regularly get email from casual wine drinkers who come across a recipe for chicken marsala or veal marsala and want to know what other alcohol they can substitute instead. I *love* both of these dishes. Here’s the issue. Imagine you had a recipe for making orange juice and you wanted to substitute lemons instead. They’re both citrus! However they taste very different. So you’re no longer making orange juice, you’re making lemon juice now.

The same thing is true for dishes with marsala. It has a very specific dish. Sure, you could make chicken with chardonnay, or chicken with cabernet, and they might be tasty. But they are no longer chicken marsala. The flavor will be completely different. So at that point you could call it “chicken with wine” and be happy. If you want chicken marsala, then you need to find marsala, so that it tastes like marsala.

Pretty much any regular wine shop will have marsala bottles on their shelves, along with the port and sherry. Again marsala doesn’t taste like port and sherry 🙂 But that’s the type of wine it is. So I highly recommend that you take a run to your local wine shop, grab a bottle of marsala and enjoy! It lasts a long time because it’s fortified. Chicken and veal marsala are really yummy, so you’ll want to make it several times. It’s one of those staples of cooking, like having lemon juice in your fridge.

If you have serious issues with alcohol, I’m afraid there is not a non-alcoholic marsala flavoring. Note that any recipe calling for “Marsala” means this wine. Marsala is the name for this wine.

Sweet vs Dry Marsala
I get emails from cooks asking which they should use – sweet or dry marsala – in a recipe. It’s like saying you have a recipe which says to use cheddar cheese and you have mild cheddar and sharp cheddar and medium cheddar, and which should you use. You can use any of them. They are all cheddar, they will all provide a cheddar flavor. If you like mild cheddar better, you might go with that. But if you’re not a cheese fanatic you might not even really notice the subtle differences between for example mild and medium cheddar flavors when they are in a dish.

So it definitely is to taste 🙂 Do you like sweetish chicken dishes? Do you like non-sweetish chicken dishes? Are you even going to notice the difference which is that kind of subtle variation? Who knows, you might not even be able to taste any difference since both are going to taste “like marsala”. Undoubtedly you’re not going to make chicken or veal marsala only once in your life if you like it, you’ll make it every few weeks. So make it one time with the sweet and one time with the dry, and see if you can even notice any difference. Or, I suppose, have someone else add in the marsala and not tell you which they used and see if you can guess 🙂 It might be you can’t even tell which is being used, in which case it’s not worth worrying about. Use whichever one you have more of.

Storing Marsala
Marsala is a fortified wine – this means they add hard alcohol to it. This also means that, just like you can keep opened (sealed) bottles of vodka and rum on your shelves, you can also keep an opened bottle of marsala around. Yes, the flavor will gently deteriorate over time, but it won’t go from wonderful tasting to awful tasting in three days. You probably won’t even notice the flavor difference after a month or two. Still, I’d suggest drinking it all within three to four months (or cooking dishes with it). When you cook with a flavor, you get a really concentrated version of that flavor. So you want really tasty, yummy marsala flavors – not sort of stale, stagnant marsala flavors. I am very much a fan of eating food that you really enjoy, and savoring the flavors!

Marsala is fortified, so you do NOT have to store it in a fridge or take any special measures. Just keep it in a cool, dark area like any other oil or wine. Marsala will not “go bad” – it won’t turn dangerous to drink – but its flavors will fade over time.

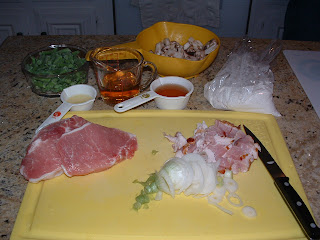
PORK CHOPS Marsala

  • 1/4 cup all-purpose flour
  • 1/2 teaspoon sea salt
  • 1/4 teaspoon ground white pepper
  • 1/2 teaspoon dried oregano
  • 4 boneless pork chops – 1/4-1/2  inch thick
  • 2 slices thick bacon, diced
  • 4 tablespoons butter
  • 1 small white onion
  • 2 cups frozen green beans
  • 1 cup sliced mushrooms
  • 1 tablespoon lemon juice
  • 1/2 cup Marsala wine
  • 1/4 cup sweet cooking sherry
  1. With a mortar and pestle grind the oregano. Sift together the flour, salt, pepper and oregano. Coat the chicken pieces well.
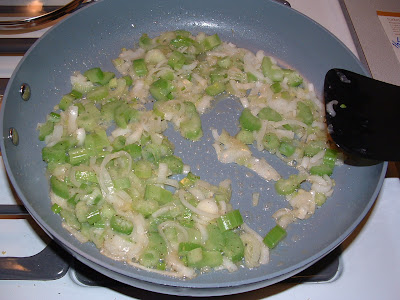
  2. In a heavy skillet, heat butter. Add the bacon pieces and stir fry for several minutes.  Slice onion into rings and separate. When butter is hot, saute’ onions until just caramelized.  Add the mushrooms and green beans and saute until cooked through. Set aside and place pork chops in skillet and brown on both sides about 5 minutes per side over medium heat. Remove and set aside.
  3. To the skillet, add the wine, lemon juice and sherry. Stir, reduce heat, and cook for about 10 minutes until the sauce is partially reduced and begins to thicken. Return chicken breasts to the skillet. Spoon sauce over the chicken. Cover and cook over low heat for about 5-10 minutes or until chicken is done.

CHICKEN MARSALA

Chicken Marsala

  • 1/4 cup all-purpose flour
  • 1/2 teaspoon sea salt
  • 1/4 teaspoon ground white pepper
  • 1/2 teaspoon dried oregano
  • 4 skinless, boneless chicken breast halves – pounded 1/4 inch thick
  • 4 tablespoons butter
  • 4 tablespoons olive oil
  • 1 small white onion, sliced into thin rings and then separated
  • 1/2 pound mushrooms, sliced thin
  • 1 tablespoon lemon juice
  • 1/2 cup Marsala wine
  • 1/4 cup sweet cooking sherry
  1. With a mortar and pestle grind the oregano. 
  2. Sift together the flour, salt, pepper and oregano. 
  3. Coat the chicken pieces well with the flour mixture.
  4. In a heavy skillet, heat oil and butter.  
  5. When oil and butter is hot, saute’ onions and mushrooms until just caramelized. 
  6. Set aside onions and mushrooms and place chicken breasts in skillet and brown on both sides about 6 minutes per side over medium heat. Remove and set aside, but keep warm.
  7. To the skillet, add the wine, lemon juice and sherry. Stir, reduce heat, and cook for about 10 minutes until the sauce is partially reduced and begins to thicken.
  8. Return onions and mushrooms to the skillet. 
  9. Plate chicken breasts.
  10. Spoon sauce over the chicken.
  11. Cover and cook over low heat for about 5-10 minutes or until chicken is done.

aprons 3

Good Cast Iron really makes the best non-stick pan… and SMOTHERED CHOPPED STEAKS taste best made in that pan.

Remember when I promised you this product review? Well, it’s time and I have the perfect recipe for you too!

I love shopping online with CSN and you can too.  It so easy and they have so many wonderful name brand products to choose from.  Whether you are looking for cheap bedroom furniture, lights, TV stands, dining room furniture or cookware  they have it all.  They sent me these awesome Emerilware cast iron pans to review.
After a good seasoning, these pans are awesome and produce super tasty recipes!  My opinion?  CSN carries the highest of quality items and these pans are the proof in the pudding so to speak.  They are even heating and consistent.  CSN really ROCKS! I can’t think of an easier way to shop with reliable shipping, awesome communication and plain nice, accommodating people to work with!

How to Season Cast Iron Cookware

Cast iron lasts nearly forever if you take care of it. Seasoning cast iron cookware is necessary to ensure a non-stick surface and to prevent the pot or pan from rusting. If seasoned correctly your cookware can last a lifetime and more.

  1. For crusty cast ironware that you inherited or picked up at a garage sale: Your cookware may have some combination of rust and thick crackly black crud. It can be restored fairly easily to good as new condition! First place the cookware in a self-cleaning oven and run one cycle OR place in a campfire or directly on a hot charcoal fire for 1/2 hour, until dull red. The crust will be flaking, falling and turning to white ash. Then, after allowing to cool a bit to avoid cracking your cast iron,use the following steps. If you have more rust than crust, try using steel wool to sand it off.
  2. Wash your cast iron cookware with warm water and soap using a scouring pad. If you have purchased your cast iron cookware as new then it will be coated in oil or a similar coating to prevent rust. This will need to be removed before seasoning so this step is essential.
  3. Dry the cookware thoroughly, it helps to put the pan in the oven for a few minutes to make sure it’s really dry. Oil needs to be able to soak into the metal for a good seasoning and oil and water don’t mix.
  4. Coat the pot or pan inside and out with lard, Crisco, bacon fat, or corn oil. Ensure that the lid is also coated.
  5. Place both the lid and the pot or pan upside down in your oven at 300F for at least an hour to bake on a “seasoning” that protects the pan from rust and provides a stick-resistant surface.
  6. For best results repeat steps three, four and five.
  7. Ongoing care: Every time you wash your pan, you must season it. Place it on the stove and pour in about 3/4 tsp. corn oil or other cooking fat. Wad up a paper towel and spread the oil across the cooking surface, any bare iron surfaces, and the bottom of the pan. Turn on the burner and heat until smoke starts to appear. Cover pan and turn heat off.

Alternate Method

  1. First, if you find your cast iron needs to be stripped down and re-seasoned do not fear. All you have to do is place the utensil in your Self Cleaning Oven on the shortest cleaning cycle (usually 3 hrs. on most models), and it will come out looking like the day it came out of the mold. Allow it to cool overnight. Wash the residue off with WATER ONLY in the sink using a stiff abrasive pad. Make certain NO DISH SOAP comes in contact with the utensil during this procedure. If it does you will have to start over!!! Dry the cast iron utensil off with a paper towel, and IMMEDIATELY place BACK in the oven at 350 degrees Fahrenheit for 10 minutes or so.
  2. Next, take the utensil out of the oven after the 10 minute drying time is complete, and lightly brush the utensil with a paper towel coated with Crisco or other solid cooking oil. Liquid vegetable oil will do in a pinch, but it’s better to save the liquids until AFTER your initial seasoning. It is important in this step only to lightly coat the cast iron with a light, thin coat of oil until it only glistens. Do not allow any puddles or pools of liquid as this will cause problems at a later time.
  3. Then, place the Cast Iron in the oven set to 500 to 550 degrees Fahrenheit with the COOKING SIDE FACING THE BOTTOM OF THE OVEN. This allows for any excess oil to drain off to the sides, and prevents pooling during the seasoning process. The higher heating temps allows for the oil to truly ‘cook’ as it should as opposed to just ‘gumming up’ at lower temps. Cook undisturbed for 1 hour.
Please note: During the previous step it will be best to turn off any smoke alarms in the immediate area as it may smoke quite a lot. Ceiling fans also aid in ventilation.

Finally, after your cast iron is finished seasoning for 1 hour or so, take it out of the oven and IMMEDIATELY wipe it down with another extra – light coat of Crisco. Allow it to completely cool.TIPS

  • If food burns, just heat a little water in the pan, and scrape with a flat metal spatula. It may mean that re-seasoning is necessary.
  • If you’re washing the cast iron too aggressively (for instance with a scouring pad), you will regularly scrub off the seasoning. Wash more gently or repeat oven-seasoning method regularly.
  • If your pan develops a thick crust, you’re not washing it aggressively enough. Follow “crusty pan” instructions.
  • If storing your Cast Iron Dutch oven for any length of time, it is always best to place one or two paper towels in between the lid and the oven to allow for air flow.
  • Also, after cleaning after each use it is always best to place it back in the oven on 350 degrees for 10 minutes or so to ensure all water has vaporized and left the surface of the cast iron.
WARNINGS
  •  Do not cook tomatoes and other acidic foods in your cast iron cookware unless it has been well seasoned.
  •  Washing pans with detergent after they have been seasoned will break down the seasoning. Either wash without detergent (if you’re cooking similar foods with the pan, this is fine) or repeatedly oven-season your cookware.

SMOTHERED CHOPPED STEAKS

2 pounds ground sirloin
1 sleeve Keebler club crackers, crushed
1/2 teaspoon sea salt
1/2 teaspoon white pepper
1 tablespoon Worcestershire sauce
1/2 cup finely chopped onion
2 Jumbo eggs
1 tablespoon liquid Smoke – MYSTERY ingredient
3 tablespoons butter
2 cloves garlic, minced
1 large heirloom tomato, chopped,
1 large Vidalia onion, sliced thin
large shred cheddar cheese
  • Combine all the hamburger steak ingredients until well mixed. Form six steaks.
  • In a well seasoned cast iron grill, sear steaks on both sides.  About 4-5 minutes each side should leave you with medium steaks.
  • In a large skillet melt the butter. Saute the onions and garlic until fragrant and caramelized.
  • Top steaks with onions, tomatoes and cheese.

Fire Day Friday: Steak Fajitas

Wow, there are only 6 days of Summer left. By the time the next Fire Day Friday post rolls around Summer will be history. As gorgeous as East Tennessee and the Great Smoky Mountains are when Fall arrives, I still hate to hear that Summer is trying to make its walk of shame out of the door.

So to grab that last gasp of Summer, I grilled one of my favorite dishes, steak fajitas.

Steak Fajita Marinade
Source: Nibble Me This

1/4 cup Oil
1/4 cup Lime Juice
1/4 cup Tequila
1-2 clove Garlic minced
1 1/2 teaspoon Season salt
1 1/2 teaspoon Oregano (I like using the dried oregano from our garden for more rustic texture)
1 1/2 teaspoon Cumin (McCormick’s new roasted cumin is awesome)
1/2 teaspoon Chili powder
1/2 teaspoon Paprika
1/2 teaspoon Red pepper flakes

1.5 lb flat iron steak, flank steak, or skirt steak
1 ea red bell pepper sliced
1 ea green bell pepper sliced
1 ea red onion sliced

flour tortillas, shredded cheese, diced tomato, and other toppings

Whisk together all marinade ingredients. Reserve 2-3 Tbsp of the marinade. Use the rest to marinade the steak and veggies for 1-2 hours.

Grill the steak over direct heat at 500f for 4-6 minutes per side. For fajitas, I am looking for an internal temp of 125f. This gives you a crispy seared outside with a medium rare inside after a 10 minute rest.

Add the veggies to a griddle for during the last two minutes.

As mentioned, let the steak rest for 10 minutes before slicing. It is better to rest your steaks off of a plate because that lets the pores of the meat close and minimize loss of juices. I normally do that on a resting rack but I tried a new trick this time. I rested the steak on top of the grill veggies. That keeps them warm, bastes them with flavor, and raises the steak all at the same time. Win-win-win.

Wrap 6 flour tortillas in foil and grill for 1 minute a side.

Slice the steak and serve with the veggies, cheese and toppings.

Do you have a favorite “Summer” dish that you are dying to have before Fall arrives next week?

BLANCO ROSA POLLO PASTA

BLANCO ROSA PASTA
 ¾ pounds penne pasta (I used lingiuini tonight)
1 pound chicken, cubed
3 Tablespoons Butter
3 Tablespoons Olive Oil 
1 small Vidalia Onion, chopped
2 cloves garlic, minced  
½ cup White Zinfandel Wine*
1 8 ounce can Contadina tomato sauce
1 cup heavy whipping cream  
Fresh parsley, chopped
Fresh basil, chopped
Salt and pepper to taste
Asiago Parmesan cheese, grated

  • Cook the penne pasta until al dente per package instructions.
  • Heat 1 tablespoon each of butter and olive oil in a skillet. 
  • Add the chicken and saute until just done. Do not overcook them. 
  • Remove from heat and let cool for a few minutes.
  • In a large skillet heat the remaining butter and olive oil. Add the garlic and onion sauteing until translucent and fragrant, stirring occasionally. 
  • Add the wine. Let the wine evaporate for a few minutes, stirring occasionally.
  • Add the can of tomato sauce. Stir until well combined. 
  • Add heavy cream. Continue stirring until well blended. 
  • Lower heat to a simmer.
  • Add chicken pieces back in and heat through.
  • Toss with prepared pasta.
  • Top with basil, parsley and grate Parmesan cheese.

*Can substitute chicken broth if you prefer.
aprons 3

CHICKEN FRIED CHICKEN with PEPPER GRAVY & FAMILY FAVORITE MASHED POTATOES

CHICKEN FRIED CHICKEN
2 large boneless chicken breasts
1 cup buttermilk
1 cup flour
1 teaspoon salt
1 teaspoon pepper
2-4 tablespoons butter (enough to keep chicken from burning~add as necessary)
  • Rinse and pat dry the chicken breasts.
  • In a shallow glass pan, pour buttermilk over chicken 1-2 hours prior to cooking.
  • Make sure to coat chicken well and turn at least once during soaking.
  • Drain, but do NOT rinse the buttermilk off.
  • In a medium sized skillet melt the butter over medium heat. As butter melts and begins to very slightly sizzle, prepare breasts.
  • In a small ziploc bag mix together the flour, salt and pepper.
  • One at a time, put each chicken breast in bag and coat well with flour mix and then into sizzling butter.
  • Cook on one side until edges begin to bleed and then turn.
  • About 6 minutes each side depending on plumpness.
  • Keep chicken warm.
PEPPERED GRAVY
3 tablespoons butter
5 tablespoons Wondra flour
1 1/4 cups whole milk
3/4 cup whipping cream
3/4 teaspoon salt
1/2 teaspoon Black pepper + (to taste)
  • Melt butter into bottom of pan you just cooked the chicken in.
  • Scrape up any of the chicken pieces and mix into new butter.
  • Add flour slowly, stirring until absorbed by butter and golden brown.
  • Slowly add first the milk and then the cream.
  • Stir constantly until thickens.
  • If necessary sprinkle in more Wondra until desired thickness is reached.
  • Serve over chicken and mashed potatoes.
FAMILY FAVORITE MASHED POTATOES
4 large Yukon potatoes, peeled & quartered
4 ounces Philadelphia Cream Cheese, softened

1 small bunch green onions, sliced thin

1/4 + buttermilk
4 tablespoons butter
salt & pepper to taste
  • Boil potatoes in salted water until fork tender.
  • Drain.
  • Mash all together, salt and peppering to taste as you go. 

SWEDISH MEATLOAF

MEATLOAF  
1 Jumbo egg
1/4 cup heavy cream
1 large slice white bread, crusts removed, and bread torn into 1-inch pieces
8 ounces ground pork, double ground

8 ounces ground beef, double ground
1 medium onion, grated or minced
1/8 teaspoon freshly grated nutmeg
1/8 teaspoon ground allspice
1/8 teaspoon white pepper
1 teaspoon brown sugar
1 1/2 teaspoons table salt
Olive Oil, heavy coat

  • Whisk egg and cream together in small bowl. Stir in bread and set aside to soak.
  • Blend hamburger & pork, onion, nutmeg, allspice, pepper, brown sugar, and salt smooth and uniform.
  • Using fork, mash bread mixture until no large dry bread chunks remain.
  • Add mixture to beef mixture and blend until well mixed.
  • Form meat loaves.  
  • Bake 45-60 minutes. 
  • During the last 10-15 minutes prepare the sauce.

SAUCE
1 tablespoon butter
1 tablespoon all-purpose flour
1 1/2 cups chicken broth
1 tablespoon packed brown sugar
1/2 cup heavy cream
2 teaspoons juice from 1 lemon
Table salt and freshly ground black pepper

  • Melt butter, add flour and cook, stirring constantly with whisk, until flour is light brown.
  • Slowly whisk in broth.
  • Add brown sugar and bring to simmer.
  • Reduce heat to medium and cook until sauce is reduced to about 1 cup, about 5 minutes.
  • Stir in cream and return to simmer.
  • Add meatballs back to sauce and simmer, turning occasionally, until heated through, about 5 minutes.
  • Stir in lemon juice; season with salt and pepper to taste and serve over noodles.

TURKEY TETTRAZINI revisited as CHICKEN TETTRAZINI

When I was a kid and just starting to do the majority of the family cooking we had a set group of recipes that were the “weeknight” recipes. One of those recipes that was especially popular during the holidays was Turkey Tetrazzini. We also substituted ham and chicken for the turkey throughout the rest of the year. Back then I prepared the recipes as they were written and they were okay, but the Tettrazzini recipe used ALL Velveeta and canned mushrooms and stuff I wouldn’t think of putting into my body now so it was my goal to create the same recipe in a more health oriented way, but still easy for a weeknight meal.

CHICKEN TETTRAZZINI
2 + 3 tablespoons butter
1 large bunch green onions, chopped
1 stalk celery, chopped
8 ounces linguine, broken in half and cooked al dente
salt and pepper to taste
2 cups shredded rotisserie chicken pieces*
3 tablespoons flour

2 cups milk
1 cup grated mild cheddar cheese
1 cup grated Mozzarella cheese

  • Preheat oven to 350 degrees.
  • Melt 2 tablespoons butter in a skillet.
  • Saute onions and celery just until tender.  Set aside.
  • In a medium sauce pan melt 3 tablespoons butter.
  • Whisk in 3 tablespoons flour until golden.
  • Gradually add milk, stirring to blend. Cook just until thick.
  • Add cheddar cheese.
  • Add salt and pepper.
  • In the bottom of an 11×7 baking dish scatter first the pasta and then the meat pieces.
  • Pour soup mixture over top.
  • Top with mozzarella cheese.
  • Bake 25-30 minutes.

*ham and turkey work well too


Southwestern Roast Beef Sandwich

I won’t fork over big bucks for the latest kitchen gadget but sometimes you get lucky at a garage sale.

I bought a dehydrator for $6 at a garage sale a couple of weeks ago on a whim. I would never have spent $50 to buy one new in a store but for $6, what did I have to lose?

I have been having fun drying out an assortment of chilies and then grinding them up in a coffee grinder. So I had this wonderful sweet paprika and a spicy chili powder to use and thought I’d make a southwestern roast beef.


Southwestern Roast Beef Sandwich

2 lb beef eye of round
4 ea hoagie rolls
5 tsp Southwestern Rub
2 Tbsp vegetable oil
Cumin mayo
8 slices swiss cheese
lettuce, tomato, red onion

Rub
2 tsp paprika
1 tsp dried oregano
1/2 – 1 tsp chili powder
1/2 tsp cumin
1/2 tsp kosher salt
1/2 tsp turbinado sugar
1/2 tsp garlic powder

Cumin Mayonnaise
4 teaspoons ground cumin
1 cup mayonnaise
2 teaspoons fresh lime juice
3 teaspoons Chopped fresh cilantro

Instructions
Make the cumin mayo. In a small skillet over medium heat (using no oil), add cumin and stir constantly until darkened (2 minutes). Remove from heat. Mix mayo, cumin, lime juice and cilantro in a bowl. Cover and let chill for an hour before serving.

Mix rub ingredients together. Rub three teaspoons onto all sides of the beef roast. Mix the other two teaspoons with the oil.

Since this is Fire Day Friday, I spit roasted my beef on a rotisserie on the grill.

I used about 3/4 chimney full of lit coal and it took about an hour or an internal temp of 140f. I brushed it with the oil/seasoning mixture about 30 minutes into the cooking time.
You could also do this in an oven. Put the roast in an oven preheated to 450f for 10 minutes. Baste with the oil mixture. Cut the heat to 250f and then cook it for another 30 to 40 minutes or until the roast hits an internal temp of 140f.

Let rest for 15 minutes and then slice thinly. TIP: When I want really thin sliced roast beef, I will put the roast in the fridge for a day and then slice it while it’s cold. Whether doing it by hand or on an electric slicer, it’s easier to get thin slices when fully chilled.

Serve on a hoagie roll with the cheese, toppings and cumin mayo.


The roast beast…errr beef was tender and packed with flavor. The cumin mayo sealed the deal. It sure beats roast beef from a deli!

CHICKEN ala BAD DAY and home made SOY SAUCE substitute

I was having one of those days with trying to get my aunt to a specific appointment at a specific time.  You know the type that she wasn’t (or wasn’t able to) cooperating, the weather was storming, it was hot and muggy and I was just plain getting worn out dealing with her.  We were supposed to have leftovers tonight, I had planned it that way knowing I would be gone dealing with her, but someone, who will remain nameless decided that it looked better for lunch.  So when I got home I rooted around the crisper and the pantry trying to throw together enough dinner for tonight and was pleasantly surprised at the outcome.  My uncle asked what I called this and I said Chicken ala Bad Day.  He asked if I would post it to my blog and I said yes, because guess what?  They want me to make it again and it turned out REALLY good.

CHICKEN ala BAD DAY 
3 tablespoons butter
2 pound boneless skinless chicken breasts
1 large bunch green onions, sliced thin
3 cloves garlic, minced
1/4 cup champagne vinegar 
1 tablespoon balsamic vinegar
2 tablespoons molasses
salt and pepper to taste 
1/2 pound green beans, trimmed 
1/4 pound mushrooms, sliced

  • Heat the butter in a large skillet over medium-high heat. 
  • Generously salt and pepper the chicken pieces.
  • Saute’ the onions and garlic until they soften and brown, about 5 minutes.
  • Add chicken pieces until golden brown on both sides. 
  • Pour in vinegars and molasses.
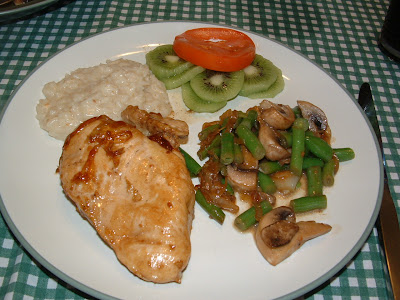
  • Reduce heat to medium-low, and simmer until chicken is well glazed.  I removed the chicken and then added mushrooms and green beans and sauteed them in the remaining sauce creating a great accompanying vegetable.
I was going to use soy sauce when I discovered I was completely out and so I looked up substitutes.  I found this and it sounds like a great mix that I plan to try soon.
Soy Sauce Alternatives
If you are looking for a substitute for soy sauce which can be stored for sometime, here is a concoction which can be used for a month, if stored in the refrigerator.

Prepare garlic vinegar
5 garlic cloves
½ a quart of boiling white wine vinegar
1½ tablespoons of peppercorns 

1 tablespoon onion powder
1/4 teaspoon ground ginger
+/-5 tablespoons blackstrap molasses (a spiritous mixture of rum and molasses)

  • Add garlic and peppercorns to vinegar and  let it stand for 3 weeks.
  • After 3 weeks,  add onion powder and ground ginger to 1¾ cups of the strained garlic vinegar. 
  • Next add +/-5 tablespoons. Take care to add the blackstrap based on how sour or sweet you want it to be. 

This soy sauce alternative is actually the best choice for those who are on a low sodium diet owing to blood pressure or cardiovascular issues and also makes way for the health benefits of blackstrap molasses which includes regularization of bowel movement, arthritic pain relief and restoration of color to graying hair.

aprons 3

MEXICAN SWISS STEAK

Hi Tamy here filling in for Min today which works well with her theme, Try a New Recipe.  This recipe is the perfect Try A New Recipe.

I recently had a thrift store find beyond belief.  An old recipe box full of old hand written recipes.  I estimate they are from the 50-60’s era when women passed around recipes at morning coffee, tupperware parties and PTA meetings.

This recipe called for either a can of diced tomatoes OR a can of cream of chicken soup for a creamy version.  I decided to amp it up a bit and added a can of Rotel diced tomatoes with green chiles and changed the soup from chicken to celery.  What resulted was an extremely tender and spicy round steak in its own gravy.
MEXICAN SWISS STEAK
2 pounds round or swiss steak, 3/4 inches thick
1 large Vidalia onion, thinly sliced
1 pound can tomatoes OR 1 can cream of chicken soup
1 can ROTEL tomatoes with green chiles
1 can cream of celery soup
salt & pepper to taste
  • Salt and pepper each piece of meat.
  • Cut meat into serving size pieces
  • Whisk together the soup and tomatoes until well blended.
  • Layer meat, onion rings and soup several times in crock pot.
  • Cook on low 8-10 hours.

I served it with Potato casserole and the guys wolfed it ALL down!

DON’T FORGET!
It’s PARTY time here at OUR KrAzY kitchen.
LUAU badge
Be sure to link up on the sidebar to join the party.