CARAMELIZED CHOCOLATE COVERED BACON

Dave at My Year on The Grill has dared, double dared in fact us KrAzY kitchen ladies to do a recipe. In my case the joke is on him. My niece had told me about this chocolate covered bacon she’d had at a county fair and it intrigued me so much I made it back at Thanksgiving time. It didn’t last long around that house full of bacon lovers. I then took it one step farther and caramelized the bacon first – talk about a taste treat for the tongue!

CARAMELIZED CHOCOLATE COVERED BACON
10 slices thick bacon
3 tablespoons brown sugar
1 tablespoons cider or balsamic vinegar
1 cup milk chocolate morsels
1 tablespoon butter
2 tablespoons milk

  • Preheat oven to 400 degrees.
  • Whisk together the brown sugar and vinegar.
  • Toss bacon slices in the mixture, packing it onto the slices.
  • Layer bacon and onions on grilling rack.
  • Bake 15-20 minutes or until JUST crisp. DO NOT OVERCOOK!
  • Cool completely.
  • In a double boiler combine chocolate, butter and milk until creamy.
  • Carefully dip bacon slices.
  • Cool on wax paper.

aprons 3

CARAMELIZED CHOCOLATE COVERED BACON

Dave at My Year on The Grill has dared, double dared in fact us KrAzY kitchen ladies to do a recipe. In my case the joke is on him. My niece had told me about this chocolate covered bacon she’d had at a county fair and it intrigued me so much I made it back at Thanksgiving time. It didn’t last long around that house full of bacon and chocolate lovers. I then took it one step farther and caramelized the bacon first – talk about a taste treat for the tongue!

CARAMELIZED CHOCOLATE COVERED BACON
10 slices thick bacon
3 tablespoons brown sugar
1 tablespoons cider or balsamic vinegar
1 cup milk chocolate morsels
1 tablespoon butter
2 tablespoons milk

  • Preheat oven to 400 degrees.
  • Whisk together the brown sugar and vinegar.
  • Toss bacon slices in the mixture, packing it onto the slices.
  • Layer bacon and onions on grilling rack.
  • Bake 15-20 minutes or until JUST crisp. DO NOT OVERCOOK!
  • Cool completely.
  • In a double boiler combine chocolate, butter and milk until creamy.
  • Carefully dip bacon slices.
  • Cool on wax paper.

aprons 3

CHICKEN & DUMPLINGS ~ CLASSIC & COMFORTING

SIMPLE CHICKEN & FEATHER DUMPLINGS
1 rotisserie chicken picked clean
chicken carcass with enough water to cover
1 medium Vidalia onion, chopped small
2 stalks celery, sliced
1 cup baby carrots, chopped
3 tablespoons Wondra flour
1 cup milk, room temperature
2 tablespoons butter

  • Cover chicken carcass with water. Bring to a boil and reduce broth to 7 cups.
  • Save 4 cups aside for making the dumplings.
  • Pour 3 cups through sieve into a large saucepan. Set aside.
  • Melt butter and saute’ vegetables.
  • Whisk together milk and flour until smooth.
  • Gradually whisk milk mixture into broth mixture until well blended.
  • Add in sauteed vegetables and chicken pieces.
  • Simmer until desired consistency.

DUMPLINGS
2 cups sifted cake flour
1 teaspoon salt
4 teaspoons baking powder
1/4 teaspoon white pepper
1 egg, well beaten
3 tablespoons butter, melted
2/3 cup milk

  • Sift together flour, salt, pepper and baking powder.
  • Add egg, butter and enough milk to make a moist, stiff batter.
  • Drop by teaspoonfuls into the boiling liquid.
  • Cover and cook 15-20 minutes ~ Watch closely!


  • aprons 3

HASH BROWN HAM & CHEESE QUICHE

I found this recipe in an old Taste of Home magazine that I bought at a library book sale – best book sale I’ve been too in a long, long time. I spent $9.80 at the sale and then calculated the retail prices of all the books and magazines plus tax ($309.73) and found I saved $299.93 when all was said and done!

I did make a few changes to the original recipe which are indicated in green and the items I removed are in red. I have to tell you this was one of the easiest brunch items I’ve ever made. Crisp and tasty too!


HASH BROWN HAM & CHEESE QUICHE
3 cups frozen shredded hash brown potatoes, thawed
4 tablespoons butter, divided 1 + 3 tablespoons
1 cup shredded jack cheese
1 cup shredded swiss cheese
+1 large bunch green onions, sliced
+6 button mushrooms, sliced
1 cup cooked ham, diced
2 eggs
1/2 cup heavy whipping cream
1/4 teaspoon sea salt
1/4 teaspoon white pepper
-1/4 teaspoon seasoned salt
PURE

  • Thaw hash browns between paper towels to absorb excess moisture.
  • Pre-heat oven to 425 degrees.
  • Spray 9 inch pie plate* with PURE.
  • Press hash browns into the bottom and along the sides of the pie plate.
  • Melt 3 tablespoons of butter and drizzle it all over the hash browns.
  • Bake uncovered for 20-25 minutes until edges are browned.
  • While these are browning, melt remaining tablespoon of butter in a small skillet and saute’ green onions and mushrooms.
  • Reduce heat to 350 degrees.
  • Combine the cheese and ham chunks. Layer over potatoes.
  • In a small bowl whisk together the whipping cream, eggs, salt and pepper.
  • Pour over the ham layer.
  • Bake uncovered 20-25 minutes or until set in the center.
  • Let stand 10 minutes before cutting.

*next time I will use an 8×8 baking dish for ease of serving.

hubby approved

aprons 3

Muffins That Taste Like Donuts: Lovin’ from the Oven

I hate buying donuts for many reasons. One, they are bad for us. Two, my kids are never happy with the variety I get. Three, my preschooler usually just eats the frosting and leaves the bottom for the garbage. Four, they are only cheap if they are a week old and stale. Five, they don’t stay with my kids, creating hungry, sugar-buzzed monsters an hour or less after they have eaten them. So, although once in a great while I buy or actually make homemade donuts, I usually make pseudo donuts. These muffins are a great example. I can make them with whole wheat flour. I can even cut down the sugar amount. Ssh! Just don’t tell my kids.
Muffins That Taste Like Donuts:
1 1/2 cups flour
1 tsp baking powder
1 tsp salt
1/2 tsp nutmeg
1/4 tsp cinnamon
1 egg
1/3 cup melted butter
1/2 cup sugar
3/4 cup milk
topping:
1/4 cup sugar
1 tsp cinnamon
1/4 cup melted butter

Combine the egg, 1/3 cup butter, 3/4 cup sugar and milk in a large bowl. In a smaller bowl, combine the dry ingredients and add, stirring just until moist. Scoop into greased muffin tin. Bake 350 degrees for 20 minutes. While still warm, dunk in melted butter. Dip into the sugar, until top is entirely coated
Here is pseudo donut coffee cake from my site, Frugal Antics of a Harried Homemaker.

Faux Grilling – Salmon Skewers with Maple-Mustard Glaze ala Year on the Grill


Before I get to the post, I have a question for you ladies… Actually two…

Remember me, Dave here from MY YEAR ON THE GRILL. I am the guy who gave you ladies advice on pleasing your man with two ROMANCE POSTS…

So…

Did any of you get diamonds for Valentines Day???

and

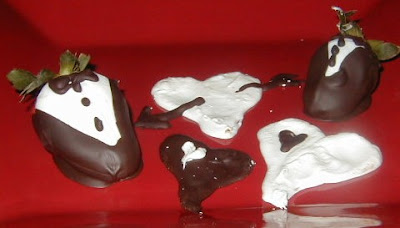
Did any of you make Moink Balls for your man???

If you answered “no” to both those questions, you have no one to blame but yourselves. I did my best for you.

But that is old business. Time for today’s post with an explanation of what I call “Faux Grilling”.

It has just been too cold, windy and nasty around here to do any grilling. Unusual for Kansas, but I really can’t remember a day since Christmas when it was above 40 degrees. I did my mandatory, “I can still grill in the cold and snow” session just to prove I could. But it is just no fun.

So, I started “Faux Grilling”. It is pretty easy. I have made Moink Balls, shrimp, pineapple wrapped in bacon (that’s a post for another day) and now Salmon skewers. So, I guess it is time I explained the process.

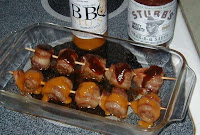
You need skewers. The flat kind work best so the do not roll. If you don’t have flat skewers, you can use 2 of the long “toothpick” style and create a flat type. In the photo on the right, I am showing the look that you want. I skewered the meat, and suspended the skewers between the sides of a small casserole dish. These were single round toothpick style, and my first efforts at “Faux” grilling. They worked… OK, but when I moved to flat skewers, I was able to turn them and grill top and bottom…


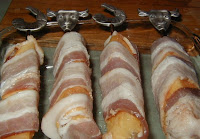
Like this photo to the left. the blades of this skewer are flat, combined with the heads in the shape of bulls and shrimp, I am able to turn the bacon wrapped pineapple (that’s a post for another day), and get both sides “grilled”.

Once I have the meat positioned correctly, I just put them in the oven, set on broil and instead of direct heat grilling over coals, I am direct heat grilling under a heating element.

But it works the same. Notice the char marks, similar to grill marks. You lose those beautiful grill marks, but the taste is as close as I can get and not get my fingers frostbit.

Til I move to a tropical Island (next week), as long as I live in Kansas in February, this is as close to grilling as I am going to get.

But before I leave you for the week, I want to share this quick, easy and great tasting recipe. This post is part of a cultural exchange program called TASTE AND CREATE! Once a month, Taste and Create pairs you with another blogger. You are asked to look over their blog and cook something from it. This month I was paired with Marthe from the Netherlands. Her blog, CULINARY DELIGHTS was great fun to look over. While she is native born Dutch, she does write in English, and very well. You would never guess this was her second language. Marthe makes lots of cupcakes and cookies; plays along with Tuesdays with Dorrie and Craving Ellie in My Belly. She started blogging about the same time I did. It was fun to get to know her.


Plus, I was reminded of my youth. 35 years ago, when I was in high school, I dated the foreign exchange student from the Netherlands. You can file this under too much information, but that Dutch girl was the first I ever… Well, you know the rest, better keep the details to myself. Suffice it to say, anything Dutch always makes me smile just a bit.


But, I digress. here’s Marthe’s recipe for

Salmon Skewers
with
Maple-Mustard Glaze


4 salmon skewers (ready bought President’s Choice, 320 gram)
1/8 cup maple syrup
1 tbsp grainy Dijon mustard (we used regular non-grainy Dijon mustard)
1/4 tsp salt
1/8 tsp pepper
In a small bowl whisk together maple syrup, mustard, salt and pepper; brush half over salmon skewers. Place skewers on grill over medium-high heat; close lid and cook, brushing once with remaining maple mixture until salmon is done, about 10 minutes.
.They came out PERFECT. Nice and flavorful, cooked to just the flaky stage (I did 7 minutes on each side, flipping the skewers once… same as I would on a grill). I loved the mustard sauce. Very easy and wonderful taste. I plated these with some Chinese Garlic noodles with snow peas. This is also one of the recipes I read on CULINARY DELIGHTS. Marthe’s blog is worth a look. I posted the details of the noodles on my “real” site today, so head over to MY YEAR ON THE GRILL to see how to make them!

Come back next week to see what I come up with during the next few days. It might be my first post after moving to the US Virgin islands… should be interesting.

PEACHES

Peaches are believed to be native to China. They are cultivated throughout warm temperate and subtropical regions of the world. In the peach fruit, the stone is covered with a fleshy substance that is juicy, melting, and of fine flavor when matured and mellowed.

The popular division of fruit varieties into clingstones and freestones-referring to the relative tendency of the flesh to cling to the stone-is by no means accurate. These two classes merge in different varieties, and even the same variety may be freestone and clingstone in different seasons. The nearly 300 varieties of peaches grown in America have been classified into five races, each with outstanding characteristics, ripening season, and uses.The nectarine is a variety of peach.

The principal peach-growing state is California. World production totaled about 5.5 million metric tons annually; the United States and Italy were the leading producers.

How to Store:
To ripen peaches, store in a brown bag at room temperature. Ripe peaches can be stored in the crisper bin of your refrigerator for up to five or sixdays.

Nutritional Facts:
· Fat-free
· Saturated fat-free
· Sodium-free
· Cholesterol-free
· High in vitamin A
· A good source of vitamin C

August is National Peach Month. Here’s a round-up of facts about one of the world’s favorite fruits.

History Of The Peach

  • The peach originated in China and has been cultivated at least since 1000 B.C.E. It has special significance in Chinese culture: The peach tree is considered to be the tree of life and peaches are symbols of immortality and unity. Peach blossoms are carried by Chinese brides.
  • Peaches traveled west via the silk roads to Persia, earning them the botanical name Prunus persica. In Persia, peaches were discovered by Alexander the Great, who mentions half a dozen types, and who introduced them to the Greeks.
  • By 322 B.C.E. Greece enjoyed the peach, and by 50 to 20 B.C.E., Romans grew and sold them for the modern equivalent of $4.50. The Romans called the peach a Persian apple, and the name for peach in numerous languages is the name for Persia.* Once the Romans cultivated the fruit, they were able to transport it north and west to other countries of their European empire.
    *Pêche (French), Pfirsich (German), pesca (Italian), melocotón (Spanish), pêssego (Portuguese), fersken (Danish/Norwegian), persika (Swedish), persikka (Finnish), persik (Russian), brzoskwinia (Polish), breskva (Serbo-Croat), piersica (Romanian), praskova (Bulgarian), robakinon (Greek), seftali (Turkish), afarseq (Hebrew), khúkh (Arabic), hulu (Persian), arú (Hindi), tao (Chinese), momo (Japanese), persik (Indonesian).
  • Spaniards brought peaches to South America and the French introduced them to Louisiana. The English took them to their Jamestown and Massachusetts colonies. Columbus brought peach trees to America on his second and third voyages.
  • To this day China remains the largest world producer of peaches, with Italy second. Italy is the main exporter of peaches in the European Union; the regions of Campania and Emilia Romagna account for more than 50% of Italy’s annual production. California produces more than 50% of the peaches in the United States (and grows 175 different varieties). So many peaches are grown in Georgia that it became known as the Peach State.
  • True wild peaches are only found in China. Unlike the cultivated fruit, the wild fruit is small, sour and very fuzzy.

Peach Varieties

  • Peach varieties can be either clingstone, where the flesh of the fruit clings to the Clingstone Peaches
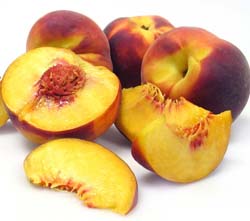
stone, or freestone, where the stone readily twists away from the fruit. The former type is generally used for canning; the latter is generally found in supermarkets. Clingstone and freestone peaches are available in both white and yellow varieties.
    Giant yellow peaches. Available in season at Melissas.com.
  • Asians generally prefer the sweeter and less acidic white varieties of peach. The sweetness is due to the “honey gene,” a dominant gene that is found in all Chinese peach varieties. Europeans and Americans have typically cultivated the yellow-skin, yellow-flesh varieties, which have higher acid.
  • The downy skin of the peach is generally flushed with red coloring, in both yellow Saturn Peach
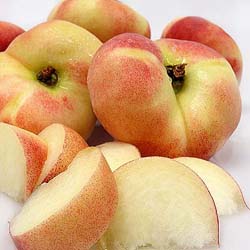
and white varieties. The most widely-available peaches are round with a pointed end, but they can also be flat and disc-shaped. The donut peach, which is flat with rounded sides that draw in toward an indented center, like a doughnut without a hole, is a descendant of the flat Chinese peach.
    A flat-variety “Saturn” peach, so-called because it resembles the rings of Saturn. Available in season (June-August) at Melissas.com.
  • The finest peaches of all are considered to be the pêches de vigne, which are small, red-fleshed fruits grown in vineyards in France and generally found only there. Covered with grayish down, they are not particularly attractive, but the flavor is said to be superb.

Nutrition and Factoids

  • Peaches are a good source of vitamins A, B and C. A medium peach contains only 37 calories.
  • You can ripen peaches by placing them in a brown paper bag for two to three days. Sliced, fresh peaches should be tossed in lemon or lime juice to prevent browning.
  • Nectarines
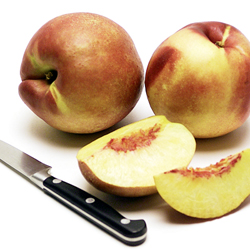
Nectarines are a variety of peach with a smooth skin, not a cross between a peach and a plum.
    At right: Honey Royale Nectarines, available in season from Melissas.com.
  • The juice from peaches makes a wonderful moisturizer, and it can be found in many brands of cosmetics.
  • A peach pit contains hydrocyanic acid, which is a poisonous substance.
  • Like the plum and the apricot, the peach is a member of the rose family (Rosaceae), distinguished by its velvety skin. It is classified as a drupe, a fruit with a hard stone.

Famous Peach Dishes

  • The Bellini: fresh peach purée and spumante, an Italian sparkling wine; Champagne or other sparkling wine can be used. The drink is said to have originated in the 1930s at Harry’s Bar in Venice, a favorite haunt of Ernest Hemingway, and is named for the 15th-century Venetian painter Giovanni Bellini. The peachy color of the cocktail reminded Cipriani of the color of the garments of St. Francis in a famous Bellini painting; Cipriani named the drink in Bellini’s honor.
  • Peach Melba: poached peaches, vanilla ice cream and raspberry purée. The dessert is named after Nellie Melba, the great Australian operatic soprano.

Peaches are a favorite fresh snacking fruit and cereal fruit, and make wonderful pies and jams. Peach ice cream is a summer favorite. Ripe peaches also freeze well for later use.

Save

So long, thank you and a Save Room for Dessert award for YOU

I am so thankful for all the wonderful and creative cooks and bloggers who have participated at Save Room for Dessert since its beginning when my blog friend Tamy started this blog and invited me to host this weekly dessert meme.

All great things must come to an end, so it’s time to say so long, but it is not really good-bye because we are all just a click away on this great super highway of friendly blogs. As I wrote for my Joy of Desserts sidebar, “the road is never long between bloggy friends.”

Gerri of Heart N Soul Cooking, one of the regulars here at Our Krazy Kitchen and at Joy of Desserts, too, has awarded me the Kreative Blogger Award, and I see it fitting to award it back to all of you as a party favor and thank-you for having fun with me while we all Saved Room for Dessert.

You are all creative cooks and bloggers, and your participation and comments are what make any blog successful, so I thank you from the bottom of my heart for every recipe and tip you have shared with me and all of us.

There will still be lots to do and read at Our Krazy Kitchen, so keep on participating here. And since most of the Save Room for Dessert regulars are also regulars and followers at my Joy of Desserts blog, you know that I have lots there too, with giveaways, recipe roundups, Vintage Recipe Thursday, etc. I’ll continue to post there, and I have great new things planned at Joy of Desserts for all of YOU.

I went back in the Save Room for Dessert Archives and below are the creative foodie bloggers who have participated. Most on them were regulars — THANK YOU!!


Joy of Desserts
http://joyofdesserts.blogspot.com

Melissa @ Frugal Creativity

Martha @ The Daily Grind

Terry @ At Home with Terry and Dennis

Chaya @ Comfy Cook

Kristen @ Frugal Antics of a Harried Housewife

Emily @ Marvelous Recipes

Liz @ Hoosier Mama

Chaya @ Sweet and Savory

Jules @ The Persimmon Perch

Sara @ Cooking with Sara

Vickie @ 2babb

Mickey @ Monster Mama

Snowhite @ Finding Joy in my Kitchen

Heather @ Girlie Chef

Lisette @ Fancy Frugalista

Martha @ Menagerie

Reeni @ Cinnamon Spice and Everything Nice

Angie @ Annie’s Home

Jennifer @ For Such a Time as This

David @ A Year on the Grill

Cook @ The Desperate Cook

Katie @ Food Stuffs

Karen @ Muffin Fixation

Marcia @ Frugal Homekeeping

Anshika @ Cooking Pleasures

Fishie @ The Fishie’s Kitchen

Pat @ Butter Yum

Pamm @ Leftovers On Purpose

Tami @ Around the Table with Tami

Simply Me @ The Local Cook

Jen @ My Petite Chefs

Sweetie @ Vanilla Strawberry Spring Fields

Tara @ Feels Like Home

Carol @ Easy to be Gluten Free

Shaunta @ Live Once, Juicy

Chris @ An Instant Out of Time

Pattie @ Bramasole … to Yearn for the Sun

Velva @ Tomatoes on the Vine

Joanne @ Eats Well With Others

Tamy @ 3 Sides of Crazy

The Kreativ Blogger Award rules.

1. Post the award.

2. Thank and mention the person who gave you the award.

3. Pass the award on to seven blogger’s who you think embody the spirit of the Kreativ Blogger Award.

4. Name seven things about yourself that others don’t know.

5. Don’t forget to notify the your seven Kreativ Bloggers about their AWARD and post a link to their blog.

HASH BROWN HAM & CHEESE QUICHE

I found this recipe in an old Taste of Home magazine that I bought at a library book sale – best book sale I’ve been too in a long, long time. I spent $9.80 at the sale and then calculated the retail prices of all the books and magazines plus tax ($309.73) and found I saved $299.93 when all was said and done!

I did make a few changes to the original recipe which are indicated in green and the items I removed are in red. I have to tell you this was one of the easiest brunch items I’ve ever made. Crisp and tasty too!


HASH BROWN HAM & CHEESE QUICHE
3 cups frozen shredded hash brown potatoes, thawed
4 tablespoons butter, divided 1 + 3 tablespoons
1 cup shredded jack cheese
1 cup shredded swiss cheese
+1 large bunch green onions, sliced
+6 button mushrooms, sliced
1 cup cooked ham, diced
2 eggs
1/2 cup heavy whipping cream
1/4 teaspoon sea salt
1/4 teaspoon white pepper
-1/4 teaspoon seasoned salt
PURE

  • Thaw hash browns between paper towels to absorb excess moisture.
  • Pre-heat oven to 425 degrees.
  • Spray 9 inch pie plate* with PURE.
  • Press hash browns into the bottom and along the sides of the pie plate.
  • Melt 3 tablespoons of butter and drizzle it all over the hash browns.
  • Bake uncovered for 20-25 minutes until edges are browned.
  • While these are browning, melt remaining tablespoon of butter in a small skillet and saute’ green onions and mushrooms.
  • Reduce heat to 350 degrees.
  • Combine the cheese and ham chunks. Layer over potatoes.
  • In a small bowl whisk together the whipping cream, eggs, salt and pepper.
  • Pour over the ham layer.
  • Bake uncovered 20-25 minutes or until set in the center.
  • Let stand 10 minutes before cutting.

*next time I will use an 8×8 baking dish for ease of serving.

hubby approved

CAPPUCCINO for ADULTS

3 cups brewed coffee
3 cups half and half
1/4 cup spiced rum
1/2 cup curacao
1/4 cup brandy
  • In a medium saucepan whisk together everything except the whipped cream.
  • Heat to Steaming.
  • Pour into warmed mugs.
  • Garnish with whipped cream and a shake of cinnamon and mocha.

Cheesy Onion, Broccoli, Mushroom, Red Pepper, and Barley Bake

Cheesy Onion, Broccoli, Mushroom, Pepper, and Barley Bake
Serves 4, adapted from Joanne at Eats Well with Others

2/3 cup barley
1 1/2 cups water
1/4 tsp salt
1 large Vidalia onion, chopped
2 cloves garlic, minced
1/2 pound mushrooms, sliced
1 large broccoli crown
1 yellow bell pepper
1 red bell pepper
1 chili pepper
2 tbsp olive oil
1 tsp oregano
1 tsp basil
1 egg
1 lb part-skim ricotta
1/4 cup cheddar cheese
1/4 cup mozzarella cheese
salt & pepper

  • Cook the barley in the water and salt until tender.
  • Preheat the oven to 350 degrees.
  • Quarter onions. Mince garlic. Wash and chop mushrooms and broccoli into bite side pieces. Wash the peppers, core them, and cut them into small dice. Mince the chili pepper.
  • Mix the ricotta with the egg.
  • Heat the olive oil over medium heat. Saute the garlic, onions, broccoli and peppers until soft.
  • Add mushrooms and continue cooking just until mushrooms are slightly sauteed. Add salt along the way. Salt at the beginning and at the end and at every step in-between. Just a little bit each time. It brings out the best flavor in things.
  • Add the basil, oregano, and white pepper.
  • Mix together the barley, onion, mushroom & pepper mix with the ricotta & egg mix. Spread into an 11×7 pan. Sprinkle with the cheeses.
  • Bake for 40-50 minutes or until the egg is set and cheese has melted.
  • Let stand for 5 minutes to set. Cut and eat.


MEXICAN MEATLOAF

I’ve been trying to use up some ingredients here and this recipe was born out of that need. We really enjoyed it especially since it started as a serious guinea pig recipe.

MEXICAN MEATLOAF
1 1/2 pounds ground beef
1/2 pound ground pork
2 small ripe avocados, mashed
1 small onion, chopped
1 can ROTEL tomatoes, drained well
1/2 can enchilada sauce
1 teaspoon chili pepper
1 egg
1 sleeve saltines, crushed
salt & pepper to taste
1/4 cup grated cheese

  • Combine all the ingredients except the cheese and enchilada sauce.
  • Form the meatloaf in a loaf pan.
  • Pour the enchilada sauce over top.
  • Bake for 1 hour.
  • Top with cheese and leave in oven only until cheese melts.
  • Let settle 5 minutes before serving.
  • Top with a dollop of sour cream.
hubby approved