SUPER INEXPENSIVE RECIPE FOR CLEANING SILVER

Now for something fun and easy – cleaning the silver. Yep, you heard me right, cleaning the silver. FIL wanted the silver polished. I have news for you, I don’t polish silver! I even sold my own and replaced it with gorgeous stainless, but I found this quick, easy AND super inexpensive recipe for cleaning silver! Here is the before picture:

Hubby helped as I have been a bit busy. He is trying to show you the instantaneous results he achieved with this formula below.

After

SILVER CLEANER
per large piece or place setting you will need:
1/2 cup baking soda
1 tablespoon salt
1 large piece aluminum foil
1 non-metal sink or wash tub
hot water

  • Lay large piece of foil along the bottom of the sink.
  • Fill the sink with VERY HOT water.
  • Swirl in the baking soda and salt until well dissolved.
  • Add silver or silverplate piece.
  • Watch the magic. Allow it to sit a few minutes. The chemical reaction of the salt and baking soda transfers the tarnish to the piece of foil leaving you with a pretty silver piece.
  • Rinse and dry!
For heavily tarnished pieces you might have to repeat the process. Hubby also found the reaction was quicker if you wrapped the foil around the pieces.

CHALLENGE: Is your guest area ready for guests?

SLEEP TIGHT, DON’T LET THE BED BUGS BITE!

I received this in an email recently and I know that where we are right now, it is all over the news that there is a big problem.  So, this seemed liked a good thing to share and it seems like a bit of common sense too! I always wash everything, always have, but now I’ll just do it immediately to help alleviate any POTENTIAL problem from even occurring.  Now while I don’t know about the validity of the actual mode of transportation that the bugs are hitch hiking on to come in to America, I have checked and the process of killing the bugs is valid.  Bed bugs are truly the ultimate hitchhiker, so it just makes sense to be on the cautious side.
THE EMAIL:
A bit of information that you might like to know about.  We have friends here in our community and one of their sons is an entomologist (insect expert), and has been telling them that there is an epidemic of bed bugs now occurring in America.  Recently I have heard on the news that several stores in NYC have had to close due to bed bug problems, as well as a complete mall in New Jersey. 
 
He says that since much of our clothing, sheets, towels, etc. now comes from companies outside of America, (sad but true), even the most expensive stores sell foreign clothing from China, Indonesia, etc.  The bed bugs are coming in on the clothing as these countries do not consider them a problem.  He recommends that if you buy any new clothing, even underwear and socks, sheets, towels, etc. that you bring them into the house and put them in your clothes dryer for at least 20 minutes.  The heat will kill them and their eggs.  DO NOT PURCHASE CLOTHES AND HANG THEM IN THE CLOSET FIRST.  It does not matter what the price range is of the clothing, or if the outfit comes from the most expensive store known in the U.S.  They still get shipments from these countries and the bugs can come in a box of scarves or anything else for that matter.  That is the reason why so many stores, many of them clothing stores have had to shut down in NYC and other places.   All you need is to bring one item into the house that has bugs or eggs and you will go to hell and back trying to get rid of them.  He travels all over the country as an advisor to many of these stores, as prevention and after they have the problem.

aprons 3

TIPS FROM AN EX-CATERER

While out blog surfing today, I happened on a fun new cooking blog, The Church Cook, who had a wonderful post about food preparation.  The post had 10 tips and but they are really good tips.  I’ll list the tips for you, then you can go check out the whys behind them.
  • Use your hands
  • Use a thermometer
  • Keep ingredients close to you
  • Store food in ziploc bags
  • Use the timer
  • Weigh Your baking ingredients
  • Clean as you go
  • Freeze
  • Prep ahead
  • Have Fun Sharing

aprons 3

You say zabaglione, I say sabayon: Don’t call the whole thing off, Save Room for Dessert

Do you remember the song? Louis Armstrong and Fred Astaire both sang this romantic tune over the decades, and this dessert from the Joy of Desserts archives would be pretty to celebrate St. Valentine’s Day no matter how you pronounce it.

Whether you call this dessert zabaglione like the Italians, or sabayon like the French, it is the same classic dessert made with egg yolks and a sweet dessert wine. It only takes about 15 minutes to make and can be prettied up by serving in a glass with berries.

Italian Zabaglione or French Sabayon
Prep time: 15 minutes
Makes 4 servings
2 packages (6 ounces each) raspberries
4 large egg yolks
1/3 cup granulated sugar
1/2 cup dry Marsala or other dessert wine

Divide berries between four 8-ounce dessert dishes or stemmed glasses.
Fill the bottom of a double boiler (or a saucepan with a metal bowl fitted snugly on top) with 1-2 inches of water or just below bowl. Bring water to a simmer.
Beat egg yolks and sugar in top of double boiler or bowl with an electric mixer or wire whisk until fluffy and light in color, about 5 minutes. Maintain water at a low simmer while beating.
Add Marsala, 1 tablespoon at a time, continuously beating until mixture forms very soft peaks, about 8 minutes.
Pour zabaglione mixture over berries and serve immediately.

Nutrition Per Serving: 238 calories, 4.79g total fat, 1.64g saturated fat, 3.39g protein, 37.47g carbohydrate, 209.78mg cholesterol, 2.04g fiber, 192mg sodium
Recipe and nutrition values from Driscoll’s, California Certified Organic Farmers (CCOF)

Healthy tips:
* Substitute blackberries, blueberries or about 3 cups sliced, hulled strawberries
* Try a mixed berry zabaglione with some of all the above berries
* 1 cup of strawberries provides an amazing 93% of your day’s supply of Vitamin C
* 1 cup of raspberries and blackberries each provide 50% of your day’s supply of Vitamin C
* Blueberries have one of the highest antioxident values at 5,486 ORAC Value (Oxygen Radical Absorbance Capacity) per cup

Happy St. Valentine’s Day,

Joy of Desserts

The new Inlinkz system is located HERE for the SUPERBOWL PARTY and this week for you to add your links and HERE for last week. We look forward to your recipes. Remember we’re looking for that special recipe to feature at the end of February.

Better than paper towels and a lot less expensive…

My niece sent me an email with this in it and it was so great I thought I’d share.

Coffee filters…..Who knew!

You can buy 1,000 at the Dollar Store for almost nothing – even the large ones.

1. Cover bowls or dishes when cooking in the microwave. Coffee filters make excellent covers.

2. Clean windows, mirrors, and chrome… Coffee filters are lint-free so they’ll leave windows sparkling.

3. Protect China by separating your good dishes with a coffee filter between each dish.

4. Filter broken cork from wine. If you break the cork when opening a wine bottle, filter the wine through a coffee filter.

5. Protect a cast-iron skillet. Place a coffee filter in the skillet to absorb moisture and prevent rust.

6. Apply shoe polish. Ball up a lint-free coffee filter.

7. Recycle frying oil. After frying, strain oil through a sieve lined with a coffee filter.

8. Weigh chopped foods. Place chopped ingredients in a coffee filter on a kitchen scale.

9. Hold tacos. Coffee filters make convenient wrappers for messy foods.

10. Stop the soil from leaking out of a plant pot. Line a plant pot with a coffee filter to prevent the soil from going through the drainage holes.

11. Prevent a Popsicle from dripping. Poke one or two holes as needed in a coffee filter..

12. Do you think we used expensive strips to wax eyebrows? Use strips of coffee filters..

13. Put a few in a plate and put your fried bacon, French fries, chicken fingers, etc on them. It soaks out all the grease.

14. Keep in the bathroom. They make great “razor nick fixers.”

15. As a sewing backing. Use a filter as an easy-to-tear backing for embroidering or appliqueing soft fabrics.

16. Put baking soda into a coffee filter and insert into shoes or a closet to absorb or prevent odors.

17. Use them to strain soup stock and to tie fresh herbs in to put in soups and stews.

18. Use a coffee filter to prevent spilling when you add fluids to your car.

19. Use them as a spoon rest while cooking and clean up small counter spills.

20. Can use to hold dry ingredients when baking or when cutting a piece of fruit or veggies. Saves on having extra bowls to wash.

21. Use them to wrap Christmas ornaments for storage.

22. Use them to remove fingernail polish when out of cotton balls.

23. Use them to sprout seeds. Simply dampen the coffee filter, place seeds inside, fold it and place it into a plastic baggie until they sprout.

24. Use coffee filters as blotting paper for pressed flowers. Place the flowers between two coffee filters and put the coffee filters in phone book..

25. Use as a disposable “snack bowl” for popcorn, chips, etc.

OH YEAH THEY ARE GREAT TO USE IN YOUR COFFEE MAKERS TOO.
aprons 3

Cookie tips, tricks, recipes, more at Our Krazy Kitchen

Do you know the secret to soft, chewy cookies? Under bake them ever so slightly. Cookies are the smallest baked items from our ovens, and they continue to bake while they cool, so even a minute more in the oven makes a huge difference. Also remember that many ovens are in need of recalibration for accurate temperature control, so even if a top chef’s recipe calls for 10 minutes in the oven, the cookies in your oven might only need 8 minutes. It’s a good idea to invest in a reliable food thermometer.

Link your dessert recipes with MckLinky below, and if they are holiday desserts, Christmas cookies, Chanukah family favorites, or other Christmas treat recipes you’ll want to also link them during our Christmas Party starting December 17.

Pick your favorite badge!


Please leave a link to your post, not your homepage,
and be sure to link back to this post or blog.

PANTRY ORGANIZATION

Most of you already know that I feel most at home in the kitchen and despite my VIRGO guided perfectionist ways, I too have a tendency to have a messy pantry. We all have those moments when it’s just easier to put it anywhere other than where it really goes. I’ll show this set of before pictures with the disclaimer that we’ve been super busy around here and it really was easier to just shove it back in.
I don’t use a ton of prepared foods due to health concerns, but we all have a pantry full of this and thats. I was fortunate in that the forced remodel of this kitchen allowed me to set things up my way when it went back together. I like to group like things together and that helps to make meal preparation simpler. In the Lazy Susan next to the stove I keep the small appliances together and then on the shelf above those I keep the canned meats, canned vegetables and soups. In the opposite Lazy Susan I group together canned fruits, Jell-Os, box mixes like cake mixes, rice mixes and stuffing as well as jams and jellies. In yet another cabinet I have grouped together all the” seasoning” bottles like soy sauces, vinegars, oils, Worcestershire, etc…. In the 2 shelves below that I keep all the back stock like extra ketchup, mayonnaise, BBQ sauce, hot sauce, etc… Spices and such use on a daily basis are all labeled and alphabetized in their handy box close to the stove while additional infrequently used spices, bread crumbs, flavorings, baking soda & powder and such are kept in a separate cabinet. Baking staples are also all grouped together.

I have all of my seasonings and ingredients placed in such a way that the butcher block becomes my central point for creating. I try to keep all the necessary tools also within an arm’s reach. All of my reaching into cabinets is also at a minimum and I don’t have to dig for what I’m looking for. Every person and every family is different in their likes and tastes, so there is no right or wrong to pantry organization, just what works for you. That said, I have found that logic, organization and common sense play an integral part in kitchen success.


No matter what the size or shape of you ‘pantry’, the whole idea is to make your job easier and cooking more fun. So take that willy nilly approach and toss it out the window. It’s time to organize and see what you have in your pantry. Knowing will help you to keep things rotated and up to date. When I was growing up, my dad always wiped the lids of cans and then dated them when we got home from the store. I don’t go that far, but I do make sure to rotate the older forward paying attention to expiration dates and replace the restock to the rear.
Now for the after pictures.
I try to group like items together. For example the parts for a Mexican Meal are all together. The green chiles are right night to the enchilada sauce which is next to the refried beans, etc…
I store the back up stock on the lowest shelves since I don’t get in there very often. I also pull forward the most frequently used condiments and ingredients so I don’t have to dig for them. The refrigerator is the hardest ‘pantry’ part to keep organized since everyone is in and out ,all day some days, but I try to keep like items together here too. The jams are all on the same shelf, the pickles are grouped together, my garlic, pestos, bases etc… are all together on one of the top shelves to keep everyone from moving them!

This post originally ran on 3 Sides of Crazy as a guest post series for Barbara over at Candy Hearts and Paper Flowers who hosted the Homemaking September 2008 Shape-up. It was an all around comprehensive house to home style of posts to help us get our homes and lives whipped into shape.

Then it ran at OuR KrAzY kItChEn this past July when Martha and I first collaborated.

Kitchen & Cooking Tips

  1. Using buttermilk as a meat marinade is an effective tenderizer. It also converts the proteins into B vitamins which helps the liver burn up to 38% more stored fat as energy.
  2. Adding sour cream to chili will curb the “hotness” of the fiery effect.
  3. Adding 1 teaspoon of cornstarch to each 1/4 cup of sour cream acts as a binder and prevents the sour cream from curdling in the heat of the chili.
  4. 2 parts instant coffee to 1 part water makes an effective paste for scratching nicks on dark furniture.
  5. Bake winter tomatoes for 30 minutes at 350 degrees to achieve that summer flavor. As the tomatoes cook, the sugars caramelize, giving them a sweeter and juicier flavor. Let them cool and then chop and toss with salads, salsas or fruits.
  6. For fluffier pancakes, separate the eggs and whip the whites into soft peaks before folding them into the remaining ingredients.
  7. Run your knife through a stick of butter before slicing marshmallows for that yam casserole. You won’t end up with a sticky residue on your knife.
  8. Applying a teaspoon of butter to your cat’s paws will help prevent hairballs.
  9. Adding a bit of butter to a watermark on your wood table before you go to bed will help replace the lost moisture from the wood. Just wipe away any residue the next morning.
  10. Rubbing butter on the edge of your snow shovel will help the snow slide right off as you toss it aside.
  11. Rubbing a bit of butter around dusty candles will make them look fresh again.
  12. Butter applied to the cut edges of blocks of cheese will prevent molding.
  13. Anchovies make a great seasoning for sauces, just a bit salty and spicy all at once. Remember to remove them before serving or mince them so fine that no one notices but you! Also remember a little goes a long way.

wildatheart

MENU PLANNING

~ MENU PLANNING ~

There is more to menu planning than just deciding what to make for dinner, at least for the average family. We’re a military family used to getting paid once a month and trying to make it last. So for me, menu planning also encompasses recipe scouring, coupon clipping (we love to read the Sunday papers and have coffee. One of the things I always go for first is the coupons to see what I can save for us – hubby always laughs when I get excited at a large coupon for something already on the grocery list – LOL), sale ad reading and logical common sense planning. I do participate in Menu Plan Monday, but I actually prepare my menu for the entire month all at once and then just break it up for posting.

I start the last week of the previous month with checking out what I already have in the freezer inventory and then the ads for my local markets for the upcoming week. I see what meats will be going on sale and then scour my recipe file for recipes to match. One of the biggest things I do to help not only with cost of ingredients, but also waste is to make sure to back up recipes to each other that use similar ingredients that I can buy in bulk. For example if a recipe calls for 1/2 an onion for Monday night’s recipe, I make sure Tuesday night’s recipe uses the other 1/2. I also know which meals we’ll probably have leftovers for so I plan to either freeze part of it for a future meal or plan a C.O.R.N. (clean out refrigerator night) within my plan if there is only going to be a little of this and that leftover. I write my list and then I match up the coupons for whatever staples (flour, sugar, eggs, butter, etc…) I need and then the luxuries if there is room within the budget. If there is a really good sale I buy in super bulk for the following month also. Now I know this sounds like a lot of work, but the whole process takes less than an hour and then it’s done for the month.

I have every scrap of a recipe I ever saved as well as many of my grandma’s too. It’s like an obsession with me. If a recipe sounds good in a magazine, I figure I can make it better based on my family’s likes and dislikes and tuck it away to try and manipulate at a later date. I recently decided it was time to clean-up this mess.

I found an old metal LP file box at a garage sale for 50 cents and dressed it up a bit so it didn’t look like a trash bin on my kitchen counter. (it was a beat up lime green with stickers everywhere). I have written 2 family reunion cook books in the past which helped some with eliminating the scraps of paper and I’m also in the midst of writing another Tastebook to use as family Christmas gifts that is helping to clean up this mess on a permanent basis. When you couple this with my blog recipe list at 3 Sides of Crazy and at OuR KrAzY KiTcHeN it makes it easy to reference. Truth be told I need 3 more of these boxes!

I have a perpetual list on the counter and every time we use something or run out of something, everyone is trained (finally) to list whatever they used or ran out of on an ongoing basis.

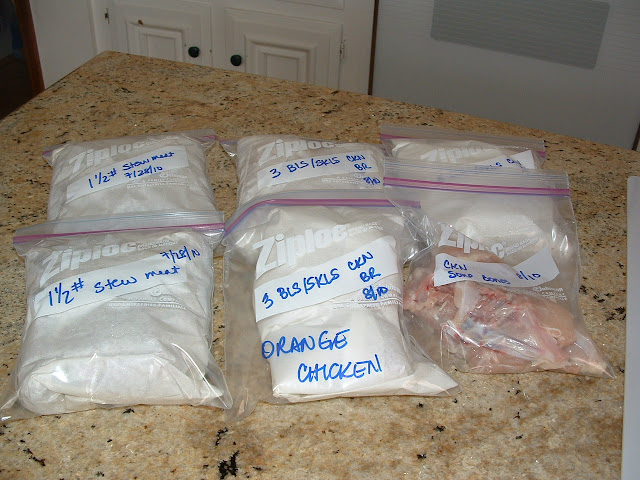
We keep a pretty concise calendar with everyone’s activities, appointments, meetings and such on it. I also write what we will be eating on each day so they’ll know what to expect. If for some reason we have to cancel a night I will rearrange the week so that the meal actually canceled is one using something from the freezer, not the fresh ingredients I’ve already purchased. When I do the shopping I buy in bulk to cut the cost and since I have my menu plan ahead of time, I break down the bulk package into meal appropriate sizes before freezing when I get home.

Thursday 13 ~ ALL ABOUT PEPPER


Thank you Janet and Megan for resurrecting it!
  1. Originally from the tropics, pepper is a berry from the vine Piper Nigrum.
  2. There are many types of peppers grown all over the world.
  3. Most of the flavor is lost during cooking.
  4. Pepper should be added after cooking.
  5. Pepper stimulates gastric juices and stimulates digestive processes.
  6. Brings out and strengthens the inherent flavor of food.
  7. Black and white pepper come from the same vine.
  8. When first harvested the berries are red, odorless and tasteless.
  9. When dried in the sun they become black and spicy.
  10. White pepper is made from berries allowed to ripen longer and the berries are soaked (fermented) to remove the outer coating.
  11. White pepper is less spicy than black pepper.
  12. It is best to buy whole peppercorns and grind them as needed.
  13. Commercial ground pepper is made from a mixture of various peppers.
    3420344618_9e5495bf19_m

Hot Cooking Bands & Food Loops

Stuff it – Roll it – loop it – Cook it ~ These are great for Chicken Kiev, Chicken Cordon Bleu or Pecan encrusted Flank Steak, or… the choices are endless. I see sooooooooooooo many new menu ideas.

Silicone Stretch Hot Cooking Bands are heat resistant to 600 degrees and the silicone food loop trussing tools which are heat resistant to 675 degrees and adjustable from 1-4 inches are my new best friends. These are an awesome replacement for toothpicks and soooooooooooo easy to work with.

The are reusable, dishwasher safe, food safe, non-stick and extremely flexible. They are oven safe, griddle safe and BBQ safe. I just thought I’d share with you.

final blog signature.