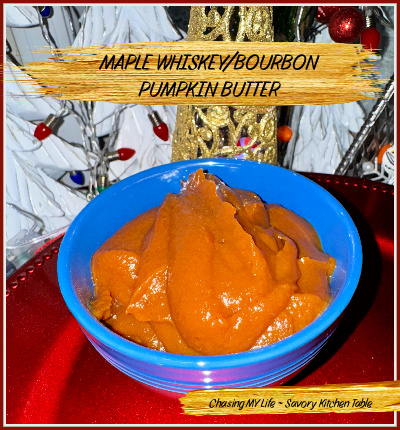
MAPLE WHISKEY/BOURBON PUMPKIN BUTTER ~ BLOG 365.21

I specifically buy Sugar Pie Pumpkins for Halloween so I have them leftover to make this DELECTABLE spicy butter in November for us to enjoy on homemade breads or muffins during the holidays. We especially like it in MOONSHINE CAKE!

MAPLE WHISKEY/BOURBON PUMPKIN BUTTER

2 sugar pie pumpkins, cut in half and de-seeded
4 tablespoons butter, divided
1 1/4 cups brown sugar
3/4 cup PURE maple syrup
1 1/2 teaspoons QUALITY ground cinnamon
1 teaspoon Pumpkin Pie Spice
Pinch of Kosher Salt
Juice of 1 LARGE Lemon
3 ounces QUALITY Whiskey or Bourbon

  • Preheat oven to 350°.
  • Line baking sheet with foil.
  • Place pumpkin halves cut side down on a baking sheet with 1 tablespoon of butter under each half.
  • Roast 50-60 minutes, or until pumpkins are cooked through.
  • Remove from the oven and set aside to cool.
  • Scrape the cooked pumpkin from the skins and place in a blender, processing 2-3 minutes until pumpkin in velvety smooth.
  • Transfer puree to a large saucepan.
  • Add brown sugar, maple syrup, cinnamon, pumpkin pie spice and a pinch of salt, stirring to combine with lemon juice.
  • Heat over low heat for about 30 minutes, stirring frequently – DO NOT ALLOW TO SCORCH OR BURN in the pan.
  • SLOWLY add the whiskey or bourbon, and simmer 15-20 minutes more.
  • Add additional maple syrup or lemon juice to adjust taste, if needed.
  • Let mixture cool and transfer to clean jars.

PUMPKIN BUTTER can be refrigerated up to one month or up to 3 months in the freezer.

PEASANT STEW ~ BLOG 366.333

HAPPY THANKSGIVING! This isn’t today’s meal, but was scrumptious enough that it could be if we weren’t turkey people!

PEASANT STEW

1 + 1 tablespoon butter
1 pound ground beef
1 medium onion, chopped
2 cans fire roasted tomatoes, undrained
4 medium carrots, sliced thin
2 celery stalks, sliced thin
1 medium potato, peeled and cubed
1 1/2 cup homemade broth
1/2 cup uncooked long grain rice
1-2 tablespoon Montreal hamburger seasoning
FRESH ground sea salt and black pepper, to taste

  • In a large dutch oven melt 1 tablespoon butter.
  • Add ground beef and onions.
  • Brown beef and onions until cooked through and beef is completely crumbled.
  • Drain well.
  • Add butter, carrots, celery and potatoes to pot and saute several minutes until starting to soften.
  • Add tomatoes, water and rice.
  • Return meat and onions to pan.
  • Season to taste with Montreal hamburger seasoning and FRESH ground sea salt and black pepper.
  • Bring to a SLOW gentle boil, reduce heat and simmer 15-20 minutes until potatoes and rice are tender.

BRINED ROAST TURKEY BREAST ~ BLOG 365.

We’re had a SMALL group for Thanksgiving this year and I ordered a LARGE boneless turkey breast, but was afraid it would be too dry so decided to try a brine to keep it juicy. This recipe calls for an overnight wet brine overnight creating maximum flavor and keeping it extremely moist. It is then roasted to a golden perfection.

BRINED ROAST TURKEY BREAST
Prep Time 15 minutes
Brine Time 12 hours

Cook Time 3 hours
Rest Time 15 minutes
+/- Total Time 15 hours 15 minutes

BRINE
8 cups water
½ cup kosher salt
½ cup PACKED brown sugar
8 cloves garlic, FINELY minced
1 cinnamon stick
¼ cup FRESH tarragon
2 sprigs FRESH rosemary
2 lemons, cut in half and juiced
1 LARGE orange, peeled, cut in half and juiced
4 cups ice, optional

  • Bring the water to a boil in a LARGE pot.
  • Add all ingredients to the pot except the ice and return to a boil, stirring to dissolve all the salt and sugar.
  • Remove from heat and cool completely.
  • To speed up the cooling add about 4 cups of ice to the brine.
Once the brine is cooled, place the turkey breast in the brine making sure it’s fully submerged. You may have to weigh it down with another pot of water to keep it submerged.
  • Store it in the refrigerator overnight or for at least for 12 hours.


TURKEY
2 medium onions, quartered
4 large carrots, rustic cut
4 cloves garlic, FINELY minced
5-8 pound turkey breast, thawed
FRESH ground sea salt and black pepper, to taste
4 tablespoons butter, cut into small pieces
8 tablespoon butter, melted
1 cup homemade chicken broth

  • Preheat your oven to 350°.
  • Remove the turkey breast from the brine solution and pat it dry with paper towels.
  • Rinse the turkey breast thoroughly to remove excess salt and pat dry.
Place the quartered onions, carrot pieces, minced garlic and 4 tablespoons diced butter in a large roasting pan then place the turkey breast on top.
  • Rub the turkey with the melted butter, keep remaining butter for later.
  • Generously season with salt and pepper on both sides. 
Add the chicken broth to the pan. 

  • Cover the pan with aluminum foil and place in the oven.
  • Roast covered for 1½ hours, basting with the melted butter, remelting as necessary every 20 minutes.
  • After 1½ hours, remove the foil and roast for another 1 hour or until golden brown. The breast is done when a meat thermometer inserted in the thickest part of the breast registers at 165°.
Transfer the turkey breast to a platter or cutting board and let it rest for a full 15 minutes before slicing into it.
  • With a slotted spoon remove carrots to a serving bow. Cover and keep warm.


GRAVY
pan drippings
¾ cup homemade chicken broth
1 tablespoon cornstarch or more for a thicker gravy

  • Skim some of the fat from the pan drippings if necessary.
  • Place the pan on the stove over medium-high heat.
  • In a small bowl whisk together the cornstarch with a couple tablespoons of the chicken broth. Add mixture to the pan, whisking it all together.
  • Strain gravy through a sieve pressing all the liquid out of the onions and garlic for additional flavor.
Add more cornstarch until you reach the desired consistency. Cook for a few minutes, until the gravy thickens a bit.
  • Adjust seasoning as necessary.

NOTES

  • Turkey breast cooking guidelines:
    4 to 6 pounds – 2 1/2 to 3 hours
    6 to 8 pounds – 2 1/2 to 3 1/2 hours
  • Use a shallow roaster so that the oven air can flow completely around the turkey breast.

CHARCUTERIE BOARDS

The greatest meal on a busy holiday eve is a charcuterie board to graze on while you work. 😃

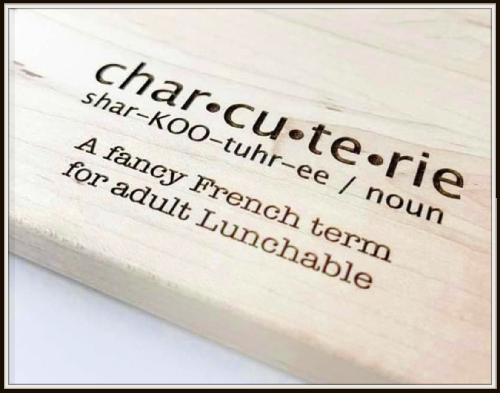
This time of year can be stressful and super busy (normally pre-pandemic) so to make things easier we have gone to making charcuterie boards on the “eve” nights of holidays. The word charcuterie sounds a bit intimidating, but it doesn’t have to be.

Charcuterie Boards are suddenly all the rage, but the culinary art of preparing charcuterie boards dates back to the 15th century. The person who prepares the charcuterie board is a charcutier which literally means “Pork Butcher” in French. The original process/meaning was intended as a way to preserve meat before the invention of refrigeration, especially pork products.

The revived comeback of the charcuterie board brings it front and center to our tables and has been born out of the necessity of our busy lives as well as our love for farm to table and deli style meals that are also quick and easy.

Since the original meaning dealt with preserved meats, adding fermented, farm to table, home canned and prepared foods just falls into place along side the meats.

One of the best things about serving a charcuterie board at your own party is that there are NO RULES! It’s yours for the making – make it as simple or as sophisticated as YOU like. One of the greatest aspects of a charcuterie board is that you can mix it all up to fit EVERYONE’S taste.

You can make these as simple or as sophisticated as YOU like. For us it is ALL about favorites and yummy satisfying and filling “bites” of food. Below is a list of some suggestions for building your own charcuterie board for your next party.

Next year I’m going to do a “DESSERT” charcuterie board for a girlfriends party instead of a cookie exchange.

  • Breads & Crackers – Crostini with toppings, Artisan Breads, Crackers, Fruitcake
  • Spreads – Jams, Chutneys, Dips, Flavored Mustards, Sauces, Dressings, Flavored Honeys, Flavored Horseradishes
  • Fermented/Pickled – Stuffed Olives, Pickles, Green Olives, Giardiniera, Peperoncinis, Pickled Carrots, Baby Corn
  • Cheeses – Cheddar, Havarti, Brie, Baby Swiss, Gouda, Pimiento Cheese, Manchego, Bleu Cheese
  • Meats – Salami, Roast Beef, Pancetta, Prosciutto, Pepperoni, Ham
  • Nuts & Seeds – Pistachios, Walnuts, Pecans, Macadamias, Sunflower seeds, Pumpkin Seeds, Almonds, Chocolate covered raisins
  • Dried fruits – Dates, Prunes, Apricots, Golden Raisins
  • Fresh fruits – Grapes, Oranges, Berries, Apple slices, Pears, Grape tomatoes, Kiwi, Starfruit
  • Decorations – sprigs of Rosemary, Thyme or Basil


THANKSGIVING LEFTOVERS ~ THANKSGIVING CASSEROLE, THANKSGIVING EGG ROLLS & TURKEY TETRAZZINI

There really isn’t a recipe per se, but these are some favorite ways to use leftover turkey besides the obvious and mandatory cold turkey sandwiches while you decorate the Christmas tree and the open face hot turkey sandwiches after you’ve spent the day outside in the cold putting up the decorations.
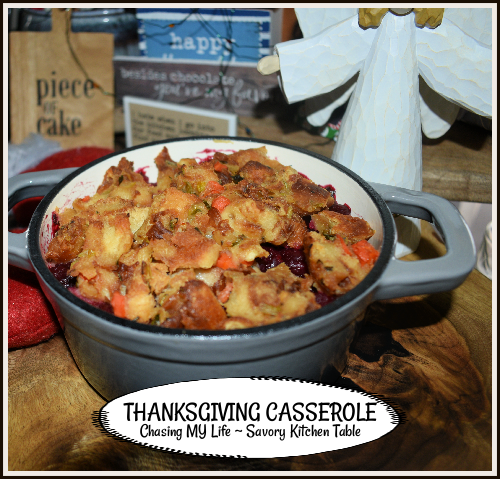
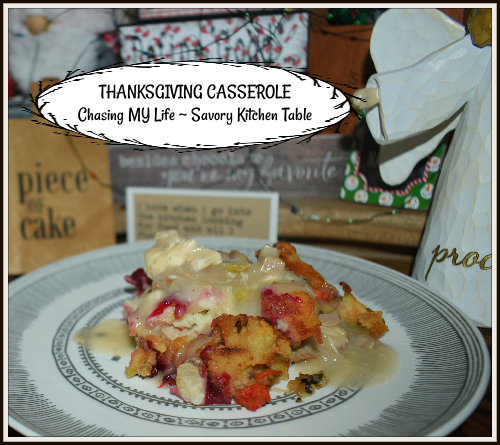
For the casserole I start with dressing followed by small pieces of chopped turkey. Then I put a layer of mashed potatoes followed by a layer of homemade cranberry sauce. I finish it off with another layer of dressing. I bake it for 30 minutes and then serve with a ladle of hot gravy. BUT, you can be as adventurous as YOU’D like with yours. Maybe you want a layer of sweet potato casserole, marshmallows and all or green been casserole. Hubby had jalapeno cranberry sauce in his! You could even top it with another layer of crispy onions 😀

The other dish I saw on Facebook or Instagram a few years back. You start with a regular egg roll wrapper. Start with a nice thick strip of white meat turkey followed by a scoop of dressing, a SMALL spoonful of mashed potatoes drizzled with a tablespoon or so of both cranberry sauce and gravy. Roll them up like a traditional egg roll sealing the finally edge with a brush of water. Deep fry in hot oil and serve with more cranberry sauce for dipping. And then again is my tried and true Turkey Tetrazzini. 😀
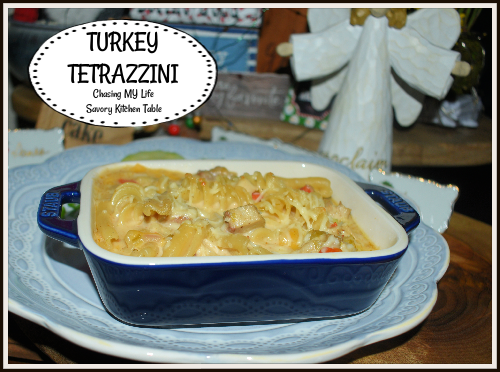
When I was a kid, tetrazzini was a dish made from leftovers. In our house it could be from left over roast chicken, turkey or ham. The cheese back then was not of my liking either, usually Velveeta or American singles – YUCK!! Personally I only like it made with chicken and I prefer it with fresh seared chicken not the traditional boiled or stewed. 😀 One of the recipes I found was a much newer version that used “canned” products that I discarded immediately to lean towards the old fashioned version of scratch.

I have seen a bunch of recipes in old recipe files and brand name pamphlets for canned chicken. I even found one that must have come from a lunch lady’s files as it called for 20 cups of cooked chicken, 24 ounces of spaghetti noodles… honestly I quit reading at that point since I knew it would never for for the 2 of us and was giving me a headache to try and convert it to serve 2!

I ended up taking the parts I liked from each recipe AND my memories to make my new one!

TURKEY TETRAZZINI ala MEMORIES serves 4-6
8 ounces uncooked spaghetti, broken in half
4 boneless, skinless chicken thighs or 2 cups cooked chicken or turkey pieces
3 tablespoons butter
1 LARGE stalk celery, sliced thin
1 shallot, diced
1 small (mini) red pepper, chopped
3 tablespoons Wondra flour
3/4 cup chicken (or turkey) broth
1 teaspoon sweet paprika
1 cup heavy cream
2 tablespoons apple cider vinegar
1 tablespoon Cream Sherry
2-3 sprigs thyme, leaves only
3/4 cup grated sharp cheddar cheese
1/4 cup grated Mozzarella
FRESH ground sea salt and black pepper

  • In a large skillet, heat oil over medium heat.
  • Generously season chicken pieces and sear 3-4 minutes per side in hot oil until cooked through and golden brown.
  • Remove chicken and small dice OR shred. Set Aside.
  • Preheat oven to 350°.
  • Spray baking dish with non-stick baking spray.
  • Prepare noodles per package directions.
  • Add butter to skillet.
  • When butter is sizzling add celery, shallots and peppers to skillet and saute 2-3 minutes.
  • Add flour to skillet, stirring to coat until golden.
  • Add chicken broth and bring to a boil.
  • Reduce to a simmer and stir in the heavy cream, apple cider vinegar, cream sherry and thyme leaves. Simmer until starting to thicken and slightly reduced.
  • Stir in cheeses, reserving a small amount for garnishing.
  • Fold in spaghetti noodles and chicken pieces.
  • Season to taste.
  • Transfer to baking dish.
  • Top with remaining cheese.
  • Bake 20 minutes until heated through and all cheese is melted.

NOTE: I have been known to throw in a can of drained petite peas 😀 to make it an all in one dish.
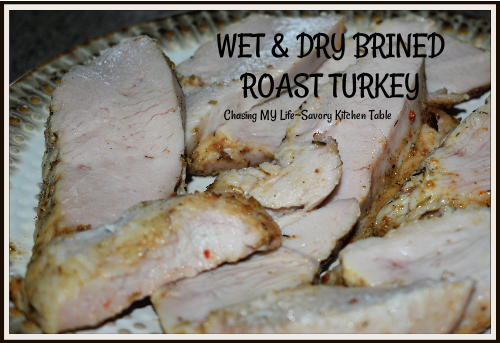
WET & DRY BRINED ROAST TURKEY

Preparing turkey breasts instead of the whole turkey is a sure fire way to make sure everyone has the white meat they desire. It is also EASIER – no carcass or bones to mess with. AND it looks more elegant when served. No wait time while someone has to carve it is a real plus too! PLUS you still get enough drippings to make a GREAT gravy with.

I use one 3 pound breast per two people. This gives you enough for the BIG day as well as leftovers for sandwiches. I also use both a WET BRINE and a DRY BRINE.

For Thanksgiving I take the turkey out of the freezer on Monday and move it to the refrigerator. It will thaw in less than 24 hours generally. Then on Tuesday I submerge it into the wet brine. On Thursday I drain off the wet brine an hour before I want to roast it and bring it to room temperature.

WET BRINE
3 cups WHOLE milk
1/2 cup apple cider vinegar
1/4 cup sea salt

  • Whisk together until salt is dissolved.
  • Place turkey breast in large ziplock bag.
  • Place bag in baking dish or large bowl.
  • Pour brine in bag and seal tight.
  • Refrigerate 24-48 hours.

DRY BRINE
1 teaspoon onion powder
1 teaspoon garlic powder
1 teaspoon sugar
1/2 teaspoon dried tarragon
1/2 teaspoon red pepper flakes
1/2 teaspoon orange peel

  • Drain wet brine for turkey breast and pat dry.
  • Combine ingredients in mortar and finely grind.
  • One hour before you plan to start roasting, rub turkey breast on both sides, lightly cover with cheesecloth and allow to come to room temperature.

3 pound half breast
2 carrots, washed and sliced (optional)
2 stalks celery, washed and sliced (optional)
1 SMALL onion, diced (optional)
2 tablespoons unsalted butter
1 tablespoon COARSE Kosher salt
FRESH ground black pepper

  • Preheat oven to 450°. This will start the browning process.
  • Adjust oven shelf to low position.
  • Add any veggies you might be using to the bottom of the roasting pan. If using veggies I add a couple tablespoons of butter to the bottom so they don’t burn. Also if using veggies you can place the breast directly on top eliminating the roasting rack and another thing to wash!
  • Top with roasting rack.
  • Transfer DRAINED brined breast to a roasting rack.
  • Brush turkey with melted butter. Loosen the skin and brush a little butter under there also. Make sure skin is covering as much meat as possible. This helps keep your turkey moist.
  • Season with Kosher salt and FRESH ground black pepper.
  • Move pan to oven.
  • Reduce heat to 350° when you place turkey breast in the oven. This will slow down the cooking to keep the meat juicy. With no bones the turkey breast will cook much more quickly.
  • Roast 1 hour or until internal temperature reaches 165°. Check every 15 minutes – NOT to baste, but to make sure your skin is no browning too fast. If it is, lightly cover with foil for the remainder of the roasting time.
  • Remove turkey to carving board, cover with foil and rest 15-20 minutes while you prepare the gravy from the drippings.
  • Prepare gravy.
  • Carve turkey.

NOTE: Leftovers can be stored in an airtight container 5 days or frozen up to 2 months. LOL like any leftovers will last that long! I see serious turkey sandwiches ALL weekend long!