Category: BLOG 365
BEEF & BBQ BEAN STEW ~ BLOG 365.56
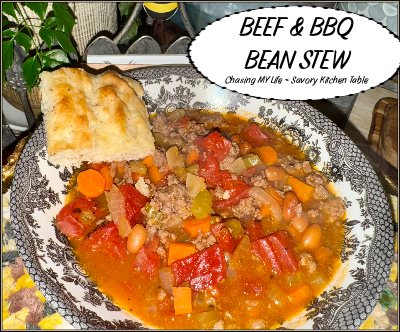
BEEF & BBQ BEAN STEW yields 6 servings
1 pound ground beef
1/2 cup onion, chopped
1/2 cup chopped red pepper
2 stalks celery, chopped
2 cans navy or cannelloni beans, rinsed
1/4 cup BBQ sauce
1 carrot, small diced
3 tablespoons tomato paste
2 cups homemade chicken broth
Juice of 1 LARGE lemon
2 cloves garlic FINELY minced
14 1/2 ounce can diced tomatoes (undrained)
6 tablespoons sour cream
- Brown ground beef until no longer pink. Drain off grease.
- Return beef to pan.
- Add carrots and celery sautéing 5 minutes.
- Add onions, red pepper and garlic, sautéing and stirring until vegetables are tender.
- Add beans, BBQ sauce, tomato paste, chicken stock, lemon juice and tomatoes.
- Reduce heat to low and simmer 45 minutes.
- Ladle into bowls and serve with a dollop of sour cream and cornbread.
HAPPY HOMEMAKER MONDAY, MENU & RECIPES week 8 of 2025 ~ BLOG 365.55

Be sure to join Happy Homemaker Monday with our host, Sandra at Diary of a Stay at Home Mom
LAST WEEK RECAPPED
My week was busy with pre-Spring cleaning, sorting and organizing as well as my many Eagles duties, but my weekend was kind of lazy, yet productive!
Saturday was A LOT of cleaning and laundry. We began working on power washing the back patio, patio cover and gutters. For some reason they have gotten exceptionally mossy and slimy so far this year. We even found horrible moss patches on the new roof that we’re working hard to eradicate before it gets a foothold that can’t be stopped.
I even took time to have lunch with a friend on Sunday and watch ALL the NASCAR races (which were recorded) since it was raining so much and all outside cleaning came to a stop.

THOUGHT FOR THE DAY

THE WEATHER OUTSIDE
Beware of captions that say a warm up is on the way, BUT, don’t put away the winter coats! That’s how SNOWMAGEDDON started a few years back!
Monday 57/44 ~ 1 inch RAIN
Tuesday 57/44 ~ 1 inch RAIN
Wednesday 58/35 ~ CLOUDY
Thursday 58/34 ~ CLOUDY
Friday 58/44 ~ CLOUDY/RAIN
Saturday 56/43 ~ 1 inch RAIN
Sunday 55/38 ~ 1/2 inch RAIN
ON MY MIND
TO DO LIST, APPOINTMENTS & PROJECTS
|
THIS WEEK’S TO DO LIST, PROJECTS & APPOINTMENTS
|
|
DVR/TV TIME
|
WHAT’S ON THE DVR/TV
|
|
READING TIME
I finished PICTURES OF YOU by Emma Grey last week and started THE BOYFRIEND by Frieda McFadden for book Club, but really want to start RUN, ROSE, RUN by James Patterson and Dolly Parton as well as so many more titles, so may be dropping book club 🙁 to read on my own.


FUNNIES

MENU PLANS
BREAKFAST is always a work in progress for me – it will generally be hot water and a fruit yogurt 😀
|
2/24 MONDAY
|
2/25 TUESDAY
|
2/26 WEDNESDAY
|
2/27 THURSDAY
|
2/28 FRIDAY
|
3/1 SATURDAY
|
3/2 SUNDAY
|
|
|
DINNER
|
CHICKEN TETRAZZINI and a fresh batch of SWEET BBQ SAUCE
|
PASTEL AZTECA
|
PIGEON RIVER CHICKEN
|
BAKED MANICOTTI with MEAT SAUCE
|
cooking at EAGLES QUESADILLAS with MEXICAN CORN SALAD and MEXICAN ROSETTE CHURROS
|
CHICKEN SALTIMBOCCA
|
HUBBY’S BIRTHDAY HIS CHOICE |
|
BREAKFAST
|
|
|
|
CANADIAN BACON ONION QUICHE
|
FAVORITE PHOTOS FROM THE CAMERA
This happened last year also. Spring blooms thinking it’s time only to be beaten back down by cold, rain, wind and/or snow 🙁


INSPIRATIONS

LIFE TIP

HOMEMAKING / COOKING TIP

RECIPES COMING UP THIS WEEK
- EARTHQUAKE CAKE

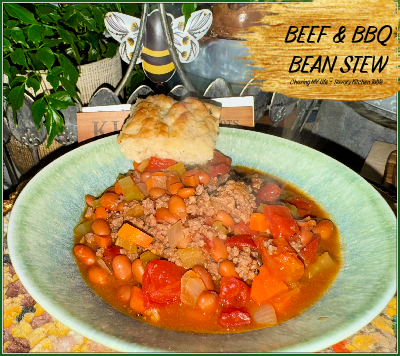
- BEAN & BBQ BEEF STEW

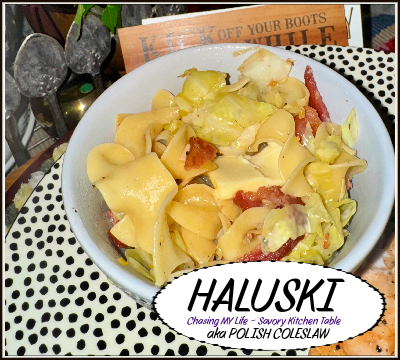
- HALUSKI aka POLISH COLESLAW
RECIPE LINKS FROM LAST WEEK
WEEKLY FEATURED PARTY LINKS

SILENT SUNDAY ~ BLOG 365.54
SATURDAY COFFEE ~ BLOG 365.53
TGIF ~ BLOG 365.52
PORK CHOPS IN CREAMY GARLIC SPINACH SAUCE ~ BLOG 365.51

PORK CHOPS IN CREAMY GARLIC SPINACH SAUCE
4 boneless pork chops
FRESH ground sea salt and black pepper, to taste
1 teaspoon paprika
2 teaspoons avocado oil
2 tablespoons butter
6 cloves garlic, FINELY minced
1 LARGE shallot, FINELY chopped
1/3 cup homemade chicken broth
1 3/4 cups heavy cream
3 cups baby spinach
1 teaspoon Italian seasoning
1 teaspoon crushed red chili pepper flakes, optional
1/4 cup fresh grated Parmesan cheese, optional, but recommended
FRESH chopped Italian flat parsley
- Heat the oil in a large skillet over medium-high heat.
- Season the pork chops with paprika, salt and pepper on both sides.
- Sear chops 3-5 minutes per side.
- Remove from pan, cover and keep warm.
- In the same pan melt butter in the cooking juices.
- Add garlic, onion, Italian seasoning, and red crushed chili pepper and stir-fry 1-2 minutes until fragrant.
- Add chicken broth, simmering until slightly reduced.
- Reduce heat to low heat, add heavy cream and bring to a gentle simmer.
- Adjust seasoning to taste.
- Add the spinach leaves and allow to wilt in the sauce.
- Stir in the Parmesan cheese.
- Let sauce simmer until cheese melts through the sauce.
- Return pork chops to the pan, turning to coat in the sauce.
- Sprinkle with the parsley, and spoon the sauce over each pork chops.
WORDLESS WEDNESDAY ~ BLOG 365.50
HAPPY HOMEMAKER MONDAY, MENU & RECIPES week 7 of 2025 ~ BLOG 365.48

Be sure to join Happy Homemaker Monday with our host, Sandra at Diary of a Stay at Home Mom
LAST WEEK RECAPPED
WHEW! The last 2 weeks have been a constant blur!!! I finished the last “PLANNED” event on Friday night only to have a monkey wrench thrown into the rest of the month. Saturday was spent doing laundry and house chores as well as a lot of recipe sorting. I’m hoping to finish sorting through the tote I’ve been working on so I can make a “quarterly” menu plan and eliminate a bunch of scrap paper. Sunday was supposed to be a “slow” day at home watching racing and being lazy, but ended up being gone to lunch with friends and then several hours of Eagle’s chores. I’m looking forward to staying home today and getting caught up on what I didn’t get done yesterday.

THOUGHT FOR THE DAY


THE WEATHER OUTSIDE
It’s going to be a super wet week and still quite cool with highs in the low 40’s. I’ll be doing layers upon layers with turtlenecks and flannels with Levis & UGGs.
ON MY MIND
So many people are anxious to “join” organizations, but I have noticed that so many are NOT willing to put the effort into sustaining them. We have had a HUGE influx of members because of our Tuesday line dancing night, but that’s the extent of their involvement. There was a “VOLUNTEER APPRECIATION” night with Italian bakes and dessert last Friday, but when all was said and done I observed that the people that participated in the bakes and desserts, set-up, break down and clean-up were the same volunteers being “celebrated”. Volunteers ate for free, all others it was a $10 all you can eat night and we did raise almost $500 for charity, but it seemed quite a bit of work and so so lopsided. 🙁
I had been asked to take over Friday night dinner coordination in June when the current lady was not going to renew her membership because of commitments elsewhere, but was a bit surprised when she announced it at the last meeting and that it would begin March 1st. And then to top it off the woman doing February 28th and canceled on Saturday so I’m hitting the ground running scrambling from the git go. 🙂 I do have some hopefully fresh ideas to generate more participation and support, so we’ll see.
TO DO LIST, APPOINTMENTS & PROJECTS
|
THIS WEEK’S TO DO LIST, PROJECTS & APPOINTMENTS
|
|
DVR/TV TIME
|
WHAT’S ON THE DVR/TV
|
|
READING TIME
I should finish PICTURES OF YOU tonight. Book Club picked a new book because most people found it “BORING” and called it a DNF (do not finish and I have never NOT finished a book) book which only tells me I’m not well fitted with this group that prefer psychological thrillers.
Most of those that found it boring gave up by page 20, which I find alarming as the book has 350 pages so they really didn’t give it a chance.
Two other friends are liking as much as I do and we have all vowed to finish it. One has finished it and declared it is definitely a book to finish.

FUNNIES

MENU PLANS
BREAKFAST is always a work in progress for me – it will generally be hot water and a fruit yogurt 😀
|
2/17 MONDAY
|
2/18 TUESDAY
|
2/19 WEDNESDAY
|
2/20 THURSDAY
|
2/21 FRIDAY
|
2/22 SATURDAY
|
2/23 SUNDAY
|
|
|
DINNER
|
SALSA VERDE CHICKEN CASSEROLE
|
FIREHOUSE SPECIAL
|
CORNED BEEF HASH ~ DINNER STYLE
|
PORK CHOPS, MASHED POTATOES and MILK GRAVY with COUNTRY DRESSING
|
CREOLE HALIBUT
|
CORNED BEEF SAUERKRAUT BAKE ~~~~~~~~~~~~~ HONEY ORANGE COTTAGE CHEESE PANCAKES (breakfast)
|
LIME GLAZED PORK CHOPS with COUNTRY DRESSING ~~~~~~~~ OVERNIGHT HAM& EGG CASSEROLE (BREAKFAST) |
|
DESSERT
|
|
WACKY CAKE
|
|
FAVORITE PHOTOS FROM THE CAMERA
I borrowed some chafing dishes from a friend (she had owned our favorite deli – Nellie’s Deli but retired last July) and she brought me these sweet treats along with the chafing dishes! How sweet is that? And this was the sky over the pond after the event Friday night.


INSPIRATIONS


LIFE TIP

HOMEMAKING / COOKING TIP

RECIPES COMING UP THIS WEEK
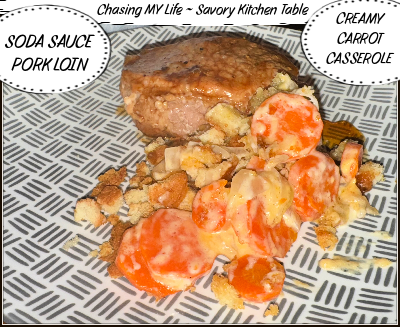
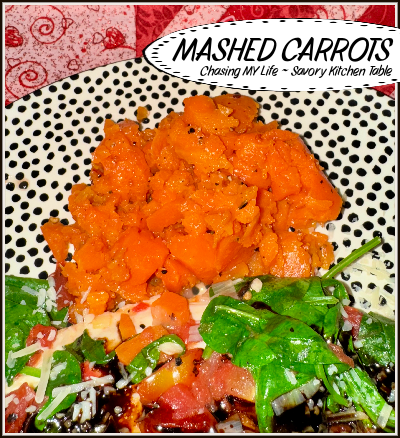
- SODA SAUCE PORK LOIN & MASHED CARROTS
- PORK CHOPS in CREAMY GARLIC SPINACH SAUCE
RECIPE LINKS FROM LAST WEEK
WEEKLY FEATURED PARTY LINKS


