FAREWELL FROM GIGI

Due to illness my hosting here was short lived, i did enjoy sharing my caribbean cuisine with you on Try a new recipe Tuesday’s. I thank you all for the warm welcome.

I really do enjoy the smorgasbord of recipes that is OKK and I will continue to refer back to site and try out many of the recipes i have bookmarked.

Thank you for creating this wonderful gathering place, for inviting me to join your community and for the warm welcome and concern.

Do join me in my adventures in and out of the kitchen and around my island paradise. Hope to see you all soon.

Bon Appetit
Gisele
http://adventuresingigi.blogspot.com/

A to Z CHALLENGE – A

A is for ALWAYS:
  • ALWAYS SMILE.
  • ALWAYS BE KIND.
  • ALWAYS BE THE BEST YOU CAN BE!
MY THEME THIS YEAR IS POSITIVE ATTITUDE!
Not only will I do it for the next month, but the entire year!

Grilled Sweet Potatoes

Hello OKK Readers,
I want to personally thank each of you for reading my posts each Sunday and want to let you know that I have enjoyed all of your feedback.  I love food and love food blogs.  If you have a food blog that I don’t know about, please leave a comment and I will check it out.  You can continue to follow my easy-to-make, family-friendly recipes at my own personal blog Meals For Real.
-April


Grilled Sweet Potatoes from Food Network Magazine
Recipe by Bobby Flay
3 sweet potatoes, unpeeled
Kosher salt
2 tsps finely grated lime zest
Pinch of cayenne pepper
1/4 cup canola oil
Freshly ground pepper
1/4 cup finely chopped fresh cilantro

Directions: Parcook the potatoes. Place in a pot of water and boil until fork-tender; let cool. Slice each potato lengthwise into eighths.

Preheat a grill to medium or place a cast-iron grill pan over medium heat. Mix 1 Tbsp salt, the lime zest and cayenne pepper in a small bowl.

Brush the potato wedges with the oil and season wtih salt and pepper. Grill until golden brown on all sides (including the skin) and just cooked through, about 1 1/2 minutes per side. Transfer to a platter; immediately season with the salt mixture and sprinkle with cilantro.

Here’s what you’ll need:

Rinse off the sweet potatoes.

Put them in a pan to boil until they are fork-tender.  
While the potatoes were boiling, measure out the salt, lime zest and cayenne pepper and mixed them up.  Then, set it aside.

Chop and mince about 1/4 cup of fresh cilantro and set it aside.  

  
Put some canola oil in a pan.  When the sweet potatoes are fork-tender, lay them out on a cutting board until they cool.  Cut them in to wedges.  

Toss the potato wedges in the canola oil.  Salt and pepper.  

Put them on the grill.  Turn them every couple of minutes until all sides are grilled.  

#9 Once finished, pull them from the grill and sprinkle the salt mixture over the top.  Top with the cilantro.  

Here’s what you’ll end up with:

These potatoes are fantastic!  They have the smokiness of the grill but the freshness of the cilantro.  These two added with that fantastic salt, lime zest and cayenne mixture made me want to eat the whole stinkin’ platter myself.

Come See Me!

Our Krazy Kitchen has been so much fun, but with life so busy, trying to maintain posts on two blogs can be a bit daunting.  Perhaps there will be a post or two every now and then here, so please keep us bookmarked. This is a great resource for recipes of all kinds.  In the meantime, please come by and visit me at Forgetfulone!  I will even have some occasional posts about recipes and eating healthy.  Thanks to 3 Sides of Crazy for your cooking expertise and for allowing me to blog at OKK!

Grilled Chicken Sliders on Farewell Fire Day Friday

Here’s a easy slider recipe that is perfect for late summer nights and is sure to please a crowd.  It’s flavorful grilled chicken with a creamy red pepper sauce that is nothing short of luxurious.

But first, my farewell.  This is the Final Fire Day Friday post here on Our Krazy Kitchen.  I will keep posting on my blog, Nibble Me This.

Grilled Chicken Sliders
Source:  Nibble Me This

Ingredients

  • 8 chicken thighs, boneless, skinless
  • 12 frozen dinner rolls

For the marinade

  • 10 oz can Rotel tomatoes and chiles
  • 1/4 cup BBQ sauce
  • 1/4 cup cider vinegar
  • 1 tsp season salt

For the creamy red pepper sauce

  • 1/2 cup whipped cream cheese
  • 1/4 cup red pepper jelly

Instructions

  1. Place the marinade ingredients in a blender or food processor and blend/process until liquified.
  2. Marinade the chicken for 12 hours.  
  3. Thoroughly mix the creamy red pepper sauce together and refrigerate.
  4. Cook dinner rolls according to direction and then split in half for buns.
  5. Preheat a charcoal grill to 350f.   Remove chicken from marinade and grill until the reach an internal temperature of 165f (about 6 minutes per side).  Allow to cool for 10 minutes.  Thinly slice.
  6. Toast the split buns on the grill.
  7. Slather the creamy red pepper sauce on the buns and top with the sliced chicken.

 I’ve had a great run here at OKK and I’ve enjoyed the time I’ve had to run a muck here:)  

ROASTED RED PEPPER HAM STRATAS

ROASTED RED PEPPER HAM STRATAS
6 large eggs
1/2 cup milk
5 cups day old bread, cubed
1/3 pound ham steak, cubed
3 green onions, sliced thin
1/3 cup diced roasted red pepper
8 ounces cheese of choice
salt and pepper to taste
2 tablespoons butter, sliced into slivers

  • Preheat oven to 350˚.
  • Whisk together eggs, milk, salt and pepper.
  • Spray four 8 ounce ramekins with PURE.
  • Divide two-thirds of the bread among the four 8 ounce ramekins.
  • Top with ham, onions, red peppers and half the cheese.
  • Top with remaining bread and then the egg mixture.
  • Top with remaining cheese.
  • Dot with butter pieces.
  • Refrigerate overnight.
  • Bake until set, about 30 minutes.

Tomato Soup with Chickpeas

It’s finally getting warm outside!  Yet, I can always enjoy a bowl of hot soup.  Seriously, it can be 90 degrees outside and I’d still love to eat this soup. 
I’ve made this a few times and it’s always so good. I always have the ingredients on hand and it’s a great soup to make in a pinch when you don’t know what else to cook!

Tomato Soup with Chickpeas Recipe
2 cans chickpeas, drained and rinsed
2 teaspoon olive oil
3 garlic cloves, peeled and coarsely chopped
1 teaspoon dried rosemary (fresh would work too)
3-15 ounce cans of tomatoes (I used diced)
1 teaspoon of sugar
1 teaspoon salt
Pepper, to taste
2 1/2 cups chicken or vegetable broth

1. Warm the olive oil in a large soup pot over medium-low heat, and add the garlic and rosemary. Cook for a minute or two, and then add the tomatoes, sugar, salt, a few grinds of pepper, roughly half of the chickpeas, and the stock. Bring to a boil over high heat; then reduce the heat to low and simmer, partially covered, for 20 minutes.
2. Remove the soup from the heat to purée. If using an immersion blender, purée the soup directly in the pot. Otherwise, wait a few minutes, until the soup cools; then purée it in batches in a blender or food processor and return it to the pot. Add the remaining chickpeas, and warm the soup over medium heat.

A to Z CHALLENGE

It’s almost time for the A to Z April 2012 challenge.  The A-Z challenge doesn’t have any theme other than the alphabet itself. The challenge starts April 1st running through the month of April. We post everyday except Sundays (other than the Sunday it begins).  Come on, join me, you know you want to. Click on the banner to learn more.

OLD FASHIONED CHEESECAKE

For the crust:

1 3/4 cups ginger snap/vanilla wafer crumbs
3 tablespoons sugar
Pinch of salt
1/2 stick (4 tablespoons) unsalted butter, melted

For the cheesecake:
2 pounds (four 8-ounce boxes) cream cheese, softened
1 1/3 cups maple sugar
1/2 teaspoon salt
1/2 teaspoons pure vanilla extract
2 teaspoons blackberry extract
1 teaspoon lemon juice
4 large eggs, at room temperature
1 1/3 cups sour cream or heavy cream, or a combination of the two

To make the crust:

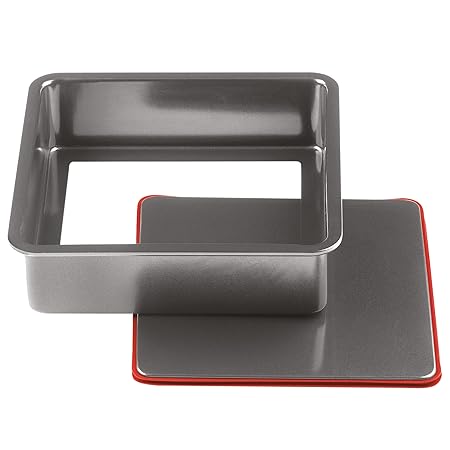
  • Butter a 9-inch springform pan—choose one that has high sides. Mine is square.
  • Stir the crumbs, sugar and salt together in a medium bowl. Pour over the melted butter and stir until all of the dry ingredients are uniformly moist.
  • Turn the ingredients into the buttered springform pan and use your fingers to pat an even layer of crumbs along the bottom of the pan and about halfway up the sides. Don’t worry if the sides are not perfectly even or if the crumbs reach above or below the midway mark on the sides.
  • Center a rack in the oven, preheat the oven to 350°F and place the springform on a baking sheet. Bake for 10 minutes.
  • Set the crust aside to cool on a rack while you make the cheesecake.
  • Reduce the oven temperature to 325°F.
To make the cheesecake:
  • Working in a stand mixer, preferably fitted with a paddle attachment, or with a hand mixer in a large bowl, beat the cream cheese at medium speed until it is soft and truly creamy, about 5 minutes.
  • With the mixer running, add the sugar and salt and continue to beat another 4 minutes or so, until the cream cheese is light. Beat in the vanilla and blackberry extract.
  • Add the eggs one by one, beating for a full minute after each addition. Reduce the mixer speed to low and stir in the sour cream and/or heavy cream.
  • Give the batter a few stirs with a rubber spatula, just to make sure that nothing has been left unmixed at the bottom of the bowl, and scrape the batter into the springform pan.
  • Bake the cheesecake for 1 hour and 30 minutes, at which point the top will be browned (and perhaps cracked) and may have risen just a little above the rim of the pan. Turn off the oven’s heat and open the door a crack.
  • Allow the cheesecake to sit for another hour.
  • After 1 hour, carefully remove from the oven and leet the cheesecake come to room temperature on a cooling rack.
  • Run a knife around the edge of the pan to loosen sides.
  • When the cake is cool, cover the top lightly and chill the cake for at least 6-8 hours, although overnight would be better.
Serving:
  • Remove springform sides. The easiest way to cut cheesecake is to use a long, thin knife that has been run under hot water and lightly wiped. Keep warming the knife as you cut slices of the cake.
Storing:
  • Wrapped well, the cake will keep for up to 1 week in the refrigerator or for up to 2 months in the freezer. It’s best to defrost the still-wrapped cheesecake overnight in the refrigerator.