According to Wikipedia STROMBOLI is: a type of turnover filled with various cheeses, typically mozzarella, Italian meats such as salami, capicola and bresaola or vegetables or a Greek Island or an Ingrid Bergman movie – you choose. The dough is Italian bread dough.
When I was much younger and elderly family friend always told me I looked just like Ingrid Bergman. I didn’t know then what a compliment that was.
Stromboli is reported to have originated in 1950 in Essington, Tinicum Township just outside of Philadelphia, at Romano’s Italian Restaurant & Pizzeria, by Nazzareno Romano. There, William Schofield supposedly gave it the name, after the movie Stromboli, starring Ingrid Bergman. Other sources claim the stromboli was the brainchild of Mike Aquino, Sr., and that he created it in Spokane, Washington, in 1954. The first claim is more credible, with most people remembering the advent of the stromboli at Romano’s Italian Restaurant & Pizzeria in the early 1950s.
No matter what you call it, it is a family favorite around here.
We have a favorite pizza – ITALIAN GARLIC SUPREME from Round Table Pizza. This pizza is full of pepperoni, Italian sausage, Roma tomatoes, white mushrooms, green onions and lots of chopped garlic and is baked with a blend of 3 cheeses in a creamy garlic sauce. Unfortunately they are not a national chain. We have spent horribly disappointing meals out trying to find a local replacement for this pizza. I have since decided the best replacement is the one I make myself. Hubby whole heartily agreed! We decided to push the envelope though and make that same recipe into a sandwich.
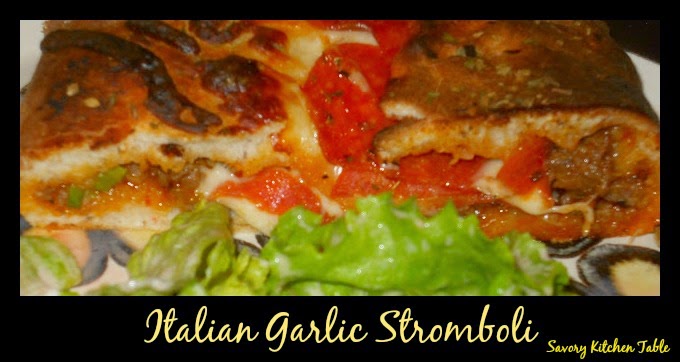
ITALIAN GARLIC SUPREME STROMBOLI aka SANDWICH PIZZA
ITALIAN GARLIC SUPREME PIZZA
CRUST
1 cup of warm water (105 degrees)
3 1/2 cups of all-purpose flour
2 tablespoons of olive oil
2 teaspoons of honey
1 teaspoon sugar
1 teaspoon of salt
1 teaspoon of yeast
- Put warm water into a bowl. Add salt, sugar and honey and mix well. Add the yeast, mix and let it sit for about 10 minutes.
- Gradually add the flour and olive oil until well blended.
- When the mixture gets too heavy to mix, start kneading the dough with your hands.
- Knead the dough until you have a smooth ball. If the dough cracks it is too dry. Add water bit by bit until if forms a nice smooth ball. If you need to add water or flour, do it by small amounts.
- Coat the dough with olive oil, place it in a large bowl and cover it with kitchen wrap and a flour sack towel. Let the dough rise for about an hour at room temperature, then push it down again so it deflates. Let it sit for about another hour. Either bake it or refrigerate for later use.
- Put the dough on a lightly floured surface, put a bit of flour on top and make it into the shape of a pie by stretching it out from the center outwards. Use a rolling pin until the dough is about 1/4″ thick. Punch some holes in the dough with a fork to let the air escape while the pizza is in the oven.
- Lightly oil a cookie sheet with olive oil and sprinkle with cornmeal.
- Pre-Bake dough at 400 degrees for 5 minutes.
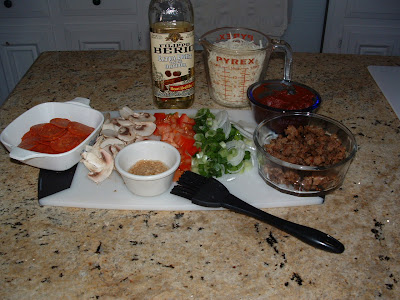
TOPPINGS
1 package John Morrell pepperoni
3 Italian sausages, cooked and crumbled
1 can Contadina tomato paste with basil and oregano or homemade sauce
1/2 pound mushrooms, thinly sliced
1 large bunch green onions, thinly sliced including the majority of the tops
6 cloves garlic, finely minced
1 Roma tomato, diced small
2/3 cup grated mozzarella cheese
2/3 cup grated provolone cheese
2/3 cup grated Romano cheese
Extra light olive oil
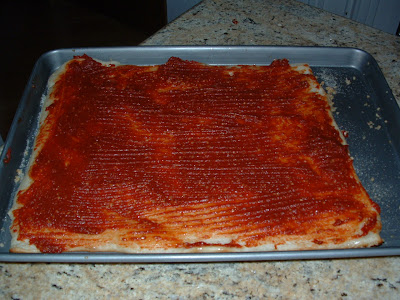
- Whisk together the tomato paste, garlic and 1 teaspoon olive oil to make the sauce.
- Brush pre-baked dough with a small amount of olive oil and then an even layer of the sauce.
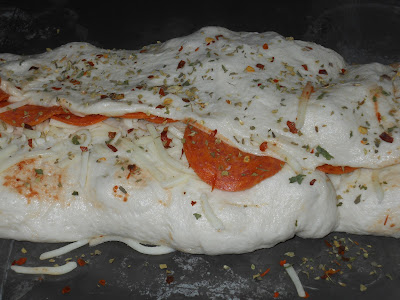
- Evenly sprinkle the crumbled sausage over the sauce followed by half of the pepperoni.
- Top with the mushrooms, green onions and tomatoes.
- Evenly sprinkle the cheese over it all
- Top with the remaining pepperoni.
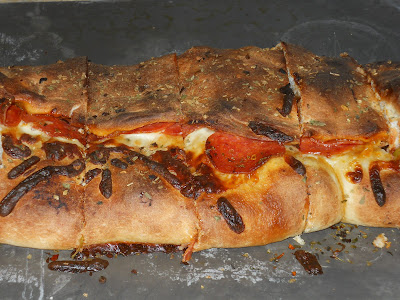
- Roll up and place on the center of the pan.
- Bake the sandwich pizza at 400-450° F for about 20-25 minutes until the crust is golden.


