MEXICALI CHEESY POT PIE

Mexicali Cheesy Pot Pie Adapted from Pam’s Midwest Kitchen Korner
1 pound ground turkey, 93% lean
1 large onion, chopped
2 tablespoon chili powder
1 tablespoon garlic powder
1/2 teaspoon each salt and pepper
1 (10 oz.) can Rotel diced tomatoes with green chilies, undrained
1 cup frozen corn
1 cup frozen peas and carrots
5 ounces cheddar cheese, divided

For corn bread topping:
1/2 cup yellow cornmeal
1/2 cup flour
1 1/4 teaspoon baking powder
1/2 teaspoon salt
1/4 tseaspoon chipotle chili powder
1 egg, lightly beaten
2/3 cup milk, 1%
2 tablespoon vegetable oil

Directions:  Brown ground turkey and onions in large pan until cooked. Season with chili powder, garlic powder, salt and pepper. Stir in tomatoes, corn and peas & carrots (used whatever veggies you want.) Transfer to an 8 x 8 in. baking dish.

Top with half the cheddar cheese.

In a bowl, combine cornmeal, flour, baking powder, chipotle powder and salt. Stir in egg, milk and oil. Spread evenly over turkey mixture. Top with the rest of the cheese. Bake, uncovered for about 35 minutes or until topping is set.

Modifications:
-I used whole wheat.
-I did not use peas or carrots.
-I used a can of drained corn.
-I used a can of tomatoes with peppers and celery
  rather than Ro-Tel.
-I used an Italian blend cheese.

Here’s what you’ll need for the meat mixture:
Here’s what you’ll need for the cornbread mixture:
Preheat the oven to 350 degrees.
Chop up the onion.
Place the turkey and the onions in a skillet and cook through.
Once cooked, add corn and Ro-tel. 
I used a can of tomatoes with peppers and celery.  
I just cut up the tomatoes a little more. 
Add the spices.
Meanwhile, add all of the ingredients for the cornbread mixture.
Place the meat mixture into a greased baking dish.  
Spread the cornbread mixture out and put in the oven for 30-35 minutes or until cornbread rises.
About 5 minutes before finished, sprinkle cheese on top and put back in the oven until melted.
Here’s what you’ll end up with:
Our Thoughts:
This meal turned out to be somewhat of a pantry meal.  I changed a lot of the ingredients or omitted them because I didn’t have them on hand.

I thought the combination of the cornbread with the meat mixture tasted really great.  There were several textures in there that complimented each other.  
The one issue I had was that it was a little dry.  The cornbread soaked up most of the juices from the tomatoes so I wish that I would not have drained the corn before putting it in.

I was also a little worried about making the cornbread topping out of the whole wheat but it had a good texture and flavor.  Of course, you could always use one of those Jiffy corn muffin mixtures and it would work great, too.
Hope you enjoy!
April

Fire Day Friday: Dip and Flip Grilled Chicken

With Labor Day weekend coming soon, a lot of grills will be firing up for their last hoorahs of the summer. Here’s an easy way to grill chicken with the rich flavor of bbq sauce without burning the sauce while grilling. 


Dip and Flip Grilled Chicken
Source:  NibbleMeThis
4 chicken thighs, boneless, skinless
Rub
1 tsp smoked paprika
½ tsp Kosher salt
½ tsp black pepper, ground
½ tsp garlic powder

Dipping Sauce
½ cup bottled sweet BBQ sauce (Blues Hog, KC Masterpiece are our favorites)
½ cup apple cider vinegar
½ tsp salt
½ tsp black pepper
Mix rub ingredients together.  Mix dipping sauce ingredients together.
Sprinkle the rub on both sides of the chicken thighs.
Preheat your charcoal grill to 400f. Set the dipping sauce in a shallow pan on the grill.
Grill the chicken for 3 minutes. Then flip and grill another 3 minutes.
Now dip each piece into the dipping sauce and then flip back to the grill. 
Cook for another 6 minutes. During this time, continue dipping and flipping the chicken every 1-2 minutes. You are cooking the dipping sauce onto the chicken in layers.
Pull the thighs when the thicker parts reach 170f. Smaller parts might get there sooner, so just pull them to a cooler area of the grill like this.
Serve with your favorite BBQ sides. Tonight we served BBQ rice and Bush’s Honey Barbecue Beans.
This is more of a basic process than recipe. Have fun with it and make it your own. Add a signature spice to the rub, like maybe chipotle chili pepper. Or substitute beer for the vinegar in the dipping sauce. The point is to thin out a prepared bbq sauce and then layer it onto your food.
So are you already planning your Labor Day weekend cook out?

JOHNNY CAKES, A CARRIBEAN STAPLE – TRY A NEW RECIPE DAY

Journey Cakes commonly known as Johnny Cakes are a yeast-less bread that are either baked or fried. In the southern Caribbean they are known as bakes (even when fried).
Today we will make some whole wheat baked Johnny Cakes
You will need:
1 cup white flour
1 cup whole wheat flour
3 teaspoon baking powder
1/2 teaspoon salt
3 oz butter (or margarine)
1 1/2 oz vegetable shortening
1 cup ice cold water
  • Sift flour with the baking powder and salt
  • Rub in the fats.
  • Slowly add the water to make a smooth dough (dough will be sticky at this point).
  • Begin to incorporate enough wholewheat flour to make a smooth, dry, but elastic dough.  Knead well.
  • Shape the dough into a bowl and allow to rest for 60 minutes.
  • Preheat oven to 400F.
  • After 1 hour, place dough onto floured board.
  • Make 1 large Johnny Cake or 4 or 5 hamburger sized Johnny Cakes.
  • Place dough onto a greased baking sheet and bake for 20 minutes.
  • Serve hot.

Dry Ingredients

Prepared dough

Finished product
From the lack of feedback, I think that my previous recipes may have been a bit too ‘exotic’. This is an easier recipe with common ingredients. I posted a fried Johnny Cake recipe over at my blog a little while ago. I do hope you try it either one and let me know what you think.
Bon Appetit!

APPLE BUNDLES

APPLE BUNDLES
2 apples, peeled, cored and chopped
4 ounces orange juice with pulp
3 tablespoons brown sugar
1 teaspoon apple pie spice
1/4 cup sugar
2 tablespoons golden raisins
puff pastry*
cinnamon sugar
egg, beaten
2 tablespoons butter
1 cup confectioners’ sugar
2 tablespoons hot water

  • Thaw the pastry sheets at room temperature until they’re easy to handle (about 45 minutes).
  • Pre-heat the oven to 375°.
  • Whisk the orange juice, apple pie spice, brown sugar and sugar together in a medium saucepan. Bring to a low boil.
  • Add apple pieces and raisins.
  • Line baking sheet with silicone mat or parchment paper.
  • Unfold pastry sheet on a lightly floured surface. Roll the pastry sheet into a 10-inch square. Cut the pastry sheet into 4 (5-inch) squares. Repeat with the remaining pastry sheet.
  • Spoon 1/4 cup of apple mixture into center of square.
  • Brush the edges of the pastry squares with the egg.
  • Fold each pastry in half over the apple mixture and press the edges to seal.
  • Place the filled pastries onto the baking sheets.
  • Brush the tops of the pastries with the egg.
  • Bake for 15-20 minutes or until the pastries are golden. Let cool on the baking sheets for 2 minutes. Remove the pastries to a wire rack and let cool.
  • Place the butter into a small microwave-safe bowl. Microwave on HIGH for 30 seconds. Stir in the confectioners’ sugar. Stir in the water, adding additional water, if necessary, until the icing is the desired consistency.
  • Drizzle the icing over the pastries.

*If you’re in a hurry, you can substitute a can of crescent rolls and have a similar dessert.

Fire Day Friday: Grilled Shrimp with Grapefruit BBQ Sauce

I’ve been on quite the shrimp kick lately.  You see, there was a time where I was hesitant to purchase it, because, living in the desert, we can’t get a lot of fresh shrimp.  Well I had a bad experience with frozen shrimp once, hence the hesitation.  I broke through that though, and finally started cooking with shrimp again.  And boy am I thankful I did.  I adore shrimp… there is so much you can do with it.  And it’s at it’s best when grilled.  At least, that’s my opinion… and that counts for something, right??

This wasn’t the best concoction ever, but it was good.  Believe me, we ate the hell out of this…there were no leftovers 🙂  I liked the sauce, but surprisingly, I liked it much better on the shrimp than by itself… and that is an odd thing for me to say, trust me.  Nevertheless, this is definitely one to try!

Grilled Shrimp with Grapefruit BBQ Sauce
Adapted from Robin Miller
Printable Recipe 
Ingredients:
36 extra larges (31/40 count) shrimp, peeled and deveined
2 yellow bell peppers, cut into 1-inch chunks
10 cherry tomatoes
6 Tablespoons freshly squeezed grapefruit juice
2 Tablespoons ketchup
1 1/2 teaspoons Dijon mustard
1 1/2 teaspoons brown sugar
1/4 teaspoon ground cumin
1/2 teaspoon chili powder
1 teaspoon olive oil
1/2 – 1 teaspoon chipotle puree
wooden or metal skewers (if using wooden, soak in water for at least 30 minutes)

Directions:
In a bowl, mix together the grapefruit juice, ketchup, mustard, sugar, cumin, chili powder, olive oil and chipotle puree until well combined.  Reserve 2 tablespoons of the sauce.  Place the shrimp in a shallow dish and pour the remaining marinade over top of it.  Toss to make sure all shrimp are coated with marinade.  Cover and place in refrigerator for 2-4 hours. 

Preheat grill to 350 degrees F.  Thread the shrimp onto the skewers.  Thread the peppers and tomatoes on their own separate skewers, or thread them together with the shrimp, it’s up to you.  Place directly over the fire and grill until shrimp is pink and cooked through, about 3-5 minutes per side.  My tomatoes only sat on there for about 4 minutes all together and the peppers were done in about 8 minutes.  Baste the shrimp with sauce at least twice during the grilling time.  Remove from grill and serve over rice.  Enjoy!

APRICOT FREEZE

I have been on the look out for dairy free frozen desserts, because milk and I are no longer friends. I will miss many creamy dishes, but this failed friendship also gave me the impetus to find a mostly healthy and delicious replacement. How about starting with this fun frozen dessert!

Apricot Freeze
adapted from:  The Marshmallow Fluff Cookbook
makes approximately 1 1/4 pints

my notes:  a simple frozen fruit dessert, you could easily cut down on the amount of “fluff” for a richer apricot flavor and firmer texture. I used an ice cream maker, but you will also find a simple method at the end of the post to whisk and freeze.

1 16oz can apricot halves
1 c Marshmallow Fluff
1 T fresh squeezed lemon juice

Mash apricot halves with a potato masher, or puree in food processor for a smoother texture.

Place all ingredients into ice cream maker and process until resistance taxes the process. Freeze until firm.

Scoop into small balls and serve over a bed of fresh blueberries or other berries of choice.

You may also prepare this without using an ice cream machine:  After mashing/puree the apricots, whisk into the fluff a little bit at a time, combining well. Stir in the lemon juice. Freeze until firm, scoop to serve.

Serves 6-8 when served with fresh fruit.

For more great recipes or just some nonsense, visit Mom’s Sunday Cafe!

Fire Day Friday: Thai Cashew Nut Pork

“If the only tool in your toolbox is a hammer, you’ll approach every problem as if it were a nail.”
That is why I like to use some unusual “tools” on my grill like my wok. It keeps my creativity fired up (I know, bad pun).
Woks may seem a bit unconventional for the grill but actually woks were originally designed for and used with fiery hot coals. You can do this recipe inside on your stove but I like to wok and roll on the grill. I call stir frying on the grill “stir firing”. 
Thai Cashew Nut Pork
Source:  Nibble Me This
1 pork tenderloin, silver skin removed
1 tsp sesame oil
2 tsp vegetable oil
1 onion, cut into 1/2” wedges
1 bell pepper, cut into slices (I like to use 1/3rd each of red, yellow and green just for color)
1 cayenne pepper, seeded and finely chopped (substitute a serrano, jalapeno, etc)
1 Tbsp ginger, peeled and finely diced
1 Tbsp garlic, peeled and finely diced
1 loosely packed cup of fresh basil leaves, stems removed and cut in half
2 Tbsp soy sauce
2 Tbsp fish sauce
¼ cup chicken stock
1 Tbsp sugar
2 Tbsp cold water
1 Tbsp corn starch
¼ cup unsalted roasted cashews
Slice the pork tenderloin into thin strips about 1” x 2” x 1/4” like this….
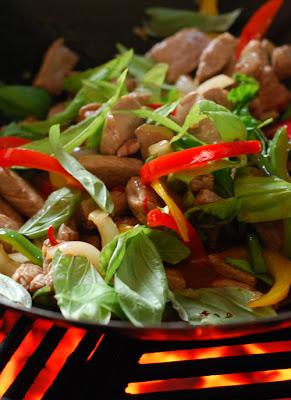
Prepare your grill to medium hot (400f) and preheat your wok. Then add the oils, let heat for another minute and “stir fire” the pork. You might need to do this in two small batches instead of one big batch to avoid over crowding the wok. (A crowded wok does not rock….it only steams and simmers.)
Cook for about 4-6 minutes until browned. Remove to a plate and tent with foil. Add the peppers and onions to the grill, “stir firing” 2 minutes.
Add the ginger, garlic and basil, tossing for another 1-2 minutes.
Stir in the soy sauce, fish sauce, stock, and sugar, cooking for another minute. While that is going on, whisk the water and starch together to form a slurry. Add to the wok.
Move the meat and veggies to the cooler sloped edges of the wok to let the liquids form a simmering hot tub in the center of the wok. Let simmer for 2 minutes or so until thickened. 
Add the cashews and toss the mix together again one last time. Serve with sweet jasamine rice.
There’s a lot of boisterous flavors in this dish but they all work together.  With the cashew only being added at the end, you might wonder why it gets named in the title.  It brings not only a taste to balance the spicy dish but also a crisp texture.

SOUR CREAM DUTCH APPLE PIE

I love apples – all apples. There I said it. Who can resist a slice of hot apple pie? Hubby wanted dutch apple, FIL wanted a turnover and I just wanted apples. So I dug into my files and found 3 recipes from grams, a vintage magazine and an old friend. I had never made any of these. Mainly because alone, they weren’t all that interesting. They all needed some UMPF! so I combined the parts I liked best from all three and came up with my version of Sour Cream Dutch Apple Pie. Together they were awesome.


SOUR CREAM DUTCH APPLE PIE
PIE
3+ cups apples, cored, peeled and chopped
lemon juice
3/4 cup sugar
2 tablespoons flour
pinch of salt
1 tablespoon cinnamon
1/2 teaspoon vanilla extract
1/2 teaspoon maple extract
1 small egg, beaten
1/2 cup sour cream (not light)
9 inch pastry shell, pre-baked and cooled
TOPPING
1/3 cup flour
1/3 cup dark brown sugar
1 teaspoon cinnamon
4 tablespoons butter, sliced extremely thin

  • Preheat oven to 350 degrees
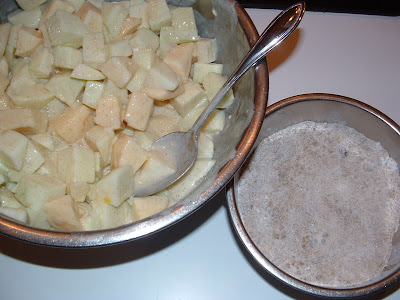
  • Chop the apples and combine with just enough lemon juice to coat and prevent browning in large bowl.
  • In a small bowl sift together the flour, sugar, cinnamon and salt.
  • Fold in the sour cream, egg, vanilla and maple extract until well blended.
  • Fold the sour cream mixture into the apples until well coated.
  • Carefully pour into the pie shell, mounding towards the center.
  • Toss together the topping ingredients until well blended.
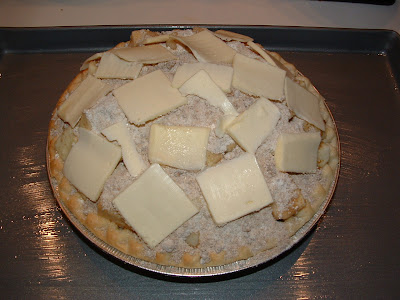
  • Sprinkle topping evenly over the apple mound.
  • Lay the pieces of butter all over the top.
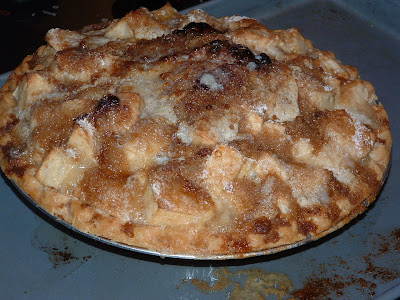
  • Bake 30 minutes or until apples are tender.
  • Best served with ice cream or fresh whipped cream. If you want to be really decadent try it with Caramel Sauce.

Veggie Tales by Kris: PEAS!

Kris here from Behold the Metatron. Martha and I are swapping days just for now.

I think I’m one of the few in my family who LOVES peas. And when made like this they are scrumptious!  I first caught wind of this recipe on Top Chef. Carla made them and I’ve been dreaming about them for years!
It’s very heavy on the butter but you can easily just put 2-3 tablespoons in. Takes out the fun, but if you need to watch your calories and fat I don’t think you will miss it too much!

We served this with Red Snapper and mushrooms. I also added asparagus to it.

Ingredients
1 pound English peas, shelled or frozen peas
1 teaspoon tarragon, chopped 
2 ounces cold butter 
1 teaspoon chives, finely sliced 
salt and pepper
4 ounces butter
1½ teaspoons lemon zest
1½ teaspoons chopped thyme
¼ teaspoon salt 


Preparation
1. Prepare compound butter: combine butter, lemon zest, chopped thyme and salt & pepper. 

2. Blanch the peas in salted water until just tender (about 5-7 minutes). Strain. 

3. Toss peas in butter, tarragon, lemon thyme butter, salt, and pepper. 

4. Garnish with snipped chives.

Fire Day Friday: Grilled Chicken with Orange Chipotle Glaze

I have a love affair with chipotles.  It’s true.  I don’t know if Chris knows about it or not, but I’m thinking he does not, as he never seems to question the numerous times chipotle shows up for dinner.  Either way, it’s not a love affair I am ready to give up yet, so let’s just keep this between us… ok?

At least I am willing to share my love with you all 🙂

The orange chipotle glaze was pretty spectacular.  The citrus and the smokiness of the chipotles blended so wonderfully together that I would swear they were meant to be together…. but I know that isn’t true as chipotle was meant for me ….and you of course!

Grilled Chicken with Orange Chipotle Glaze
Adapted from Cooking.com
– Serves 2 –
Printable Recipe 
Ingredients:
1/2 of a whole chicken
3 cups water
1 1/2 Tablespoons kosher salt
1 1/2 Tablespoons granulated sugar
1 teaspoon black pepper
1 Tablespoon minced garlic
1/4 cup frozen orange juice concentrate, thawed
2 Tablespoons chipotle puree
2 Tablespoons balsamic vinegar
2 teaspoons Dijon mustard
1 Tablespoon molasses

Directions:
Place the chicken in a large resealable bag or bowl.  Mix together the water, salt, sugar, pepper, and garlic until the sugar and salt has dissolved.  Pour mixture over chicken and allow to brine for at least 2 hours.  Remove chicken from brine and rinse thoroughly.  Pat dry with paper towel.

In a small bowl, mix together the orange juice concentrate, chipotle puree, balsamic, Dijon, and molasses until well combined.  Pour half of the glaze over the chicken and allow to rest in the refrigerator for 4 hours.

Preheat grill to 375 degrees F.  Oil grill grates.  Place the chicken, skin side down directly over the fire.  Grill for 10 minutes.  Move the chicken to indirect heat (no longer directly over the fire), and continue to grill another 10 minutes.  Move chicken back to direct heat and flip over.  Baste skin side of chicken with some of the remaining glaze and allow to grill for 10 minutes.  Baste again with any remaining glaze and continue grilling until the chicken is cooked through – 160F in the breast and 180F in the deep thigh.  Enjoy!

SUMMER APPLE COLESLAW

I love coleslaw. And I love to combine different flavors to make new salads!  I am more of a celery and cucumber fan in salads.  The husband and my brother both prefer green pepper. So I made this for them. They put up with me putting beans into almost every meal so I can certainly cave and put green pepper into their coleslaw. It admit, it was good. 
We ate this salad with the most delicious grilled cheese sandwiches with a caramelized red onion jam.  It was an excellent meal.
I’ve actually made this a couple times as everyone loved it and it is an easy summer side dish.

Apple Coleslaw
4 cups coleslaw mix
1 green pepper, chopped
2 apples, chopped
1 – 8 oz. Yoplait french vanilla yogurt, light
2 tablespoons mayonnaise, light
2 teaspoon lemon juice
1/4 teaspoon dill weed
Salt and pepper

Combine coleslaw, pepper and apples.  In a small bowl, combine yogurt, mayo, lemon juice, dill, salt and pepper. Mix and add to coleslaw.  Mix and serve.

Total calories = 467 calories
4 servings = 117 calories per serving

Grilled Cheese with Red Onion Jam + Apple Coleslaw = 515 calorie dinner

Fire Day Friday: Grilled Chicken Sandwich with Manchalapeno sauce

Never heard of Manchapeno sauce before?

Me either until I made it up the other day when I made up this summery grilled chicken sandwich inspired by the Kentucky Hot Brown. Manchapeno sauce is a white sauce powered by a fire roasted jalapeno pepper and the salty nutty taste of manchego cheese.

The result was decadent. If it wasn’t for the sound of the crispy bacon as I bit into this, I think I would have been able to hear my taste buds sing.
Open Faced Grilled Chicken Sandwich with Manchapeno Sauce
3 large chicken thighs, boneless, skinless
Chicken Rub (see recipe)
3 sliced Italian bread
2 ea roma tomatoes, sliced in 1/4” pieces
6 slices bacon, cooked
Manchapeno Sauce (see recipe)
NMT Basic Chicken Rub
½ tsp kosher salt
¼ tsp black pepper
¼ tsp garlic powder
¼ tsp paprika
¼ tsp turbinado sugar
Manchapeno Sauce
1 Tbsp butter, unsalted
1 clove garlic, minced
1 Tbsp flour, all purpose
1 cup milk
1 cup manchego cheese
¼ tsp pepper
¼ tsp salt
1 jalapeno (red if possible), fire roasted, peeled and seeded
2 Tbsp parsley, finely diced
Season chicken with the chicken rub. Feel free to substitute a purchased chicken rub if you have it on hand.
Make the “manchapeno sauce”. Melt the butter and saute garlic over medium heat for 1-2 minutes. Add the flour and stir until well blended in (2-3 minutes), starting to form a roux.
Add in the milk and lightly simmer for 5-6 minutes. Stir in the cheese in small batches until all blended. Stir in the salt, pepper, jalapeno, and parsley. Keep warm on low, stirring occasionally.
Grill chicken over direct heat at 400f for 4 minutes. Flip can cook another 4 minutes.
Boneless thighs are thin and cook quick, keep an eye on them.
Flip again and cook 1-2 minutes. Flip last time and cook 1-2 minutes until chicken is an internal temp of 160f.
Toast both sides of the bread over the flames. 
Top each piece of bread with a piece of chicken, slices of tomato, and 2 slices of bacon. Then ladle the sauce over the sandwich and serve immediately.
Note: I used a red jalapeno from our front yard. Fire roasting the pepper gives it a smokiness like a “quickie chipotle”. Feel free to use a regular jalapeno or any other fire roasted chili. If you don’t like heat, you could use a roasted red bell pepper instead.