Category: MEMES & LINK PARTIES
TRIVIA TUESDAY ~ BLOG 365.279

HAPPY HOMEMAKER MONDAY with MENUS & RECIPE LINKS week 40 of 2026 ~ BLOG 365. 278

It’s Monday morning!! Be sure to start your week right and join us at Happy Homemaker Monday with our host, Sandra at Diary of a Stay at Home Mom
I’m in EVEN MORE INTO the “BER months mindset than I was in September, so HELLO OCTOBER!! I’m REALLY glad you’re here. 🙂

LAST WEEK RECAPPED
GOOD MORNING I barely had time to think and put two thoughts together last week. There were A LOT of last minute changes to the newsletter and calendar that I write for the Eagles as well several flyers to be created. It’s the one job I enjoy and want to keep doing – love doing the graphics and layout work.
We helped an elderly friend with a water heater leak and a few other errands and chores because she couldn’t use her hand much after a reaction to a bug bite sent her to urgent care when her hand swelled up to twice its size and put her in pain. I’ve been cat, house and garden sitting so have been busy doing end of the season things for both us and them. I also deep cleaned the BIG garage 🙂
I actually took a day for myself and went shopping for some fall clothes, got the car washed, roamed around Costco for some Christmas ideas…

THOUGHT FOR THE DAY

THE WEATHER OUTSIDE
We ended up with an unplanned bit of a “warm” spell that brought along its friend, humidity this past week. At least for 2 hours a day 🙂 After the sun went down the nights were nice and cool so the mornings were also quite nice. It was just the 2-4 PM time that got too warm and humid.
We have a couple days left of that “warm” spell and then we’re supposed to return to out normally scheduled fall weather in the high 60’s or low 70’s with lows in the 40’s. We really need rain so hope next week brings us better news.
TO DO, APPOINTMENTS, DVR/TV & PROJECTS
|
THIS WEEK’S TO DO LIST, PROJECTS, TRAVEL, APPOINTMENTS, MENUS & DVR/TV
|
|
READING TIME
I’m still about to finish THE BAKING GAMES by Rachel Hannah. I usually like her books, but this one is dragging for me. Still not sure what I’ll read next.
FUNNIES


MENU PLANS

BREAKFAST is always a work in progress for me – it will generally be hot water and a fruit yogurt 😀
| 10/5 MONDAY | 10/6 TUESDAY | 10/7 WEDNESDAY |
10/8 THURSDAY
|
10/9 FRIDAY | 10/10 SATURDAY | 10/11 SUNDAY | |
|
DINNER
|
TRIVIA NIGHT CORN/YOYO clean out refrigerator night or you’re on your own
|
PORK RIB STEW & SALAD
|
TRIVIA NIGHT CORN/YOYO clean out refrigerator night or you’re on your own
|
CHICKEN CROQUETTES & TOMATO FRITTERS
|
TRIVIA NIGHT CORN/YOYO clean out refrigerator night or you’re on your own
|
POT ROAST, MASHED POTATOES & GLAZED CARROTS
|
YAKI SOBA TERIYAKI CHICKEN
|
|
DESSERT
|
|
FAVORITE PHOTOS FROM THE CAMERA
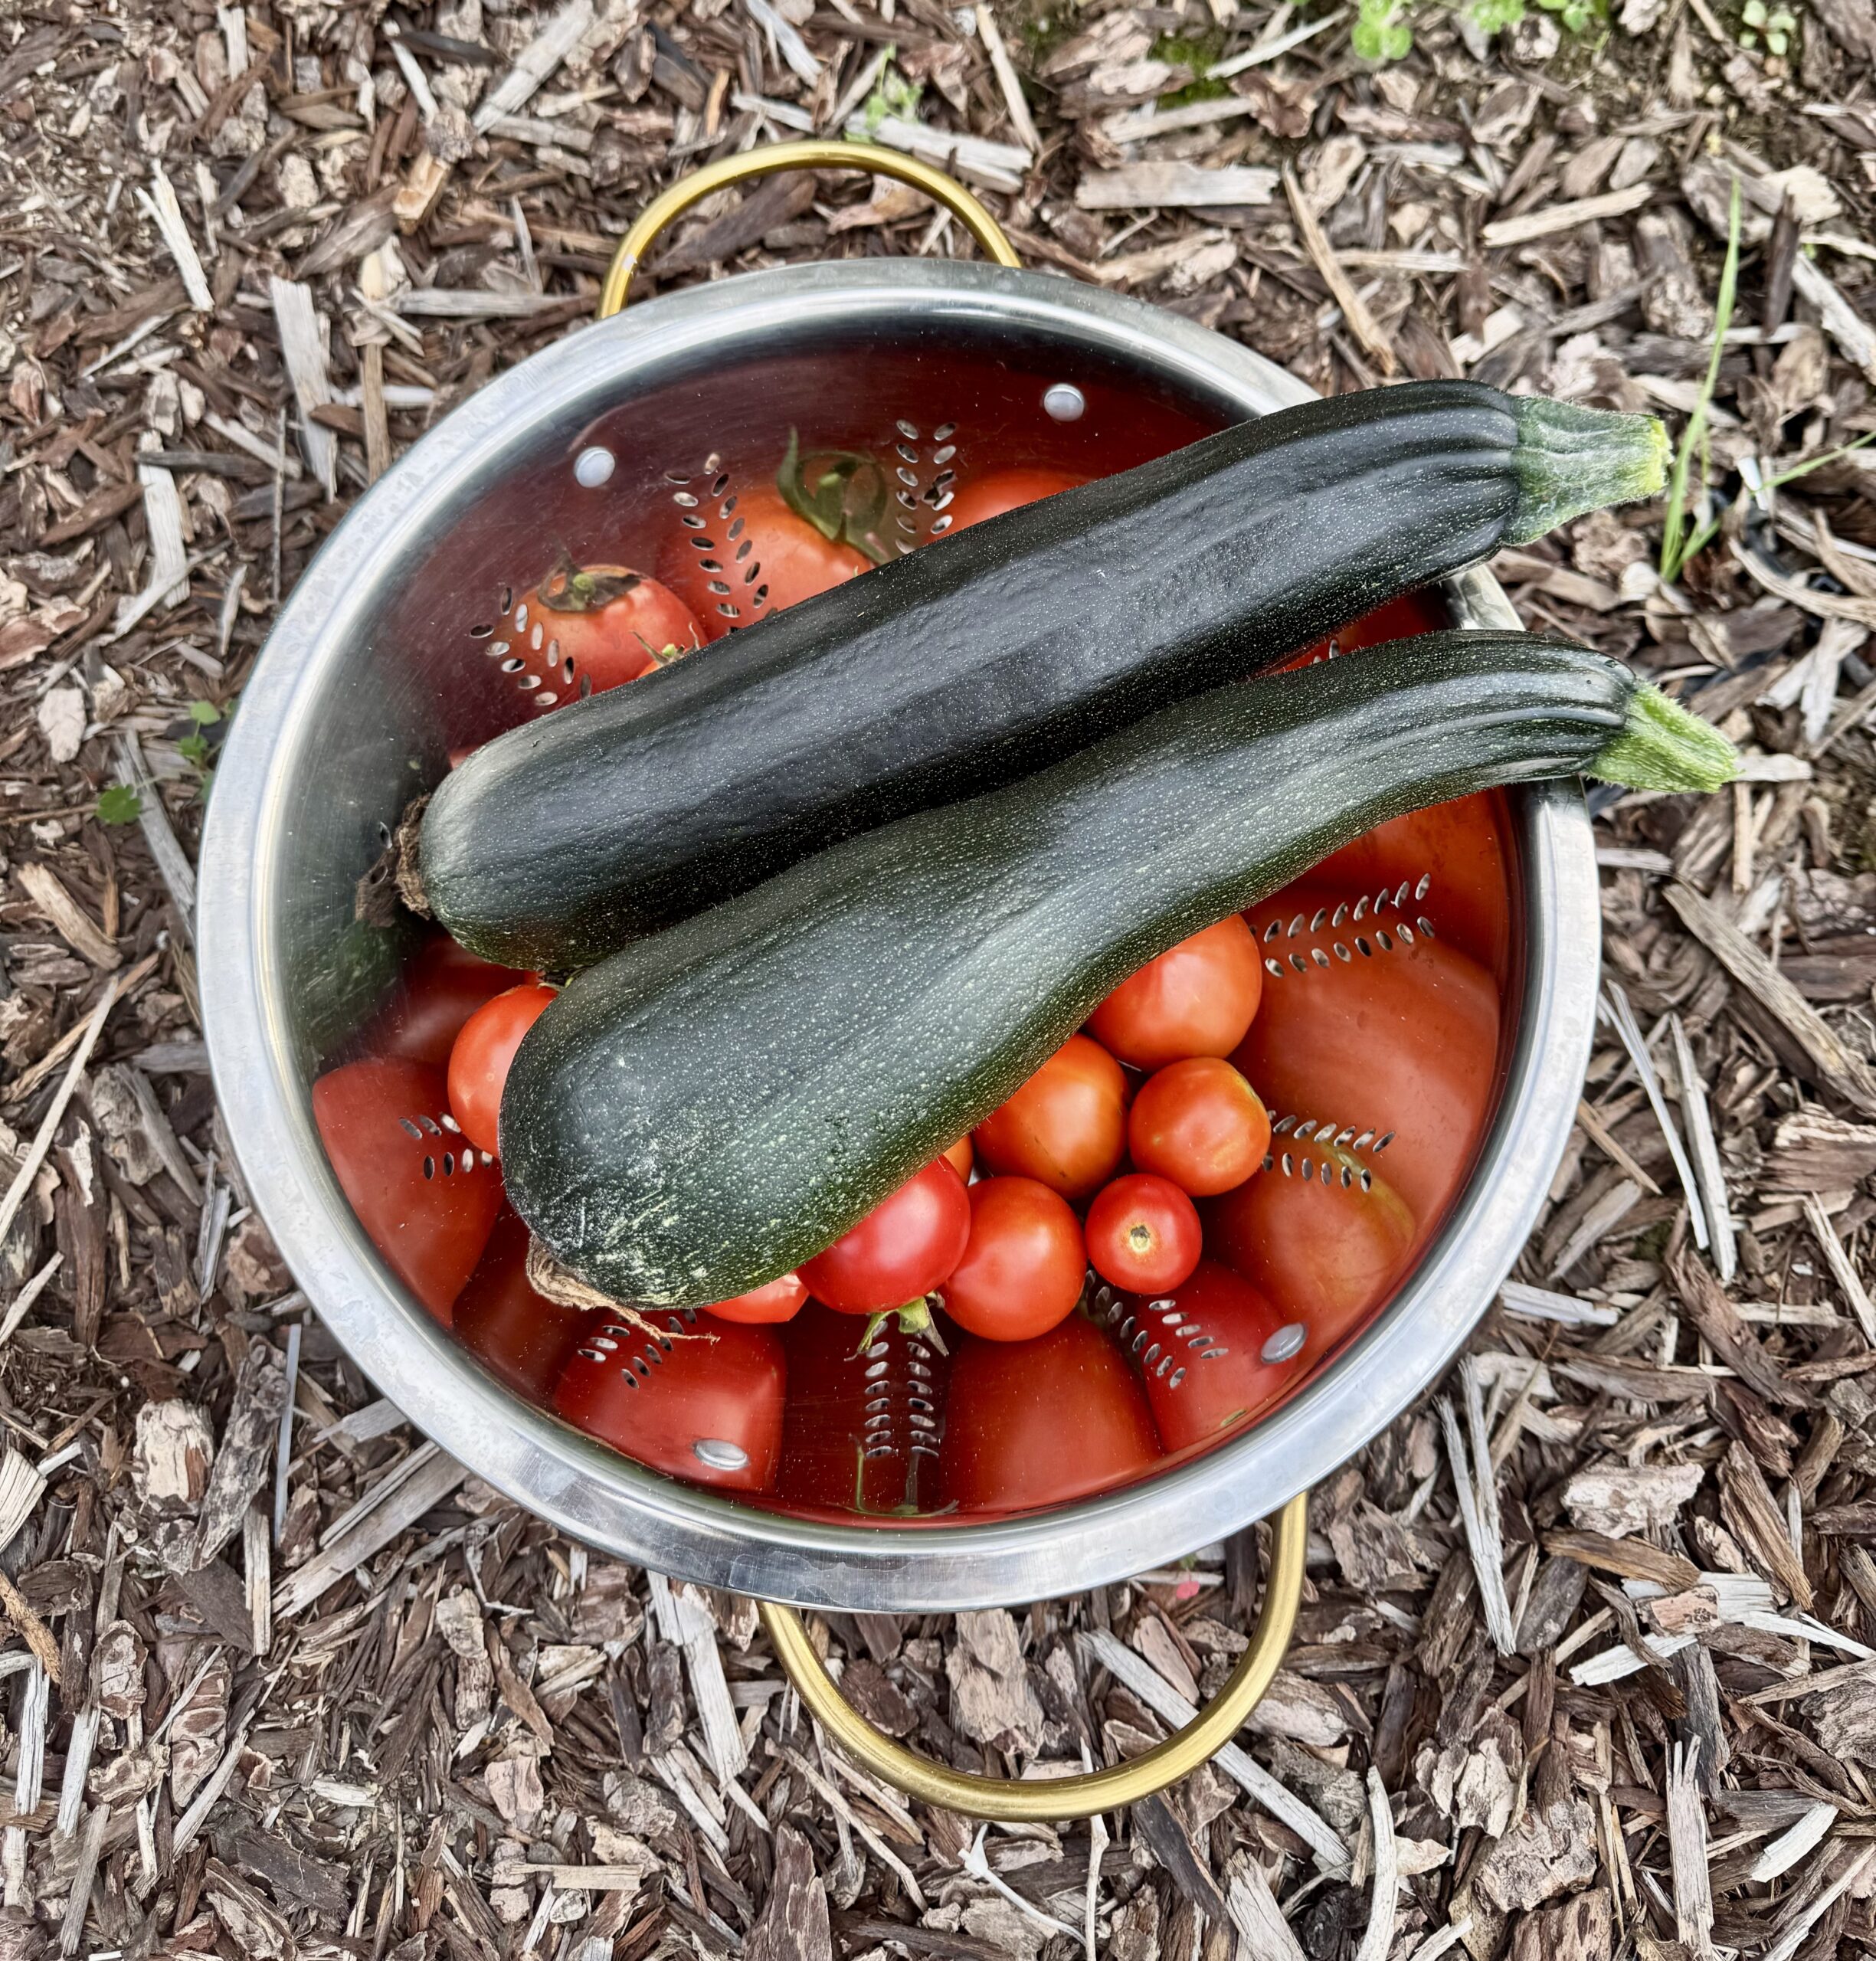
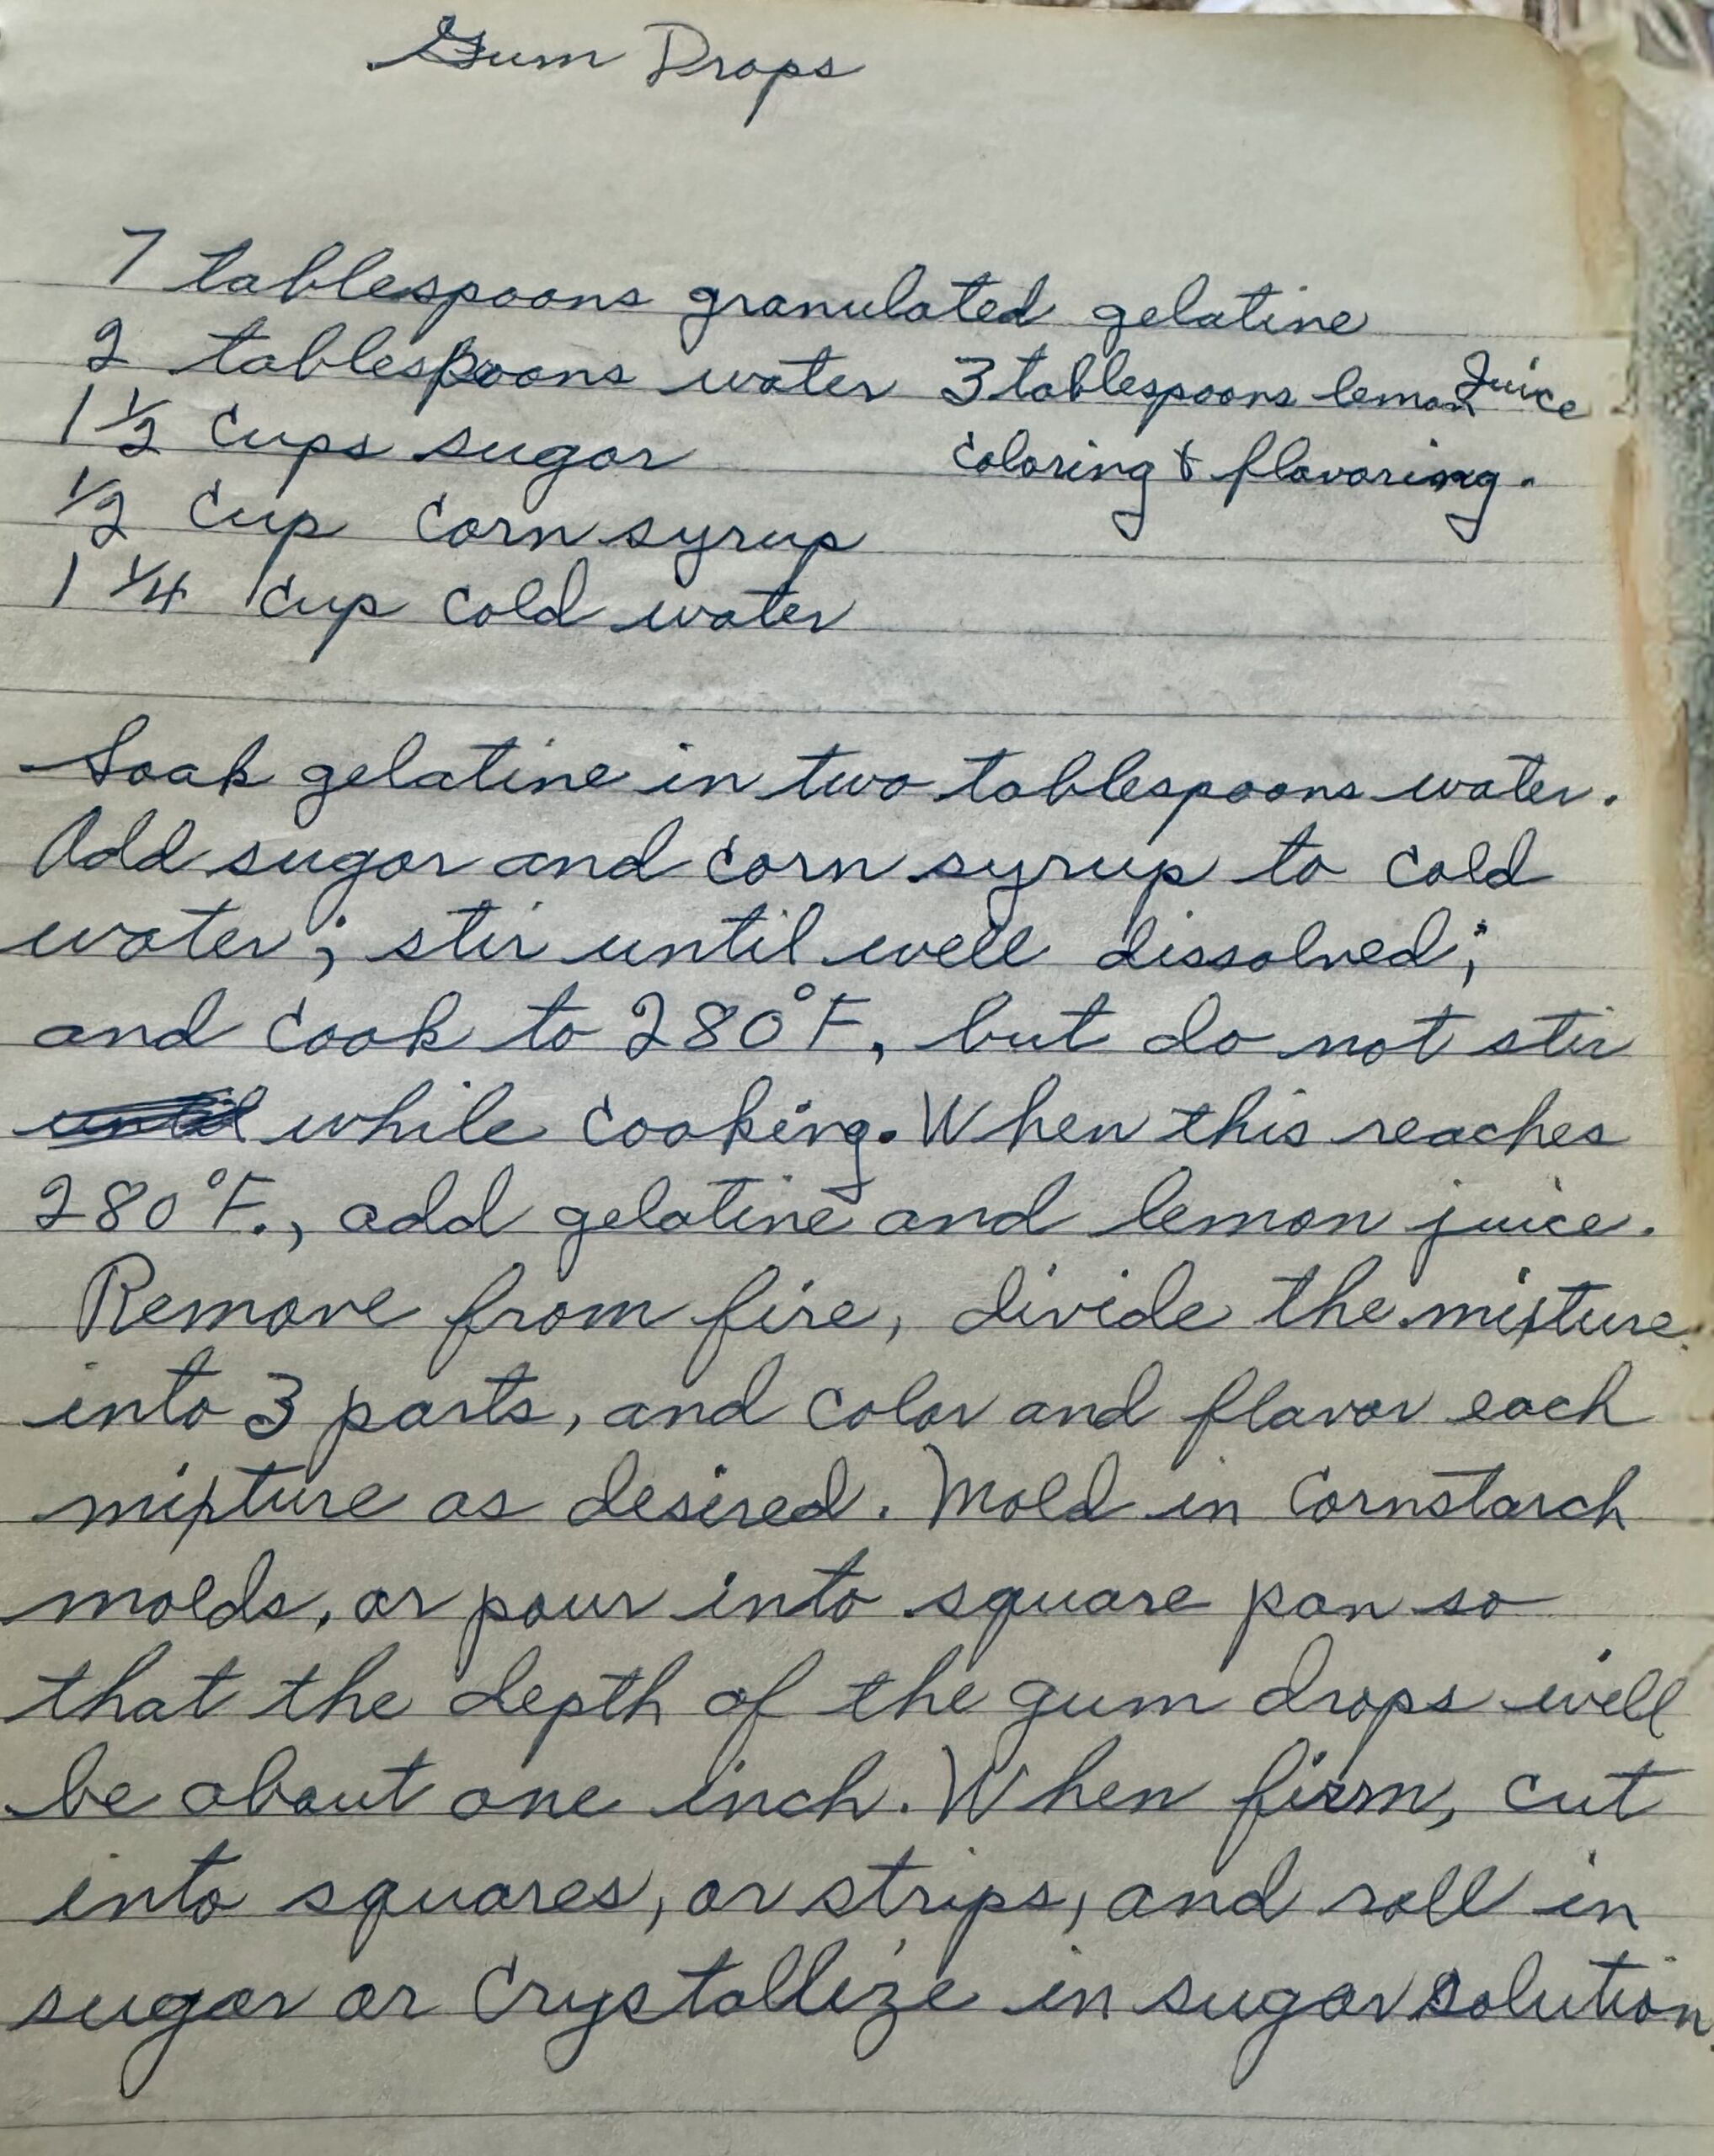
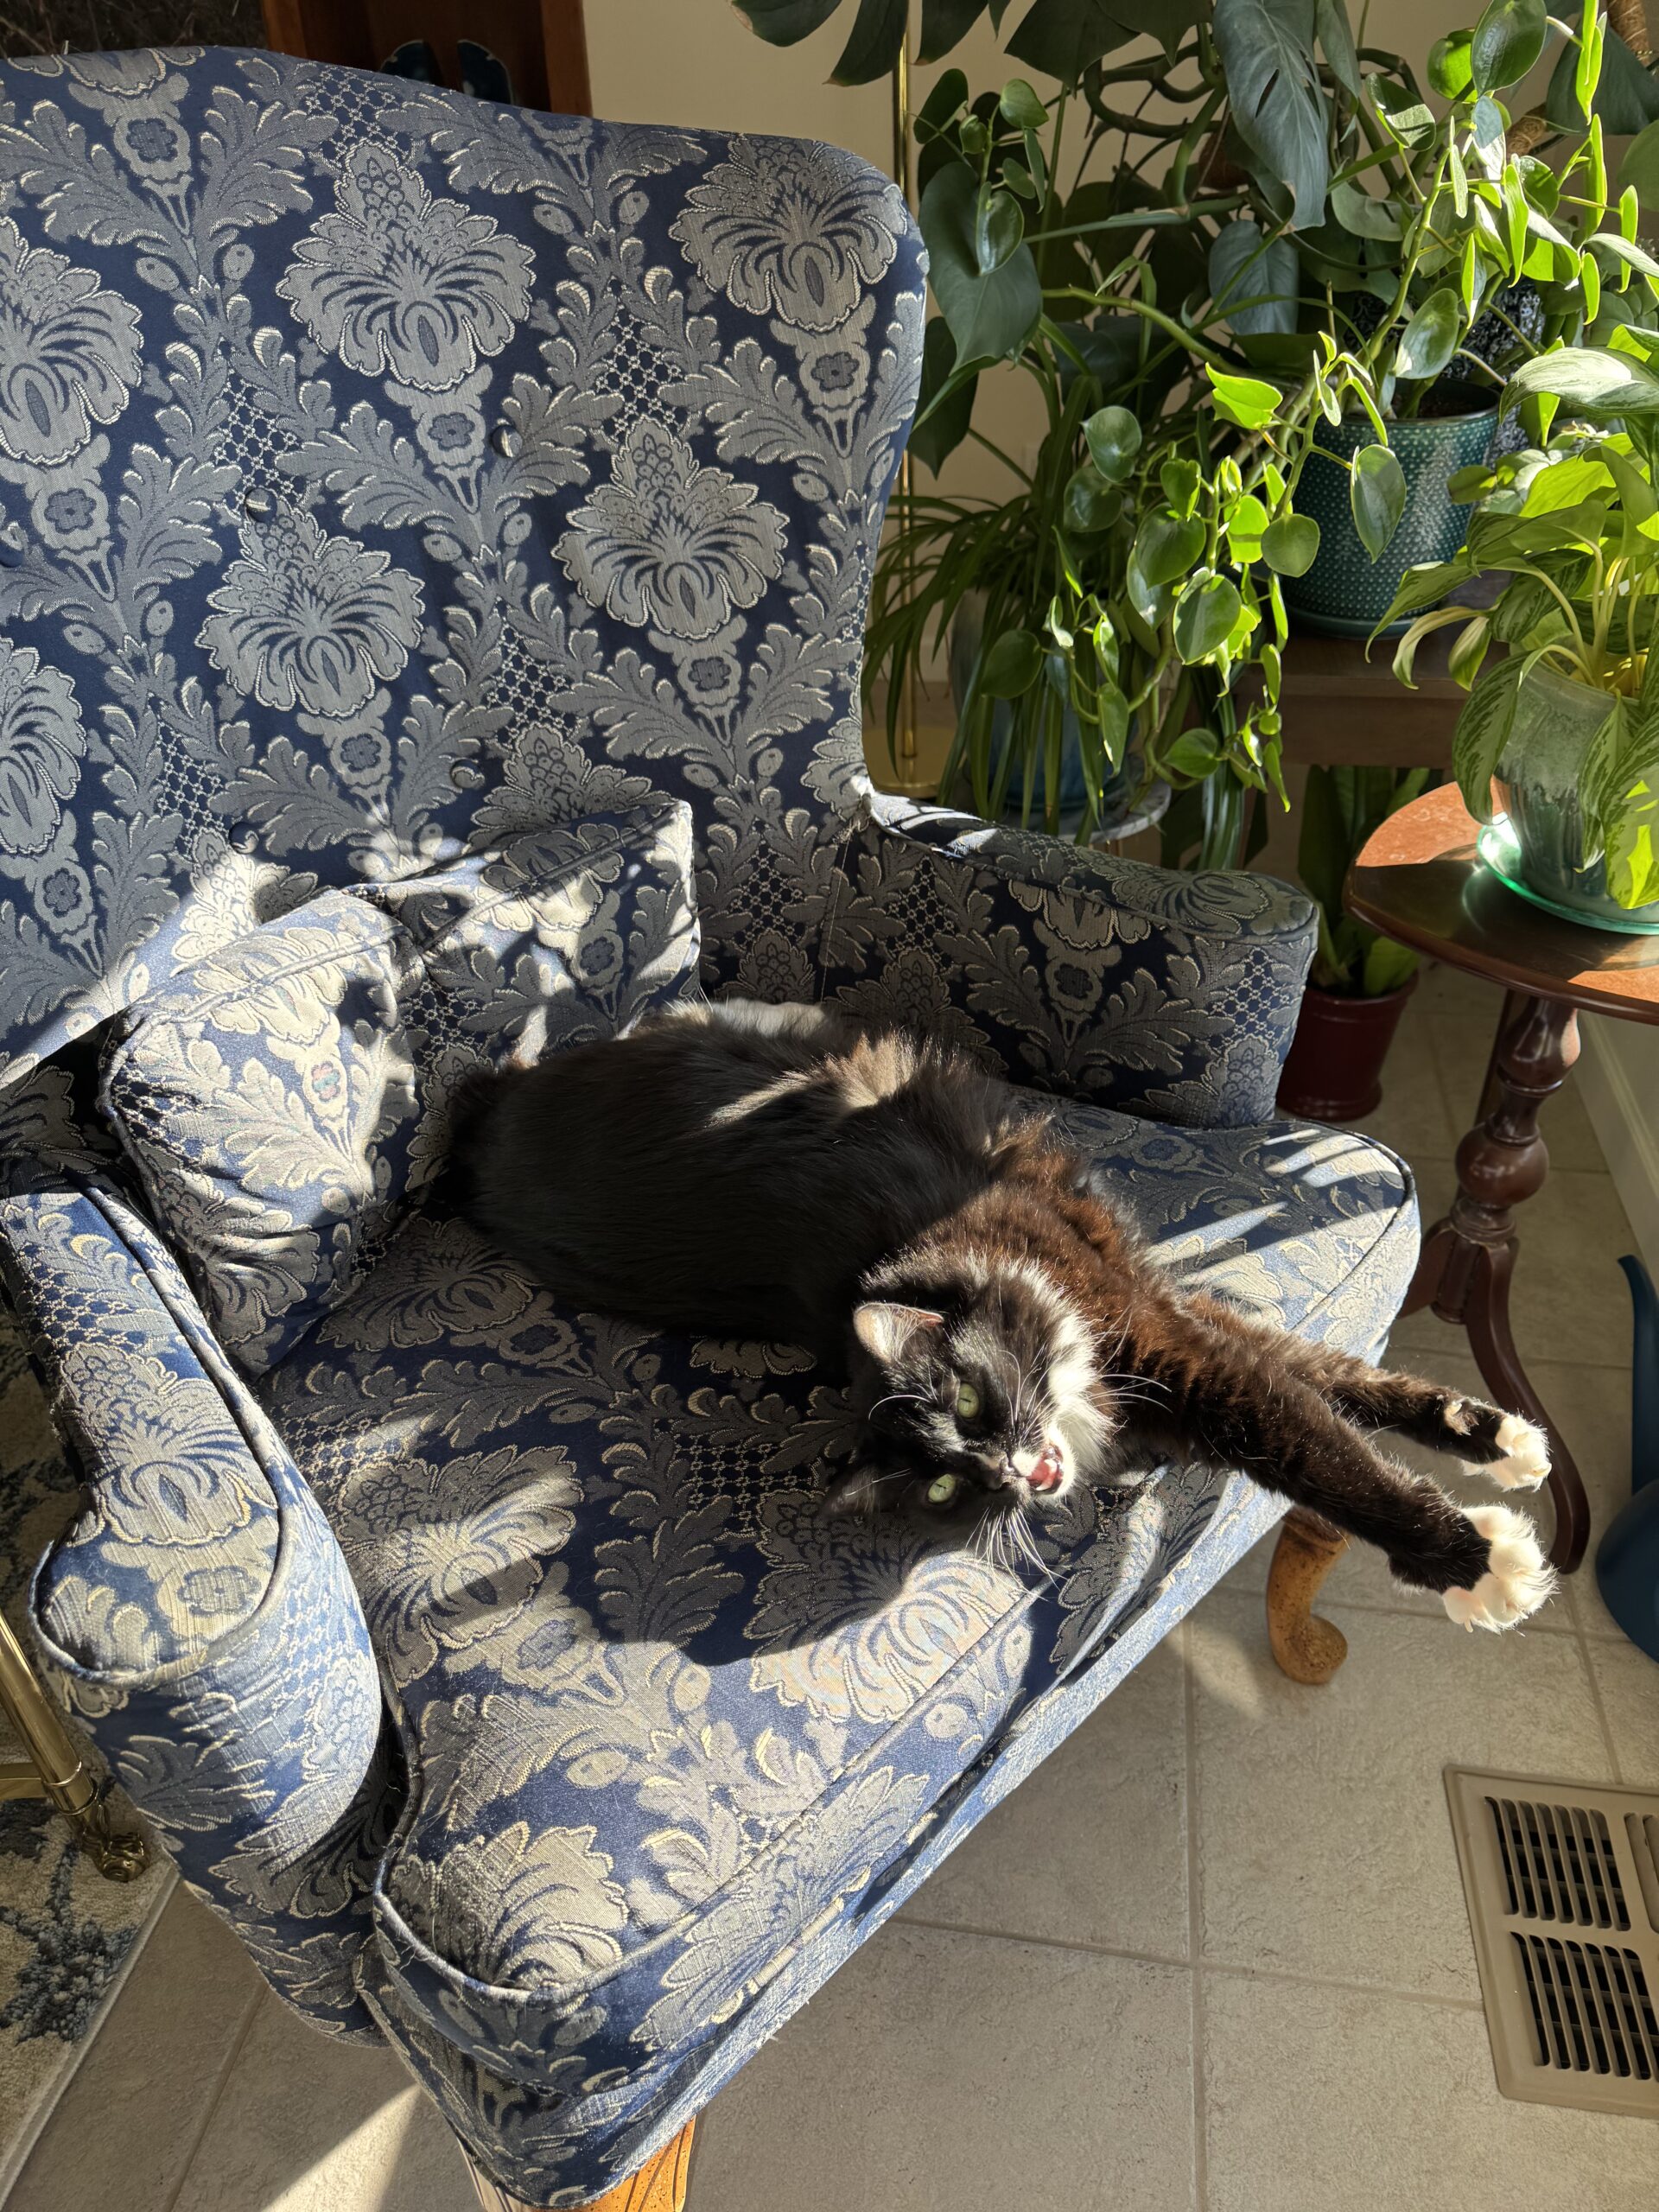
I’m cat, house, garden sitting for my neighbor while their off on a bucket list trip! The cat is fat and happy with where I moved her favorite chair to catch the sun. I gleaned the last of the garden yesterday for making another batch of Sunday sauce to put in their freezer. He grows beautiful roses and she loves colorful flowers. She likes to make gum drop cookies every year. I ran across an antique recipe for her to make her own gumdrops.


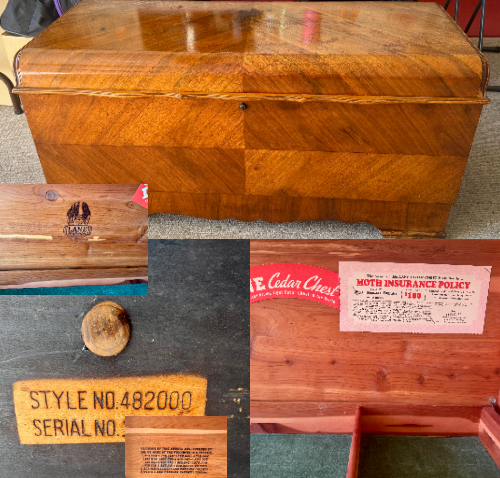
And my favorite is this 1950’s Waterfall hope chest I found for a steal on Saturday. It’s in excellent antique shape with the serial number and even the original tags in lid.
INSPIRATIONS


LIFE TIP

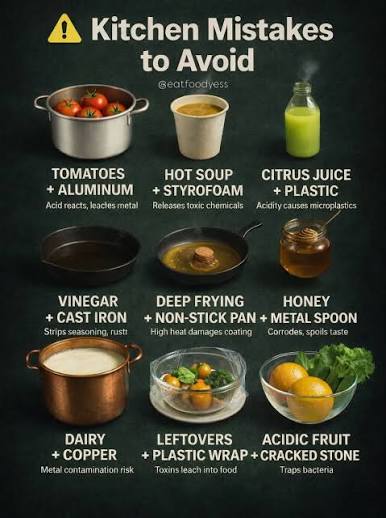
HOMEMAKING / COOKING TIP
COOKING THURSDAY RECIPES COMING UP THIS WEEK
- SWEDISH MEATBALLS aka SVENSKA

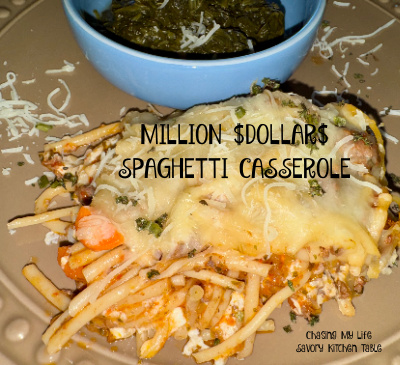
- MILLION DOLLAR SPAGHETTI CASSEROLE
- GRAMS OLD FASHIONED APPLE CRISP

COOKING THURSDAY RECIPE LINKS FROM LAST WEEK
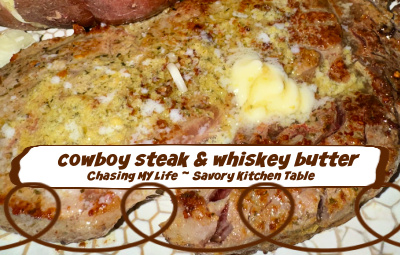
- COWBOY STEAK & WHISKEY BUTTER
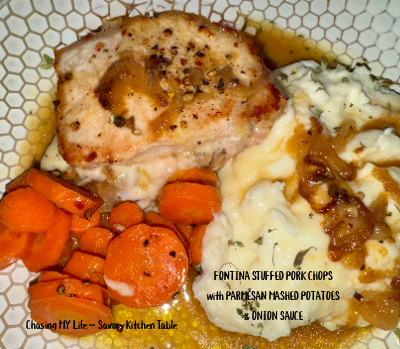
- FONTINA STUFFED PORK CHOPS with MASHED POTATOES & ONION SAUCE


SILENT SUNDAY ~ BLOG 265.277

SATURDAY COFFEE ~ BLOG 365.276

TGIF ~ BLOG 365.275

COOKING THURSDAY ~ COWBOY STEAK & WHISKEY BUTTER ~ BLOG 365.274B
From the old magazine files I found this fun summer recipe from an old 2017 Midwest Living magazine.
COWBOY STEAK & WHISKEY BUTTER
WHISKEY BUTTER ~ Makes about 1 cup
1 cup (2 sticks) unsalted butter, softened
1/4 cup FINELY chopped shallots
1 tablespoon snipped fresh parsley
1 tablespoon QUALITY whiskey
FRESH ground sea salt and black pepper, to taste
1/2 teaspoon Dijon mustard
1/2 teaspoon Worcestershire sauce
- In a medium bowl combine the butter, shallots, parsley snips, whiskey, 1/2 teaspoon Dijon mustard, Worcestershire sauce, FRESH ground sea salt and black pepper, to taste.
- Cover and chill until ready to serve.
NOTES:
- Store the remaining Whiskey Butter in the refrigerator for up to 1 week or freeze for up to 3 months.
- Store the remaining rub in a covered container at room temperature for up to 3 months.
RUB
1 tablespoon packed brown sugar
1 tablespoon ground chile pepper powder
1 tablespoon ground chipotle chile pepper
1 ½ teaspoons smoked paprika
1 ½ teaspoons ground white pepper
1 teaspoon freshly ground black pepper
- Combine the sugar, chile pepper powder, chipotle chile pepper, paprika, white pepper and black pepper in a small bowl.
STEAKS
2 1 pound bone-in beef ribeye steaks, cut 1 inch thick
2 teaspoons avocado oil
Snipped fresh parsley (optional)
- Trim fat from steaks.
- Brush both sides of steaks with oil.
- Sprinkle about 1 tablespoon of the rub evenly over both sides of steaks; rub in with your fingers. Set aside for an hour.
- Grill to desired doneness.
- Rest 5-10 minutes. Spoon Whiskey Butter onto steaks.
- Sprinkle with parsley.
COOKING THURSDAY ~ FONTINA STUFFED PORK CHOPS with MASHED POTATOES & ONION SAUCE~ BLOG 365.274A
FONTINA STUFFED PORK CHOPS with MASHED POTATOES & ONION SAUCE
Adapted from BIG OVEN
CHOPS
4 tablespoons, unsalted butter, divided 2 + 1 + 1
1 LARGE onion, thinly sliced
1-2 cloves garlic, FINELY minced
1 teaspoon FRESH thyme leaves
1 teaspoon smoked paprika
FRESH ground sea salt and black pepper, to taste
4 LARGE, THICK bone-in, center cut, pork chops
1 cup FRESHLY shredded Fontina cheese
- Heat 1 tablespoon unsalted butter in a large nonstick skillet over medium heat.
- Add onions, cooking and stirring occasionally 15-20 minutes, until lightly caramelized.
- Stir in garlic, thyme leaves, paprika and FRESH ground sea salt and black pepper, to taste.
- Cook, stirring often, until fragrant, 1-2 minutes. Remove from heat: set aside.
- Using a paring knife, cut a 2-inch slit in sides of pork chops, creating a pocket, cutting to the bone.
- Stuff each with 1/4 cup shredded fontina cheese and 1 tablespoon onion mixture.
- Set aside remaining onion mixture for later use.
- Preheat oven to 375°.
- Heat 1 tablespoon butter in nonstick skillet over medium-high.
- Sprinkle both sides of pork chops evenly with FRESH ground sea salt and black pepper, to taste.
- Cook stuffed pork chops 2 at a time in skillet, 3 minutes per side undisturbed, until golden brown on each side. Add more butter before adding more pork chops.
- Transfer chops to a wire rack set inside a rimmed baking sheet.
- Transfer baking sheet to preheated oven and bake pork about 18-22 minutes.
- Remove from oven, let rest 10 minutes.
POTATOES
2 pounds Russet potatoes, peeled and cut into 2-inch pieces
1/4 cup WHOLE milk
1/4 cup sour cream
1 cup FRESHLY shredded Fontina cheese
5 tablespoons unsalted butter, divided 4 + 1 tablespoons
FRESH ground sea salt and black pepper, to taste
1 cup homemade chicken stock
1 tablespoon apple cider vinegar
- While pork chops bake add potatoes to a large saucepan and cover with cold water. Bring to boil over medium-high and simmer until tender, about 15 minutes. Drain and return potatoes to saucepan.
- Stir in milk, sour cream, Fontina cheese, butter, FRESH ground sea salt and black pepper, to taste until combined.
- Mash to desired consistency.
- Cover to keep warm.
- Add 1 cup chicken stock and remaining onion mixture to skillet over medium.
- Cook 5-6 minutes, stirring often, until slightly reduced.
- Remove from heat, and stir in apple cider vinegar and remaining 1 tablespoon of butter.
ASSEMBLY
- Plate pork chops and mashed potatoes.
- Top with onion sauce and sprinkle with fresh thyme leaves.
WORDLESS WEDNESDAY ~ BLOG 365.273

TRIVIA TUESDAY ~ BLOG 365.272

HAPPY HOMEMAKER MONDAY ~ week 39 of 2026 with MENU & RECIPE LINKS ~ BLOG 365.271

Be sure to join us at Happy Homemaker Monday with our host, Sandra at Diary of a Stay at Home Mom
And just like that the first “BER month is almost over 🙁

LAST WEEK RECAPPED

GOOD MORNING I had a SUPER busy, but very productive week and feel like I’m finally getting back into the swing of things 🙂
MONDAY~THURSDAY I finally got all the shopping done to restock the kitchen and we had several appointments that all seemed to be at weird times of the day so I felt like I was running back and forth A LOT!!!
FRIDAY~SUNDAY
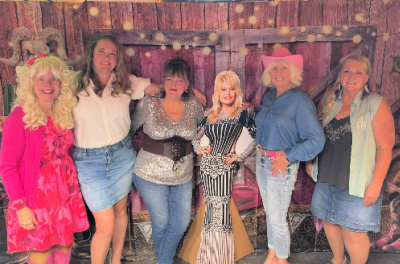
Friday was one of my closet friends birthday. She also happens to manage a bar and grill. So what better way to celebrate than having a 9-2-5 Dolly Day party? We had a lot of fun. She did up baked potatoes and fried chicken. I made banana pudding from Dolly’s own recipe and banana nut muffins. We did a baked potato bar with the chicken and fixin’s, played Dolly’s music on the juke box all night and just had good clean birthday fun for her. I even won the Dolly dress up award. YEP, we even dressed up right down to my pink cowboy boots. We had a few Dolly’s and even a Burt Reynolds 🙂
Saturday was another story as we are getting to the end of September it was time to clean up the garden! Hubby and I spent most the morning cleaning out the bed and covering them for winter. I then prepped all the food for Sunday, baked a cake and cleaned the kitchen, prepped 12 quarts and 4 gallons of “SUNDAY sauce” for the freezer, as well as got 5 loads of laundry done. It was time to change the bed linens over to cooler weather and wash the blankets etc…
Sunday was a true day of rest and football! We also had a dinner for another friend’s birthday. September is certainly a month of birthdays.
THOUGHT FOR THE DAY

THE WEATHER OUTSIDE
This will be an absolutely beautiful week of days in low to mid 70’s with nights in the 40’s and lots of sun.
TO DO, APPOINTMENTS, DVR/TV & PROJECTS
|
THIS WEEK’S TO DO LIST, PROJECTS, TRAVEL, APPOINTMENTS, MENUS & DVR/TV
|
|
READING TIME
I’m about to finish THE BAKING GAMES by Rachel Hannah. I usually like her books, but this one is dragging for me. Not sure what I’ll read next.

FUNNIES


MENU PLANS
BREAKFAST is always a work in progress for me – it will generally be hot water and a fruit yogurt 😀
| 9/28 MONDAY | 9/29 TUESDAY | 9/30 WEDNESDAY |
10/1 THURSDAY
|
10/2 FRIDAY | 10/3 SATURDAY | 10/4 SUNDAY | |
|
DINNER
|
TRIVIA NIGHT CORN/YOYO clean out refrigerator night or you’re on your own
|
CHICKEN CROQUETTES & TOMATO FRITTERS
|
CORN/YOYO clean out refrigerator night or you’re on your own
|
CORN/YOYO clean out refrigerator night or you’re on your own
|
CHICKEN MADEIRA, POTATOES AU GRATIN & SPOON BREAD
|
GREEN CHILE PORK & BEANS with CHEESY CORN PUDDING
|
CHICKEN POSOLE
|
|
DESSERT
|
|
APPLE CHERRY CAKE
|
FAVORITE PHOTOS FROM THE CAMERA
I’m still trying to figure out WHY? this snail crawled all the way up to the top of the arch. The arch I fear won’t make it another season with all the rust I discovered when we pulled down the clematis vines, but we’ll see. We also had a pretty dramatic skyline Friday night. I’m also trying to figure out why the Azaleas are blooming.

INSPIRATIONS

LIFE TIP

HOMEMAKING / COOKING TIP
COOKING THURSDAY RECIPES COMING UP THIS WEEK
- COWBOY STEAK & WHISKEY BUTTER
- FONTINA STUFFED PORK CHOPS, MASHED POTATOES & ONION SAUCE
COOKING THURSDAY RECIPE LINKS FROM LAST WEEK