


Category: MISC
GREEN TABASCO CHICKEN
 GREEN TABASCO CHICKEN
2 pounds chicken tenders
1 teaspoon salt
1/2 teaspoon freshly ground black pepper
1 orange halved
1 teaspoon Penzey’s California crushed jalapenos
2 cloves garlic, minced
1/4 cup Green Jalapeño Tabasco Sauce
1 bunch green onions, sliced thin
1/4 cup melted butter
1-1/2 chicken broth
- Preheat oven to 350 degrees.
- Juice 1/2 of orange.
- Section other half of orange.
- In a small sauce pan whisk together the orange juice and green Tabasco sauce.
- Add the butter, garlic and chicken broth.
- Simmer 10-15 minutes until well blended and slightly reduced.
- Spray a baking pan with pure.
- Toss together the chicken and green onions. Arrange in baking dish. Add orange sections.
- Pour sauce over top.
- Bake 30 minutes. Serve with Parmesan Potatoes and tortillas.
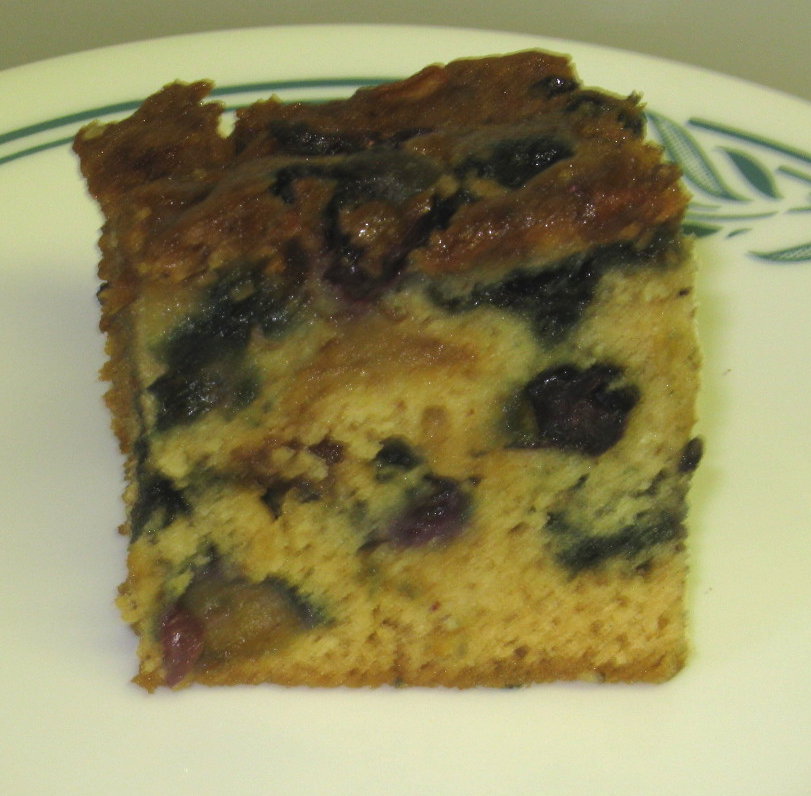
CANTALOUPE CAKE

Cantaloupe Cake
By Bizzy from Bizzy Bakes
What do you do when you have leftover blueberries and cantaloupe? My answer would be, make a fruit salad. That sounded like a wonderful idea so I did a search for cantaloupe recipes. Why, I did not search for a cantaloupe fruit salad is beyond me. Cantaloupe recipes brought all kinds of interesting combinations for a variety of different presentations.
The minute, I saw cantaloupe cake, I knew what I was doing. I am sure, this leaves you, scratching your head. Is it just me, or have you heard or eaten a cantaloupe baked good? If not, it is time to try something new.
Cantaloupe Cake (adapted from CD Kitchen)
Serves/Makes: 10
Ingredients:
1/2 cup oil
11/4 cup sugar
3 eggs
2 cups self-rising flour
1 teaspoon cinnamon
1/2 teaspoon salt
1 teaspoon baking soda
1/2 teaspoon baking powder
1 cup fresh cantaloupe, cut into large chunks
1 cup blueberries
- In food processor, blend cantaloupe until partially smooth with small chunks.
- Combine oil, sugar, cantaloupe and eggs, beat until smooth. Add flour, cinnamon and baking soda, mix until smooth. Fold in blueberries.
- Spread mixture into a greased 9×13 inch pan. Bake at 375 for 30 minutes.Lower heat to 325 F and bake 10 more minutes. Cool completely.
BANANA BLUEBERRY CRUNCH

I usually make everything from scratch, but this recipe is too good to mess with much. I have reduced the fat a bit and altered the ingredients to meet my family’s likes, but other than that this recipe is fantastic as is. The key is to remember to layer exactly as listed! It is great in a pinch since most ingredients are always in the cupboard or freezer. The original recipe called for the butter before the nuts and coconut, but I changed that. By putting it last, the nuts and coconut toast up fantastically.
BANANA BLUEBERRY CRUNCH
1 large can crushed pineapple, undrained
2-3 cups frozen blueberries
1-3 ripe banana(s), sliced thin
1 cup sugar
1 box yellow cake mix, dry
1/2-1 cup minced walnuts
1/2-1 cup flaked coconut
1 1/2 -2 sticks butter, melted
- Preheat oven to 350 degrees
- Layer exactly as listed in even layers
- Bake 45-60 minutes until it tests done


IT’S TAILGATING TIME AGAIN!
This week on Thursday, September 8th, NFL football season officially begins. You know what that means don’t you? Yes, it’s time for the second annual season of Tailgating Time!

It doesn’t matter if you are a football fan or not, great party food is always a good thing. Bring over your grilled goods, chips and dips, appetizers, chili and chowders, cocktails, or any recipes that would be great for the football party buffet!
We have decided to make a change this year in the way Tailgating Time will work. Instead of a new linky for each week we will be using the same linky to keep all the great recipes in one place. This will provide easy access to the recipes and create one big awesome recipe index collection. There is no limit to how many you add – of course we hope you will add a new recipe each and every week! Tailgating Time will generally be posted each week on Sundays at noon.
If any of you would like to host along with us you can click –> get the InLinkz code to add the linky to your blog too. You can post it once in awhile or every week during football season, that’s up to you. The only thing we ask is that you leave a comment here to let us know you are co-hosting, and that you visit and comment on as many of the participants as you can.
We are opening the linky today to get things rolling. I can’t wait to see what you will bring to the party. Let the games begin. Whoo-hoo!
CHICKEN “FRIED RICE”
Chicken “Fried Rice”
1-1/2 pounds chicken breast, diced
Stir fry vegetables
3-4 cloves of garlic, minced
1/2 onion, sliced
2 cups bulgur wheat
4 cups water
2-3 tablespoons olive oil
1 egg
1/4 cup teriyaki sauce (to taste)
Here’s what you’ll need:

Disregard the soy sauce, sesame seed oil, rice wine vinegar. I was going to use it to make a sauce but I could never get it to taste right so I just went with teriyaki.


Cook bulgur wheat according to directions. It is a 2:1 ratio so I used 4 cups of water and 2 cups of bulgur. I minced 3-4 cloves of garlic and sliced up 1/2 of an onion.


Dice up the chicken into bite-sized cubes.
Put the bulgur on to boil and let it boil for 10-15 minutes.


Saute the onions and garlic in 2-3 tablespoons of olive oil in either a wok or a hot skillet.
Add the chicken.


Once most of the water has cooked out of the wheat, pour it over into the pan with chicken, onions, and garlic. Move all of it over to one side and crack the egg. Scramble it up and mix it in with the rest of the mixture.


Add the vegetables. If you use canned, make sure to drain. I used frozen. After letting the veggies cook for a couple of minutes, I poured about 1/4 cup of teriyaki sauce and mix it together.

I really wanted to have the wheat crisp up like a fried rice so I pushed it all down into the skillet and let it cook for 2-3 minutes. I then scooped it all around and pressed it all down again and let it cook for another 3-4 minutes. This really gave the wheat some crispiness.
This is what you’ll end up with:

This dish was so good and so healthy. If you dont’ know anything about bulgur wheat and you are trying to eat more healthfully, I encourage you to do some research on it. I love it.
I am really glad that I pushed the wheat down into the skillet to really let it crisp up. It gave it the crispiness of Chinese fried rice and even Kanin really liked it. He ate 3 helpings!!
BTW, the broccoli was great with the earthiness of the wheat. I should have just added a whole bag of broccoli but I also added peas, carrots, and corn.
This pan was full if it gives you any indication of how much everyone liked it.

Hope you enjoy!
April
HAPPY BIRTHDAY MARTHA!!!!!!

I want to wish my dear friend Martha from The Motivation Station & Seaside Simplicity, OUR KrAzY kitchen, & Menagerie a very Happy Birthday today. Stop by and show her some bloggy love!
Fire Day Friday: Slow Smoked Spare Ribs
Normally I try to keep my Fire Day Friday posts to short grilling recipes but since it is Labor Day Weekend, I want to post how I like to smoke pork spare ribs. The process is written for 1 rack of ribs, multiply as needed.

Slow Smoked Spare Ribs
1 rack pork spare ribs trimmed St. Louis style and membrane removed from back
1 Tablespoon peanut oil
2 teaspoon black pepper, coarse ground
¼ cup BBQ dry rub
1/2 cup brown sugar
2 “long squirt” Squeeze Parkay (See instructions)
¼ cup Tiger Sauce
1/2 cup BBQ sauce
2 Tablespoons honey
1.5 teaspoons BBQ dry rub
Rub rib on both sides with the oil. Sprinkle both sides with black pepper. Sprinkle both sides evenly with BBQ rub. [Rub note: There are a lot of good BBQ dry rubs available on the market now. If you can’t find one or want to make your own, try the dry rub from this recipe from Chris Lilly on Grilling.com.]
 |
| The St Louis style trim gives you even portions and quicker cooking. |
Build an indirect fire in your grill at 250f. If you are using a charcoal smoker or grill, mix several fist sized chunks of wood in with the coal. If you are using a gas grill here are some options for you from Grill Master, John Dawson of Patio Daddio.
 |
| I like hickory wood for flavor and cherry wood for coloring the meat. |
Smoke the ribs bone side down in a covered grill for 3 hours, replenishing coals and wood as needed to maintain the temperature.

Remove the ribs from the smoker/grill. Fold a 3 foot piece of foil in half. Place half the brown sugar and Tiger Sauce on the foil. Squirt one “rib length” squirt of the Parkay on top. Place the rib meat side down on top.

Place the rest of the brown sugar, Tiger Sauce, and another squirt of the Parkay on top. Parkay sounds weird I know. But a LOT of the pros on the competition BBQ circuit use this trick.
Wrap the foil tightly around the rib rack and seal tightly. Place back on the grill/smoker for another hour.
Remove the ribs from the grill. CAREFULLY open the foil with tongs and oven mitts. Take the ribs out of the foil but keep the juice.
Whisk together the BBQ sauce, honey, and BBQ rub. Add 2 Tablespoons of the juice from the foil pack and whisk into the glaze.
Glaze both sides of the rack of ribs and return to the grill for another hour. The ribs are done when they bend easily like this but don’t fall apart.

If you want “fall off the bone” ribs (which are technically overdone), leave them in the foil for an extra 30 minutes during the foiled portion.
Slice and serve with the leftover BBQ glaze.

I hope you all fire up your grills and enjoy this holiday weekend!
CHICKEN PUFFS
I’m not quite sure where I originally found this recipe, but we fell in love with it and it makes a wonderful presentation for company. The pictures are from when I originally made it with whole chicken breasts, but I have since changed it to using bite sized pieces. Using chicken tenders works best. It bakes better and is much easier to eat!
CHICKEN PUFFS
2 pounds boneless, skinless chicken breasts or tenders
4 Pepperidge farm puff pastry sheets, defrosted
4 ounces cream cheese
1/2 pound bacon, cut into quarters
1 bunch green onions, chopped
1 handful flat leaf parsley
sea salt and white pepper to taste
1 large egg, beaten
PURE
- Preheat oven to 400 degrees.
- Add cream cheese, green onions, parsley, salt and pepper to a small food processor and process until well blended. Set aside.
- Cook bacon until crisp. Drain on paper towels.
- Cut chicken into bite size pieces.
- In a large bowl, toss chicken pieces with cream cheese mixture until well coated.
- On a large jelly roll pan that has been sprayed with PURE, lay out your puff pastry pieces and seal any stray seams.
- Divide chicken evenly among the 4 sheets.
- Top evenly with the bacon.
- Pull up all four corners and give them a little twist in the center.
- Brush with beaten egg.
- Bake 30 minutes until golden brown.
- Serve immediately.


CHEESY CHIMICHANGAS

Cheese! Cheese! Cheese!
I don’t often indulge in cheese. Even though I do so love it. I usually feel that you need a LOT of cheese in order for it to really taste good. I don’t usually indulge in that many calories, I usually choose to flavor my food in other ways.
However, one does have to have cheese sometimes, right??

I tasted this before adding the cheese and after and it was delicious with the cheese. It still has a lot of flavor and the cheese brings it out even more!
These were plenty flavorful on their own but I used some of my tomatillo green salsa to put on it. This made it even better! Seriously, this was a fantastic meal! Loved the leftovers the next day too!

Cheesy Chimichangas
Adapted from Food Snob
1 pound ground turkey
1 onion, diced
3 cloves garlic, minced
11/2 tablespoon cumin
1 can green chiles, 4 oz.
2 teaspoons oregano
1 can Rotel tomatoes with green chiles
1 can tomato sauce, 15 oz. (I only used about 3/4 of it)
1 1/2 cups of cheddar cheese, 6 oz.
10 – 100 calorie whole wheat tortillas
- Cook the ground turkey and the onions together.
- When the ground turkey is done, add spices, chiles and tomatoes. Let simmer for 10 minutes or until thickened.
- Turn off heat and add cheese and stir until melted.
- Put 1/2 cup of turkey mixture onto tortilla and roll and place seam side down in a pan.
- Spray tops with cooking spray and bake in oven for about 25 minutes at 400 degrees.
Total calories = 2569 calories
10 servings = 257 calories per chimichanga
2 Cheesy Chimichangas = 514 calorie dinner

Rocky Road meets the Black Forest Brownies


ROCKY ROAD MEETS THE BLACK FOREST BROWNIES
1 1/2 sticks butter, softened
2 squares Baker’s semi-sweet chocolate
3/4 cup marshmallow cream
2 teaspoons PURE vanilla
1-2 teaspoons cherry extract
1 1/4 cup sugar
3 JUMBO eggs
1/2 cup walnuts, chopped
1/2 cup milk chocolate chips, chopped
1/3 cup chopped maraschino cherries
1/2 cup all purpose flour
1/4 cup cake flour
1/2 teaspoon baking powder
1/2 teaspoon salt
- Preheat oven to 350 degrees.
- Grease (really well) a 9×9 baking pan. I like to use my stoneware for nice even baking.
- Melt butter and chopped unsweetened chocolate in a double boiler until smooth and consistent. Set aside to cool.
- Sift together the flours, baking powder and salt. Set aside.
- Toss chocolate chip pieces and walnuts with a bit of the flour mixture and set aside.
- In a large mixing bowl beat the eggs and vanilla until smooth and consistent.
- Add cooled chocolate mixture into the eggs and blend well.
- By hand stir in the flour mixture just until well blended – DO NOT over mix!
- Fold in the chocolate pieces, cherry pieces and walnuts just until well blended.
- Warm the marshmallow cream for 15-20 seconds in the microwave (just enough to make it spreadable) and spread it over the chocolate batter in the mixing bowl.
- With a knife gently and slightly swirl it lightly into the chocolate batter. If you swirl too much it will just become part of the batter instead of clumps of marshmallow.
- Gently pour the batter into the prepared ban and bake 40-45 minutes or until edges pull away from the sides of the pan.
- Cool the cake in the pan until completely cooled.
PERFECT BROWNIES
Taste and Create was started as a food event by Nicole from For the Love of Food. The whole purpose of Taste and Create was, and has been, and continues to be to create a community of bloggers who test each others’ recipes and share links. The participants of the event are paired together and try a new recipe from one another’s blog. My partner this month is Laura from Tasteful Diversions. I spent a lazy afternoon perusing her recipes and was intrigued by her recent brownie recipe. Laura had adapted the recipe from Cook’s Illustrated and I opted to follow her version. These brownies were awesome. Hubby gave them 2 thumbs up! I added a Mocha cream cheese frosting and they really were perfect!


PERFECT BROWNIES
1/3 cup Ghiradelli unsweetened cocoa
1/2 cup plus 2 tablespoons boiling water
2 ounces Baker’s unsweetened chocolate, finely chopped
4 tablespoons unsalted butter, melted
1/2 cup plus 2 tablespoons safflower oil
2 eggs
2 egg yolks
2 teaspoons vanilla extract
2 1/2 cup sugar
1 3/4 cup all purpose flour
3/4 teaspoon salt
6 ounces dark chocolate chips (those melty ones you get in bulk to make fondue with at the grocery store) I used Whole Foods brand
- Preheat oven to 350°.
- Line 13×9 pan with foil; spray lightly with cooking spray.
- In a large bowl, whisk cocoa and boiling water together until smooth.
- Add in unsweetened chocolate and continue to whisk until chocolate is melted.
- Whisk in melted butter and oil. (CI notes at this point that the mixture may look curdled; I have not had this issue.)
- Whisk in sugar.
- Stir in eggs, yolks, and vanilla until all ingredients are fully incorporated.
- Fold in chips.
- Pour batter into prepared pan and bake at 350° 30-35 minutes, until a toothpick inserted halfway between edge and center comes out clean.
- Remove from oven and allow to cool in pan on a rack for 1 1/2hrs.
- Using foil, remove brownies from pan and place on rack to cool another hour before serving.*
*Laura said, “Okay look, this is 2 1/2 hours of cooling time. I don’t know about you, but there is no chance in hell that fresh brownies are going to get that much alone time at my house. I usually make it about 45 minutes before I start cutting” and I wholeheartedly concur!