COD POCKETS

COD POCKETS adapted from The Magic Pumpkin
For 4 People
1 Pepperidge Farm Puff Pastry box = 3 POCKETS people
3 cod fillets
breadcrumbs
ground ginger
Juice of 1 lemon 
salt
white pepper 
sesame seeds
  • Unroll the pastry and divide into 3 wedges.*
  • Rinse and dry cod fillets gently. 
  • In a bowl put the bread crumbs, ginger, salt and pepper, blending well.  Pour into a shallow dish
  • Dredge the cod fillets in the seasoned bread crumbs making sure to coat them evenly.
  • Sprinkle each filet with a VERY small amount of lemon juice. 
  • Wrap the fillet and seal all edges.
  • Lay the packetson a baking sheet lined with parchment paper, sprinkle with sesame seeds. 
  • Use a beaten egg wash.
  • Bake at 200 degrees for 20 minutes.  Serve Warm
*What I actually ended up with was 2 big and 2 small portions.

COKE CAKE – SAVE ROOM FOR DESSERT

This recipe has been a family favorite for many years now and always puts a smile on my face when I think of grams. She didn’t hesitate to try any strange or new recipe and always made them work whether it was potato chip cookies or this cake.

BEFORE & AFTER ICING

COKE CAKE
1 cup flour
1 cup sugar
3/4 cup miniature marshmallows
1/4 cup shortening
1/4 cup butter, softened
2 scant tablespoons cocoa
1 Jumbo egg, beaten
1/2 cup Coca-cola
1/4 cup buttermilk
1/2 teaspoon baking soda

  • Preheat oven to 350 degrees.
  • In a large mixing bowl sift together the flour and sugar. Stir in marshmallows and set aside.
  • In a medium saucepan melt the butter and shortening together. Add the cocoa and coke, mixing well.
  • Pour over the flour mixture. Add the buttermilk, egg and baking soda, mixing well.
  • Pour into a greased 8×8 pan and bake 30-40 minutes or until cake center springs back.

ICING
1/4 cup butter, softened
3 tablespoons coke
2 scant tablespoons cocoa
2 cups powdered sugar

  • Bring butter, cocoa and coke to a boil.
  • When smooth, remove from heat and mix in sugar to desired consistency.
  • YUM ~ Enjoy

Hubby gave it 2 thumbs up!

MEXICALI CHEESY POT PIE

Mexicali Cheesy Pot Pie Adapted from Pam’s Midwest Kitchen Korner
1 pound ground turkey, 93% lean
1 large onion, chopped
2 tablespoon chili powder
1 tablespoon garlic powder
1/2 teaspoon each salt and pepper
1 (10 oz.) can Rotel diced tomatoes with green chilies, undrained
1 cup frozen corn
1 cup frozen peas and carrots
5 ounces cheddar cheese, divided

For corn bread topping:
1/2 cup yellow cornmeal
1/2 cup flour
1 1/4 teaspoon baking powder
1/2 teaspoon salt
1/4 tseaspoon chipotle chili powder
1 egg, lightly beaten
2/3 cup milk, 1%
2 tablespoon vegetable oil

Directions:  Brown ground turkey and onions in large pan until cooked. Season with chili powder, garlic powder, salt and pepper. Stir in tomatoes, corn and peas & carrots (used whatever veggies you want.) Transfer to an 8 x 8 in. baking dish.

Top with half the cheddar cheese.

In a bowl, combine cornmeal, flour, baking powder, chipotle powder and salt. Stir in egg, milk and oil. Spread evenly over turkey mixture. Top with the rest of the cheese. Bake, uncovered for about 35 minutes or until topping is set.

Modifications:
-I used whole wheat.
-I did not use peas or carrots.
-I used a can of drained corn.
-I used a can of tomatoes with peppers and celery
  rather than Ro-Tel.
-I used an Italian blend cheese.

Here’s what you’ll need for the meat mixture:
Here’s what you’ll need for the cornbread mixture:
Preheat the oven to 350 degrees.
Chop up the onion.
Place the turkey and the onions in a skillet and cook through.
Once cooked, add corn and Ro-tel. 
I used a can of tomatoes with peppers and celery.  
I just cut up the tomatoes a little more. 
Add the spices.
Meanwhile, add all of the ingredients for the cornbread mixture.
Place the meat mixture into a greased baking dish.  
Spread the cornbread mixture out and put in the oven for 30-35 minutes or until cornbread rises.
About 5 minutes before finished, sprinkle cheese on top and put back in the oven until melted.
Here’s what you’ll end up with:
Our Thoughts:
This meal turned out to be somewhat of a pantry meal.  I changed a lot of the ingredients or omitted them because I didn’t have them on hand.

I thought the combination of the cornbread with the meat mixture tasted really great.  There were several textures in there that complimented each other.  
The one issue I had was that it was a little dry.  The cornbread soaked up most of the juices from the tomatoes so I wish that I would not have drained the corn before putting it in.

I was also a little worried about making the cornbread topping out of the whole wheat but it had a good texture and flavor.  Of course, you could always use one of those Jiffy corn muffin mixtures and it would work great, too.
Hope you enjoy!
April

CHICKEN SCALLOPINI IN BRANDY SAUCE

I was intrigued by the brandy sauce in this recipe, but don’t usually make veal so decided to give it a try on chicken.   I have to tell you there was nothing left, nada, so I know they loved every bite.  It didn’t hurt that they said I could make it again.  Next time I will add some thinly sliced green onions and mushrooms.

CHICKEN SCALLOPINI IN BRANDY SAUCE
For 4 People
4 boneless, skinless chicken breasts, sliced in 1/2 horizontally
3+ tablespoons butter
½ cup brandy
Juice of 1 lemon
flour
salt and pepper

  • Wash and dry the slices after slicing them in half and removing any excess fat. 
  • Melt 2-3 tablespoons of butter in  large skillet.
  • Dredge the chicken slices and place in the pan.
  • Brown them, salt and peppering them generously.
  • Set aside, keeping warm. 
  • Add the remaining butter, brandy and juice of a lemon to the pan, scraping the bottom for any chicken pieces. Blend well. Let sauce start to thicken.
  • When sauce has just about reached desired thickness, return the chicken slices to the pan, covering well with the sauce.
  • Serve immediately.

Recipe Rundown
Taste: Both savory and sweet, tangy and rich.
Texture: Tender caramelized onions on top and fork tender. 
Ease: Super easy and quick.
Appearance: Appetizing and visually appealing.
Pros: Addicting and wonderful for entertaining.
Cons: None!
Would I make this again? Yes.
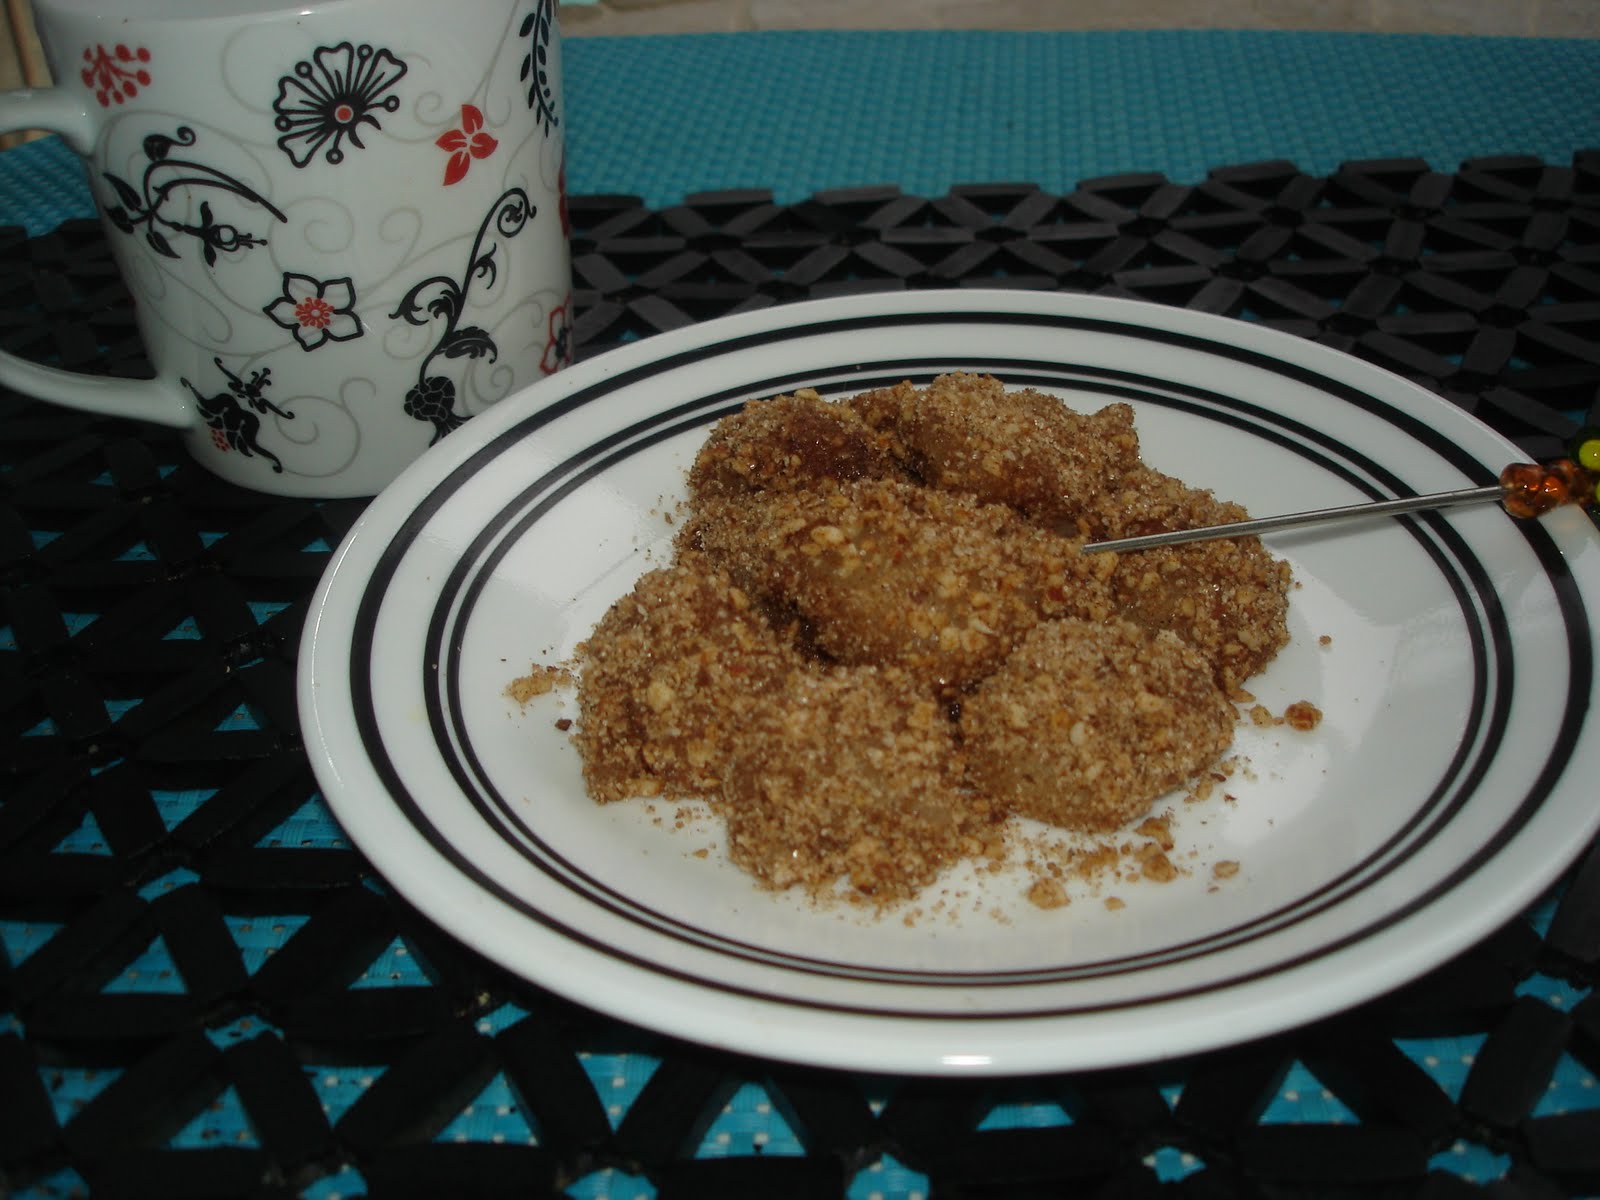
Muah Chee – Glutinous Rice Balls

Muah Chee 麻糍 is a Chinese dessert or snack that is popular in South East Asia. It is easily found at roadside food stalls all around Malaysia and Singapore. A glutinous or sticky rice ball rolled in sugar and crushed peanuts…similar to mochi but with the filling on the outside rather than inside. It is easy to find some glutinous rice flour in the your local Asian market. I might never get a chance to go to Malaysia and try it from a hawker, so I had to try to make it for myself. I didn’t have peanuts or the fragrant oil, but I could use almonds right? I figured since I have never had the original in the countries known for making it I could use a different nut. 😀

I had to change things up and do a few things different just because that’s what I do, so I decided to spice it up a bit too, adding some chai spice to the sugar/nut mix for the topping!

I also tried the microwave way…

Ingredients for the dough:

1 cup of glutinous rice flour (easily found in your Asian market)

3/4 cup water

2 tablespoons sugar

1 teaspoon vanilla extract

1 tablespoon cooking oil (normally you use shallot oil, but I didn’t have that)

Topping:

1/2 cup chopped nuts I used almonds

3 tablespoons sugar

1 tablespoon sesame seeds

1 -2 teaspoons chai spice mix*

*Chai Spice Mix:

2 teaspoons cinnamon

2 teaspoons cardamom

1 teaspoon cloves

1 teaspoon ginger

1 teaspoon coriander

1/2 teaspoon allspice

1/4 teaspoon white pepper (optional)

  • All spices are in powdered form for this one. Mix all together and store in a spice jar. Add it to tea, coffee, cookies, granola and much more.
    • For the muah chee mix all the ingredients for the dough mixture in a microwave safe glass bowl. Microwave for 3 minutes…I covered mine with a glass plate but I don’t think you have to do this.
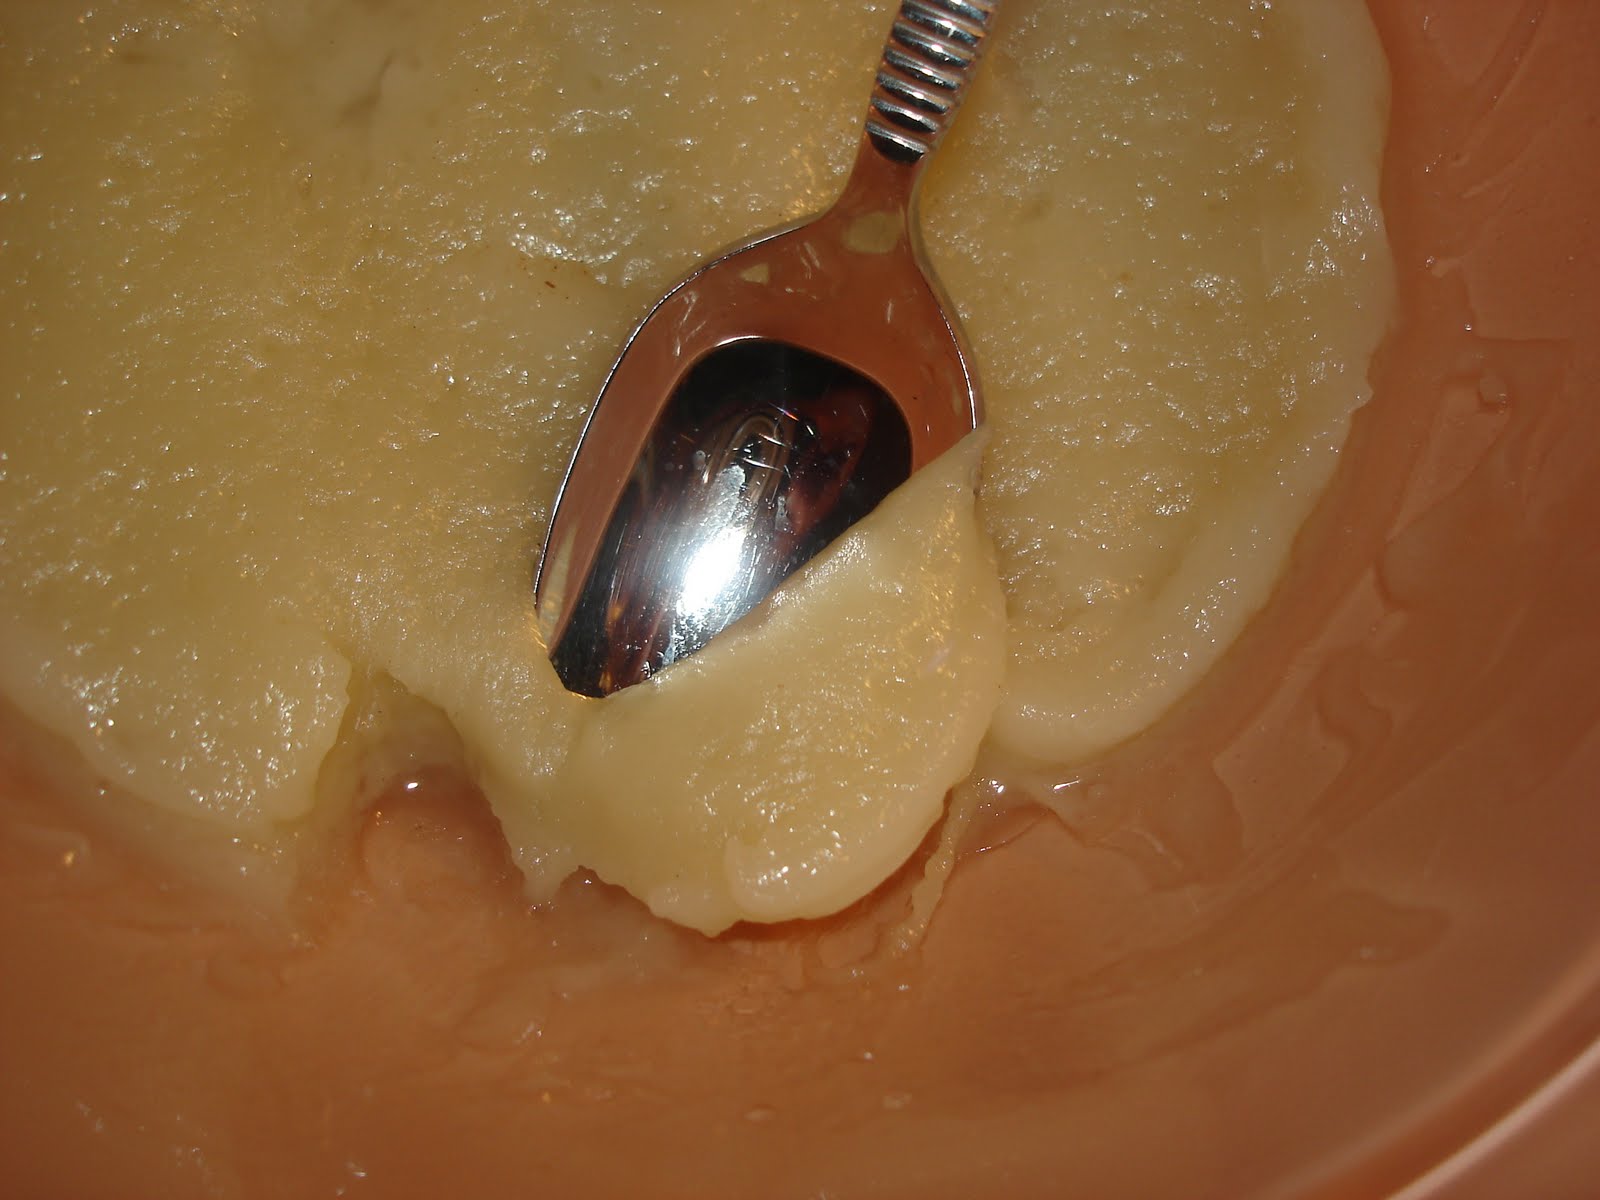
      Remove from microwave and spoon out in bite size pieces. Then drop them into the topping mixture, it was just sticky enough to grab onto some of the nuts, sugar and spice and everything nice…couldn’t resist. Some will dip the dough balls in shallot oil first then stick it in the topping mix, but this way worked good for me.
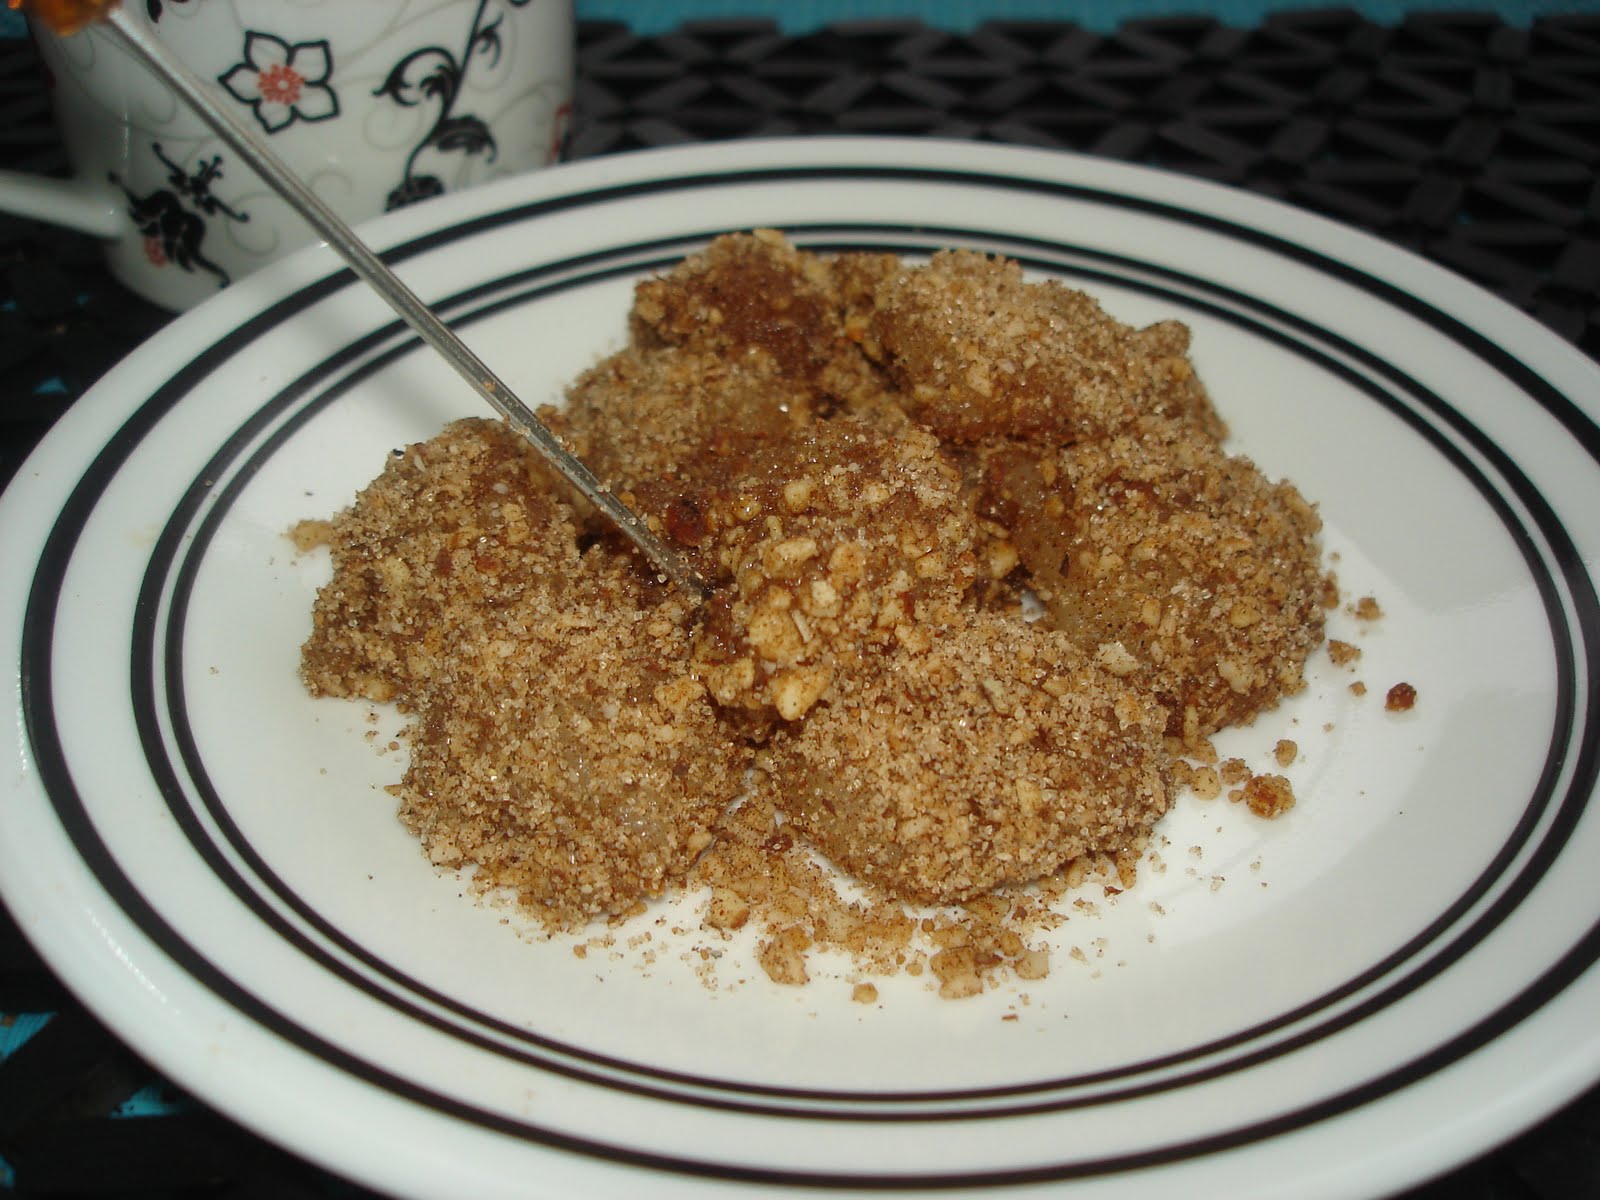
      There you have it…muah chee my way 😀 I still have to make it to Singapore or Malaysia to try it the right way!
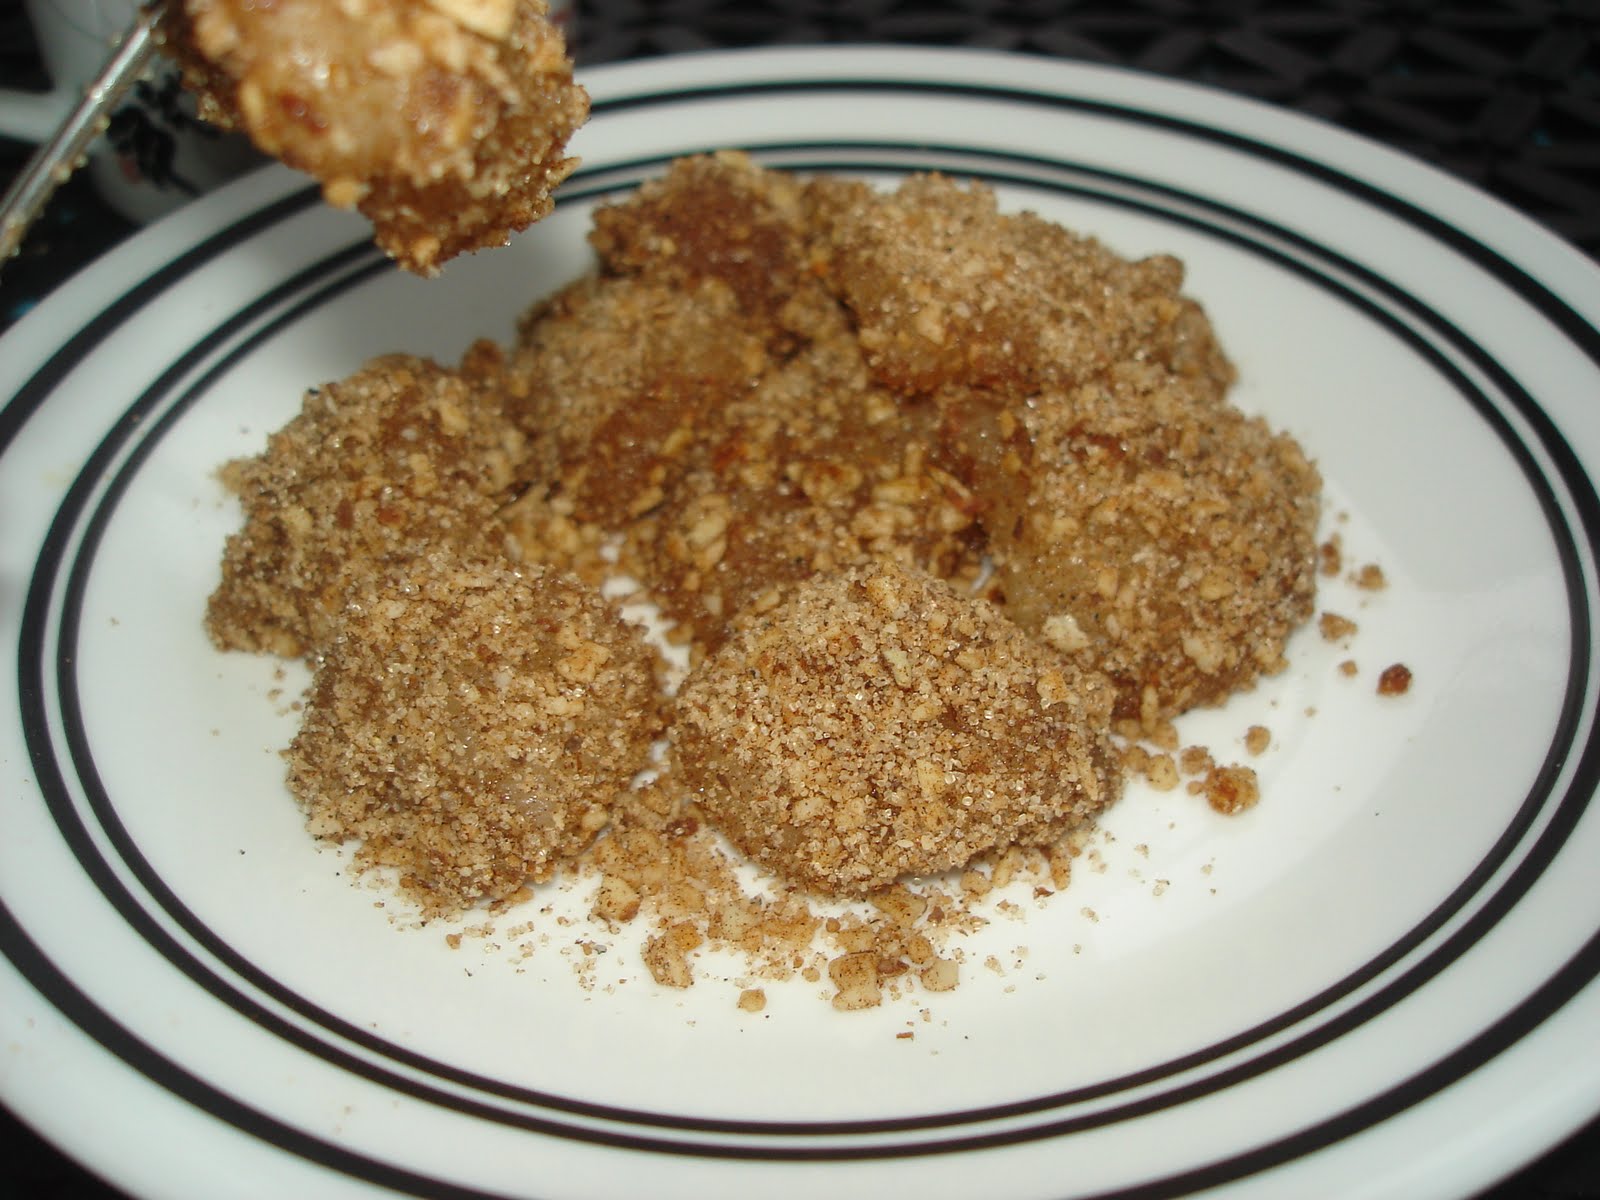
      But I really liked it a lot, I think better than I thought I would, just because of the texture thing…
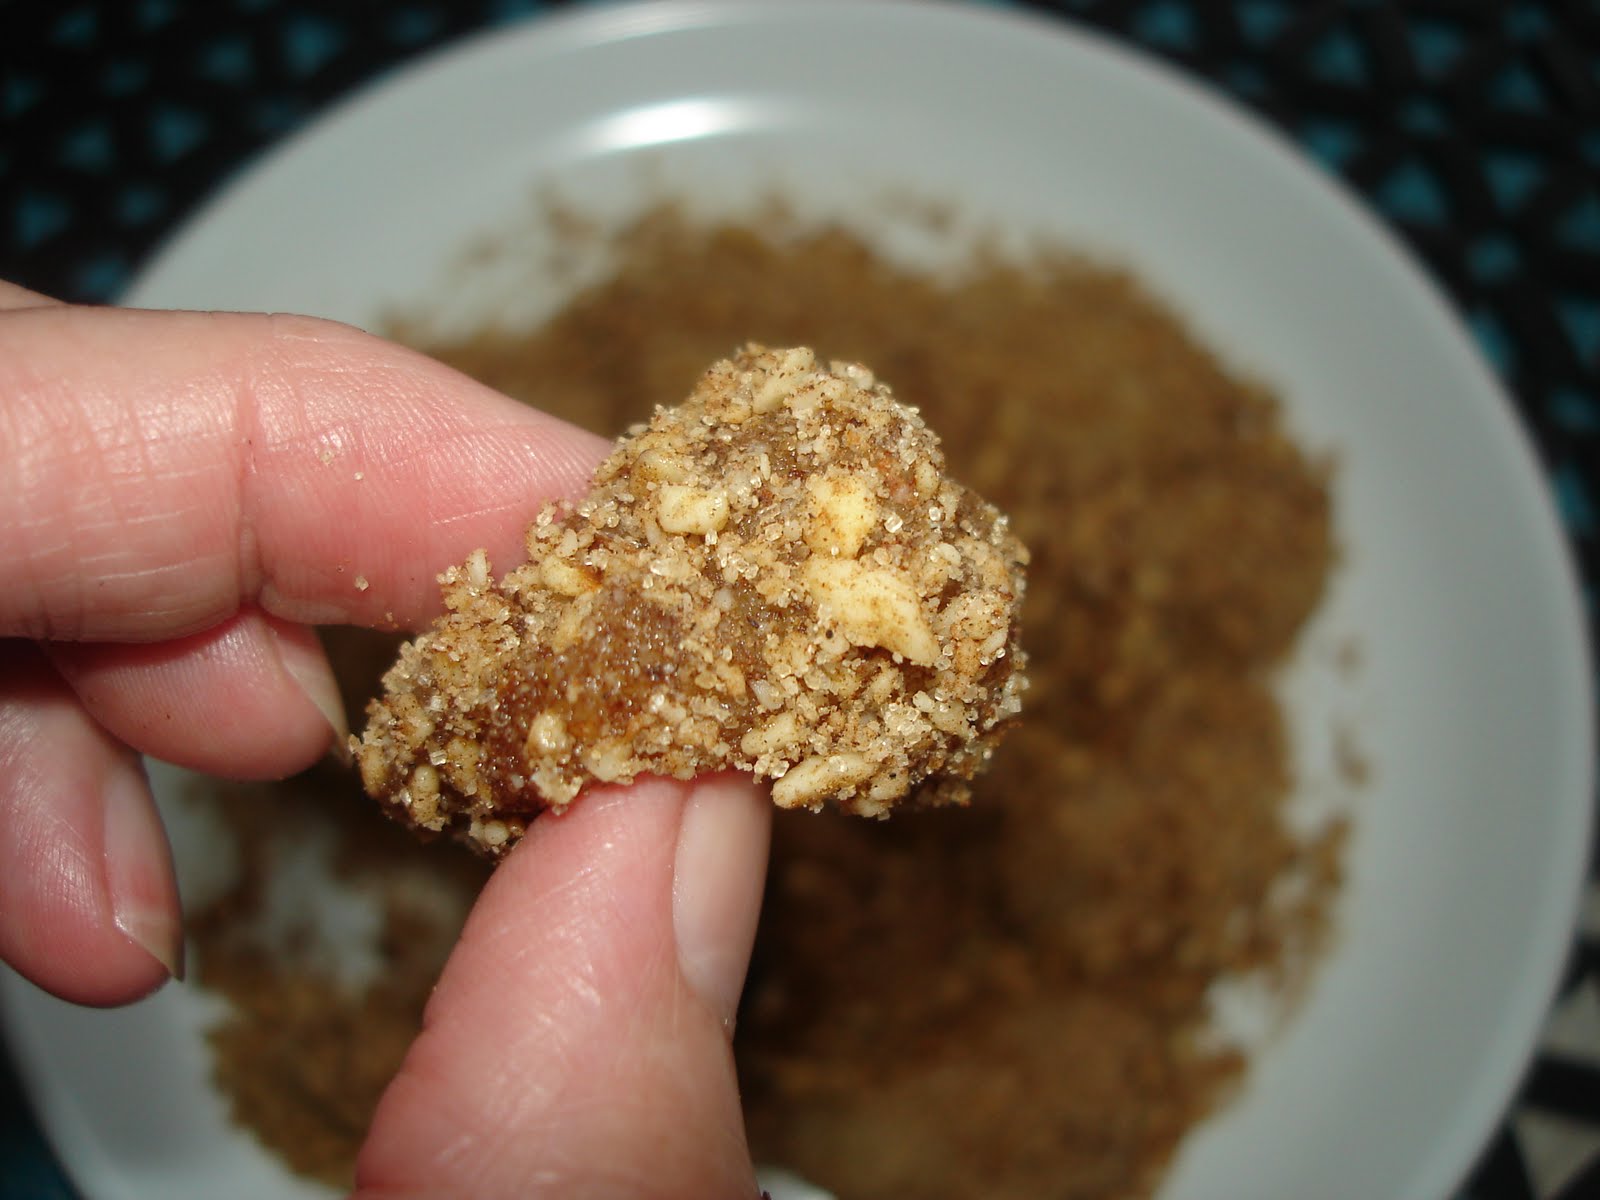
      I enjoyed the cardamom, cinnamony flavors with the nuts. I think toasted, desiccated coconut with peanuts would be good on it too.

      The texture is soft, chewy and didn’t stick to your teeth…really nice. I enjoyed it with some Vietnamese coffee, it went well together…mmm so good!
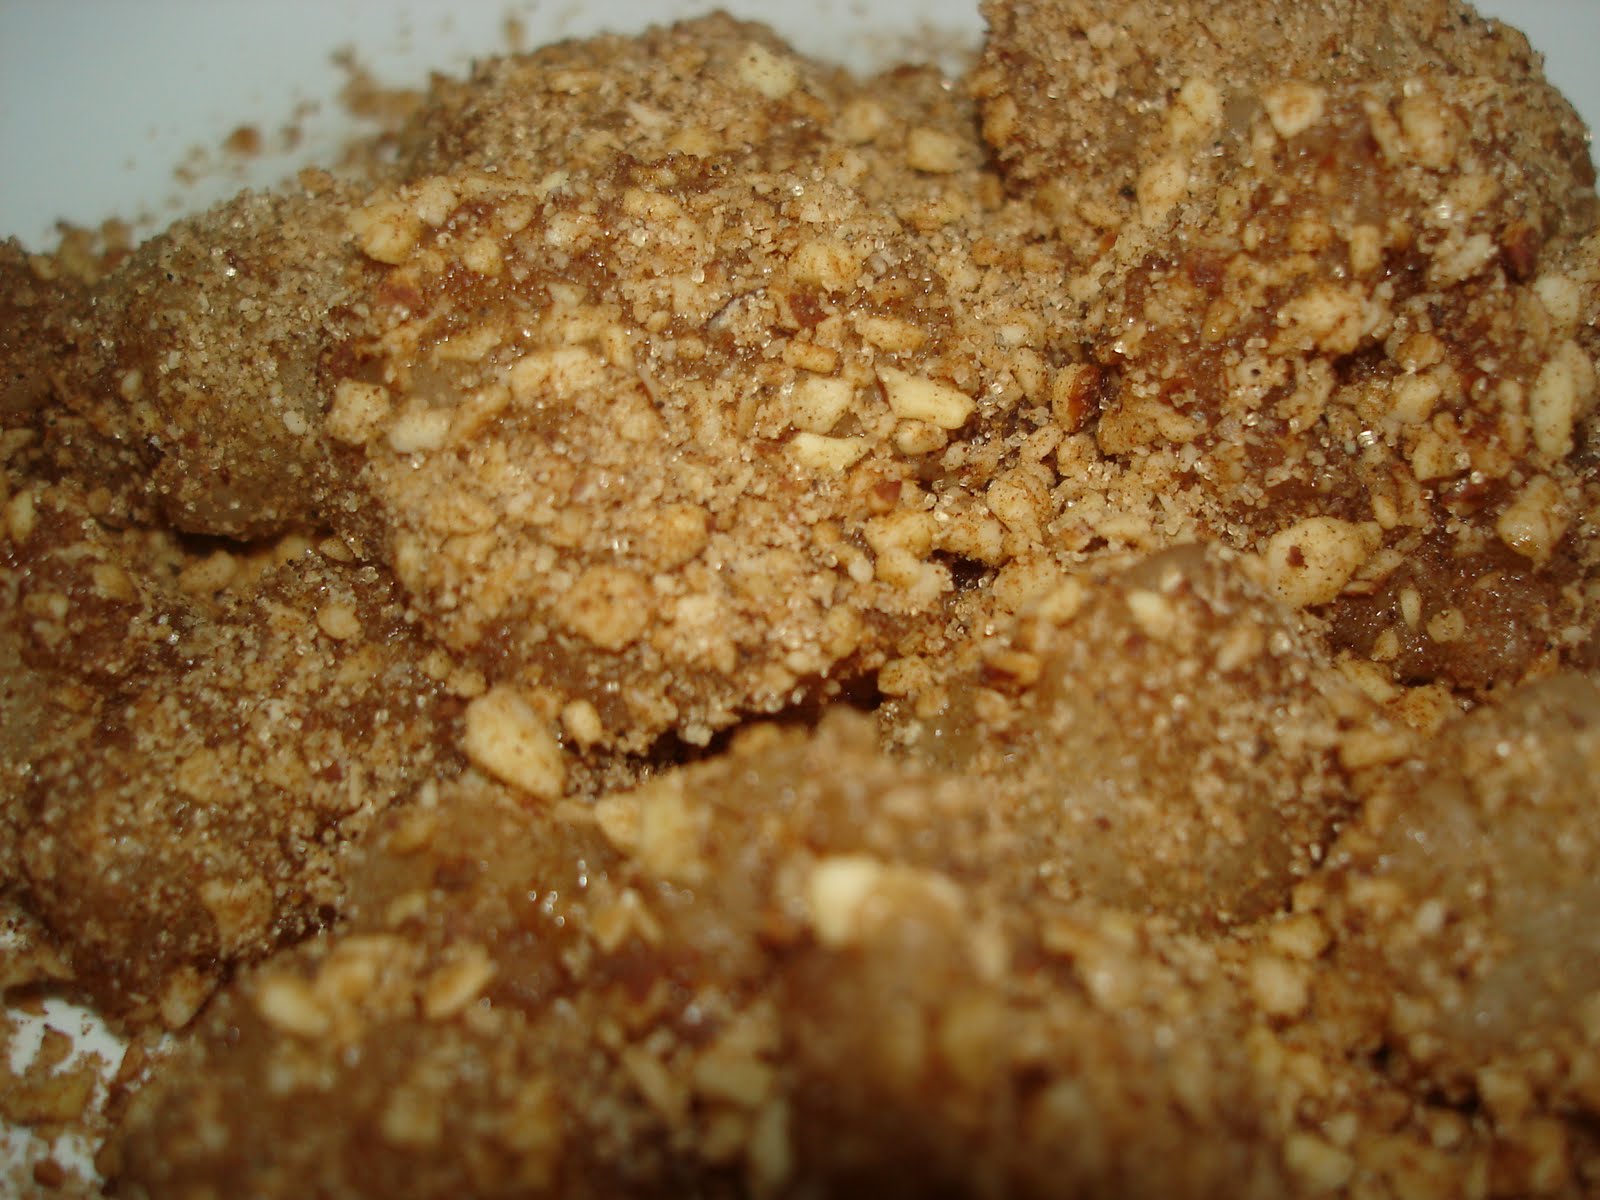

      It was so easy and good! You should try it! It’s fun!


      HEALING BURNS

      I checked this on multiple sites and it appears to be true in which case we should all know it and pass it on!

      A young man sprinkling his lawn and bushes with pesticides wanted to check the contents of the barrel to see how much pesticide remained in it.  He raised the cover and lit his lighter; the vapors inflamed and engulfed him.  He jumped from his truck, screaming.  His neighbor came out of her house with a dozen eggs, yelling to another neighbor: “bring me some eggs!”  She broke them, separating the whites from the yolks.  The other neighbor woman helped her to apply the whites on the young man’s face.  When the ambulance arrived and when the EMTs saw the young man, they asked who had done this.  Everyone pointed to the lady in charge.  They congratulated her and said: “You have saved his face.”  By the end of the summer, the young man brought the lady a bouquet of roses to thank her.  His face was like a baby’s skin.
      Healing Miracle for burns:
      Keep in mind this treatment of burns which is included in teaching beginner fireman this method.  First aid consists to spraying cold water on the affected area until the heat is reduced and stops burning the layers of skin.  Then, spread egg whites on the affected are.

      One woman burned a large part of her hand with boiling water.  In spite of the pain, she ran cold faucet water on her hand, separated 2 egg white from the yolks, beat them slightly and dipped her hand in the solution.  The whites then dried and formed a protective layer.

      She later learned that the egg white is a natural collagen and continued during at least one hour to apply layer upon layer of beaten egg white.  By afternoon she no longer felt any pain and the next day there was hardly a trace of the burn.  10 days later, no trace was left at all and her skin had regained its normal color.  The burned area was totally regenerated thanks to the collagen in the egg whites, a placenta full of vitamins.

      Fire Day Friday: Dip and Flip Grilled Chicken

      With Labor Day weekend coming soon, a lot of grills will be firing up for their last hoorahs of the summer. Here’s an easy way to grill chicken with the rich flavor of bbq sauce without burning the sauce while grilling. 


      Dip and Flip Grilled Chicken
      Source:  NibbleMeThis
      4 chicken thighs, boneless, skinless
      Rub
      1 tsp smoked paprika
      ½ tsp Kosher salt
      ½ tsp black pepper, ground
      ½ tsp garlic powder

      Dipping Sauce
      ½ cup bottled sweet BBQ sauce (Blues Hog, KC Masterpiece are our favorites)
      ½ cup apple cider vinegar
      ½ tsp salt
      ½ tsp black pepper
      Mix rub ingredients together.  Mix dipping sauce ingredients together.
      Sprinkle the rub on both sides of the chicken thighs.
      Preheat your charcoal grill to 400f. Set the dipping sauce in a shallow pan on the grill.
      Grill the chicken for 3 minutes. Then flip and grill another 3 minutes.
      Now dip each piece into the dipping sauce and then flip back to the grill. 
      Cook for another 6 minutes. During this time, continue dipping and flipping the chicken every 1-2 minutes. You are cooking the dipping sauce onto the chicken in layers.
      Pull the thighs when the thicker parts reach 170f. Smaller parts might get there sooner, so just pull them to a cooler area of the grill like this.
      Serve with your favorite BBQ sides. Tonight we served BBQ rice and Bush’s Honey Barbecue Beans.
      This is more of a basic process than recipe. Have fun with it and make it your own. Add a signature spice to the rub, like maybe chipotle chili pepper. Or substitute beer for the vinegar in the dipping sauce. The point is to thin out a prepared bbq sauce and then layer it onto your food.
      So are you already planning your Labor Day weekend cook out?

      PASTRAMI BURGERS

      These couldn’t have been much simpler and were super tasty!

      PASTRAMI BURGERS
      1/2 pound ground beef per person
      1 slice BOAR’S HEAD pastrami per person
      1 green onion, minced per person
      1 clove garlic, minced per person
      1 slice provolone cheese per person
      1/3 cup bread crumbs per 4 burgers
      1 JUMBO egg per 4 burgers
      salt and pepper to taste

      • Mix all ingredients together except cheese.
      • Form burgers by hand.
      • Chill 2 hours.
      • Pan fry or grill.
      • Top with provolone cheese and serve.

      CREAMY FRENCH ONION ARTICHOKE DIP

      Hi everyone.  Tamy here filling in for Diana as her schedule is completely chaotic with school beginning this past Monday.  I know she normally brings you healthy recipes, but with football pre-season in full swing, I thought I’d bring you this family favorite dip for game time!

      CREAMY FRENCH ONION ARTICHOKE DIP

      The original recipe called for:
      4 ounces cream cheese at room temperature
      15.5 ounce container of french dip
      15.5 ounce can artichoke hearts, drained and coarsely chopped
      1/2 cup shredded Parmesan cheese
      1/4 cup + 1 tablespoon scallions
      1 tablespoon fresh chopped parsley
      1/2 teaspoon garlic powder
      1/4 teaspoon pepper

      • Whisk cream cheese until fluffy.
      • Stir in dip and artichoke hearts, cheese, 1/4 cup green onions, parsley, garlic powder and pepper.
      • Refrigerate until ready to serve.
      My version calls for:
      4 ounces cream cheese, softened
      16 ounces sour cream
      KNORR French onion soup mix
      1 1/2 cups artichoke hearts, drained and coarsely chopped
      1/2 cup shredded Parmesan cheese
      1 large bunch green onions, chopped
      2 cloves garlic
      1/2 teaspoon sea salt
      1/4 teaspoon pepper

      • In a small food processor pulse artichoke hearts, garlic, green onions and Parmesan cheese until smooth.
      • In a small mixing bowl blend together the sour cream, Knorr mix and cream cheese until smooth.
      • Add artichoke mixture and blend well.
      • Refrigerate until ready to serve.

      HOMEMADE CHICKEN BROTH & STOCK UP TIPS

      At this time of year, I’m usually stocking up for winter in the wild and snowy north.  I start with LARGE bulk packs of meat.  I then break them down by size and meat right down to cutting certain recipes into bite sized pieces.  Then I wrap them in freezer paper because I really hate freezer burn!  And I package them into pre-labeled ziploc bags for the freezer.

      I didn’t get a secondary picture, but I then wrap the center of each one with a strip of duct tape.  Yep, you read that right, duct tape.  Just a small strip.  Enough so when they’re stacked in the back of the freezer you can identify the meat.  I buy it in colors – red for beef, green for chicken and blue for pork.  It makes it soooooooo much easier when you’re searching in the freezer for the right meat.
      Many times this prep includes rotisserie chickens.  My market at home has buy one, get one free on Tuesdays.  Can you figure out when I did my shopping? By the time I get home and put away the groceries, the rotisserie chickens are cool enough to pick off the bone.  The bowl below is the skin, congealed juices and bones I collected as I stripped 2 birds.
      I think Martha (MM) and I met over some post about buying in bulk and we found a common ground – saving money!  Talk to your butcher.  Many times you can save even more than the advertised sale prices.  For example, recently my local market was running a sale on chuck roast.  None of the roasts were as large as I really needed for company so I asked the butcher if they had one the size I wanted and instead she offered up a manager’s daily sale (in the bulk section just a few feet away from the ones I was looking at) where I could buy twice as much for half as much saving me $8 over what I intended to spend and gave me enough for 3 meals.  I made ALL the chuck roast as Pot Roast & Veggies for company and then used the leftovers to make Ortega Chile Bake and Beef Chili.
      I then use a large stock pot and cover the “debris” with water.  I set it to simmer on a low temp and let it go for an hour or so.  I don’t add any seasonings since I’ve normally bought mesquite broiled or lemon herb, but adjust according to your tastes.

       Then I drain it into my large 8 cup measuring cup and allow it to cool.

      I have several of these containers that I bought just for chicken stock in the freezer.  I haven’t bought chicken stock in over 10 years now.  It’s just so easy to make your own.  Even if I start with raw chicken and poach it for a recipe I add seasonings and by the time the chicken is done, there is several cups of broth ready for the freezer.

      Today’s flavor was Mesquite broiled so it left us with a spicy red color also.

      So what do you do to get ready for winter?  Have I motivated you to stock up?

      JOHNNY CAKES, A CARRIBEAN STAPLE – TRY A NEW RECIPE DAY

      Journey Cakes commonly known as Johnny Cakes are a yeast-less bread that are either baked or fried. In the southern Caribbean they are known as bakes (even when fried).
      Today we will make some whole wheat baked Johnny Cakes
      You will need:
      1 cup white flour
      1 cup whole wheat flour
      3 teaspoon baking powder
      1/2 teaspoon salt
      3 oz butter (or margarine)
      1 1/2 oz vegetable shortening
      1 cup ice cold water
      • Sift flour with the baking powder and salt
      • Rub in the fats.
      • Slowly add the water to make a smooth dough (dough will be sticky at this point).
      • Begin to incorporate enough wholewheat flour to make a smooth, dry, but elastic dough.  Knead well.
      • Shape the dough into a bowl and allow to rest for 60 minutes.
      • Preheat oven to 400F.
      • After 1 hour, place dough onto floured board.
      • Make 1 large Johnny Cake or 4 or 5 hamburger sized Johnny Cakes.
      • Place dough onto a greased baking sheet and bake for 20 minutes.
      • Serve hot.

      Dry Ingredients

      Prepared dough

      Finished product
      From the lack of feedback, I think that my previous recipes may have been a bit too ‘exotic’. This is an easier recipe with common ingredients. I posted a fried Johnny Cake recipe over at my blog a little while ago. I do hope you try it either one and let me know what you think.
      Bon Appetit!

      Aw, shucks, we’re blushing. Thank you!

      Deirdra from A Storybook World is our newest follower and has given us this beautiful award. She is also an author and illustrator and made some awards to give to fellow bloggers whose sites she enjoys. We were pleased to receive one. She has such beautiful talent.  Be sure to stop by and see her beautiful blog.  Thanks again Deirdra for this beautiful award.