HOT BEEF DIP

Just in time for football season!!


HOT BEEF DIP
1 1/2 pounds ground beef
1/2 cup chopped red onion
8 ounce can tomato sauce
1/4 cup Country Bob’s All Purpose Sauce

8 ounce package cream cheese
1 cup grated Monterey jack cheese
2 teaspoons minced garlic, jar
1 tablespoon parsley
2 teaspoons sugar
1 teaspoon salt
1/2 teaspoon white pepper
1 teaspoon Frank’s red pepper sauce

  • Brown Hamburger.
  • Add onion and garlic.
  • Drain off fat.
  • Add all other ingredients.
  • Stir until well blended.
  • Transfer to slow cooker ad keep warm.
  • Serve with tortilla chips.

Marinara Sauce – This Time it IS Your Italian Grandmother’s Red Gravy


This is one of those “application” posts.  So many things you can do once you master this simple sauce…

I like to use phrases like, “Not your Grandmothers’s…” (Like my“Not your Grandmother’s Herbes de Provence”).  Often, with availability of ingredients, new fangled cooking appliances or even building on years of other cooks experimenting, updated recipes really are better.  But also often, all you are really doing is dressing up a classic that doesn’t really need to be dressed up.

And marinara sauce is one of those things that really doesn’t need much of a dressing up.  Tomatoes are still available fresh, but only for a little while longer.  Cheap; $2.50 a pound is the going rate for sorted, top quality, and as little as a dollar for a bag if you are willing to take fluctuating sizes, a few bruises and variations in color.  For this recipe, grab the dollar a bag ones.  In fact, grab 5 or 6 bags.  Make a big batch, freeze in bags of 1 cup size each bag and you will be very glad you did.  February is just around the corner.  I don’t think my wife will take me to the tropics this year.  But with a few bags of these in the freezer, next winter, I can take my wife to the Mediterranean.  Well, at least her taste buds.

Need I add that this bounty all came from my Farmer’s Market.  If you missed it, I did a photo review of the Kansas City River Market.  Click HERE to see one of the best in the country.  Again… Farmer’s markets are terrific.. even this late in the season.


And you don’t need much to make this thick rich sauce.  All “real food”, nothing zingy.  But deep rich flavors will add all the zing you need.


1 TBS Extra Virgin Olive Oil
4 clove Garlic, smashed and minced
3 pounds ripe Tomatoes (a $1 bag), skins removed
1 tsp sugar
and a few leaves of Basil
2 TBS “Not your Grandmother’s Herbes de Provence”   
or, use the herbs you like, thyme, rosemary, lavender, whatever you please.  My  “Not your Grandmother’s Herbes de Provence” herb mixture works great, and since I always have a little bag of it handy, easy and fast, and is a ready made batch of the herbs I like.


Removing the skins is an easy thing to do.  Get a pot of water boiling, and have a bowl with ice water handy.  Cut an X into the top (not the vine end, the other end)just enough to break the skin.  Plunge them into the boiling water for only 15 seconds.  You want the outside to cook just a shade, but not so hot that the inside starts to cook.  Remove and plunge into the ice bath.  The skin peals easily now.


Smashing and mincing garlic is just as easy.  Take a wide chef’s knife, put a garlic clove between the flat of the knife and a cutting board and smash away with the flat of your hand.  Then just mince away.  Easy and fast!


And now, once all the prep work is done, it is finally time to cook.  In a big cast iron skillet, heat the olive oil.  Add the minced garlic and sauté for just a few minutes. 


While that is working, rough cut the tomatoes into quarters.  Be careful and don’t cut your hand, but best to quarter the tomatoes over the skillet. Every bit of juice you lose on the cutting board is just a bit less flavor.  Also, while you are cutting, remove any hard parts.  the stem end, and if the center is not ripe and red, pull it out.


Add a little sugar, add the “Not your Grandmother’s Herbes de Provence” spices (or your own favorites) and stew away at a gentle simmer.  At a simmer, it takes about 45 minutes for the tomatoes to break down properly.  BUT, the longer you allow them to simmer, the sweeter the sauce will be.  I was doing other things around the house, and let mine cook for an hour and a half.  If you have less time, you can cook at a higher heat.  But keep an eye on them and stir often so they do not scorch.


And here it is after the hour and a half… All bubbly, sweet and filled with flavors.  I moved this in a couple of batches into a food processor and pulsed for just a few times to break it up.  At the last minute, add some fresh minced Basil leaf.  If you want a thin sauce, pulse a lot.  If you want a thicker sauce, no real need to pulse at all.  Me, i like the smooth even look, texture and taste of a thick but not chunky sauce.


Like This…


Can you stand a little history???  As originally printed in theWISEGEEK.COM site…

Marinara sauce originated with sailors in Naples in the 16th century, after the Spaniards introduced the tomato to their neighboring countries. The word marinara is derived from marinaro, which is Italian for “of the sea.” Because of this, many people mistakenly believe marinara sauce includes some type of fish or seafood. However, marinara sauce loosely translates as “the sauce of the sailors,” because it was a meatless sauce extensively used on sailing ships before modern refrigeration techniques were invented. The lack of meat and the sheer simplicity of making tasty marinara sauce were particularly appealing to the cooks on board sailing ships, because the high acid content of the tomatoes and the absence of any type of meat fat resulted in a sauce which would not easily spoil.

Even though marinara sauce has a reputation for being easy to make at home, there are currently several hundred different types of marinara offered on the market. Perhaps the increased popularity of marinara sauce is due to recent research which revealed that cooked tomatoes are rich with lycopene, an antioxidant which may help reduce the risk of certain types of cancer.

Written by A. B. Kelsey

 So, simple, fast, easy to make and much richer than the jars you get in the stores.  And CHEAPER!  Save a dollar here and 50 cents there, and you have the budget to buy those little extras (like Kalamata Olives that add so much extra flavor to a simple tuna casserole (well, not so simple actually)).  But, that’s a post for another day.


And the go great with some pasta and meatballs… And that’s today’s subject of my post on my own site… Take a look


Dave here from MY YEAR ON THE GRILL. It really is just this easy!  

 … I CAN COOK THAT! 

And so can you!

CRAB PUFFS for TAILGATING TIME

Last week Martha posted her puffs recipe with her shrimp filling and it made me think of my crab salad and it was a good thought!  The crab salad was an awesome filling!

PUFFS recipe from Martha at Seaside Simplicity
1/2 cup water
1/4 cup butter or margarine
1/2 cup all purpose flour
1/4 teaspoon salt
2 eggs
  • Heat oven to 425 degrees. 
  • In a medium saucepan heat water and butter until boiling. 
  • Lightly spoon flour into measuring cup and level off. 
  • Stir in flour and salt. 
  • Cook over medium heat until mixture leaves sides of pan in a smooth compact ball, about 2 minutes, stirring vigorously. 
  • Remove from heat. 
  • Add eggs one at the time, beating vigorously until smooth and glossy. Do not under-beat! Drop by teaspoons full onto parchment paper lined cookie sheets. 
  • Bake for about 15 minutes or until golden brown and crisp.
  • Once puffs are cooled completely split and stuff with crab salad when ready to serve.
This recipe makes about 20 puffs.
CRAB SALAD
8 ounces Louis Kemp Crab, finely chopped
1 stalk celery, finely chopped
1/3 cup minced red onion
salt and pepper
mayo (about 1/4 cup)
  • Mix crab, celery, onion, salt and pepper together until well blended using enough mayonnaise for desired consistency.
  • Place a large scoop of crab salad in each puff.

Shredded Chicken Sandwiches with Dr. Pepper BBQ Sauce

I love to make my own BBQ sauce.  You can make it sweet, tangy, spicy, whatever. Most importantly, you KNOW what’s in there.
I’ve made several different kinds of barbecue sauces.  All sorts of ways.

This one is a bit different.

It’s made with Dr. Pepper.
Pop isn’t healthy. I know this.  This is why I stopped drinking it. Yup. Cold turkey. Stopped.  I don’t let my kids drink it either, unless they are at a party or something. 
Dr. Pepper USED to be one of my favorites.

But when I saw this recipe, it looked so intriguing, I just HAD to try it.  So forgive me, but I used Dr. Pepper in this. Get over it and try it, it’s really good.  It was quite sweet but that’s okay.  Go easier on the honey if you want.    
You don’ taste Dr. Pepper.  If I didn’t tell you that there was Dr. Pepper in this, you wouldn’t know. Seriously.  That’s what I thought was so intriguing about it!

I’ve seen a recipe with barbecue sauce made with rootbeer too!  Shhh. Don’t tell the Dr. Pepper.
We ate this meal on Arnold Select Sandwich Thins for dinner.  We also had some delicious roasted cauliflower. The next couple of days, I ate it on tortillas like a wrap. Very tasty!
Dr. Pepper Barbecue Sauce Recipe
Adapted from Simply Recipes
1 cups minced onion
1 tbsp. oil
3 cups Dr. Pepper (I used diet)
2 cans diced tomatoes
1 cup orange juice
1 cup honey
1/2 cup apple cider vinegar
1 tsp. cayenne pepper
Salt to taste

Heat the oil in pan. Add onions and saute for 5 – 6 minutes.  Add the remaining ingredients and stir well.  Simmer for 30 minutes.

Pour the sauce carefully into a blender and puree until smooth.  It’s best to work in batches and don’t fill the blender more than 1/3 full. 

Put the sauce into pan and simmer, uncovered for 1 – 2 hours.  Stirring occasionally. Yield 4 1/2 cups.

Pulled Chicken Sandwiches
Boneless chicken breasts (I had 2 – 20 oz. packages)

Cook chicken until done and shred.  Add BBQ sauce and mix together. I used 2 1/2 cups of this BBQ sauce and I froze the other 2 cups of sauce.
 
2 Chicken Sandwiches + Roasted Cauliflower  = Very Tasty Meal!


Check out Debbi Does Dinner Healthy for more (mostly) healthy recipes!

SWEET & SOUR GLAZED PORK CHOPS

We normally grill these outside, but it was really windy the day I planned these so I decided to try them on the stove and was pleasantly surprised.  The taste was similar but unique without the smoke flavor.
SWEET & SOUR PORK CHOPS
4 thick boneless pork chops
2 tablespoons olive oil
sea salt and white pepper
1/3 cup balsamic vinegar
2 tablespoons honey
3 + 2 tablespoons butter
fresh rosemary
  • Drizzle one tablespoon of olive oil on a plate.
  • Salt and pepper pork chops and lay in olive oil seasoned side down.
  • Salt and pepper tops and drizzle with remaining olive oil.
  • Let sit for 30 minutes.
  • In a small saucepan combine vinegar and honey, blending well. Cook until reduced to about 1/4 cup.  Add butter and rosemary. Set aside.
  • Melt remaining butter in sizzling skillet.
  • Add pork chops and brown on both sides.
  • Brush on glaze and cook through.
  • Enjoy.

Try a New Recipe: Min’s Pork Chile Verde

For a while, we had a Schwan’s delivery guy who said he used to be chef. He said he was “Irish-Mexican” and that his dream job would be cooking on a ranch like ours. He was large, round, friendly and nice, and we talked quite a bit about food. He shared the ingredients for his “secret” Green Chile, and I wrote them down. I didn’t write down the technique, amounts, or anything else, so the first time I made this, I winged it. For a last-minute dinner for 14 hungry cowboys. Everyone loved it!

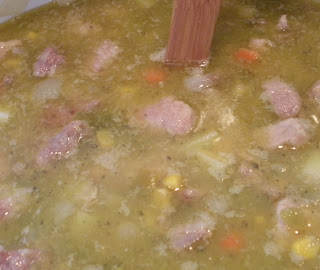
This is a nice, filling stew, perfect for a fall day.
Just so you know, here are all the notes I started with:
Green Chile
chicken stock
roasted green chiles
chicken bouillon
cumin
mexican oregano
pork sirloins or chicken
cornstarch to thicken (don’t if freezing)
pureed tomatoes
And that’s all I got. He said that green chile is “peasant food” or something to that effect, and that he used to make and serve it in a restaurant where he cooked. He also said something about feeling okay to share the “recipe” with me because I live in the middle of nowhere, basically “who are you going to tell?” Ahem.
But, you know, I made this up as I went along, and I also added more ingredients, and completely improvised the method. So it’s not really like I divulged any big secrets here. I don’t think, anyway, given the end result.
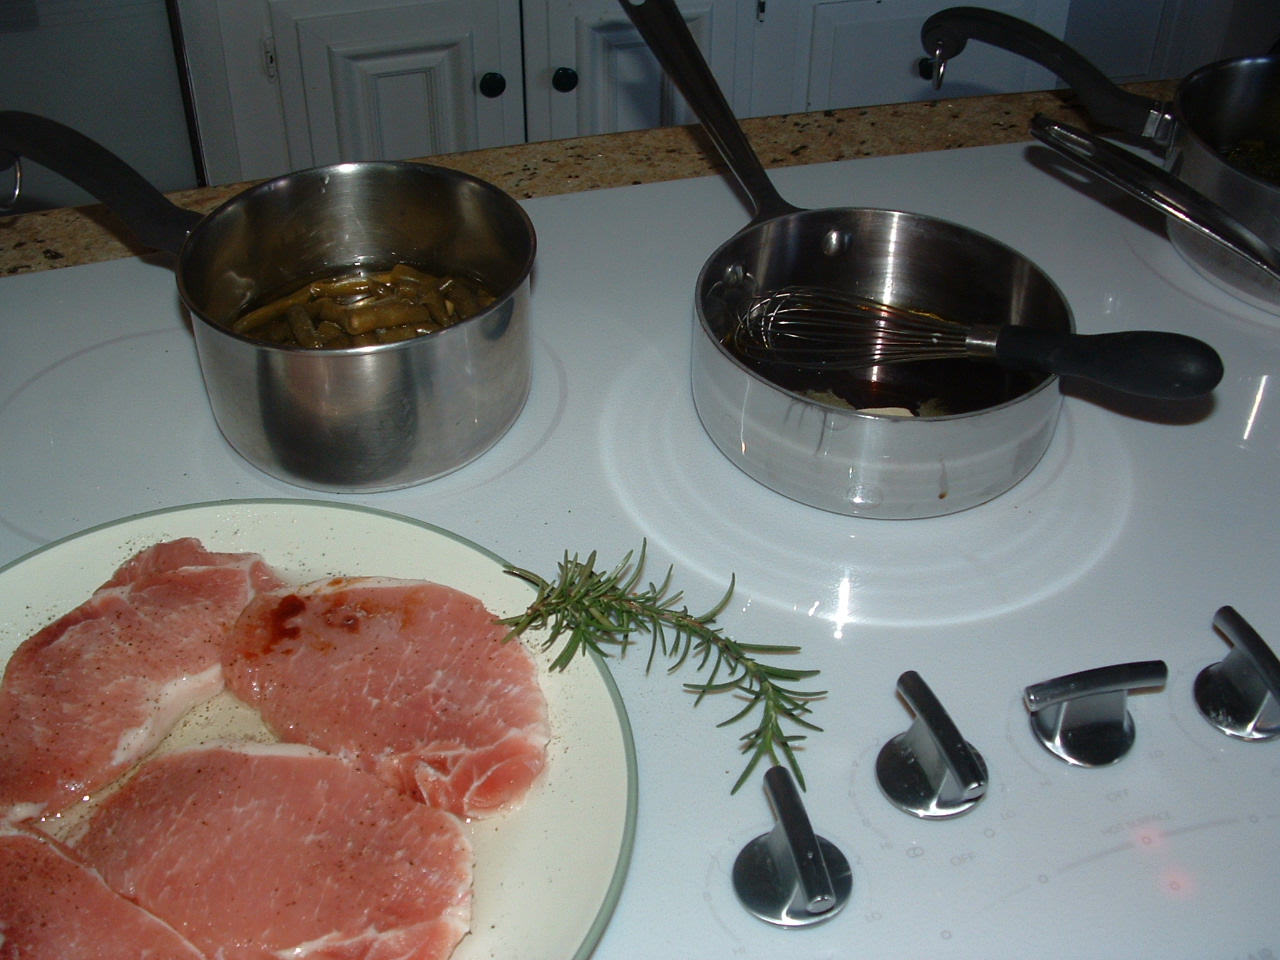
I pulled a 5-pound package of pork loin ribs out of the freezer, but didn’t realize that they were not boneless, but that’s all I had. That’s okay, since I was cutting the meat up anyway, I just had an extra step of removing all the bones. Incidentally, the slab of meat wouldn’t fit into our microwave for defrosting, so I did it a different way: I stuck it into the biggest frying pan I have (it didn’t all fit, some was sticking over the edge), put a cup of water in the pan and perched the lid on top of the meat. I turned it on medium to sort of “steam-thaw” it until I could get the ribs apart and cut them into bite-size pieces. It worked pretty well, I just tried not to cook the meat very much in the process. It would be much easier with advance notice (instead of, “Do you think you could make dinner for us tonight? There are 14 of us”) and having meat that was thawed.
Yesterday, I used boneless country pork ribs that I had already thawed, so I didn’t have any pork “broth.” I just used all chicken broth instead.
And although this started out to be a somewhat “authentic” Chile Verde, it ended up being something quite different. I embraced the “peasant food” label and ran with it, boiling and straining the pork rib bones for broth, adding ingredients that we had in the pantry to extend the recipe when I didn’t think it looked like enough to feed 14.
It was a bit too spicy for the kids…If you’re concerned about it being too spicy, just leave out the can of jalapeños and reduce the cumin.

Don’t forget, this recipe serves 14 with some leftover. You can half the amounts of everything if you wish, although it’s sooooo good, I don’t know why you would. Also, I always always forget to add the tomatoes at the end. I’m going to go ahead and call them “optional.” =)

Min’s Pork Chile Verde Stew
serves about 14
Butter
Olive oil
5 pounds boneless pork ribs
1 cup flour
1 1/2 yellow onions, diced (about 2 cups)
2 carrots, peeled and cut in 1/4-inch dice
4 cans chicken broth (2 cans if using pork “broth”)
7 cubes chicken bouillon
4 4-ounce cans fire-roasted diced green chiles
1 4-ounce can fire-roasted diced jalapeños
6 to 8 red potatoes, washed and cut in 1/4-inch dice
1 can garbanzo beans
1 can whole kernel corn
1 tablespoon cumin (or to taste)
2 teaspoons Mexican oregano, crushed
1 can diced tomatoes (optional)
Kosher salt and freshly ground pepper to taste
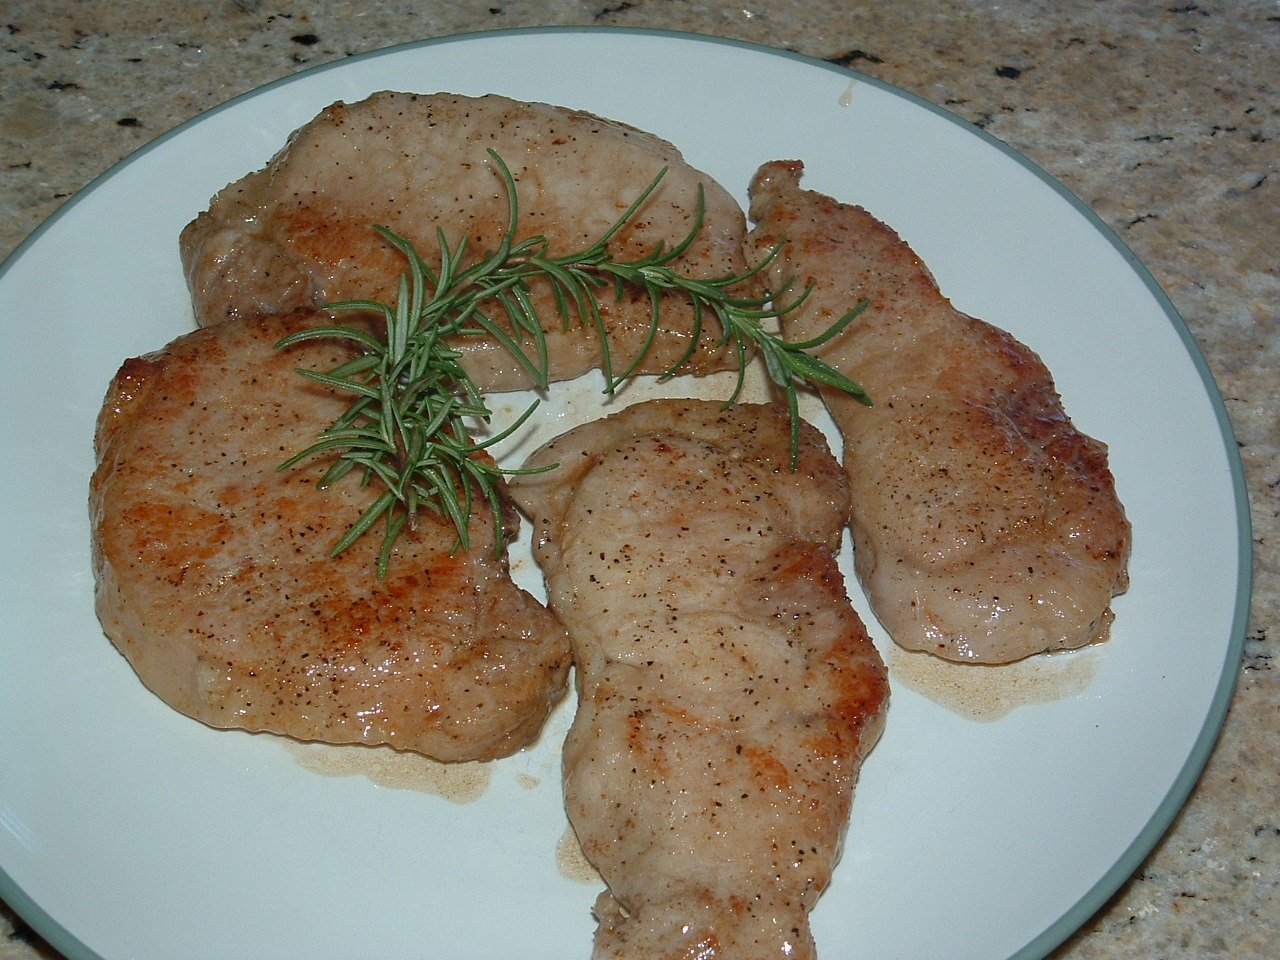
Pour flour into a large ziploc bag. Cut pork into 1/2-inch pieces, add to ziploc bag, seal and shake to coat. Starting with two tablespoon each, add butter and olive oil to a large soup pot over medium heat. Remove pork from flour with a slotted spoon, and fry in butter and oil until golden brown and cooked through, stirring occasionally. Remove cooked pork to a plate, and repeat until all pork is cooked and on a plate, using more butter and oil as necessary in equal amounts.
Add diced onions to the pan, along with an additional tablespoon each of butter and olive oil, if necessary. Saute over medium-low heat until onions are translucent. Add carrots, stirring in and cooking for a few minutes. Add chicken and pork broth, and chicken bouillon cubes. Return pork to the pot.
Add everything else except tomatoes, salt and pepper, and stir well. Reduce heat to low, and simmer until potatoes are tender. Stir in tomatoes and warm through. Taste and adjust for spices, add salt and pepper if needed.
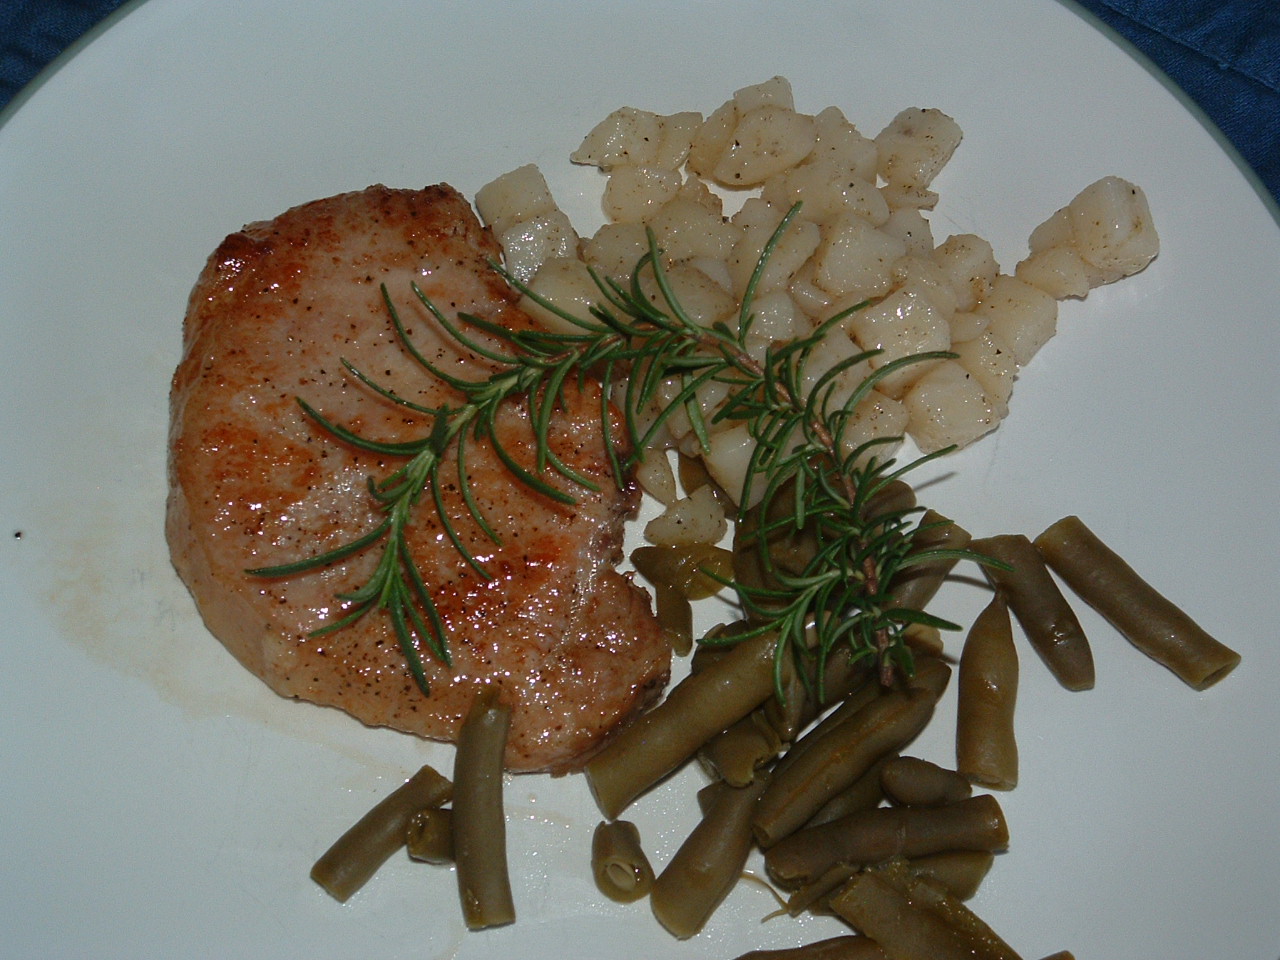
Serve with tortillas or crusty bread on the side and plenty of Corona.
Don’t forget to visit me at The Bad Girl’s Kitchen for more fabulous recipes!

GUILTY PLEASURES SWAP

PhotobucketI once again participated in one of Mamarazzi’s swaps! In this one, we were supposed to send our partners things that we consider “guilty pleasures.”  You know, things like your favorite bath oil that you only splurge on once a year, or an expensive cooking tool, or your favorite chocolate… What are your guilty pleasures?

My partner was Kathleen from Measuring My Life in Love.  She sent me this wonderful group of goodies.  There is a new Christmas Idea Magazine, a thankful journal, a photo album, a romance novel, an awesome apple candle, sweet smelling milk and honey chapstick, Aussie 3 minute miracle and bobby pins to do my hair, Apricot leathers – yum!, Chocolate Bliss, vanilla pudding and some fun purple nail polish that I’ll use next week with my pedicure.

I had already wrapped these when I realized I had not taken a picture yet, so you have to imagine the insides of these packages as I describe them. 

To me guilty pleasures means things I wouldn’t normally buy myself, but are seriously on a “want” list.  My life is so hectic that there is never any “pamper me time” so the Bath and Body Works Bubble Bath is a true guilty pleasure for those long, but far and few in between bubble baths.  I hate my feet or hands to get cracked from the hot summers or the cold winters and the Burt’s Bees salve is so soothing and calming to the skin.  Because of my hectic life the key chain with the pictures is something that I can look at throughout the day to remind me of who I do it all for.  The baking mat is PURE guilty pleasure.  I have never burnt a cookie since I started using these mats so it’s a 2 fold guilty pleasure since I have to make cookies to make this one work.  The oval frame I just saw and thought was pretty.

aprons 3

Save Room for Dessert..Symphony Bar Milk Chocolate Cookies

Today’s dessert comes from Martha Stewart’s Cookies.  I’ve had it for awhile, and I have yet to try any of the recipes.  The cookie on the cover, Chewy Chocolate Gingerbread Cookies, looked delicious to me – chocolate, cinnamon, ginger, cloves, & nutmeg – a perfect combination of flavors as far as I am concerned, but I knew neither the child nor the husband would eat them, and I really wanted to bake a cookie for them to enjoy.  So, I kept looking, and I came across Milk Chocolate Cookies – perfect, except I didn’t have the requisite good-quality milk chocolate; however, I did have 2 large Symphony bars.  Good enough for me, I decided.  This is both a chewy and crunchy cookie, a perfect combination in my book.  Hope you enjoy them!
Symphony Bar Milk Chocolate Cookies
1 cup flour
1/2 cup cocoa powder
1/2 teaspoon baking soda
1/2 teaspoon salt
2-4.25 oz Symphony Bar with Almond & Toffee Chips
1 stick unsalted butter
1 1/2 cups sugar
2 eggs
1 teaspoon vanilla
  • Preheat oven to 325 degrees.
  • Line a cookie sheet with parchment or spray with non-stick spray.
  • In a small bowl, combine flour, cocoa, baking soda, and salt; set aside.
  • Melt together one of the Symphony bars with the stick of butter – I did this in the microwave, stirring after intervals of 30 seconds.  The cookbook says to use a double-boiler technique – your choice.  Once melted, allow the mixture to cool.
  • In a large bowl, beat together the cooled melted chocolate, sugar, eggs, and vanilla.
  • With the mixer on low, add the flour/cocoa mixture.
  • Chop the remaining Symphony bar, and add to the cookie dough. 
  • Chill for 15 minutes.
  • Using a small cookie scoop, drop cookie dough onto prepared pan.  The cookies spread, so allow at least 2″ between them.
  • Bake for 12-13 minutes at 325 degrees.
  • Allow to cool before removing from pan.
Recipe adapted from Martha Stewart’s Cookies.

WEEKLY MENU

I’ve been sitting here all day watching football and going through old cookbooks and have decided I’m going to do a recipe experiment week this time. Take us all out of our comfort zone so to speak.  Maybe they’ll really appreciate the old fall backs next week, but really I’m hoping it’s a raving success so I can do it again next week.
Menu Plan Monday hosted by Laura at I’m an Organizing Junkie

DATE breakfast lunch supper
MON 9/27

GLAZED SESAME CHICKEN STIR-FRY
TUES
9/28

SAUTEED PASTA with TOMATOES & GARLIC
WED 9/29

SWEET & SOUR GLAZED PORK CHOPS
THU
9/30

CHEESEBURGER SALAD
FRI
10/1


LEMON HERB CHICKEN RING
SAT
10/2
Shirred Eggs leftovers FAMILY BURRITO
SUN
10/3
S.O.S. or S*$# on a Shingle Swampy’s Chicken Broccoli Pasta in Garlic Cream Sauce

aprons 3

VOODOO MELTS aka HOT WING MELTS

1 large Heirloom tomato,sliced
1 small red onion, sliced thin
4 boneless, skinless chicken breasts, pounded thin
2 cups Flour
1 teaspoon salt
1 teaspoon pepper 

Hidden valley ranch dressing mix (DRY) OR Good Seasons Italian dressing mix (DRY)
1/2 cup crumbled Bleu Cheese or Havarti slices
Thick Bread of Choice
3-4 tablespoons butter 


1 batch  Bleu Cheese Dressing for dipping

I prepare the chicken breasts the same as you would HOT WINGS except that I flatten the chicken breasts first.

  • Preheat oven to 350 degrees
  • Wash and dry the chicken pieces.
  • Mix together the flour and seasonings in a plastic ziploc bag. Using a ziploc bag makes it easy to throw away the whole mess after dredging all the chicken pieces and it helps you coat every possible spot of the chicken pieces.
  • Add chicken a few pieces at a time and coat them well. Set chicken pieces aside.
  • While you’re doing this, have the butter melting in the pan. Start with 2 tablespoons and add as necessary, but make sure you don’t run dry.
  • Once all the chicken has been dredged, start frying. 
  • After you have the pan full, pepper the pieces again. You only need to turn the chicken one time. Brown evenly and then drain on paper towels.
  • As the last batch is frying, melt 4 tablespoons of butter in a flat bowl. To that add 1/2 cup of Frank’s hot sauce.  Whisk them together well.
  • Spray a cookie sheet with PURE.
  • Dip each piece of chicken into the hot sauce mixture and put on cookie sheet.
  • After you’re all done and if you have hot sauce and butter mixture left, pour a little over the top of each wing.
  • Bake for 30 minutes.
  • Melt 2 tablespoons butter on griddle over medium high heat. Add more as necessary to keep from burning.
  • After butter begins to sizzle lay bread slices on top of butter.
  • On one side lay chicken breast or shredded it into smaller pieces. Today I thinly shaved some and shredded some so you could see the difference.
  • If using Havarti lay it on the other slice of bread, otherwise sprinkle bleu cheese crumbles over the chicken breast.
  • After bread begins to toast golden, close up the sandwiches. 
  • Continue cooking until golden on all sides and heated through.

SUBMITTED TO:
HEARTH and SOUL

TEMPT MY TUMMY TUESDAYS
TUESDAYS AT THE TABLE

ARE YOU READY FOR SOME FOOTBALL????????????

We are – we’re HUGE fans!  We do a count down in August to pre-season every year and never miss a game when at all humanly possible!  Well, it’s that time of year again! Football season is already 1 week old and that means it’s time for tailgating at the games, serious football food and game day buffets.  Bring over your best appetizers and your biggest appetite and oh don’t forget the Brewskis to go with it all.  I like mine really cold please with a side of lime!
Tailgating Time will be posted every Sunday at noon and open all week for you to add your football favorites. We’ll play each and every week until Superbowl Sunday. I can’t wait to see what you’ll be bringing!
It’s Tailgating Time!
HOSTED BY:
Martha at Seaside Simplicity 
Tamy at 3 sides of Crazy 
Lyndsey at Tiny Skillet
Martha at Menagerie
Would you like to be a host of Tailgating Time too? 
Leave me a comment here with your email or with Martha over at Seaside Simplicity so we can send you the code and add you to the host list – more exposure, more links, more football food!

Also don’t forget that the CSN winner will be announced at Seaside Simplicity  today!

aprons 3