
This German Bearded Iris is one of my most most favorite flowers because of its beauty. It always stands tall and proud with a luscious blend of color. I just love this picture!


“The “Memorial” in Memorial Day has been ignored by too many of us who are beneficiaries of those who have given the ultimate sacrifice. Often we do not observe the day as it should be, a day where we actively remember our ancestors, our family members, our loved ones, our neighbors, and our friends who have given the ultimate sacrifice:
Always remember and never forget!


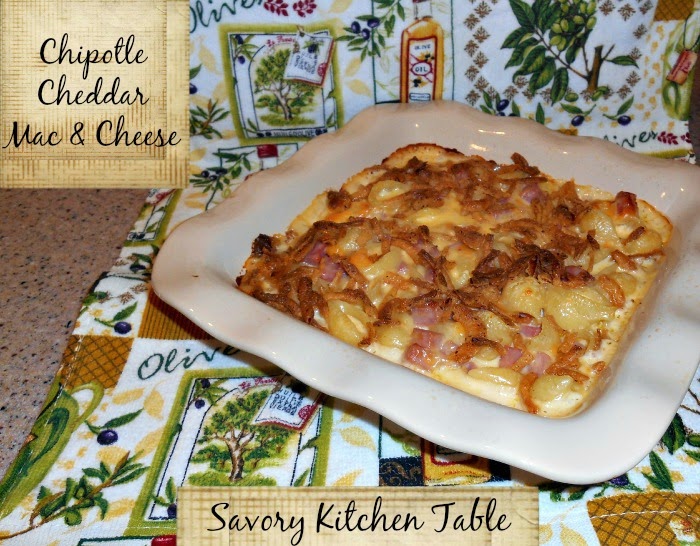
CHIPOTLE CHEDDAR MACARONI & CHEESE ala TAMY
1 1/2 cups dried macaroni (elbows or shells)
1 1/4 cup diced ham
1/2 cup garlic pepper crispy onions
3/4 cup heavy cream
2 tablespoons butter
salt and pepper, to taste
4 slices Chipotle cheddar cheese, torn into pieces
3 slices sharp cheddar cheese, torn into pieces
3 slices white American cheese, torn into pieces


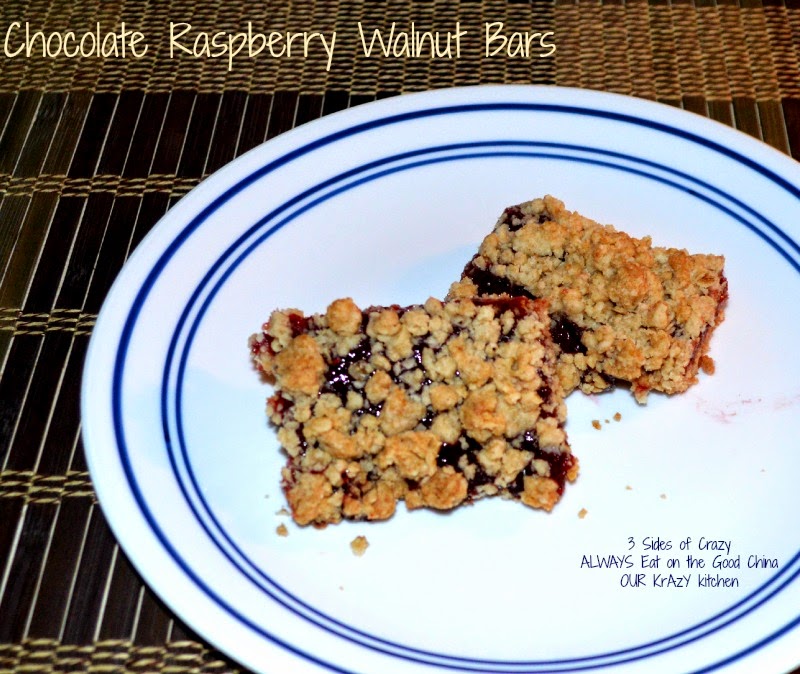
This month our Baking partners challenge is “Bar” recipes. The recipes are for Lemon Bars, an all time favorite! and I adored the Chocolate Raspberry Walnut Bars.
This month’s challenge was suggested by Suja from Kitchen Corner Try it!
Lemon Bars
Recipe source The Secrets of Baking, Sherry Yard and The Good Cookie by Tish Boyle
Basic short crust recipe:
All Purpose flour- 1 1/4 cup
Confectioner’s sugar- 2/3 cup
Pinch of salt
Cold unsalted butter cut into half inch cubes- 10 tbs (1 1/4 stick)
For the filling:
Sugar- 3/4 cup
Lemon zest- 1 tablespoon
Eggs-4
Lemon juice-1 cup
Condensed milk- 1/2 cup (or milk 1/2 cup. Milk or condensed milk is optional it gives the bars a custard flavor and firmer texture)
All purpose flour- 3 tablespoons
Salt- 1/8 teaspoon
Yellow food color- 2-3 drops (optional)
Powdered sugar for dusting
To make the crust
To make the filling
Chocolate Walnut Raspberry Bars
Recipe source Faye Levy’s Chocolate Sensations
Walnut cookie dough
Walnuts- 1 cup (3-3/4 0z.)
Egg yolks-3
Sugar- 1/2 cup
Salt- 1/4 teaspoon
Vanilla extract-2 teaspoon
Grated lemon zest- 2 teaspoon
Chilled Unsalted butter- 1 cup ( 8 oz.)
All purpose flour- 1 3/4 cups
Chocolate Raspberry filling
Raspberry preserve- 1/2 cup
Semi sweet chocolate cut into chunks- 6 oz.
Nutty crumble topping
Sugar- 2 tablespoons
All purpose flour- 1/4 cup
Walnuts- 1/4 cup
To make the dough
Filling
Topping


I told her it was a Princess House Heritage Crystal Glass and she immediately put it down and backed away from it like it was Uranium or something. I asked her what was wrong and she said she was afraid she’d break it, so she better not touch it. I laughed and said don’t worry about it, we use them every day. We even break them now and again.
Then I asked her to put the beans in the oven and she looked at the bowl and said, “You really want this pretty bowl in the oven”? Again I laughed and said yes.
So I asked her if she had ever heard of Erma Bombeck and she said no. I had to share this with her.
See many, no, most of you know me as just a fellow blogger with a positive attitude and generally friendly demeanor. What you don’t know is that I too suffer from a terrible debilitating disease that requires constant maintenance, positive attitude and a stress free life as well as a preservative free diet to stay even close to healthy. To look at me you would never know I was sick, but for that all I can say is thank you as I have worked hard to maintain that appearance and attitude, because it wasn’t always that way and it was hard work to get this healthy. I also know though how tenuous life is and how quickly it can change so for that reason I post this tribute to Erma Bombeck as a reminder to us all to burn the pink candle, use the pretty bowl and crystal glasses for everyday.
The following was written by the late Erma Bombeck after she found out she had a fatal disease.
If I had my life to live over, I would have talked less and listened more.
I would have invited friends over to dinner even if the carpet was stained and the sofa faded.
I would have eaten the popcorn in the ‘good’ living room and worried much less about the dirt when someone wanted to light a fire in the fireplace.
I would have taken the time to listen to my grandfather ramble about his youth.
I would never have insisted the car windows be rolled up on a summer day because my hair had just been teased and sprayed.
I would have burned the pink candle sculpted like a rose before it melted in storage.
I would have sat on the lawn with my children and not worried about grass stains.
I would have cried and laughed less while watching television – and more while watching life.
I would have shared more of the responsibility carried by my husband.
I would have gone to bed when I was sick instead of pretending the earth would go into a holding pattern if I weren’t there for the day.
I would never have bought anything just because it was practical, wouldn’t show soil or was guaranteed to last a lifetime.
Instead of wishing away nine months of pregnancy, I’d have cherished every moment and realized that the wonderment growing inside me was the only chance in life to assist God in a miracle.
When my kids kissed me impetuously, I would never have said, “Later. Now go get washed up for dinner.”
There would have been more “I love you’s”.. More “I’m sorrys” …
But mostly, given another shot at life, I would seize every minute… look at it and really see it … live it…and never give it back.
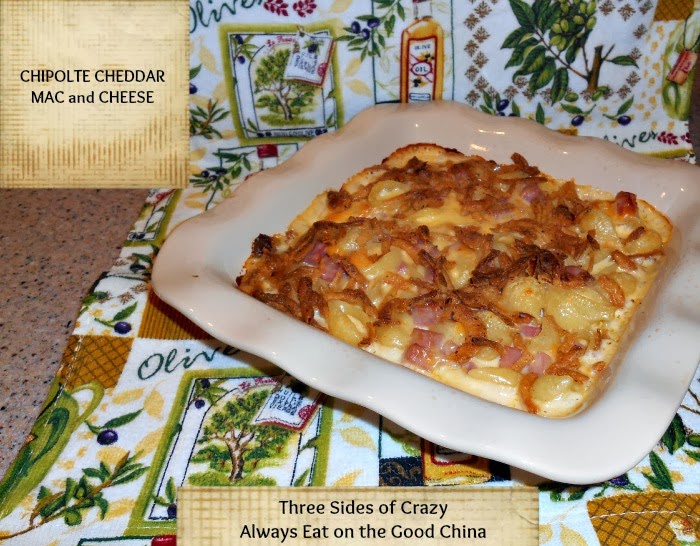
CHIPOLTE CHEDDAR MACARONI & CHEESE ala TAMY
1 1/2 cups dried macaroni (elbows or shells)
1 1/4 cup diced ham
1/2 cup garlic pepper crispy onions
3/4 cup heavy cream
2 tablespoons butter
salt and pepper, to taste
4 slices Chipolte cheddar cheese, torn into pieces
3 slices sharp cheddar cheese, torn into pieces
3 slices white American cheese, torn into pieces

Cinnamon Chocolate Babka Muffins
DOUGH
1/2 cup whole milk, warmed 110 degrees
1/4 cup sugar
2 teaspoons instant rapid rise yeast
1 large egg at room temperature
2 cups all purpose flour
1/2 teaspoon salt
3 tablespoons unsalted butter at room temperature
FILLING
3/4 cup milk chocolate chips
1/4 cup brown sugar
1 teaspoon ground cinnamon
pinch of salt
3 tablespoons unsalted butter at room temperature
EGG WASH
1 egg, lightly beaten
1 tablespoon heavy cream
STREUSEL TOPPING
1/3 cup brown sugar
1/4 cup all purpose flour
3 tablespoons unsalted butter at room temperature
ASSEMBLY


3+ cups peeled, grated & squeezed* potatoes
1 large bunch green onions, minced or 1 small Vidalia onion, minced
1/2 cup self rising flour
1 teaspoon salt
1/2 teaspoon pepper
1 cup buttermilk**
1 egg, beaten
4 tablespoons butter, melted
*I use a cheese cloth towel as my base. I grate the potatoes on top of it and then bring all the corners together like a knapsack wrapping the potatoes inside. I continue to tighten the turns until I squeezed all the moisture from the potatoes.
**I generally use regular milk and 1 tablespoon apple cider vinegar.
There is more to menu planning than just deciding what to make for dinner, at least for the average family. We’re a military family used to getting paid once a month and trying to make it last. So for me, menu planning also encompasses recipe scouring, coupon clipping (we love to read the Sunday papers and have coffee. One of the things I always go for first is the coupons to see what I can save for us – hubby always laughs when I get excited at a large coupon for something already on the list – LOL), sale ad reading and logical common sense planning. I do participate in Menu Plan Monday, but I actually prepare my menu for the entire month all at once and then just break it up for posting.
I start the last week of the previous month with checking out what I already have in the freezer inventory and then the ads for my local markets for the upcoming week. I see what meats will be going on sale and then scour my recipe file for recipes to match. One of the biggest things I do to help not only with cost of ingredients, but also waste is to make sure to back up recipes to each other that use similar ingredients that I can buy in bulk. For example if a recipe calls for 1/2 an onion for Monday night’s recipe, I make sure Tuesday night’s recipe uses the other 1/2. I also know which meals we’ll probably have leftovers for so I plan to either freeze part of it for a future meal or plan a CORN (clean out refrigerator night) within my plan if there is only going to be a little of this and that leftover. I write my list and then I match up the coupons for whatever staples (flour, sugar, eggs, butter, etc…) I need and then the luxuries if there is room within the budget. If there is a really good sale I buy in super bulk for the following month also. Now I know this sounds like a lot of work, but the whole process takes less than an hour and then it’s done for the month.
MONDAY ~ Meatloaf & Scalloped Potatoes
TUESDAY ~ Stuffed Shells & Salad
WEDNESDAY ~ Seafood Salad & Parmesan Rolls
THURSDAY ~ Chicken Cacciatore & Salad
FRIDAY ~ Chicken Carbonara & Salad
SATURDAY ~ Lemon Lime Pepper Chicken & Rice Pilaf
SUNDAY ~ Hot Wings and Home made bleu cheese dressing
MONDAY ~ Out
TUESDAY ~ Mexican Baja Casserole
WEDNESDAY ~ Spaghetti Bolegnese & Salad
THURSDAY ~ Sauteed Garlic Shrimp & Salad
FRIDAY ~ Meatloaf Muffins & Garlic Smashers
SATURDAY ~ Chicken and Onions in White Cream Sauce
SUNDAY ~ Beef Stew & Cheddar rolls
MONDAY ~ Taco Ring Salad
TUESDAY ~ Chicken Cordon Bleu & Applesauce
WEDNESDAY ~ Orange Honey Chicken & Fried Rice
THURSDAY ~ Grandma’s Chicken and Noodles – I’m working on a written recipe for this – I’ve made it from scratch for so long – it’s hard to write it down – LOL
FRIDAY ~ Chili and Beer Bread
SATURDAY ~ Chicken Enchiladas & Refried Beans
SUNDAY ~ Stuffed Pork Chops & Salad
MONDAY ~ PEANUT PORK NOODLE SALAD
TUESDAY ~ HOBO FOIL STEW
WEDNESDAY ~ CHICKEN SAUSAGE GUMBO
THURSDAY ~ HOT CHICKEN SALAD
FRIDAY ~ CROQUE MADAME
SATURDAY ~ HOT WING SOUP
SUNDAY ~ TWISTED PEPPER STEAK IN GRAVY

