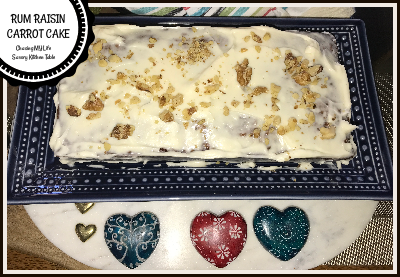
RUM RAISIN CARROT CAKE with CREAM CHEESE FROSTING

This has been a family favorite for many years and is the first dessert I taught my niece, Amber how to bake with so it has some seriously “sweet” memories 😀

RUM RAISIN CARROT CAKE with CREAM CHEESE FROSTING
CAKE
2 1/2 cups flour
2 teaspoons baking soda
1/4 teaspoon salt
1 tablespoon cinnamon
1 cup packed golden brown sugar
1 cup sugar
1 1/2 cup butter, softened
3 JUMBO eggs
2 teaspoons PURE vanilla extract
1/4 cup golden rum** SEE NOTE
3 cups grated carrots
8 ounce can crushed pineapple, drained well
1 cup golden raisins
1/2 cup chopped walnuts

  • Pour rum over raisins and set aside for at least an hour.
  • Preheat oven to 350°.
  • Grease and flour 2-9 inch cake pans or line cupcake tins.
  • In a large bowl sift together the flour, baking soda, salt, cinnamon and sugars.
  • In another bowl cream together the butter, brown sugar, vanilla and 1 egg.
  • Add additional eggs and beat until well creamed.
  • Add dry ingredients gradually until well blended.
  • Add carrots, pineapple and walnuts until well blended.
  • Drain raisins and fold in last.
  • Pour batter into prepared pans.
  • Bake 1 hour or until toothpick comes out clean.
  • Cool 10 minutes.
  • Invert cakes onto rack and cool completely.

**NOTES:

  • As an option you could soak the raisins in orange juice instead of the rum and then substitute 1 teaspoon maple flavoring for the rum.
  • This recipe also makes scrumptious cupcakes.

FROSTING
16 ounces cream cheese, softened
1/2 cup butter, softened
Juice of 1 LARGE lemon
2 teaspoons PURE vanilla extract
3 cups powdered sugar

  • In a medium bowl beat cream cheese and butter until smooth.
  • Add lemon juice and vanilla, beating.
  • Add powdered sugar gradually until well blended and smooth.
  • Ice first layer and then add 2nd cake top and ice again including sides of cake.
  • Refrigerate 1 hour to set icing before serving.

Save Room for dessert new badgeOriginally posted 7-26-2010 for OURkRazZykitchen a food blog a friend and I hosted 😀
Update posted 7-26-2022

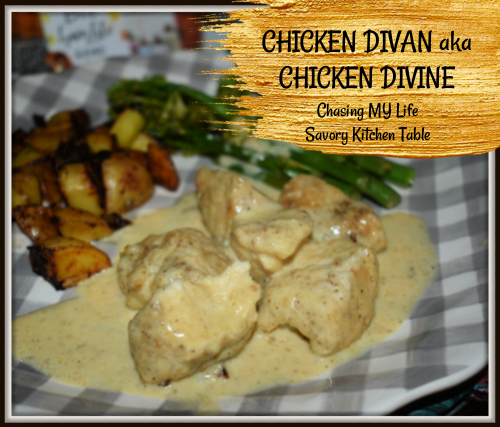
CHICKEN DIVAN aka CHICKEN DIVINE

I have a genetic disorder. Really, I do. It is just genetically impossible for me to follow a simple recipe!  This started out as me making Chicken Divan from a recent issue of Cook’s Country on skillet suppers, but turned it into something completely different.

This was originally posted on July 7th of 2010, but needed a desperately new and updated picture so here is my revamp of a favorite recipe.

Hubby loved it so much, he ate it for 3 nights in a row with no complaints and renamed it!

CHICKEN DIVAN aka CHICKEN DIVINE
1 1/2 pounds boneless, skinless chicken, cut into bite sized pieces
1 1/2 pounds broccoli crowns, chopped large (optional)
1 large bunch green onions, sliced thin
4 cloves garlic, minced
1 cup heavy cream
1/2 cup chicken broth (preferably FRESH well seasoned bone broth)
3 LARGE egg yolks
1/2 cup cream sherry
2 teaspoons Lea & Perrins Worcestershire sauce
Juice of 1 LARGE lemon
FRESH ground sea salt and black pepper, to taste

1 1/2 cups Parmesan cheese
3 + 3 tablespoons butter
1/2 CUP WONDRA flour
1 teaspoon black pepper
1 teaspoon sea salt

  • In a  LARGE ZIPLOC bag combine Wondra flour, 1 teaspoon each sea salt and black pepper.
  • Add chicken pieces to bag, seal and shake to coat well.
  • In a large skillet melt 3 tablespoons of butter.
  • When butter is sizzling add green onions and garlic, cooking a few minutes until garlic is fragrant.
  • Add chicken pieces, generously salt and peppering to taste as you go. Saute’ until cooked through. The seasoning of the chicken as you go enhances this recipe A LOT!
  • IF USING: Clean and rinse broccoli pieces.  In a large sauce pan heat chicken broth and add a vegetable strainer with the broccoli.  Steam until al dente. Reserve chicken broth.
  • Arrange broccoli and chicken on platter and keep warm.
  • Add remaining butter to skillet, scraping bits of chicken from the bottom of the skillet.  Add the chicken broth, sherry and Worcestershire sauce, cooking until slightly reduced.
  • Add heavy cream gradually, whisking all the while.  Cook until starts to thicken.
  • Remove from heat.
  • Add egg yolks, lemon juice and half of the cheese, blending well.
  • Pour sauce over chicken and broccoli.
  • Top with remaining cheese.

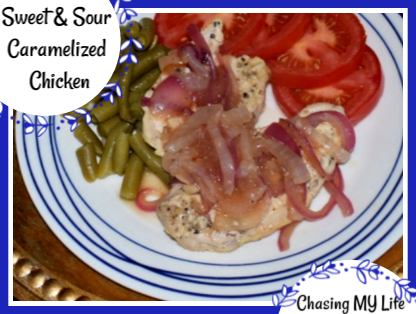
SWEET & SOUR CARAMELIZED CHICKEN

I originally posted this recipe years and years ago (2009 or 2010) on my original blog, but seriously, it needed an update picture so I made it specifically for that reason now.  😀 as well as updating the technique a bit.  I’m still NOT thrilled with the picture, but it IS better than the old one 😀

This really is an easy and quick meal to make, but it looks & tastes like you worked all afternoon so it’s perfect for company.  I should have taken a picture of the baking dish full of chicken, caramelized onions and gravy – much more impressive looking.  Oh well, next time.

SWEET & SOUR CARAMELIZED CHICKEN
4 boneless chicken breasts
1 LARGE sweet Walla Walla or Vidalia onion, halved and sliced thin
2-3 LARGE cloves garlic, minced
2 tablespoons sugar
1 cup chicken broth
4 tablespoons WONDRA flour
Juice of 1 lemon (2 tablespoons)
2 tablespoons rice wine balsamic vinegar
FRESH ground sea salt and black pepper
avocado oil
1 LARGE egg
1 teaspoon cornstarch

  • Between 2 sheets of wax paper flatten chicken breasts if they are too thick. If they are too thick they will take longer to cook.
  • Whisk together the egg and cornstarch. Soak chicken breasts in mixture for an hour before cooking. This mixture seals in the moistness and keeps the chicken juicy throughout.


  • Preheat oven to 400°.
  • In a oven proof skillet (or transferring to a baking dish) coat the bottom of the pan with avocado oil.
  • Generously season chicken with FRESH ground sea salt and black pepper.
  • When the oil is hot, brown both sides of the chicken breasts including all the sides.
  • When breasts are browned, put the pan in the oven for 5 minutes.
  • Add onions to skillet over medium high heat to caramelize. You want to gather all the little browned bits on the bottom of the pan also.


  • Reduce the heat to 300°.
  • Whisk together the hot water, bullion, flour, lemon juice, vinegar, salt and pepper.
  • Pour liquid mixture over the chicken and cover tightly with foil.
  • Return it to the oven for additional 10 minutes until chicken is cooked through. Sauce will be thick.

NOTE: I have used breast tenders in a pinch and they work well, but they cook faster so keep a close eye on them.

FRENCH ONION SOUP with MAC & CHEESE CROUTONS

I was reading emails this morning that lead to checking out the occasional shopping link that lead to cookbooks and I found one that sounded so interesting that I had to check it out which lead to checking out his blog, The Food in My Beard-Crazy Good Comfort Food (catchy title) which looks fantastic and then I started on the recipe page and found a recipe that sounded so interesting I was going to add it to my menu for next week and then I froze!  He uses processed foods almost completely.  So I moved on.  But, then I had an idea.  Why do I have to give up this amazing sounding recipe?  Why can’t I just recreate it from scratch?  I am so glad I did.

Dan’s recipe is for French Onion Soup with Macaroni & Cheese croutons.  So is mine.  Mine is more labor intensive, but still quite easy and definitely from scratch with fresh products. I blind tasted hubby and he chose mine, but you be the judge.  Hubby said he preferred the traditional flavor of my cheese blend, but loved that the mac & cheese doesn’t get soggy like the regular croutons used to.

Here’s Dan’s recipe with his picture that caught my eye:
French Onion Soup with Mac and Cheese Croutons
French Onion Soup with Mac and Cheese Croutons 
2 (7 ounce) boxes Betty Crocker Mac & Cheese original flavor
1/2 cup milk
1/2 cup butter
1/2 cup shredded cheddar cheese
2 cans Progressoâ„¢ French onion soup

  • Cook the mac and cheese according to package directions and drain. 
  • Stir in the milk, butter, and cheese packet and return to heat. 
  • Cook 3-5 minutes until it is drier and sticky. 
  • Stir in the grated cheese and mix until melted. 
  • Line a pan with wax paper and pour the mac and cheese onto the paper. 
  • Flatten with more wax paper on top until it is a little less than 1 inch thick. 
  • Put into the fridge to cool for at least an hour. 
  • When the mac and cheese is cooled, use mini ramekins as a cookie cutter to form your round tops. 
  • Divide the soup into the ramekins and top with the mac and cheese rounds. 
  • Bake at 400ºF for 20 minutes or until hot throughout and browned on top. 

Here’s Mine (a 2 part recipe):
French Onion Soup with Mac and Cheese Croutons 

FRENCH ONION SOUP (adapted from my everyday normal recipe)

1/3 cup butter
1 tablespoon sugar
4 medium VIDALIA onions, thinly sliced**
1 tablespoon flour
5 cups hot water
1 KNORR beef gel pack
1 tablespoon kitchen bouquet for color
1 teaspoon sea salt
1/2 teaspoon white pepper
4 thin slices french or sourdough bread, toasted (omit)
4 slices Gruyere cheese*(omit)

  • Melt butter in bottom of stock pot.
  • Stir in the sugar.
  • Separate onions into rings and add to butter. Cook until tender and golden.
  • Add flour and blend well with butter mixture and onions.
  • Add water, beef granules, kitchen bouquet, salt and pepper and stir well.
  • Simmer 15-20 minutes.
  • Toast bread and then butter it.
  • Ladle soup into 4 oven proof bowls that have been put on a cookie sheet for easier handling.
  • Place 1 slice of toast over top of soup.
  • Lay 1 slice of cheese on top of toast.
  • Bake at 400 degrees for 7 minutes or until cheese is melted.

*mozzarella cheese works well too

MAC & CHEESE (adapted from my everyday Chipolte recipe and adapted to his directions for croutons)
1 1/2 cups dried macaroni (elbows or shells)
1/2 cup garlic pepper crispy onions
3/4 cup heavy cream
2 tablespoons butter
salt and pepper, to taste
4 slices GRUYERE cheese, torn into pieces
3 slices BABY SWISS cheese, torn into pieces
3 slices white American cheese, torn into pieces

  • Preheat oven to 350Ëš.
  • Prepare macaroni according to package directions. Drain well.
  • Using the same pan, melt butter and add cream until smooth.
  • Add cheese a few pieces at a time, stirring until well blended.
  • Salt and pepper to taste.
  • Line a pan with wax paper and pour the mac and cheese onto the paper. 
  • Flatten with more wax paper on top until it is a little less than 1 inch thick. 
  • Put into the fridge to cool for at least an hour. 
  • When the mac and cheese is cooled, use mini ramekins as a cookie cutter to form your round tops. 
  • Divide the soup into the ramekins and top with the mac and cheese rounds. 
  • Bake at 400ºF for 20 minutes or until hot throughout and browned on top.

    DISCLOSURE

    While every caution has been taken to provide my readers with the most accurate information and my honest analysis, please use your discretion before taking any decisions based on the information in this blog. I will not compensate you in any way whatsoever if you ever happen to suffer a loss, inconvenience and/or damage because of making use of information in this blog. I may keep updating old posts on a regular basis and am not bound to explicitly state all corrections made… I blog for pleasure and enjoyment and don’t currently have commercial interest in blogging at this moment and may not accept invitations/requests of certain type which I deem inappropriate.

    I do not receive monetary compensation for their reviews. I may be sent a complimentary item in exchange for my honest opinions and receiving a free product does not influence my review posts. All opinions and thoughts are my own, and different people may have different opinions. We are not responsible for those who purchase these items and experience different results. Occasionally, the company provides a product to give away as well.

    LEMON BARS & CHOCOLATE RASPBERRY BARS

    http://2.bp.blogspot.com/-HedLhhfB-7Y/U2XOZY8C3-I/AAAAAAAASiY/OFbPJbDMomU/s1600/LEMON+BARS.jpg

    This month our Baking partners challenge is “Bar” recipes.  The recipes are for Lemon Bars, an all time favorite! and I adored the Chocolate Raspberry Walnut Bars too.

    This month’s challenge was suggested by Suja from Kitchen Corner Try it!

    Lemon Bars

    Recipe source The Secrets of Baking, Sherry Yard and The Good Cookie by Tish Boyle

    Basic short crust recipe:

    All Purpose flour- 1 1/4 cup

    Confectioner’s sugar- 2/3 cup

    Pinch of salt

    Cold unsalted butter cut into half inch cubes- 10 tbs  (1 1/4 stick)

    For the filling:

    Sugar- 3/4 cup

    Lemon zest- 1 tablespoon

    Eggs-4

    Lemon juice-1 cup

    Condensed milk- 1/2 cup (or milk 1/2 cup. Milk or condensed milk is optional it gives the bars a custard flavor and firmer texture)

    All purpose flour- 3 tablespoons

    Salt- 1/8 teaspoon

    Yellow food color- 2-3 drops (optional)

    Powdered sugar for dusting

    To make the crust

    • Pre-heat oven to 325 degree F and position rack in the center of the oven.Butter 9inch square baking pan and set aside (you can also line pan with aluminum foil)
    • Using a food processor,mix flour,sugar and salt.
    • Add pieces of butter and pulse 8-10 times till the mixture resembles coarse meal. Process until the mixture forms large clumps and holds together when pinched between two fingers (around 15-20 seconds).
    • Scrape dough into prepared pan and pat it into an even layer.
    • Using a fork prick the dough at one inch intervals.
    • Bake the crust for 20 minutes till the edges become golden brown.
    • Allow this to cool in the pan on a wire rack.

    To make the filling

    • Pulse sugar and lemon zest in a processor till it is fragrant.
    • Beat eggs and mix the sugar and whisk till it is pale yellow color.
    • Add the condensed milk, lemon juice, flour and salt.
    • Pour over the baked crust.
    • Bake at 325 degree F for18-20 minutes or until just set and firm to touch.
    • Cool in room temperature and the place in the refrigerator to chill for 1 hour before cutting into bars.
    • To finish dust the top of each bar with powdered sugar and serve.
    • Store lemon bars tightly warped in room temperature for two days or in the freezer for one week. (I store in the fridge)

    Chocolate Walnut Raspberry Bars

    Recipe source Faye Levy’s Chocolate Sensations

    Walnut cookie dough

    Walnuts- 1 cup (3-3/4 0z.)

    Egg yolks-3

    Sugar- 1/2 cup

    Salt- 1/4 teaspoon

    Vanilla extract-2 teaspoon

    Grated lemon zest- 2 teaspoon

    Chilled Unsalted butter- 1 cup ( 8 oz.)

    All purpose flour- 1 3/4 cups

    Chocolate Raspberry filling

    Raspberry preserve- 1/2 cup

    Semi sweet chocolate cut into chunks- 6 oz.

    Nutty crumble topping

    Sugar- 2 tablespoons

    All purpose flour- 1/4 cup

    Walnuts- 1/4 cup


    To make the dough

    • Finely process nuts in a food processor and set aside.
    • Combine egg yolks, sugar,salt,vanilla,lemon zest and butter in the food processor.  Start with 10-12 pulses and the continuously pulse for 5 seconds until combined.
    • Add flour and walnuts and process for five seconds.
    • Scrape down and continue processing till the dough begins to form sticky crumbs but does not come together as a ball.
    • Put dough in a plastic bag or a wrap and press together to form a ball. Chill for one hour.
    • Pre heat oven to 350F (175C).
    • Cut out 1/4 of the dough and set aside in the refrigerator.
    • Pat the remaining dough in bottom of an unbuttered 13″x9″ pan.

    Filling

    • Stir preserve, using a rubber spatula.
    • Gently spread over the dough.
    • Sprinkle chocolate over the jam.

    Topping

    • Cut reserve dough into small pieces. In the food processor process flour, walnuts, sugar and the cut dough till it resembles a crumbly mixture.
    • Spread this evenly over the chocolate.
    • Bake for 30-35 minutes until the crumbs are firm and light brown.
    • Cool in pan over a rack till it is lukewarm.
    • Using a sharp knife slice into bars.
    • Store in airtight containers (up-to three days in room temperature) (I store in the fridge)

    Save

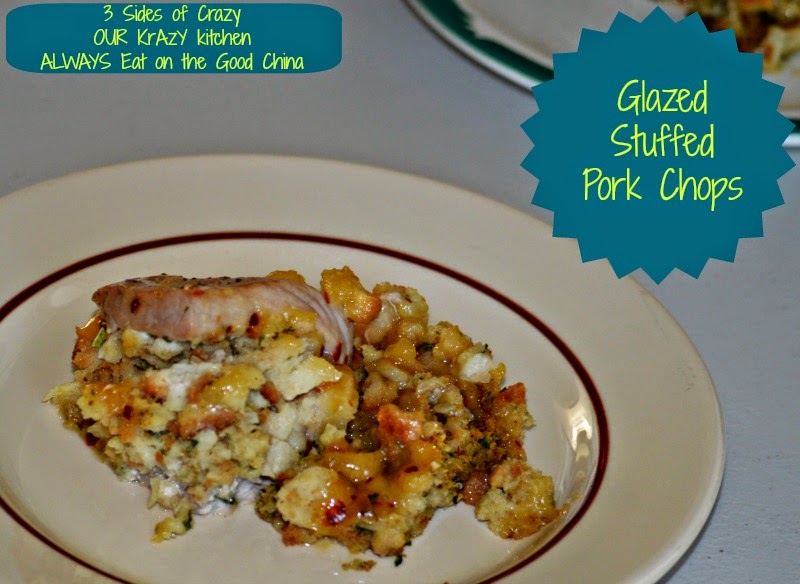
    GLAZED STUFFED PORK CHOPS – the secret is in the sauce

    Glazed Stuffed Pork Chops

    4 VERY thick pork chops

    8 slices oatnut bread

    butter

    1/2 teaspoon thyme

    1/2 teaspoon garlic salt

    1/2 teaspoon white pepper

    1/2 teaspoon ground ginger

    1/4 teaspoon red pepper flakes

    1/2 cup apricot pineapple jam, room temperature**

    1 tablespoon peach schnapps

    1 large lemon, juiced

    • Preheat oven to 350°.
    • Slit each pork chop along 2 sides to create a large pocket.
    • *Toast each slice of bread well and then lightly butter.
    • Cut each piece into small squares.
    • Toss with thyme, garlic salt and pepper.
    • Stuff each pork chop with 1/3 cup of mixture.
    • Whisk together the jam, peach schnapps, red pepper flakes, ginger and lemon juice.
    • Place chops in a square greased baking dish.
    • Arrange remaining stuffing around the edges.
    • Glaze chops and stuffing tops.
    • Bake uncovered 30 minutes.
    • Turn chops, glaze chops and stuffing again. Bake another 30 minutes.

    *If you prefer, prepare 1 box of stove top stuffing instead.

    **Tonight I used Lemon Curd and had a distinctively fresh flavor with the same consistency.  Use whatever flavor speaks to you.

    Save

    Cinnamon Chocolate Babka Muffins

    Cinnamon Chocolate Babka Muffins

    DOUGH

    1/2 cup whole milk, warmed 110 degrees

    1/4 cup sugar

    2 teaspoons instant rapid rise yeast

    1 large egg at room temperature

    2 cups all purpose flour

    1/2 teaspoon salt

    3 tablespoons unsalted butter at room temperature

    • Using a stand mixer, use a paddle to combine the milk, sugar and yeast, stirring to blend.
    • Add the egg, flour and salt mixing on low until a sticky dough begins to form.
    • Mix in the butter until well blended with no remaining chunks.
    • Switch to a dough hook and knead on low for about 10 minutes. The dough will be loose and sticky.
    • Butter a large bowl.  Add dough, cover with tea towel and let rise until doubled in a warm place. This will take 1-2 hours.

    FILLING

    3/4 cup milk chocolate chips

    1/4 cup brown sugar

    1 teaspoon ground cinnamon

    pinch of salt

    3 tablespoons unsalted butter at room temperature

    • Chop chocolate pieces in a food processor until small coarse pieces.
    • Add brown sugar, cinnamon and salt and pulse until coarse crumbs.
    • Set aside.

    EGG WASH

    1 egg, lightly beaten

    1 tablespoon heavy cream

    • Whisk together until well blended.

    STREUSEL TOPPING

    1/3 cup brown sugar

    1/4 cup all purpose flour

    3 tablespoons unsalted butter at room temperature

    • In a small bowl combine the brown sugar and flour.
    • Cut the butter in with a pastry blender until it resembles coarse crumbs.
    • Set Aside.

    ASSEMBLY

    • VERY GENEROUSLY butter 12 muffin tins OR use muffin papers for easier clean up.
    • Turn out the dough onto a floured work surface.  Gently depress the center to deflate.  Let rest 5 minutes.
    • Roll the dough into a 12×20 rectangle.  (flour as needed to prevent sticking)
    • Sprinkle the filling evenly over the dough.
    • Roll the dough into a tight log.
    • Cut the dough into 12 equal pieces (HINT: I now use dental floss for all this type of cutting.  You get a good clean cut every time.)
    • Place each piece into you prepared tin or papers.
    • Cover with your tea towel and let rise 30 minutes or so.
    • Preheat oven to 350 degrees.
    • After 30 minutes, brush tops with the egg wash.
    • Sprinkle each with the streusel topping.
    • Bake for 15-20 minutes or until puffed and brown around the edges.
    • Cool completely on wire racks in the tin. (I use the papers because I like them warm, but the come out of the tins better cool).


    POTATO PANCAKES

    This one is for Riley at Pig’n’Pancake in Seaside.  Thank you for being a great server and so friendly. You made breakfast enjoyable during our stay.
    POTATO PANCAKES

    3+ cups peeled, grated & squeezed* potatoes

    1 large bunch green onions, minced or 1 small Vidalia onion, minced

    1/2 cup self rising flour

    1 teaspoon salt

    1/2 teaspoon pepper

    1 cup buttermilk**

    1 egg, beaten

    4 tablespoons butter, melted

    • Sift together the flour, salt and pepper.
    • Whisk together the buttermilk, egg and butter until smooth.
    • Whisk in the flour mixture until well blended.
    • Fold in the potatoes and onions.
    • Drop onto hot griddle and make your pancakes.
    • Serve with applesauce and sour cream or with the Sauerbraten gravy.

    *I use a cheese cloth towel as my base. I grate the potatoes on top of it and then bring all the corners together like a knapsack wrapping the potatoes inside. I continue to tighten the turns until I squeezed all the moisture from the potatoes.

    **I generally use regular milk and 1 tablespoon apple cider vinegar.

    2014, COOKBOOKS, MENUS and A PLAN FOR SIMPLIFYING

    Every year I receive a new cookbook from my brother as a gift for either my birthday or Christmas.  I sit and devour these books as I read them like a novel tagging every “MUST TRY” recipe.  Besides those cook books I’ve been collecting recipes from magazines, newspapers and blogs.  I recently scanned in all those little pieces of paper which took up and entire 18 gallon tote.  I also vowed to hubby not to cut out any more, well at least for awhile.

    This year I’ve decided to work on the basics – my working theory that once you have a good foundation the rest is all icing.  I’m particularly fond of tutorial style with color pictures and/or historical based cookbooks.  So all the scanned little recipes will wait (by the way, there were over 5000 recipes in that tote) and I’m going to concentrate on these 3 cookbooks this year.
    I’ve always believed that no recipe is the same depending on who is making it and their techniques – whether the techniques are passed down through the generations, are school learned or experience learned through trial and error.  Once you get your basics down pat, variations based on your likes and dislikes become fun and easy to experiment with and then the rest is all gravy.
    So I sat down with these cookbooks and read from cover to cover, tagging each recipe that caught my eye (and tummy too) to try or technique I wanted to learn and then made a list by categories.
    Like Julie cooking her way through Julia Child’s cookbook, I will work my way through these books before buying another cookbook or touching my stash of recipes. My biggest drawback will be that I’m only cooking for 2 so need to alter or adapt almost every recipe. Spices and seasonings will become my best friends to make these recipes my own.  It’s all about your choice of ingredients, spices, seasonings and ALSO about HOW you put them together.
    Our palates know flavors and based on our genetics we all crave different flavors, flavor combinations and have our individual cravings and comfort foods.  Cooking healthy can be done from scratch easily with enough preparation and organization.
    My ultimate goal is to cook my way through 2014 using absolutely no pre-prepared ingredients while learning new techniques and trying tried and true recipes.
    Here is my basic thoughts on menu planning and what should be in a basic pantry from earlier posts:

    There is more to menu planning than just deciding what to make for dinner, at least for the average family. We’re a military family used to getting paid once a month and trying to make it last. So for me, menu planning also encompasses recipe scouring, coupon clipping (we love to read the Sunday papers and have coffee. One of the things I always go for first is the coupons to see what I can save for us – hubby always laughs when I get excited at a large coupon for something already on the list – LOL), sale ad reading and logical common sense planning. I do participate in Menu Plan Monday, but I actually prepare my menu for the entire month all at once and then just break it up for posting.

    I start the last week of the previous month with checking out what I already have in the freezer inventory and then the ads for my local markets for the upcoming week. I see what meats will be going on sale and then scour my recipe file for recipes to match. One of the biggest things I do to help not only with cost of ingredients, but also waste is to make sure to back up recipes to each other that use similar ingredients that I can buy in bulk. For example if a recipe calls for 1/2 an onion for Monday night’s recipe, I make sure Tuesday night’s recipe uses the other 1/2. I also know which meals we’ll probably have leftovers for so I plan to either freeze part of it for a future meal or plan a CORN (clean out refrigerator night) within my plan if there is only going to be a little of this and that leftover. I write my list and then I match up the coupons for whatever staples (flour, sugar, eggs, butter, etc…) I need and then the luxuries if there is room within the budget. If there is a really good sale I buy in super bulk for the following month also. Now I know this sounds like a lot of work, but the whole process takes less than an hour and then it’s done for the month.

    I have every scrap of a recipe I ever saved as well as many of my grandma’s too. It’s like an obsession with me. If a recipe sounds good in a magazine, I figure I can make it better based on my family’s likes and dislikes and tuck it away to try and manipulate at a later date. I recently decided it was time to clean-up this mess.

    I found an old metal LP file box at a garage sale for 50 cents and dressed it up a bit so it didn’t look like a trash bin on my kitchen counter. (it was a beat up lime green with stickers everywhere). I have written 2 family reunion cook books in the past which helped some with eliminating the scraps of paper and I’m also in the midst of writing a Tastebook to use as family Christmas gifts that is helping to clean up this mess on a permanent basis.

    I have a perpetual list on the counter and every time we use something or run out of something, everyone is trained (finally) to list whatever they used or ran out of on an ongoing basis.

    We keep a pretty concise calendar with everyone’s activities, appointments, meetings and such on it. I also write what we will be eating on each day so they’ll know what to expect. For the planning purposes here I’ll show you the rest of the month so you can see the pattern(s). If for some reason we have to cancel a night I will rearrange the week so that the meal actually canceled is one using something from the freezer, not the fresh ingredients I’ve already purchased. When I do the shopping I buy in bulk to cut the cost and since I have my menu plan ahead of time, I break down the bulk package into meal appropriate sizes before freezing when I get home.  Then I wrap each meat package with a color coded band to help keep the freezer organized.  Red for beef, green for fish, blue for chicken and yellow for pork.  

    Here is a sample month of menu planing with links to current recipes.  With each meal we also incorporate a small salad or 4 ounces of Green Goddess.

    MONDAY ~ Meatloaf & Scalloped Potatoes 
    TUESDAY ~ Stuffed Shells & Salad 
    WEDNESDAY ~ Seafood Salad & Parmesan Rolls 
    THURSDAY ~ Chicken Cacciatore & Salad 
    FRIDAY ~ Chicken Carbonara & Salad 
    SATURDAY ~ Lemon Lime Pepper Chicken & Rice Pilaf 
    SUNDAY ~ Hot Wings and Home made bleu cheese dressing

    MONDAY ~ Out  
    TUESDAY ~ Mexican Baja Casserole 
    WEDNESDAY ~ Spaghetti Bolegnese & Salad 
    THURSDAY ~ Sauteed Garlic Shrimp & Salad 
    FRIDAY ~ Meatloaf Muffins & Garlic Smashers 
    SATURDAY ~ Chicken and Onions in White Cream Sauce 
    SUNDAY ~ Beef Stew & Cheddar rolls

    MONDAY ~ Taco Ring Salad 
    TUESDAY ~ Chicken Cordon Bleu & Applesauce 
    WEDNESDAY ~ Orange Honey Chicken & Fried Rice 
    THURSDAY ~ Grandma’s Chicken and Noodles – I’m working on a written recipe for this – I’ve made it from scratch for so long – it’s hard to write it down – LOL 
    FRIDAY ~ Chili and Beer Bread 
    SATURDAY ~ Chicken Enchiladas & Refried Beans 
    SUNDAY ~ Stuffed Pork Chops & Salad

    MONDAY ~ PEANUT PORK NOODLE SALAD
    TUESDAY ~ HOBO FOIL STEW
    WEDNESDAY ~ CHICKEN SAUSAGE GUMBO
    THURSDAY ~ HOT CHICKEN SALAD
    FRIDAY ~ CROQUE MADAME
    SATURDAY ~ HOT WING SOUP
    SUNDAY ~ TWISTED PEPPER STEAK IN GRAVY

    As you can see the theme for this month is chicken with a bit of pork and hamburger thrown in. 

    ~ Tools, Condiments and Seasonings ~

    I’ve been thinking about this category a lot and no matter how you look at it, it is subjective. I mean if I cooked a lot of oriental food I’m sure I’d find a WOK an essential tool, but I don’t so we’ll approach this through logic and I’ll list ‘my’ essentials and then you can interpret any way necessary for your household and the meals you prepare.


    As for essential tools I have many that I consider truly essential! But, in reality we can truly get by with very few. I consider a good set of cutting boards, a set of great sharp knives, my cast iron skillet, quality stainless steel pans, spoons, spatulas and tongs a necessity. I try to stay away from most plastics as they do wear quicker and tend to harbor bacteria. I’m still using the same stainless steel tools and cookie sheets I spent a small fortune on 20 years ago, so that expenditure has paid off. The cast iron skillet has been passed down through my hubby’s parents and grandparents and it too is still going strong. I did purchase new heavy gauge stainless steel pots and pans about 10 years ago and they look brand new as stainless cleans so well. I also stay away from all non-stick surfaces as they do wear eventually and I just don’t want that in our food. I do change my cutting boards and rubber spatulas every couple of years just to be on the safe side despite always running them through the dishwasher.


    As much as I like all my pampered chef toys, they could all be eliminated by using just what I have listed above. Personally I cannot live without my essential Kitchen Aid stand mixer & hand mixer and my Cuisinart mini food chopper. I have a blender, but only use it to make my home made Creamy Tomato Basil soup. I don’t even own an electric can opener. I do love my slow cooker too and my Magnalite stock pots and roaster, but they too could be substituted with other pots and pans.


    Now for seasonings, this too is subjective based on the foods you prepare, but honestly if that recipe you cut out of a magazine calls for Herbs de Provence don’t run out and buy it for a one time recipe. It is a combination of herbs you probably already have on hand. It usually contains rosemary, marjoram, basil, bay leaf and thyme. So you can adjust what you have with your own likes. What I consider essential in the spice cabinet around here is kosher salt, sea salt, white & black pepper, celery salt, garlic salt/powder, basil, thyme, oregano, marjoram, parsley, paprika, cinnamon, apple pie spice, pumpkin pie spice, PURE vanilla, maple sugar, orange rind, bourbon extract, rum extract and vanilla powder.

    In the pantry I have:
    • flours ~ all purpose, bread and cake flour, self rising flour
    • sugars ~ fine sugar, brown sugar, powdered sugar
    • coconut
    • golden raisins
    • cornstarch
    • baking soda 
    • baking powder
    • rices ~ white rice, brown rice…
    • barley
    • split peas
    • tapioca
    • various pastas.
    In the way of liquid essentials I have: 
    • Worcestershire sauce
    • soy sauce
    • honey
    • apple cider vinegar
    • red wine vinegar
    • avocado oil
    • olive oil
    • canola oil
    • balsamic vinegar and several flavored rice wine vinegars.

    In the refrigerator I have:
    • mayonnaise
    • ketchup (both homemade when I have the time)
    • mustard (despite my severe allergy everyone else LOVES it)
    • sun dried tomato pesto
    • Better than Bouillon chicken and beef bases
    • fresh lemons & limes
    • chili sauce.
    The real key here is to have what YOU need on hand at all times without a lot of effort.
    PARMESAN MUSHROOM CHICKEN

    PARMESAN MUSHROOM CHICKEN

    4 thin skinless, boneless chicken steaks

    seasoned flour (I use Wondra with salt & pepper)

    1/4 cup buttermilk

    2 tablespoons butter

    2 tablespoons olive oil

    2 cups sliced mushrooms

    1/2 teaspoon fresh thyme

    2 cloves garlic, minced

    1 cup white wine

    1/2 cup heavy cream

    1/2 cup Asiago Parmesan

    • Combine WONDRA flour with salt and pepper – mix well.
    • Dip chicken in the buttermilk and then dredge in the flour mixture.
    • Heat butter and saute’ chicken until golden.  Remove from skillet and keep warm.
    • Add olive oil.
    • When oil and butter are well mixed and heated through add mushrooms, thyme and garlic sauteing until golden.
    • Add wine to deglaze pan being sure to scrape up any bits from the bottom of the pan.
    • Slowly add the heavy cream, stirring constantly until well blended.
    • Add Parmesan cheese, stirring until melted.
    • Plate chicken, serving with rice pilaf or mashed potatoes and top with mushroom sauce.

    LEMON DOODLES

    When I try a new recipe for the first time I make it EXACTLY as it is written.  Sometimes that makes for some seriously bad recipes.  The beauty of a cookie recipe is that you can make just a few to try them and then add to the recipe to change it, which is exactly what I had to do with these cookies.

    LEMON DOODLES

    2 1/2 cups flour

    1 1/2 cups sugar

    3/4 cup flaked coconut

    1 cup LAND O LAKES butter, softened

    2 eggs

    1 1/2 teaspoons cream of tartar

    1 teaspoon baking soda

    1/4 teaspoon salt

    1 tablespoon lemon juice

    1/2 teaspoon grated lemon peel

    *1 tablespoon lemon emulsion

    *cinnamon sugar

    • Preheat oven to 400°.
    • In a large mixing bowl combine all ingredients, beating at low speed and scraping bowl often until well mixed.
    • Drop rounded teaspoons of dough 2 inches apart onto ungreased cookie sheets.
    • Bake 7-10 minutes or until edges are golden.
    • Remove immediately.
    • Cool completely.
    *Now these were a bit lacking in flavor for us.  So I added a tablespoon of lemon emulsion.  They were a bit better, but still needed something so I then thought about the name and thought about Snickerdoodles and decided to roll them in cinnamon sugar and now we have a cookie!