Aztec Chicken with Fresh Pico de Gallo

Oh yes, chicken again!!  Here’s a healthy meal full of fresh ingredients and tons of flavor!
 
I love finding new marinade for chicken.

Dress it up and you can have your chicken a million different ways!

I loved this way!

I devised this from several different recipes and it turned out really good!
I finally put my tomatoes and peppers to good use! I made a rockin’ pico de gallo!

I bought 2 tomato plants and 1 pepper plant this year. They have all been doing very well. But all I usually do with them is add them to quesadillas or salads.

This turned out great and I can’t wait to make it again!


Check out the Our Krazy Kitchen pals who have entries in Project Food Blog!  Please take a minute and vote for them!  Vote quick!  Polls close tomorrow the 23rd!

Dave – My Year on the Grill
Heather – Girlichef
Joanne – Eats Well With Others
Kristen – Frugal Antics of the Harried Homemaker
Min – The Bad Girl’s Kitchen

Aztec Chicken Recipe 

1 1/2 pounds boneless chicken
1 tablespoon oil
4 cloves of garlic
1 medium onion
3 tablespoon cilantro
1 tablespoon paprika
1 teaspoon cumin
1 teaspoon chili powder
1 teaspoon salt
1/2 teaspoon pepper

Combine oil, garlic, onion, cilantro, paprika, cumin, chili powder, salt and pepper in a food processor. Save a bit of the mixture for while cooking. Pour the rest into a large baggie with the chicken, mix and let marinade for a few hours.

Grill or pan fry chicken until done, brushing with reserved sauce. Serve with Pico de Gallo.

Rockin’ Pico de Gallo
1 pound tomatoes, chopped
1/2 cup onion, diced
1 jalapeno, diced
3-4 cloves garlic, minced or pressed
2 tablespoons lime juice
1/4 cup cilantro, chopped
Salt and pepper

Mix everything together and refrigerate until ready to use.

Total calories for chicken = 970 calories
Total calories for pico de gallo = 140 calories

6 servings = 185 calories per serving with pico de gallo

Aztec Chicken with Pico de gallo and Cilantro Rice = 456 calorie dinner

This makes a lot of Pico de gallo but I put a bunch on my rice too!

Check out the Cilantro Rice recipe on Debbi Does Dinner Healthy.

Save Room for Dessert…Cinnamon Mocha Pie with Orange Essence Whipped Cream

Last week, I took the non-chocolate route with raspberry pecan crumble bars.  So, I definitely thought it was time for chocolate again, yes?  The recipe is from Christmas with Southern Living 2003.  This pie has always been one of my favorites, as I adore all things chocolate, and with the addition of coffee and whipped cream, well, it’s a win-win!  My little twist is the orange flavor added to the whipped cream; it’s certainly optional, but oh so delicious! This pie is sheer indulgence.  There is no other way to describe it.  Dense with fudgey chocolate flavor.  Heady with the fragrance of cinnamon.  Luxuriously sinful with a dollop of whipped cream that’s just kissed with a hint of orange.  And, best of all, deceptively simple…enjoy!

Cinnamon Mocha Pie
1/2 cup unsalted butter
1 tablespoon instant coffee
2 oz unsweetened chocolate squares, chopped
2 oz semi-sweet chocolate squares, chopped
3 large eggs
3/4 cup granulated sugar
1/4 cup brown sugar
1 teaspoon vanilla extract
1/3 cup flour
1 tablespoon ground cinnamon
1 recipe all butter pastry, fitted into 9″ pie pan
1 cup whipping cream
1 tablespoon orange zest, plus extra for garnish
1 tablespoons orange juice
2 tablespoons powdered sugar

Prepare pastry and place pan into freezer while you prepare the filling.
Preheat oven to 350 degrees.
In a small saucepan over medium-low heat, melt butter and add instant coffee.  Stir in the chopped chocolate and continue to stir until chocolate is melted and the mixture is smooth.  Remove from heat, set aside, and allow to cool.
In another bowl, beat eggs and sugars until slightly frothy.  Add cooled chocolate and vanilla.  Stir in flour and cinnamon.  Pour mixture into prepared pie shell.
Bake at 350 degrees for 25 minutes or until filling sets.  Allow pie to cool to room temperature (the pie will cut better) and serve with whipped cream and a dusting of orange zest.

Whipped Cream with Orange Essence
Whip cream until soft peaks form.
Add 1 tablespoon zest, juice, and powdered sugar.
Continue to beat until firm peaks form.
Use immediately.

Adapted from Christmas with Southern Living 2003

ARE YOU READY FOR SOME FOOTBALL????????????

We are – we’re HUGE fans!  We do a count down in August to pre-season every year and never miss a game when at all humanly possible!  Well, it’s that time of year again! Football season is already 1 week old and that means it’s time for tailgating at the games, serious football food and game day buffets.  Bring over your best appetizers and your biggest appetite and oh don’t forget the Brewskis to go with it all.  I like mine really cold please with a side of lime!
Tailgating Time will be posted every Sunday at noon and open all week for you to add your football favorites. We’ll play each and every week until Superbowl Sunday. I can’t wait to see what you’ll be bringing!
It’s Tailgating Time!
HOSTED BY:
Martha at Seaside Simplicity 
Tamy at 3 sides of Crazy 
Lyndsey at Tiny Skillet
Would you like to be a host of Tailgating Time too? 
Leave me a comment here with your email or with Martha over at Seaside Simplicity so we can send you the code and add you to the host list – more exposure, more links, more football food!
And don’t forget today is the last day to enter the $55 CSN giveaway here at 3 Sides of Crazy.  
Today is the first day to enter the $65 CSN giveaway over at Seaside Simplicity.  You  have to go to http://www.allcoffeetables.com/ and then come back either here or over at Seaside Simplicity and leave a comment saying which one is your favorite AND then link up a recipe to Tailgating Times. You are only eligible to win if you do both.  The winner will be announced at next week’s tailgating time.

Bento Box Lunches ~

Today I thought I would share a few of my bento box lunches with you.
Bento is a single-portion takeout or home-packed meal common in Japanese cuisine. A traditional bento consists of rice, fish or meat, and one or more pickled or cooked vegetables. Containers range from disposable mass produced to hand crafted lacquerware. Although bento are readily available in many places throughout Japan, including convenience stores, bento shops, train stations, and department stores, it is still common for Japanese homemakers to spend time and energy for their spouse, child, or themselves producing a carefully prepared lunch box. (From Wikipedia)
The fun part about making a bento is that is almost like a craft or can be as elaborate as a piece of art. Many foodies or food bloggers are very crafty for the most part because of what we create when we bake or cook a great meal. We always add our own touch to it. Bento box lunches are fun to look at, fun to eat, and for me they are fun to make too.
The idea is to make it colorful, fresh, well balanced and fun to eat. It can be simple using leftovers from dinner…
Or using egg molds and rice molds to create fun shapes and characters…
Fun and colorful food pick work well to add some color where needed…
Silicone cups can be used to hold many different tidbits of food and works well to keep it separate from other foods.
Sometimes just adding some greens or edible flowers makes the final touch and worth looking at.
Cookie and vegetable cutters can add a lot of fun to any bento…here is your chance to be creative! It is such a nice way to pack a healthy fresh meal for your child, and try different things that they just might eat.
My daughter was a little older by the time I got into bento making, but I can still get away with making one that isn’t too cute.
I made some Chicken Katsu last night for dinner and I had enough left over for Maranda and my lunch today. I packed my new “tropical Bento box” it came with a cute cloth tote too. I love it. It’s glittery too. This one you can even use in the microwave if you need to. Inside the large section I have rice with furikakae, chicken katsu, kumquat and green beans. The fruit side has pineapple, grapes and a strawberry.

I packed Maranda one too. I figured I was safe with it and she wouldn’t mind eating it at school.

This is what came home, but in her defence I did pack her a chicken and cheese half sandwich too.
I made the chicken katsu a little different than usual, because I cut the chicken breasts up before frying them. I thought it would be easier. I don’t know if that was the case though.
Panko bread crumbs with flour and grated parmesan cheese.
After dipping in egg beaten with spicy mustard and garlic ginger paste. Then dredge in the panko mix. I pan fried mine in a little grape seed oil. You can store extras in individual servings in ziplock bags and freeze. Pull them out when you need it for a lunch or snack.
Thank you for joining me again at Our Krazy Kitchen and if you would like to see more bento box lunches you can check out my bento blog The Tiny Bento or my food blog The Tiny Skillet. Make sure that you have a great weekend!

Fire Day Friday: Steak Fajitas

Wow, there are only 6 days of Summer left. By the time the next Fire Day Friday post rolls around Summer will be history. As gorgeous as East Tennessee and the Great Smoky Mountains are when Fall arrives, I still hate to hear that Summer is trying to make its walk of shame out of the door.

So to grab that last gasp of Summer, I grilled one of my favorite dishes, steak fajitas.

Steak Fajita Marinade
Source: Nibble Me This

1/4 cup Oil
1/4 cup Lime Juice
1/4 cup Tequila
1-2 clove Garlic minced
1 1/2 teaspoon Season salt
1 1/2 teaspoon Oregano (I like using the dried oregano from our garden for more rustic texture)
1 1/2 teaspoon Cumin (McCormick’s new roasted cumin is awesome)
1/2 teaspoon Chili powder
1/2 teaspoon Paprika
1/2 teaspoon Red pepper flakes

1.5 lb flat iron steak, flank steak, or skirt steak
1 ea red bell pepper sliced
1 ea green bell pepper sliced
1 ea red onion sliced

flour tortillas, shredded cheese, diced tomato, and other toppings

Whisk together all marinade ingredients. Reserve 2-3 Tbsp of the marinade. Use the rest to marinade the steak and veggies for 1-2 hours.

Grill the steak over direct heat at 500f for 4-6 minutes per side. For fajitas, I am looking for an internal temp of 125f. This gives you a crispy seared outside with a medium rare inside after a 10 minute rest.

Add the veggies to a griddle for during the last two minutes.

As mentioned, let the steak rest for 10 minutes before slicing. It is better to rest your steaks off of a plate because that lets the pores of the meat close and minimize loss of juices. I normally do that on a resting rack but I tried a new trick this time. I rested the steak on top of the grill veggies. That keeps them warm, bastes them with flavor, and raises the steak all at the same time. Win-win-win.

Wrap 6 flour tortillas in foil and grill for 1 minute a side.

Slice the steak and serve with the veggies, cheese and toppings.

Do you have a favorite “Summer” dish that you are dying to have before Fall arrives next week?

Caramelized Bacon Bits from Roast Mortem Ala Cleo Coyle

This is actually a PART TWO of a post I started on my own blog.


I wrote the recipe for a wonderful Mac ‘n’ Cheese over at My year on the Grill.  Click HERE to see that post.


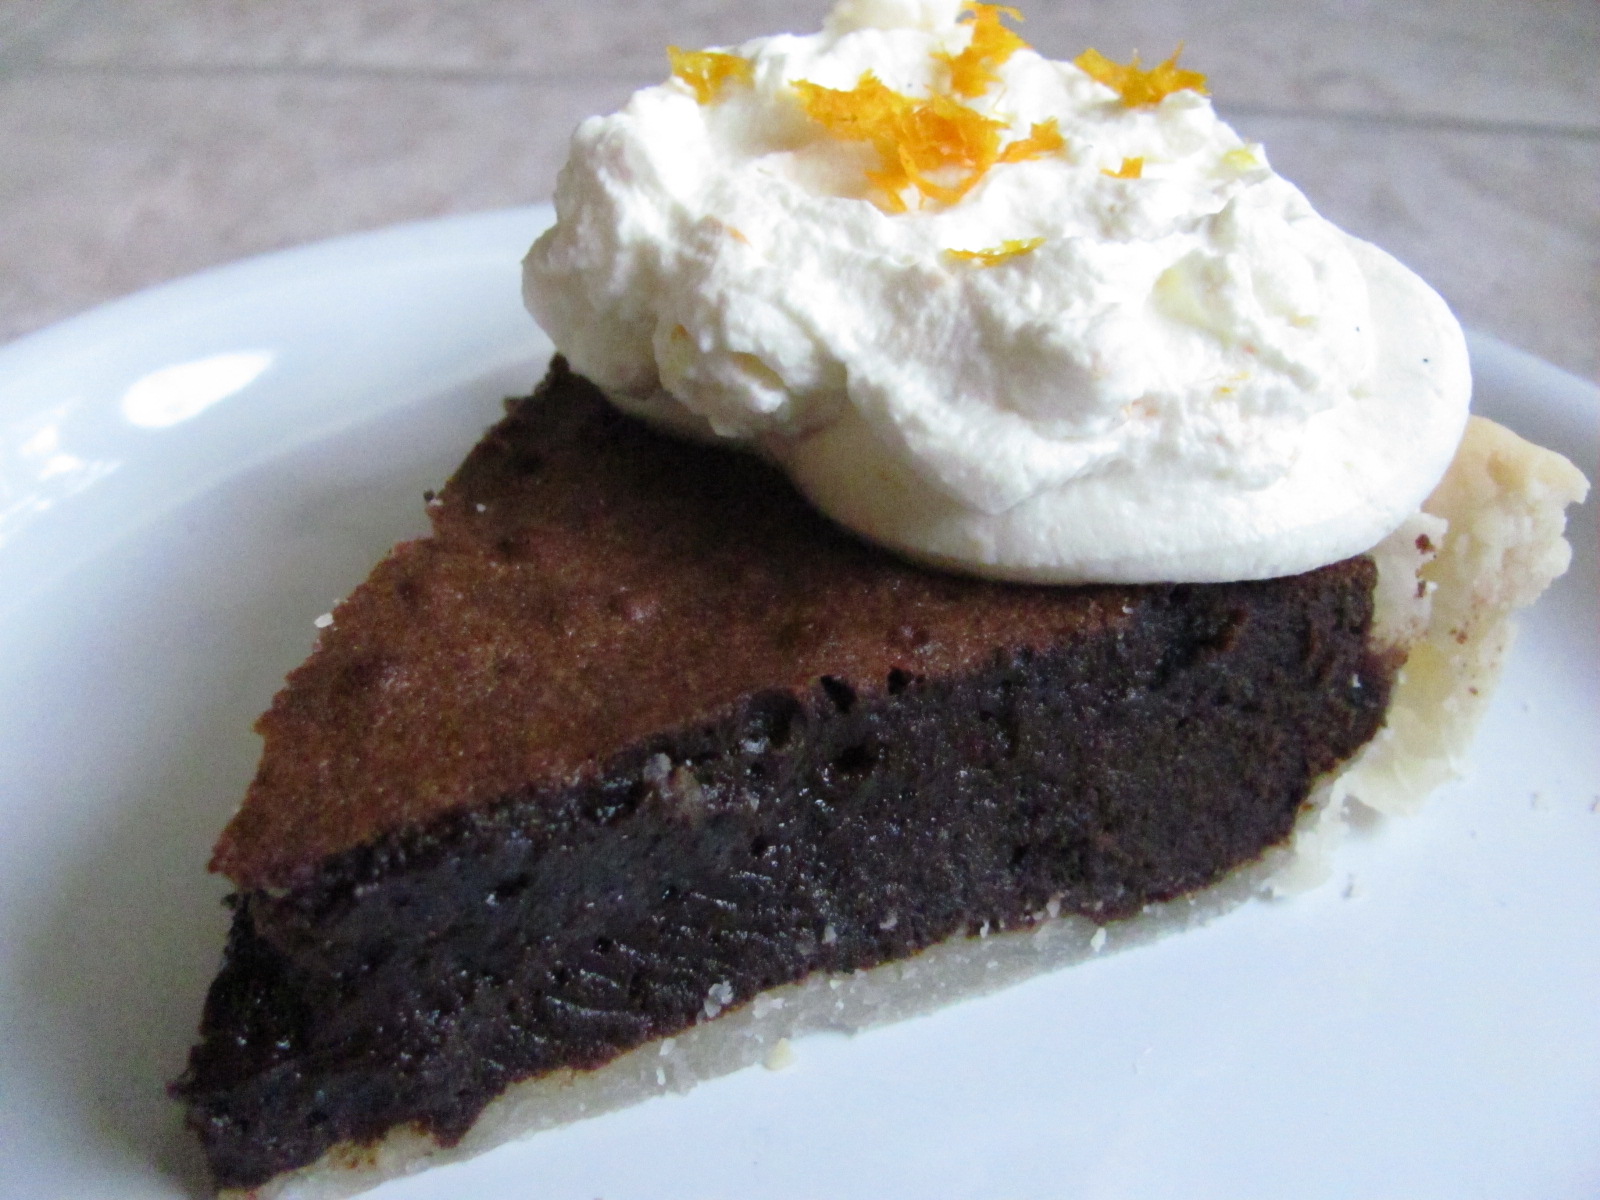
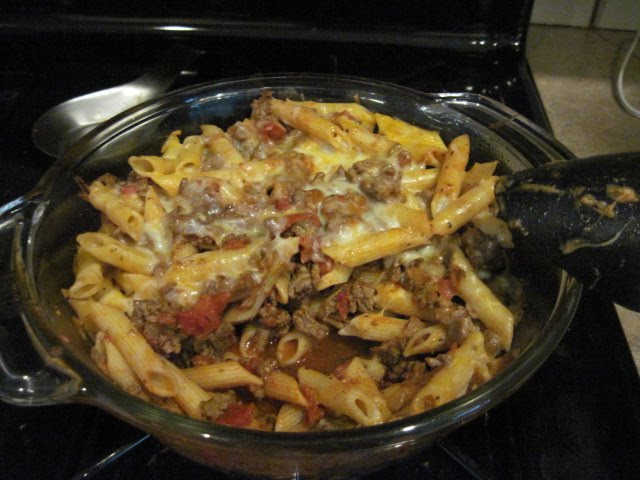
This is one of those posts where I really wish I could give you all one of those little sample tastes in a thimble cup you get at a grocery store.  Once you go “real” Mac ‘n’ Cheese with these candy bits, you’ll never go blue.  It is the caramelized Pig Candy bacon bits that really makes this dish stand out as the best you will ever have!

“These bits of caramelized bacon make a delicious salty sweet topping for any cheesy casserolet”.  – Cleo Coyle author and recipe genius, ROAST MORTEM.

Yes, if you’ve been paying attention, yet another of the prolific six merry murderesses of the MYSTERY LOVERS’ KITCHEN has written a new book!


At this point, you should hit the play button on the youTube clip below… I always like to have the soundtrack on in the background when I write up anything to do with the ladies of the mystery kitchen…

I have never met the ladies personally, but I envision a book tour with all 6 of them singing and dancing to the Cell Block Tango (bet it would be their most successful book signing event ever).  Like notches on my kitchenAid, this is the third book from the ladies I have read and enjoyed.  The completest in me wants to hit on (literary speaking) all 6.  Stay tuned.

As an aside, whenever I put the Cell Block tango song together with the murderesses from the MYSTERY LOVERS’ KITCHEN, I always picture Cleo in a bad cop movie with the swinging single bare light bulb above her head as she explains to the cop that “He ran into my knife 10 times”.
 

But I digress.

If you have never been,  the MYSTERY LOVERS’ KITCHEN is a blog with alternating cozy mystery writers (all with book series centered around different foods) post a recipe and allow us to glimpse in on the life of a writer.  A fun site, worth a look (actually 6 looks, as they alternate days, with a guest author on Sundays).


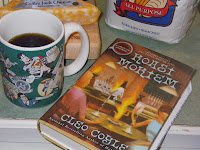
Cleo Coyle’s specialty is coffee and coffee shop type foods.  ROAST MORTEM is the 9th in her “Coffeeshop Mystery series.  While it is 9th in the series, it is very accessible for new readers.  I was able to find the first book in the series a few days ago, but have not read any of the books in between.  While there are changes in the lives of the coffee shop folks, nothing that you have to know in order to enjoy the latest book.

The series, set in a NYC Coffee House, is among the best I have ever read.  Roast Mortem is an homage to NYC Firefighters.  The book starts out with a bang when cafes around town are being torched and firemen are being killed.  Cleo walks the fine line between gruesome and disturbing; and fast paced and action packed perfectly.  While this book will be pigeon holed as a cozy, in fact, it holds it’s own as a Lawrence Block style thriller.  I totally enjoyed the book.  Lovers of New York, Coffee, cozy comfy escapist coffee shops and feisty heroines will love the series and this book in particular.

Like all of the books in the series, the recipes for the food that fits into the blot are included.  Now, I have to walk a fine line here, because I know that the other murderesses are going to be reading this, but Cleo’s recipes and instructions are hands down the best I have ever seen in a cozy (guess I stepped over that line).  Her attention to detail, as well as the little “extras”, hints that will make your efforts a success imply that she really wants to have her recipes made.

let me give you an example… In the recipe I gave for the Mac ‘n’ Cheese (Click HERE to see that post), she gives two hints that will make your cream sauce not separate, and a hint to prevent the sauce from clumping at the bottom instead of clinging to the pasta.  These hints could have been either left out, or just be included as instructions.  By drawing attention to the “hints”, she emphasizes the potential roadblocks to a success.  Without the benefit of a photo of a dish, we are dependent on the instructions.  Personally, I need and value all the hints I can get.

So, with thanks to Cleo who gave me permission to reprint her recipe, here’s what I did (and this is one of those rare times I did not change a thing)…

CARAMELIZED BACON BITS


1 pound Bacon, cut into small bite sized pieces
1/2 cup packed Dark brown Sugar

Step 1 – Slice and Saute: On medium high heat, sauté the bacon bits in a large skillet stirring often until half cooked (still soft and flexible, with fat just begining to change color).  Drain the rendered fat from the pan.

Step 2 – Caramelize: Reduce the heat to medium.  Add the brown sugar to the pan and stir until dissolved.  Continue cooking and stirring until the bacon crisps up.  remove from heat and drain and cool in a single layer on a sheet pan or other clean dry surface (Hint: DO NOT cool on a paper towel.  the bacon gets sticky and the towel will become a permanent part of the glaze).  The longer you allow to cool, the crisper the bacon will become..

Step 3 – Assemble and Bake: After the Mac ‘n’ Cheese is done cooking, top with the pig candy and you are all set for one of the great side dishes of all time!

Oh, and not only did I make caramelized bacon, but I also wanted to see what Caramelized Pulled Pork would taste like…

Using Cleo’s directions… it is candy hog heaven!


And here’s where I do that legal thing… Cleo was nice enough to send me a FREE (yes free… bwahahahaha free I tell ya) signed copy of the book, as well as gave me permission to reprint her recipe.  No promises of a positive review were made.  I loved the book, and the recipes are wonderful!  I am happy to tell the world!


Dave here from MY YEAR ON THE GRILL. It really is just this easy!  

 … I CAN COOK THAT! 

And so can you!

Healthy Meals ~ Beef Penne ~ Lowfat Cooking

“Lower your cholesterol. Doctor’s orders!” That’s what my husband and I have been told. The doctor said the best way to do this would be to eat meals lower in fat. So… I have had to change the way I cook. We’re a family who loves our beef, so I searched for some lowfat options, and I’m happy to say I found this great beef and penne recipe that is not only low in fat, but also tasty and (better yet) easy! The family liked it, too, as you can see. They started serving it before I took my photo. I’d love to know if you try it!

Ingredients:
• 1/2 pound penne pasta
• 1 14-ounce can crushed tomatoes (I used diced Italian tomatoes)
• 1 8-ounce can tomato sauce, no salt added
• 1 teaspoon oregano (I used Italian seasoning and doubled it)
• 1 pound lean or extra-lean ground beef (Laura’s Lean Beef is a great option)
• 1 medium onion, finely chopped
• 1/2 cup shredded reduced fat mozzarella and cheddar cheese blend (I used mozzarella only)

1. Preheat oven to 350 degrees.
2. Boil pasta according to instructions on package. Do not overcook. Drain and set aside. 3.Meanwhile, in a large skillet sprayed with cooking spray, saute onions and ground beef on a medium to high heat until the beef is browned.Add crushed tomatoes, sauce and oregano, and stir well. Cover and simmer for about 10 minutes.
4.Empty pasta into a 2 quart baking dish; add beef and tomato mixture and toss well to coat. 5.Sprinkle with cheese blend and bake for 25 minutes.

• Serves 4-6
• Per Serving: Calories 299, Calories from Fat 60, Total Fat 6.6g (sat 3.2g), Cholesterol 54mg, Sodium 216mg, Carbohydrate 35.3g, Fiber 3.1g, Protein 24.5g

PINEAPPLE ENCHILADAS ~ THE FLAVORFUL VEGETARIAN ALTERNATIVE

I found this great recipe for a flavorful vegetarian alternative for great enchiladas.  I changed it up a bit to fit my family’s likes and it was awesome.

PINEAPPLE ENCHILADAS
1 (15 oz.) can crushed pineapple, VERY well drained
1 bunch green onions, minced
1/4 c. sour cream
2 cups shredded jack and cheddar cheese combo
1 (10 oz.) can verde enchilada sauce
6 flour tortillas

  • Preheat oven to 375 degrees.
  • In a medium mixing bowl combine the pineapple, sour cream, and 1 cup of the cheese. 
  • Pour 1/4 cup enchilada sauce in the bottom of a 9 x 12 inch baking dish. 
  • Fill tortillas with pineapple mixture, roll and place in dish. 
  • Pour on remaining enchilada sauce and sprinkle with remaining cheese. 
  • Bake, covered, for 20 minutes.
  • Uncover and bake 5 minutes more until cheese is golden.

aprons 3

ARE YOU READY FOR SOME FOOTBALL????????????

It’s that time of year! Football season is underway, that means it’s time for tailgating, football food and game day buffets. Bring over your chips and dip, chili and chowder, all your wings and party things!

Tailgating Time will be posted every Sunday at noon and open all week for you to add your football favorites. We’ll play each and every week until Superbowl Sunday. I can’t wait to see what you’ll be bringing!

It’s Tailgating Time! hosted by Martha at Seaside Simplicity. Would you like to be a host of Tailgating Time too? Leave me a comment with your email so I can send you the code and add you to the host list – more exposure, more links, more football food!

CHICKEN FRIED CHICKEN with PEPPER GRAVY & FAMILY FAVORITE MASHED POTATOES

CHICKEN FRIED CHICKEN
2 large boneless chicken breasts
1 cup buttermilk
1 cup flour
1 teaspoon salt
1 teaspoon pepper
2-4 tablespoons butter (enough to keep chicken from burning~add as necessary)
  • Rinse and pat dry the chicken breasts.
  • In a shallow glass pan, pour buttermilk over chicken 1-2 hours prior to cooking.
  • Make sure to coat chicken well and turn at least once during soaking.
  • Drain, but do NOT rinse the buttermilk off.
  • In a medium sized skillet melt the butter over medium heat. As butter melts and begins to very slightly sizzle, prepare breasts.
  • In a small ziploc bag mix together the flour, salt and pepper.
  • One at a time, put each chicken breast in bag and coat well with flour mix and then into sizzling butter.
  • Cook on one side until edges begin to bleed and then turn.
  • About 6 minutes each side depending on plumpness.
  • Keep chicken warm.
PEPPERED GRAVY
3 tablespoons butter
5 tablespoons Wondra flour
1 1/4 cups whole milk
3/4 cup whipping cream
3/4 teaspoon salt
1/2 teaspoon Black pepper + (to taste)
  • Melt butter into bottom of pan you just cooked the chicken in.
  • Scrape up any of the chicken pieces and mix into new butter.
  • Add flour slowly, stirring until absorbed by butter and golden brown.
  • Slowly add first the milk and then the cream.
  • Stir constantly until thickens.
  • If necessary sprinkle in more Wondra until desired thickness is reached.
  • Serve over chicken and mashed potatoes.
FAMILY FAVORITE MASHED POTATOES
4 large Yukon potatoes, peeled & quartered
4 ounces Philadelphia Cream Cheese, softened

1 small bunch green onions, sliced thin

1/4 + buttermilk
4 tablespoons butter
salt & pepper to taste
  • Boil potatoes in salted water until fork tender.
  • Drain.
  • Mash all together, salt and peppering to taste as you go. 

Potato Salad

get-attachment.aspx

IMG_0006


When peeling potatoes I use a plastic/paper store bag to catch the peels… then when done just wrap up the peels and put in the trash…

IMG_0008


While boiling the potatoes I like to add pepper…
Put the potatoes in the fridge for a few hours to chill before adding other ingredients…

IMG_0001


I’ve been told time and again that I make the best potato salad… however it’s never the same each time I make it…
And I don’t quite measure…
Vinegar, but now I have discovered apple vinegar
White sugar
Mayonnaise
Mustard or honey mustard
Green onions
Boiled eggs
Paprika

IMG_0003

It was great for Labor Day weekend…

IMG_0009


Happy Eating…