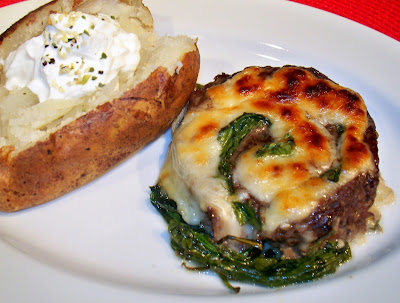
TOASTED ONION SALISBURY STEAK SLIDERS & BONUS HOMEMADE ORANGE CRANBERRY SAUCE

I made this recipe last week when I was trying to clean out the pantry and the fridge and was quite pleased with the results.  I never hesitate to experiment and/or substitute what I have on hand for what a recipe traditionally calls for.  We are usually (99% of the time) quite happy with the change up of ingredients.

TOASTED ONION SALISBURY STEAK SLIDERS
2 small flour tortillas, cut into small pieces
1/4 cup milk
2 tablespoons butter
1 large Vidalia onion, sliced thin
1/2 red pepper, sliced thin
1 1/2 pounds ground round
1 package Laura Scudders toasted onion dip
1 1/2 cups beef broth
2 tablespoons flour

  • Pour milk over tortillas and let sit for an hour.
  • With your hands mix ground round and onion dip mix together and let sit for an hour in fridge.
  • Mix together the tortilla mixture and the beef mixture until uniform in consistency.
  • Hand form 6 small steaks.
  • In a large skillet, melt butter.
  • When sizzling, add onions and pepper and saute’ until caramelized.
  • Lower heat slightly. Arrange onions around the outside of the skillet and add steaks. Turn regularly until brown all over and cooked through.
  • In a saute’ pan, bring broth to a simmer.
  • Sprinkle flour into broth while constantly whisking until slightly thickens.
  • Lower heat, transfer steaks into broth mixture and top with onion mixture.
  • Serve over mashed potatoes.

Since Thanksgiving is so close and Linda did a wonderful apple cranberry sauce yesterday, I thought I would share how very easy it is to make homemade cranberry sauce.

CRANBERRY SAUCE
1/2 cup orange juice with pulp*
1/2 cup pineapple juice*
1 bag cranberries
2 cups sugar
¼ teaspoon cinnamon
1 teaspoon orange peel
Wash cranberries and drain in colander. Mix orange juice and sugar in saucepan until dissolved. Add cinnamon and orange peel. Stir well, Add the cranberries and simmer over medium high heat until bubbling, stirring often. When the mixture begins to boil, reduce heat. Cook 10 minutes uncovered or until all cranberries have ’popped’. Sauce will thicken as it cools. Can be stored in the refrigerator for a week or frozen for future holidays.

Yields: 2 cups
*You can use ALL orange juice if you prefer

***I like to make a double batch at Thanksgiving and freeze half for Christmas.

    ITALIAN BEEF STROGANOFF ~ SLOW COOKED

    ITALIAN BEEF STROGANOFF
    28 ounce can Contadina crushed tomatoes
    8 ounce can Contadina tomato sauce
    1 MAGGI beef seasoning cube
    1 large Vidalia onion, chopped
    4 cloves garlic, minced
    2 1/2 pounds chuck roast or chuck eye steak*, cut into stew sized pieces
    2 cups cooked wide egg noodles
    1 cup sour cream
    fresh parsley

    • Layer beef chuck pieces, garlic and onions in bottom of slow cooker.
    • Whisk together tomatoes and sauce.  Microwave for 3 minutes until HOT!  Add beef cube and stir until dissolved.
    • Pour over meat and onions.
    • Cook 8-10 hours on low OR 4-6 hours on high.
    • Pour meat through colander so it is separate from the sauce.
    • Stir sour cream into sauce. 
    • Fold noodles into sauce mixture.
    • Fold beef back in.
    • Sprinkle with parsley.
    • Enjoy.

    *these 2 pieces of meat are actually from the same cut, but I base it on which one is currently on sale.  This week I saved 50 cents a pound by using 2 steaks instead on 1 roast.

    TOASTED ONION SALISBURY STEAK SLIDERS

    TOASTED ONION SALISBURY STEAK SLIDERS
    2 small flour tortillas, cut into small pieces
    1/4 cup milk
    2 tablespoons butter
    1 large Vidalia onion, sliced thin
    1/2 red pepper, sliced thin
    1 1/2 pounds ground round
    1 package Laura Scudders toasted onion dip
    1 1/2 cups beef broth
    2 tablespoons flour

    • Pour milk over tortillas and let sit for an hour.
    • With your hands mix ground round and onion dip mix together and let sit for an hour in fridge.
    • Mix together the tortilla mixture and the beef mixture until uniform in consistency.
    • Hand form 6 small steaks.
    • In a large skillet melt butter.
    • When sizzling, add onions and pepper and saute’ until caramelized.
    • Lower heat slightly. Arrange onions around the outside of the skillet and add steaks. Turn regularly until brown all over and cooked through.
    • In a saute pan, bring broth to a simmer.
    • Sprinkle flour into broth while constantly whisking until slightly thickens.
    • Lower heat, transfer steaks into broth mixture and top with onion mixture.
    • Serve over mashed potatoes.

      QUICK & EASY CHICKEN CHILI and CHEDDAR CHEESE BISCUITS

      QUICK & EASY CHICKEN CHILI
      3 skinless, boneless chicken breasts, frozen
      2 cups homemade chicken broth, frozen
      1 can cream of potato soup
      1 jar dried beef, chopped
      1 Williams chili mix package
      1 can chopped green chilies
      • Place frozen chicken breasts on the bottom.
      • Pour green chilies over chicken pieces.
      • Top with cream of potato soup.
      • Top with frozen broth.
      • Sprinkle chili seasoning mix on top of chicken broth.
      • Top with beef pieces.
      • Slow cook on high for 2 hours. Reduce to low for 6 hours. Or cook on low 10 hours.
      As the slow cooker heats up, the broth will melt absorbing the chili seasoning mix which will then be absorbed by the potato soup and by the end of the day you have a huge bowl of wonderful yummy goodness perfect for a crisp fall evening. Serve with cheddar cheese biscuits.

      Hubby likes the biscuits a bit more done and the rest of us like them a little lighter! Either way they are really yummy.

      CHEDDAR CHEESE BISCUITS
      2 1/2 cups Bisquick
      1 cup shredded cheddar cheese
      2 teaspoons celery seeds
      1 egg, room temperature
      1 cup milk 
      • Combine Bisquick and seeds and mix well.
      • Add cheese and mix again. 
      • Whisk egg and milk together. 
      • Gradually add egg mixture to Bisquick mixture and mix until well blended. 
      • Drop by spoonfuls onto a well greased cookie sheet or use a mini-muffin pan.
      • Bake at 375 degrees for 20 minutes.

      London Broil with Spicy Chimichurri

      First, I must say thank you to Chris for asking me to guest post for him.  I was so excited when I received his email!  I love to grill…actually, love doesn’t even describe it correctly, it’s more than that…grilling is in my blood.  For me, being asked to guest post on Fire Day Friday is like a home cook being asked to star in their own show on the Food Network!!
      But enough with this embarrassing gushing, let me introduce myself.  I’m Jenn from Jenn’s Food Journey.  I have a love affair with cooking and, of course, grilling.  I had no desire to cook when I was younger.  Yes, I loved to help my mom or my grandma with certain little tasks in the kitchen, but that was it, I didn’t want to do the whole shebang.  It was much later in life when I found the passion and love I have for it now. Grilling is my true love, though.  When my boyfriend and I moved into our house together, my parents gave us the best house warming gift ever: A GRILL!!  As soon we got it set up, I immediately wanted to start cooking on it.  From that point on, I grilled 6 nights a week for 3 months straight. (Seriously!)  Despite all the hours standing at the grill, I still do not claim to be a master griller (is that an actually word? who cares, I like it)…but every now and then I truly shock myself with my creations……like this one I’ll be sharing with you today…yes, I’m finally getting to why I’m really here!!
      I made my first Chimichurri -an Argentinean sauce similar to pesto- back in August.  I had recently come in possession of Steven Raichlen’s Planet Barbecue and knew his recipe for chimichurri would be one of the first ones I would try.  When Chris asked me to guest post my mind immediately started turning…what was I going to make?  I sorted through files with all kinds of grilling recipes and could not come up with a good idea.  Then it hit me.  I had a London Broil in my freezer that I had been wanting to use, why not do something with that?  (And by the way, I found out after purchasing this particular cut of meat, that London Broil is actually the way you prepare the cut of meat, not the cut itself.  London broil is broiling or grilling flank steak.  So even though the cut I bought said London Broil on the package, it’s really a cut of flank steak….I learned something new I guess!  So don’t worry if you can’t find “London Broil”, it’s really just flank steak!!)  Once I knew what kind of meat I was going to use, I started thinking about what to do with it.  Marinating?  Yes, that would be a good start.  A sauce maybe?  Well, yes, of course, I am a self proclaimed sauce lover.  But what kind???  hhhhmmmm… I have jalapenos…what about a fire roasted salsa of some kind??  DING! (that’s the light bulb going off in my head by the way)  The spicy chimichurri was born!  I am one that loves heat, you may not be, so to tone down this recipe, you can just use jalapenos, or better yet, use an Anaheim or poblano pepper instead.  Either way, this chimichurri will work fantastic on any cut of beef, chicken, or pork.  I hope you enjoy it as much as we did!

      London Broil with Spicy Chimichurri
      Created by Jenn’s Food Journey
      Printable Recipe 
      Ingredients:
      For Marinade:
      1 cup lager beer
      3 Tablespoons Worcestershire sauce
      1 Tablespoon honey
      1 Tablespoon olive oil
      1/2 teaspoon red pepper flakes
      1/2 teaspoon black pepper
      2 cloves of garlic, smashed and roughly chopped
      1/4 teaspoon Hungarian sweet paprika
      1 1/4 lbs. London broil
      For Spicy Chimichurri-
      2 large garlic cloves, unpeeled
      2 jalapeno peppers
      1 Serrano pepper
      1/2 teaspoon dried oregano
      1 Tablespoon lime juice
      1/4 cup packed fresh parsley, minced
      3 Tablespoons olive oil
      1/2 Roma tomato, finely diced (about 1 Tbls) 

      Directions:

      In a resealable bag or baking dish, mix together all the marinade ingredients.  Place the London Broil in the bag, seal, and marinate for at least 4 hours, but 8-24 is recommended.
      Fire roast your garlic and peppers.  For the garlic: place unpeeled cloves in a square of foil, drizzle with olive oil, season with salt and pepper, and seal foil around it.  Place on preheated grill for about 5 minutes, or until the garlic becomes soft.  Squeeze garlic from the skins, mash with side of knife and mince.  For the peppers: rub with a little olive oil and place directly over the fire on the grill grates.  Allow to cook until the skins are black and blistered, about 8-10 minutes.  Place peppers in a bowl and cover with plastic wrap for 5 minutes.  When peppers have cooled a bit, peel skin, remove seeds, and then finely dice.
      Heat grill to 350-400 degrees.  In a bowl, combine the garlic, peppers, and oregano.  Stir in the lime juice.  Add the parsley and the olive oil and mix to combine.  Fold in the tomatoes; set aside.
      Remove the steak from the bag and discard the marinade.  Place the meat on the grill grate directly over the fire and close the lid.  Allow to cook for 4-10 minutes on each side, depending on your desired doneness. (Rare: 120-125 degrees; MedRare: 130-135 degrees; Medium: 140-145 degrees; MedWell: 150-155 degrees; WellDone: 160 degrees).  Remember to take the steak off about 5 degrees sooner then your desired doneness, they need to rest for at least 5 minutes and they will continue to cook.  Serve with chimichurri and enjoy!

      BEEF VEGETABLE STEW revisited

      BEEF STEW

      1 pound lean beef stew eat, cut into cubes
      1/2 pound baby carrots, halved
      1 large Vidalia onion, peeled and quartered
      1 teaspoon minced garlic
      1/2 teaspoon celery seeds
      1/2 teaspoon dried thyme
      1 teaspoon sea salt
      1/2 teaspoon pepper
      Knorr Spring Vegetable Recipe Mix
      1 cup V8 juice*
      1/4 cup white zinfandel wine*
      2 tablespoons brown sugar*
      1 tablespoons tapioca*

      • Spray bottom of slow cooker lightly with PURE!
      • Place the beef cubes in the bottom of the slow cooker.
      • Layer onions over top of beef.
      • In a mortar and pestle, grind all the seasonings together to reactivate their properties.
      • Add to Knorr Spring vegetable mix and blend well.
      • Sprinkle over the meat and onions.
      • Add carrots.
      • Whisk together the wine, V8 juice, brown sugar and tapioca until sugar and tapioca is completely dissolved.
      • Pour this over meat and vegetables.
      • Cover and cook on low 5 hours, undisturbed.
      • DO NOT CHECK ON IT!
      • Serve Immediately over mashed potatoes.
      *The tapioca, wine and brown sugar make a really nice thick gravy consistency with robust flavor when mixed with the V8.

      aprons 3

      COUNTRY FRIED STEAK

      A favorite of ours is “chicken fried” anything.  Chicken-fried steak (also known as pan-fried steak country-fried steak or CFS) is a piece of steak (tenderized cube steak) coated with seasoned flour and pan-fried. It is generally associated with the South and their hospitality. Its name is thought to be likely due to chicken-fried steak’s similarity in preparation to fried chicken, though the dish is also similar to the classic Austrian dish,  Wiener Schnitzel, a tenderized veal or beef cutlet, coated with flour, eggs, and breadcrumbs and then pan fried.  It is truly a comfort food.

      The precise origins of Chicken Fried Steak are unclear, but many sources attribute its development to Germans and Austrians who immigrated to Texas in the nineteenth century and brought recipes for Wiener Schnitzel from Europe to the USA. Lamesa, the seat of Dawson County on the Texas South Plains, claims to be the birthplace of chicken-fried steak, as does Bandera, Texas’ favorite son, John “White Gravy” Neutzling.

      The Virginia Housewife, published in 1838 by Mary Randolph has a recipe for veal cutlets that is one of the earliest known recipes for a food like chicken-fried steak. The recipe for what we now know as chicken-fried steak was included in many regional cookbooks by the late nineteenth century. The actual term “chicken-fried steak” was probably developed in the 1930s. It is thought that the  name change was due to the war with Germany.  Chicken-fried steak is among numerous popular dishes which make up the official state meal of Oklahoma, added to the list in 1988.

      All that said, even being a Texan, I grew up with it being called Country Fried Steak which makes so much more sense to me!  There is nothing chicken about this meal.  I have over the years played with the flavor and this is how we like it.
      COUNTRY FRIED STEAK
      1 cube steak or thin top sirloin steak per person
      Marsala wine
      green onions, thinly sliced
      1 egg per 2 steak, beaten
      flour
      salt and pepper
      butter
      • Generously salt and pepper the steaks.
      • Slice your onions and marinate the steaks in just enough Marsala wine to cover.  Layer the steaks and onions into a tupperware and refrigerate for several hours.
      • Drain steaks on paper towels.
      • Heat large skillet with enough butter to evenly coat the bottom.
      • Dipped drained steaks in beaten egg and then flour.
      • Lay each steak in sizzling butter and salt and pepper again.
      • Turn steaks and season again.
      • Serve with Parmesan Potatoes and Peppered Gravy.

      aprons 3

      Good Cast Iron really makes the best non-stick pan… and SMOTHERED CHOPPED STEAKS taste best made in that pan.

      Remember when I promised you this product review? Well, it’s time and I have the perfect recipe for you too!

      I love shopping online with CSN and you can too.  It so easy and they have so many wonderful name brand products to choose from.  Whether you are looking for cheap bedroom furniture, lights, TV stands, dining room furniture or cookware  they have it all.  They sent me these awesome Emerilware cast iron pans to review.
      After a good seasoning, these pans are awesome and produce super tasty recipes!  My opinion?  CSN carries the highest of quality items and these pans are the proof in the pudding so to speak.  They are even heating and consistent.  CSN really ROCKS! I can’t think of an easier way to shop with reliable shipping, awesome communication and plain nice, accommodating people to work with!

      How to Season Cast Iron Cookware

      Cast iron lasts nearly forever if you take care of it. Seasoning cast iron cookware is necessary to ensure a non-stick surface and to prevent the pot or pan from rusting. If seasoned correctly your cookware can last a lifetime and more.

      1. For crusty cast ironware that you inherited or picked up at a garage sale: Your cookware may have some combination of rust and thick crackly black crud. It can be restored fairly easily to good as new condition! First place the cookware in a self-cleaning oven and run one cycle OR place in a campfire or directly on a hot charcoal fire for 1/2 hour, until dull red. The crust will be flaking, falling and turning to white ash. Then, after allowing to cool a bit to avoid cracking your cast iron,use the following steps. If you have more rust than crust, try using steel wool to sand it off.
      2. Wash your cast iron cookware with warm water and soap using a scouring pad. If you have purchased your cast iron cookware as new then it will be coated in oil or a similar coating to prevent rust. This will need to be removed before seasoning so this step is essential.
      3. Dry the cookware thoroughly, it helps to put the pan in the oven for a few minutes to make sure it’s really dry. Oil needs to be able to soak into the metal for a good seasoning and oil and water don’t mix.
      4. Coat the pot or pan inside and out with lard, Crisco, bacon fat, or corn oil. Ensure that the lid is also coated.
      5. Place both the lid and the pot or pan upside down in your oven at 300F for at least an hour to bake on a “seasoning” that protects the pan from rust and provides a stick-resistant surface.
      6. For best results repeat steps three, four and five.
      7. Ongoing care: Every time you wash your pan, you must season it. Place it on the stove and pour in about 3/4 tsp. corn oil or other cooking fat. Wad up a paper towel and spread the oil across the cooking surface, any bare iron surfaces, and the bottom of the pan. Turn on the burner and heat until smoke starts to appear. Cover pan and turn heat off.

      Alternate Method

      1. First, if you find your cast iron needs to be stripped down and re-seasoned do not fear. All you have to do is place the utensil in your Self Cleaning Oven on the shortest cleaning cycle (usually 3 hrs. on most models), and it will come out looking like the day it came out of the mold. Allow it to cool overnight. Wash the residue off with WATER ONLY in the sink using a stiff abrasive pad. Make certain NO DISH SOAP comes in contact with the utensil during this procedure. If it does you will have to start over!!! Dry the cast iron utensil off with a paper towel, and IMMEDIATELY place BACK in the oven at 350 degrees Fahrenheit for 10 minutes or so.
      2. Next, take the utensil out of the oven after the 10 minute drying time is complete, and lightly brush the utensil with a paper towel coated with Crisco or other solid cooking oil. Liquid vegetable oil will do in a pinch, but it’s better to save the liquids until AFTER your initial seasoning. It is important in this step only to lightly coat the cast iron with a light, thin coat of oil until it only glistens. Do not allow any puddles or pools of liquid as this will cause problems at a later time.
      3. Then, place the Cast Iron in the oven set to 500 to 550 degrees Fahrenheit with the COOKING SIDE FACING THE BOTTOM OF THE OVEN. This allows for any excess oil to drain off to the sides, and prevents pooling during the seasoning process. The higher heating temps allows for the oil to truly ‘cook’ as it should as opposed to just ‘gumming up’ at lower temps. Cook undisturbed for 1 hour.
      Please note: During the previous step it will be best to turn off any smoke alarms in the immediate area as it may smoke quite a lot. Ceiling fans also aid in ventilation.

      Finally, after your cast iron is finished seasoning for 1 hour or so, take it out of the oven and IMMEDIATELY wipe it down with another extra – light coat of Crisco. Allow it to completely cool.TIPS

      • If food burns, just heat a little water in the pan, and scrape with a flat metal spatula. It may mean that re-seasoning is necessary.
      • If you’re washing the cast iron too aggressively (for instance with a scouring pad), you will regularly scrub off the seasoning. Wash more gently or repeat oven-seasoning method regularly.
      • If your pan develops a thick crust, you’re not washing it aggressively enough. Follow “crusty pan” instructions.
      • If storing your Cast Iron Dutch oven for any length of time, it is always best to place one or two paper towels in between the lid and the oven to allow for air flow.
      • Also, after cleaning after each use it is always best to place it back in the oven on 350 degrees for 10 minutes or so to ensure all water has vaporized and left the surface of the cast iron.
      WARNINGS
      •  Do not cook tomatoes and other acidic foods in your cast iron cookware unless it has been well seasoned.
      •  Washing pans with detergent after they have been seasoned will break down the seasoning. Either wash without detergent (if you’re cooking similar foods with the pan, this is fine) or repeatedly oven-season your cookware.

      SMOTHERED CHOPPED STEAKS

      2 pounds ground sirloin
      1 sleeve Keebler club crackers, crushed
      1/2 teaspoon sea salt
      1/2 teaspoon white pepper
      1 tablespoon Worcestershire sauce
      1/2 cup finely chopped onion
      2 Jumbo eggs
      1 tablespoon liquid Smoke – MYSTERY ingredient
      3 tablespoons butter
      2 cloves garlic, minced
      1 large heirloom tomato, chopped,
      1 large Vidalia onion, sliced thin
      large shred cheddar cheese
      • Combine all the hamburger steak ingredients until well mixed. Form six steaks.
      • In a well seasoned cast iron grill, sear steaks on both sides.  About 4-5 minutes each side should leave you with medium steaks.
      • In a large skillet melt the butter. Saute the onions and garlic until fragrant and caramelized.
      • Top steaks with onions, tomatoes and cheese.

      Fire Day Friday: Steak Fajitas

      Wow, there are only 6 days of Summer left. By the time the next Fire Day Friday post rolls around Summer will be history. As gorgeous as East Tennessee and the Great Smoky Mountains are when Fall arrives, I still hate to hear that Summer is trying to make its walk of shame out of the door.

      So to grab that last gasp of Summer, I grilled one of my favorite dishes, steak fajitas.

      Steak Fajita Marinade
      Source: Nibble Me This

      1/4 cup Oil
      1/4 cup Lime Juice
      1/4 cup Tequila
      1-2 clove Garlic minced
      1 1/2 teaspoon Season salt
      1 1/2 teaspoon Oregano (I like using the dried oregano from our garden for more rustic texture)
      1 1/2 teaspoon Cumin (McCormick’s new roasted cumin is awesome)
      1/2 teaspoon Chili powder
      1/2 teaspoon Paprika
      1/2 teaspoon Red pepper flakes

      1.5 lb flat iron steak, flank steak, or skirt steak
      1 ea red bell pepper sliced
      1 ea green bell pepper sliced
      1 ea red onion sliced

      flour tortillas, shredded cheese, diced tomato, and other toppings

      Whisk together all marinade ingredients. Reserve 2-3 Tbsp of the marinade. Use the rest to marinade the steak and veggies for 1-2 hours.

      Grill the steak over direct heat at 500f for 4-6 minutes per side. For fajitas, I am looking for an internal temp of 125f. This gives you a crispy seared outside with a medium rare inside after a 10 minute rest.

      Add the veggies to a griddle for during the last two minutes.

      As mentioned, let the steak rest for 10 minutes before slicing. It is better to rest your steaks off of a plate because that lets the pores of the meat close and minimize loss of juices. I normally do that on a resting rack but I tried a new trick this time. I rested the steak on top of the grill veggies. That keeps them warm, bastes them with flavor, and raises the steak all at the same time. Win-win-win.

      Wrap 6 flour tortillas in foil and grill for 1 minute a side.

      Slice the steak and serve with the veggies, cheese and toppings.

      Do you have a favorite “Summer” dish that you are dying to have before Fall arrives next week?

      SWEDISH MEATLOAF

      MEATLOAF  
      1 Jumbo egg
      1/4 cup heavy cream
      1 large slice white bread, crusts removed, and bread torn into 1-inch pieces
      8 ounces ground pork, double ground

      8 ounces ground beef, double ground
      1 medium onion, grated or minced
      1/8 teaspoon freshly grated nutmeg
      1/8 teaspoon ground allspice
      1/8 teaspoon white pepper
      1 teaspoon brown sugar
      1 1/2 teaspoons table salt
      Olive Oil, heavy coat

      • Whisk egg and cream together in small bowl. Stir in bread and set aside to soak.
      • Blend hamburger & pork, onion, nutmeg, allspice, pepper, brown sugar, and salt smooth and uniform.
      • Using fork, mash bread mixture until no large dry bread chunks remain.
      • Add mixture to beef mixture and blend until well mixed.
      • Form meat loaves.  
      • Bake 45-60 minutes. 
      • During the last 10-15 minutes prepare the sauce.

      SAUCE
      1 tablespoon butter
      1 tablespoon all-purpose flour
      1 1/2 cups chicken broth
      1 tablespoon packed brown sugar
      1/2 cup heavy cream
      2 teaspoons juice from 1 lemon
      Table salt and freshly ground black pepper

      • Melt butter, add flour and cook, stirring constantly with whisk, until flour is light brown.
      • Slowly whisk in broth.
      • Add brown sugar and bring to simmer.
      • Reduce heat to medium and cook until sauce is reduced to about 1 cup, about 5 minutes.
      • Stir in cream and return to simmer.
      • Add meatballs back to sauce and simmer, turning occasionally, until heated through, about 5 minutes.
      • Stir in lemon juice; season with salt and pepper to taste and serve over noodles.

      Southwestern Roast Beef Sandwich

      I won’t fork over big bucks for the latest kitchen gadget but sometimes you get lucky at a garage sale.

      I bought a dehydrator for $6 at a garage sale a couple of weeks ago on a whim. I would never have spent $50 to buy one new in a store but for $6, what did I have to lose?

      I have been having fun drying out an assortment of chilies and then grinding them up in a coffee grinder. So I had this wonderful sweet paprika and a spicy chili powder to use and thought I’d make a southwestern roast beef.


      Southwestern Roast Beef Sandwich

      2 lb beef eye of round
      4 ea hoagie rolls
      5 tsp Southwestern Rub
      2 Tbsp vegetable oil
      Cumin mayo
      8 slices swiss cheese
      lettuce, tomato, red onion

      Rub
      2 tsp paprika
      1 tsp dried oregano
      1/2 – 1 tsp chili powder
      1/2 tsp cumin
      1/2 tsp kosher salt
      1/2 tsp turbinado sugar
      1/2 tsp garlic powder

      Cumin Mayonnaise
      4 teaspoons ground cumin
      1 cup mayonnaise
      2 teaspoons fresh lime juice
      3 teaspoons Chopped fresh cilantro

      Instructions
      Make the cumin mayo. In a small skillet over medium heat (using no oil), add cumin and stir constantly until darkened (2 minutes). Remove from heat. Mix mayo, cumin, lime juice and cilantro in a bowl. Cover and let chill for an hour before serving.

      Mix rub ingredients together. Rub three teaspoons onto all sides of the beef roast. Mix the other two teaspoons with the oil.

      Since this is Fire Day Friday, I spit roasted my beef on a rotisserie on the grill.

      I used about 3/4 chimney full of lit coal and it took about an hour or an internal temp of 140f. I brushed it with the oil/seasoning mixture about 30 minutes into the cooking time.

      You could also do this in an oven. Put the roast in an oven preheated to 450f for 10 minutes. Baste with the oil mixture. Cut the heat to 250f and then cook it for another 30 to 40 minutes or until the roast hits an internal temp of 140f.

      Let rest for 15 minutes and then slice thinly. TIP: When I want really thin sliced roast beef, I will put the roast in the fridge for a day and then slice it while it’s cold. Whether doing it by hand or on an electric slicer, it’s easier to get thin slices when fully chilled.

      Serve on a hoagie roll with the cheese, toppings and cumin mayo.


      The roast beast…errr beef was tender and packed with flavor. The cumin mayo sealed the deal. It sure beats roast beef from a deli!

      MEXICAN SWISS STEAK

      Hi Tamy here filling in for Min today which works well with her theme, Try a New Recipe.  This recipe is the perfect Try A New Recipe.

      I recently had a thrift store find beyond belief.  An old recipe box full of old hand written recipes.  I estimate they are from the 50-60’s era when women passed around recipes at morning coffee, tupperware parties and PTA meetings.

      This recipe called for either a can of diced tomatoes OR a can of cream of chicken soup for a creamy version.  I decided to amp it up a bit and added a can of Rotel diced tomatoes with green chiles and changed the soup from chicken to celery.  What resulted was an extremely tender and spicy round steak in its own gravy.
      MEXICAN SWISS STEAK
      2 pounds round or swiss steak, 3/4 inches thick
      1 large Vidalia onion, thinly sliced
      1 pound can tomatoes OR 1 can cream of chicken soup
      1 can ROTEL tomatoes with green chiles
      1 can cream of celery soup
      salt & pepper to taste
      • Salt and pepper each piece of meat.
      • Cut meat into serving size pieces
      • Whisk together the soup and tomatoes until well blended.
      • Layer meat, onion rings and soup several times in crock pot.
      • Cook on low 8-10 hours.

      I served it with Potato casserole and the guys wolfed it ALL down!

      DON’T FORGET!
      It’s PARTY time here at OUR KrAzY kitchen.
      LUAU badge
      Be sure to link up on the sidebar to join the party.