TUESDAY TRIVIA ~ SLOW COOKER SECRETS & TIPS ~ BLOG 365.34B

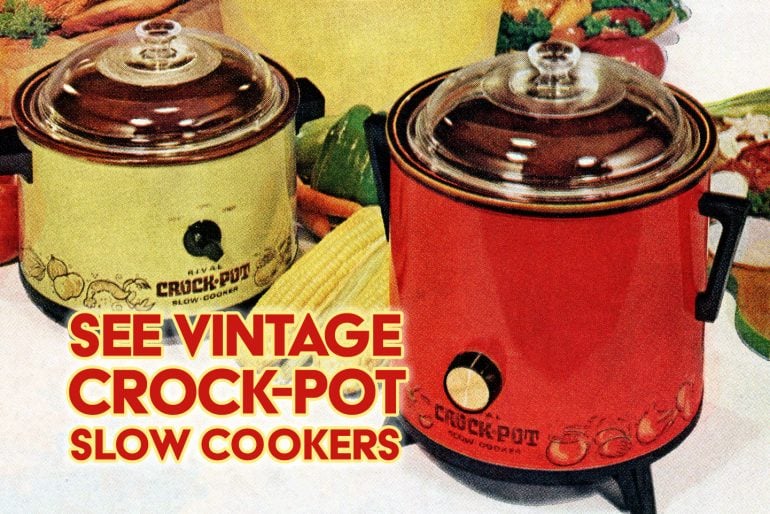
I’m continuing on with the slow cooker theme while we’re still in winter and my slow cooker is in use regularly. Last week I talked about the invention of the slow cooker. So, this week let’s talk about some secrets and tips to get the most out of your cooker.

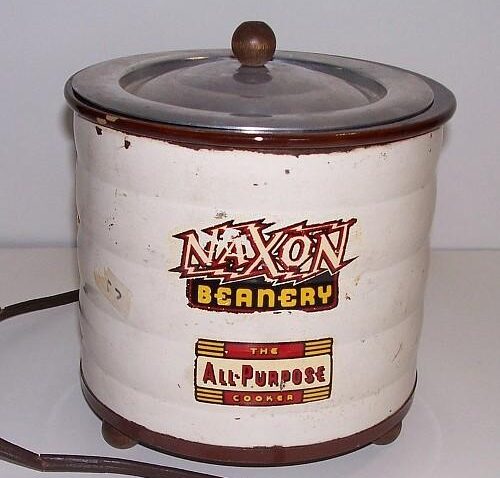
Slow Cookers come in a variety of shapes and sizes these days and from a multitude of manufacturers. I recently saw an old West Bend in an antique store that was in pretty good shape for its era.

Not every slow cooker is right for every recipe though. I, myself have 4 different types. And I use each one for different reasons and recipes. For example when making most of my chicken breast or pork chop recipes, I LOVE using my long flat one to have a single layer, but for soups or chilis I LOVE my NINJA slow cooker because of all the options for browning meats first right inside the cooker and varied temperature options.

SLOW COOKER SECRETS

  • Did you know they make disposable liners for your slow cooker? I buy them at my local grocer 4 for $1.29 and they are a real time saver for clean up! If you don’t use these, be sure to spray the crock before use to make your clean up easier.
  • The more marbling or fat to a cut of meat means more liquid that is released during the cooking requiring less added liquid.
  • Vegetables tend to cook slower than meats and should be placed on the bottom for direct contact with the cooker unless the recipe states otherwise.
  • Pasta should be cooked separately and added last to any slow cooked meal to maintain their texture.
  • Long grain converted rice is best for use in a slow cooker.
  • Dried beans take longer to tenderize if mixed with sugar, salt or acids. Be sure and soak beans for at least 8 hours before beginning your cook time. Save the salt, sugar or acids for the end of your cook time.
  • FRESH herbs and spices are better than dried because they take longer to release their flavors. If you must use dried use whole or crushed and avoid ground all together.
  • Both dairy and seafoods break down when cooked for extended cook times. Unless otherwise indicated, any dairy or seafood should be added in the last 15-20 minutes of your cook time.
  • Defrost frozen foods before adding them to your slow cooker to insure foods reach a safe internal temperature and cook evenly.
  • ALWAYS allow the ceramic crock to cool COMPLETELY before washing to avoid cracking the insert.
  • NEVER immerse and slow cooker with a non-removable crock in water. Unplug it and wipe clean or better yet use a liner for easy clean up.

SLOW COOKER SUCCESS TIPS

  • Be sure a trim excess fats from meats before slow cooking. Browning the meat before adding it to the slow cooker adds a depth of flavor also.
  • Soups, stews and chilis made in the slow cooker are pretty forgiving on time. It’s okay if you run a little late. Low and Slow is my advice.
  • Resist the urge to continually peek inside while the slow cooker is doing its job!! Each time you do, it releases heat and moisture! Each time you remove the lid can add 20-30 minutes to your cook time! There is usually no need to stir the ingredients during the cooking time unless the recipe specifically tells you to.
  • When opening the cooker when it’s time to serve lift the lid AWAY from the food to avoid making things soggy from dripping condensation.
  • When making roasts or stews, pour the liquids directly over the meats. Avoid the desire to add more liquid than called for. Meats will release quite a bit of moisture as they cook and there is less evaporation than traditional roasting methods.
  • Be sure and use wooden or silicone utensils to avoid scratching the interior of your cooker, especially if using one of the newer coated ones like a NINJA.
  • Rule of thumb is that 1 hour on HIGH equals 2 hours on low.
  • If your cooker has a removable insert, you can usually add your ingredients the night before and refrigerate the entire insert until time to start cooking. Cold ingredients can increase your cook time. If time permits, bring your refrigerated crock to room temperature before you begin.

SLOW COOKER SAFETY

  • Newer slow cookers tend to cook with higher temperatures than older ones. Maintaining even temperature is the key to success whether you inherited an old one from your grandmother or have just bought a new one.
  • Rule of thumb is to fill your slow cooker between 1/2 to 2/3 full. As you can see from the game of Jenga my girlfriend plays with hers every week, this is rule meant to be broken. By the end of the day she has a crock pot full of the MOST delicious chicken for Taco Tuesday.

TRIVIA TUESDAY @ the OFFYCE ~ NAXON BEANERY to CROCK POT ~BLOG 365.27B

Do you ever wonder what inspired people to invent the things they do? In today’s homes I would bet there is AT LEAST one type of slow cooker in every home. It was only a little over 80 years ago that the slow cooker didn’t even exist!!!

The first patent was issued in 1940 to Irving Naxon in 1940. But it wasn’t for the slow cooker as we know it today. Long before the Crock-Pot was a household name, the patent was for Boston Beanery or Naxon Beanery or the Flavor Crock and it was marketed to luncheonettes and coffee shops with a more specific purpose to use for making soups and chilis specifically.

Today’s versions produce not only soups and chilis, but roasts, savory stews and even moist breads and cakes.

Naxon’s slow cooker allowed families to prepare a meal without turning on the oven. The basic idea for the slow cooker was inspired by Naxon’s grandmother and a story she would tell about his great grandmother making CHOLENT back in Lithuania. Cholent is a traditional Jewish stew, a slow cooked meat, bean and barley stew served on the Sabbath that cooks unattended from before sundown on Friday to midday Saturday. Naxon wanted to create an appliance that would do all the work.

Dubbed the Beanery all-purpose cooker, a self contained ceramic crock with a heating element that ran at a low temperature with the contents left to simple simmer for hours. There was originally no removable insert or even a control switch. It was either plugged in and on or unplugged and off.

The “bean pot” never caught on large scale, so in 1970 Naxon sold his device to Rival Manufacturing. Rival was a Kansas City company already famous for kitchen gadgets like the Juice-O-Mat or the Knife-O-Mat sharpener. Rival was less than impressed with the original Beanery and gave it to their test kitchen personnel to see what they could do with it.

“No one paid any attention to it,” Rival president Isidore Miller told the Kansas City Times in 1981. “We almost forgot about it.” As the story goes, Miller handed the Beanery over to Rival’s test kitchen, where an employee named Marilyn Neill had an immediate epiphany: This can cook way more than just beans. Creating a freedom from kitchen duties. The tag line “Cooks All Day while The Cook’s Away” was embraced by working women everywhere for its ability to save time and money.


The test kitchen was able to create MANY recipes for the device that were both delicious and required minimal effort. This helped make it a BIG hit and the slow cooker was rebranded in 1971 as the Crock Pot and it was manufactured in Chicago, USA. This accomplishment also gave more attention to the accomplishments of the test kitchen. With that attention also came pressure to teach people how to use this new and novel small appliance as well as creating a book of successful comfort recipes for the soups, stews, roasts and other comforting old-fashioned food that would accompany each appliance. Multiple recipes were influenced by their midwestern origin. Flipping through 70’s cookbooks you’ll find recipes like steak soup, and brisket cooked low and slow or “Busy Woman’s” roast chicken that relied heavily on carrots and stove top stuffing, “Pork Chop Abracadabra” which relied heavily on a can of cream of mushroom soup or “Male Chauvinist Chili” which relied heavily on a trifecta of bacon, sausage, and ground beef. Other recipes centered ingredients you can’t find as easily today, nor would most people want to, like stuffed beef hearts and chicken livers.


Home economist, Mabel Hoffman contributed to the Crock-Pot craze when she published her cook book, rockery Cookery, in 1975. With over 250 recipes it was an instant best seller that she has revised over the years to changing palates.

The renamed Crock-Pot made its official debut in 1971 at the National Housewares Show in Chicago. Offered in colors like avocado or harvest gold print ads and television commercials flaunted the Crock-Pot as a miraculous, time-saving device, assuring women in no uncertain terms that they could have it all. And the pitch worked with their sales hitting $2 million the first year it was introduced.

They didn’t stop trying to improve the design and in 1974 they made removable crocks for ease of cleaning. That next year sales reached even higher – $93 million.


In 1981 they were developing recipes that required more than just a piece of meat and a can of soup. Moore and Wyss loved developing recipes together, but they spent a majority of their time doing quality control and putting the Crock-Pot through its paces with Rival’s engineers. They also felt pressured do always do more!


Each day before they went home they would set up eight Crock-Pots with whole chickens and carefully measured-out proportions of carrots, onions and celery.


It was all very scientific. They’d leave the slow cookers overnight for the engineering department to watch over their temperatures and would come to work the next morning to evaluate those chickens to make sure that those pots were performing acceptable.


When the oil crisis hit the U.S. in the 1970’s, Americans were especially concerned about energy usage and turned to their slow cookers after learning that a crock pot took a mere 4 cents a day to operate, making it far more efficient than an oven. And, more importantly it was during this era that more and more women were working outside the home and Rival began marketing the Crock-Pot directly to them. The marketing plan worked. Women turned to the Crock-Pot to provide nutritious and affordable meals for their family that required minimal effort when they arrived home at the end of a long work day. To the working woman it was an easy, foolproof way to turn inexpensive, tough cuts of meat into more tender, long braised meals that also make the house smell great.


Moore and Wyss eventually left Rival Manufacturing, but they never stopped creating recipes together. They’re still in Kansas City — they just cook on their own terms now. The two women authored nearly 20 cookbooks together.


If you ask Moore and Wyss why the Crock-Pot endures today, they’ll tell you convenience plays a big part, but it’s not everything. The Crock-Pot has an emotional appeal, too — that feeling of coming home to a hearty meal, already simmering away. “I don’t think that any meal delivery or any of the frozen products can ever replace the aroma, the comfort, the emotion and the memories that come from a home-cooked meal,” Moore says.

My girlfriend received one many years ago as a wedding present and she still uses it today in her business to prep for Taco Tuesday every week. I love how she plays Jenga with the frozen chicken 🙂

EXTRACTS vs. EMULSIONS – a TUTORIAL

Recently a friend and I were debating the flavorings I was going to use in an upcoming recipe and it led us to question a couple definitions, specifically for extracts and emulsions used in baking.

The main difference between emulsions and extracts are that the emulsions are water based and not alcohol based. Yet they can be substituted 1:1 in a recipe. So how do you choose which to use and when to use it when so many meet your flavor needs while cooking and baking?  Best answer: you should choose an emulsion when you’re concerned about the flavor baking out of a recipe. Because they are water-based, bakery emulsions don’t evaporate as quickly as extracts, resulting in stronger aromas and tastes.

EXTRACT – an extract is a preparation containing the active ingredient of a substance in a concentrated form such as vanilla extract used in many cakes and cookies.    SYNONYMS: distillation, distillate, concentrate, essence, juice

EMULSION – I found SEVERAL definitions for emulsions:

  • A system (such as fat in milk) consisting of a liquid dispersed with or without an emulsifier in an immiscible liquid – liquids not forming a homogeneous mixture when added together.
  • A fine dispersion of minute droplets of one liquid in another in which it is not soluble or miscible.

But for me the most accurate definition I think is:

  • a mixture that results when one liquid is added to another and is mixed with it but does not dissolve into such as mixing oil and vinegar together which produces an emulsion.

Extracts and Flavors are great for both cooking and baking applications. Most extracts and flavors contain 45% alcohol by volume and require sufficient cooking time to evaporate the alcohol.

Use an extract or flavor in cookies, cakes, brownies, muffins, and other baked goods. You can also use extracts and flavors in homemade chocolates and candies.

Bakery Emulsions are water-based and alcohol-free versions of extracts. Use them the same way you would an extract but they are also especially great for flavoring frostings and other no-bake applications.

Bakery Emulsions have the same strength as extracts, so they can be substituted one to one in recipes. But conversely because they are water-based, bakery emulsions aren’t suitable for flavoring hard candies or chocolates.

I like the brands Cook’s and Lorann’s extracts and emulsions because they are fairly readily available in most specialty grocers.

Making your own vanilla extract is easy too.  Most recipes call for vodka, but I find flavored rums work really well to as do whiskeys.

VANILLA EXTRACT

6 whole Vanilla Beans
1 cup ALCOHOL of your choice

  • Slice the vanilla beans in half lengthwise with scissors or a knife, leaving a bit intact at the end just to make it pretty. Cut the beans down to fit the height of your jar.
  • Place beans in jar.
  • Cover with alcohol.
  • Screw the lid on tight or cork it and give it a good shake.
  • Place in a cool, dark place for at least 2 months. The longer it sits, the stronger the flavor will be. Be sure and give the jar a shake every week or so.

LEBKUCHEN aka GINGER COOKIES

Do you have a recipe that calls for candied citron? Don’t know what it is? Well, it’s not candied lemon or grapefruit peel. Citron is an actual semitropical fruit that’s similar to a lemon but with a thicker skin. To make candied citron, the citron is blanched in water, boiled in sugar syrup, and dried. It lends a mild floral note to fruitcakes and other such confections. While I love candied citron know that you have other options. Each shines in a different way, but they can pretty much be used interchangeably in most recipes, so if you happen to have one kind on hand, try that in your recipe.

Photography by: Chelsea Cavanaugh

ORANGE SLICES (Top Left) – They’re great as a decorative flourish on top of cupcakes.
CITRON PEEL (Top Right) – Though the pulp is sour, the candied peel is perfect for baking into stollen or stirring into granola.
LEMON RIND (Middle Left) – Finely chop it and mix into muffins and pancakes for a bright flavor.
ORANGE PEEL (Middle Right) – Dip pieces in dark chocolate and serve as an after-dinner treat.
CITRON SLICES (Bottom Left) – Serve thin slices as part of a holiday cheese plate.
CLEMENTINE SLICES (Bottom Right) – You can also garnish cocktails with these.

Candied citrus is available at specialty stores (especially around the holidays) and online at stores like junetaylorjams.com, but you can also easily make your own at home. Either way, store it in an airtight container in a cool, dry place for up to a month.

LEBKUCHEN
Traditional Lebkuchen German Christmas cookies are a form of gingerbread descended from medieval times and taste spicy and nutty in flavor. They were typically a combination of spices, honey, and dried bread crumbs. They are often cut into “sugar” cookie shapes and ornately decorated. I made a super “simple” version this year for hubby since I am unable to make neighbor plates and do my normal holiday baking.

  • Prep time: 15 minutes.
  • Cook time: 10-12 minutes.
  • Makes 12 servings.

COOKIES
½ cup honey
½ cup molasses
¾ cup brown sugar
1 LARGE egg
1 tablespoon lemon juice
1 teaspoon lemon zest
2¾ cup flour, plus flour for dusting
½ teaspoon baking soda
1 teaspoon each ground cinnamon, cloves, allspice & nutmeg
⅓ cup candied citron, diced (I prefer candied ginger)
⅓ cup hazelnuts, finely chopped

ICING
1 cup sugar
¼ cup milk
½ teaspoon PURE vanilla extract
½ cup confectioners’ sugar

GARNISH
Sliced almonds
Candied citron or ginger
Melted chocolate

  • In a medium saucepan, bring honey and molasses to a boil.
  • Remove from heat; stir in brown sugar, egg, lemon juice and zest.
  • In a large bowl, combine flour, baking soda and all spices, and stir in molasses mix, citron and hazelnuts. Cover; chill overnight.


  • Preheat oven to 350°.
  • Line baking sheets with parchment paper.
  • On a floured, hard surface roll out a small amount of chilled dough to ¼-inch thick. If dough is sticky, use more flour.
  • Cut dough in 2-inch rounds or shapes; transfer to prepared baking sheets.
  • Bake 10-12 minutes.
  • Meanwhile, make icing by heating sugar and liquids in a small saucepan (do not boil).
  • Remove from heat; stir in confectioners’ sugar. If icing crystallizes, reheat and add a touch of water or milk.
  • Transfer cookies to rack and while still hot, brush with icing and decorate with almonds, citron, ginger or sprinkles; or, let cool completely and drizzle with melted chocolate.
  • Store in sealed container.

IT’S ABOUT THE PROTEIN – FLOUR TUTORIAL

Wheat flours contain a protein called gluten which, in the presence of water, forms an elastic network throughout the dough. This is the stuff that gives bread doughs their rubbery consistency. The whole point of kneading bread dough, in fact, is to organize the strands of gluten running through the dough into a strong, resilient, interconnected web. It is this web of protein that will entrap the bubbles of CO2 given off by the yeast as it ferments, enabling the dough to rise. Without the gluten, the CO2 would just bubble up to the surface and be lost.

But flour vary greatly in both the quantity and quality of the gluten they contain because different strains of wheat from different regions and different growing seasons have different gluten profiles. There are times when gluten is not your friend; in a cake batter, excess gluten will create a chewy, coarse-grained cake, and in pastry doughs it will produce a tough pie crust. But for bread you want lots of strong gluten to produce a well-risen and well-shaped loaf. This is why there are special flours for special purposes: cake flour, pastry flour, bread flour, etc.

All-purpose flour is typically a blend of “hard” and “soft” wheats which will perform pretty well in most roles. It usually contains 10-12% gluten. It can be used for bread, but will tend to produce a denser, flatter loaf. Some people will add 1T extra per cup of flour when using all-purpose for bread.

Bread flours have from 12-14 percent protein. They will feel decidedly more elastic while kneading, and will give full, rounded loaves. These flours are made from hard winter wheats from northern states.

Besides the quantity, the quality of the gluten will vary. Some glutens are better at forming the elastic network than others. You can judge this for yourself by making a “gluten ball” from different flours: make a stiff dough using just water and 1/4 c of flour. Knead it until it becomes quite elastic, then continue kneading it between your fingers under a stream of water. This will wash out the starch from the flour and after a few minutes of this you will have a ball of pure gluten. By playing with this ball, stretching and folding it, you will see that some are far more resistant to tearing than others. A good bread flour will enable you to pull the gluten into a thin membrane.

SOURCE