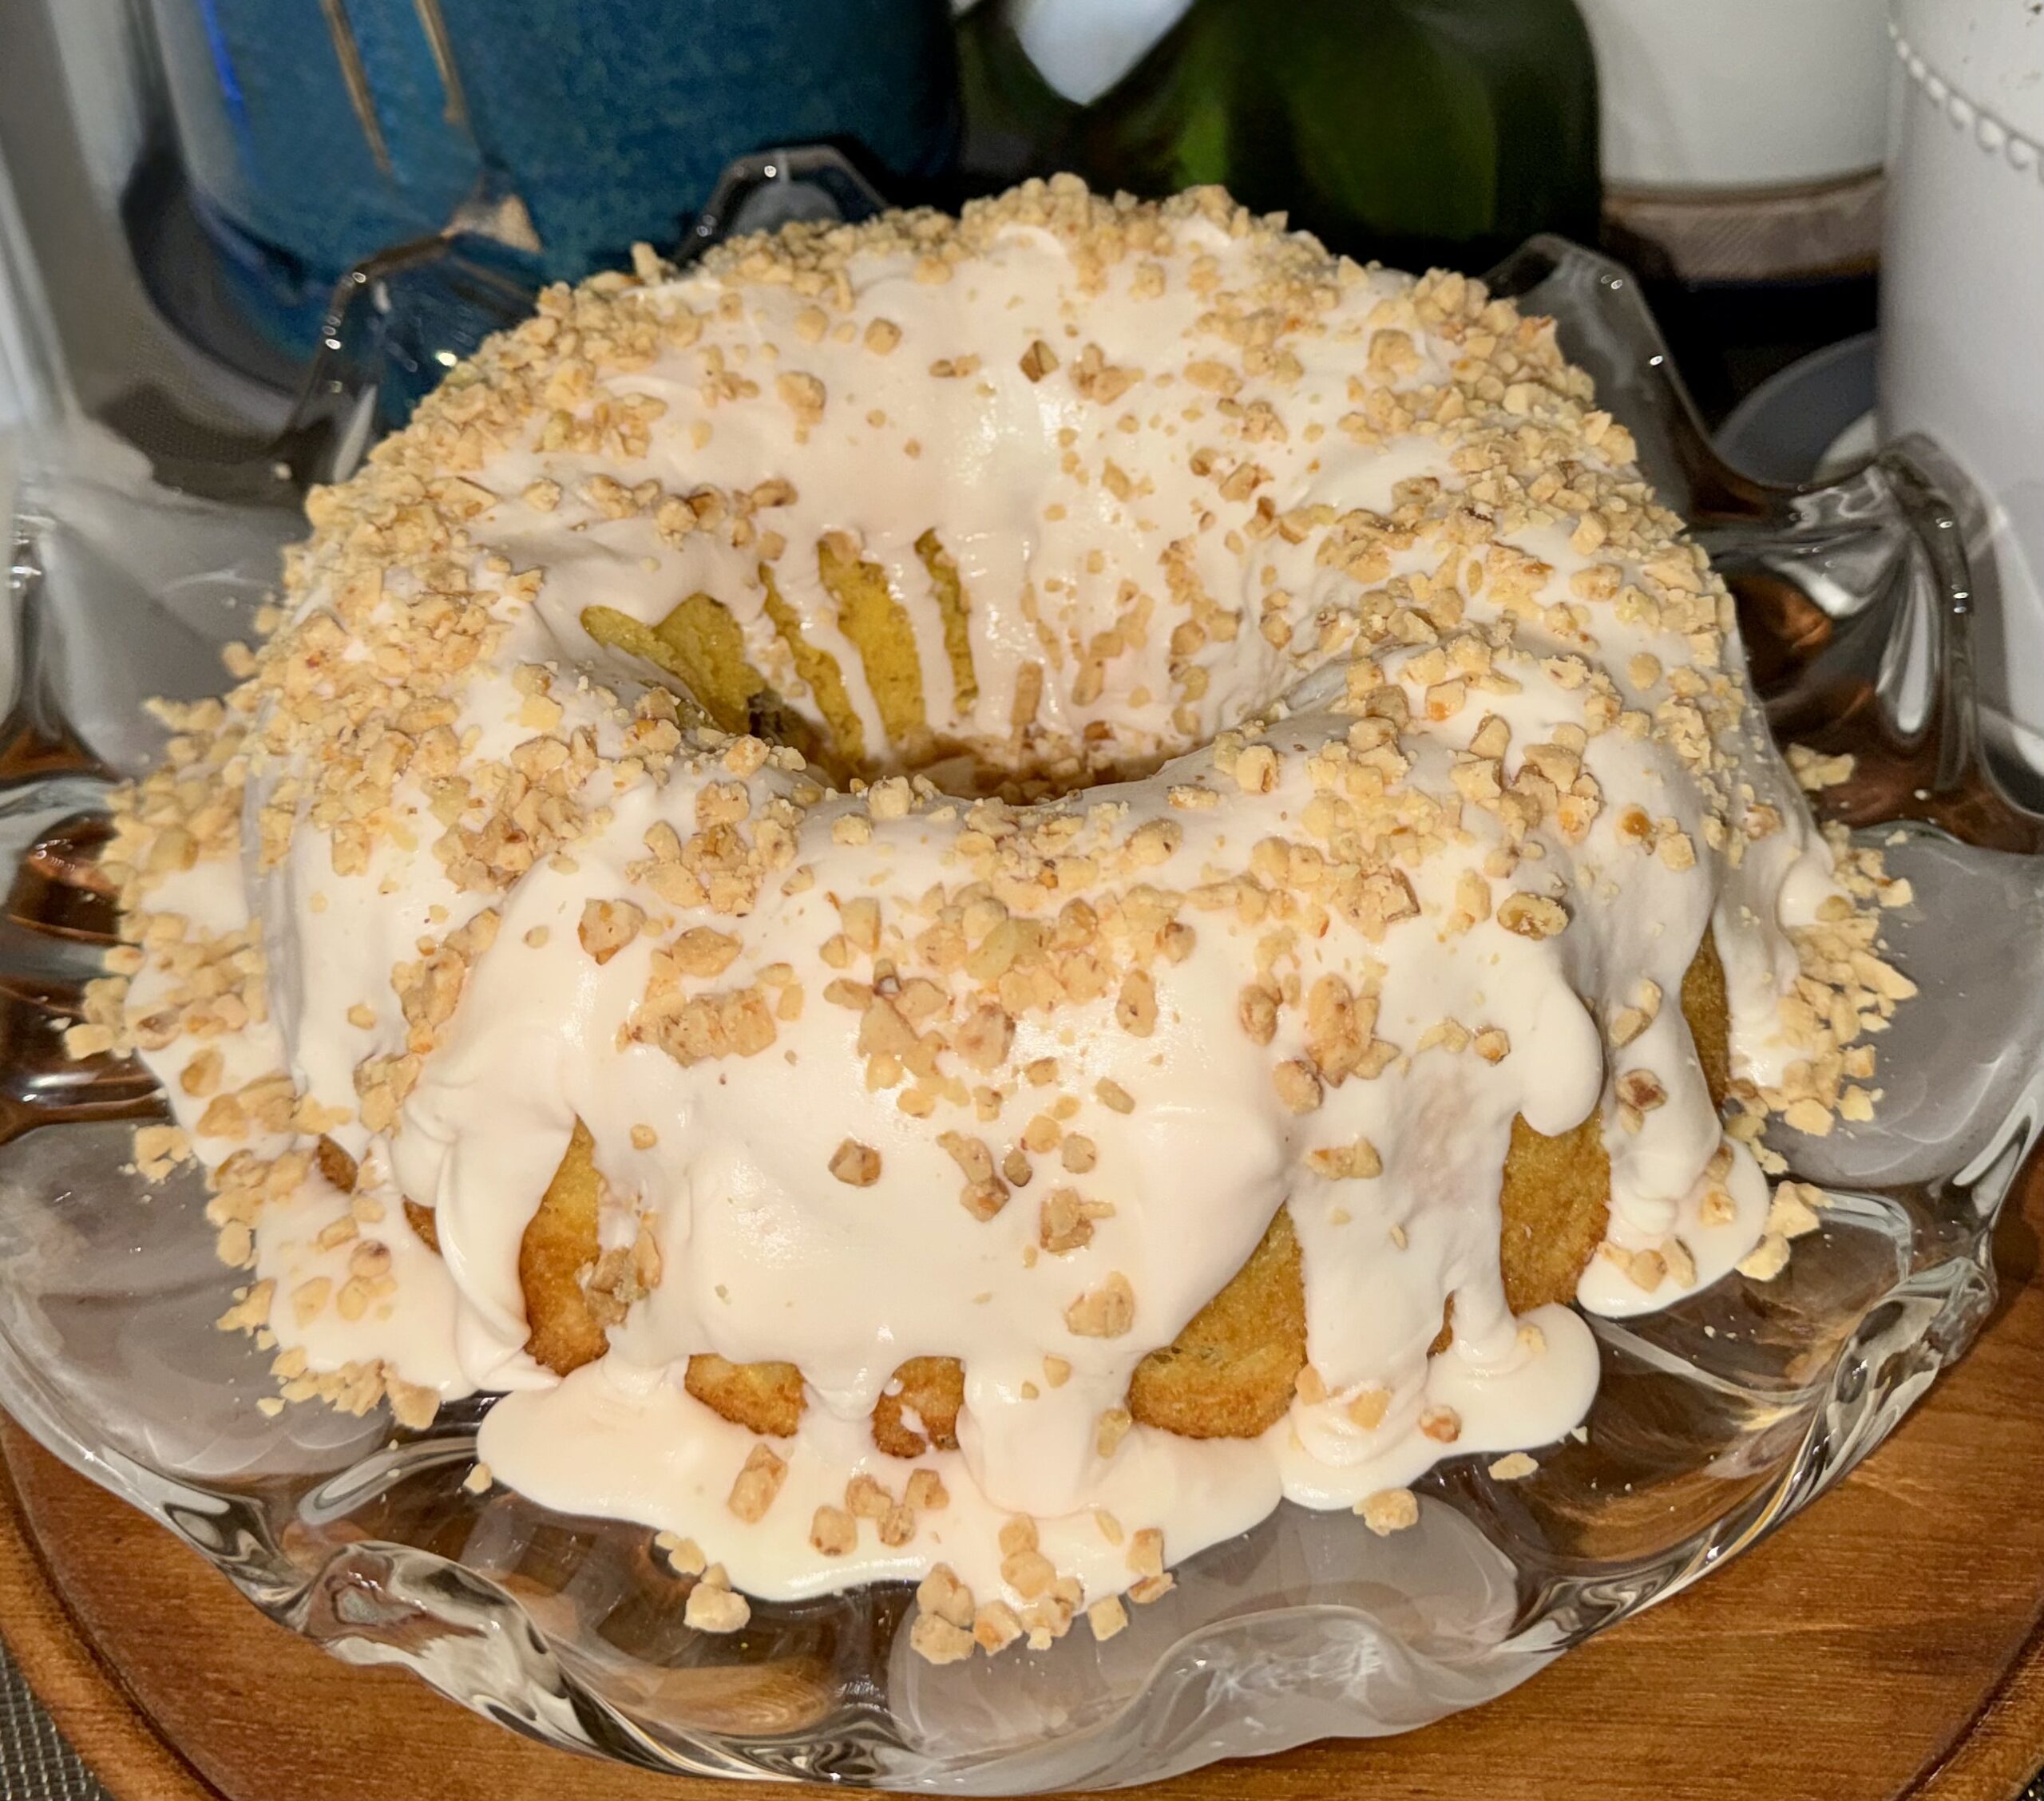
BLUE CARROT BUNDT CAKE ~ BLOG 365.317

I decided to combine two of my favorite flavors into a single cake and was NOT disappointed!!!! I think you’ll enjoy it also. It has a uniquely yummy pop of flavor.

BLUE CARROT BUNDT CAKE ~ 12 servings

1 lemon, zested & juiced
1 orange, zested and juiced
1/2 cup FINELY grated carrot (1 medium carrot)
3 LARGE eggs
16 ounces sour cream
1 yellow cake mix
1/4 cup powdered sugar
1 pint blueberries

  • Heat oven to 350°.
  • Lightly spray bundt pan with Baker’s Joy. Set aside.
  • Whisk together the eggs, sour cream, orange and lemon zest until smooth.
  • Fold in most of the grated carrots, reserving a few for garnish.
  • Mix in cake mix, beating until smooth.
  • Fold in most of the blueberries, reserving a few for garnish.
  • Pour into prepared pan and tamp on counter to even out.
  • Bake 35-45 minutes until set and toothpick comes out clean.
  • Loosen sides and invert onto serving plate.
  • Brush warm cake with reserved juices.
  • Cool completely.
  • Sprinkle with powdered sugar or drizzle with a cream cheese glaze.
  • Garnish with some FINELY grated carrot and a couple blueberries for a stunning and colorful presentation.

NOTE: If using frozen blueberries, toss the thawed berries in some flour before folding them into the batter.

CREAM CHEESE GLAZE
2 ounces softened cream cheese
1⁄2 tablespoon butter
3 tablespoons WHOLE milk
2 -3 tablespoons powdered sugar
1⁄2 teaspoon QUALITY vanilla

  • With an electric mixer, beat cream cheese, butter and milk together.
  • Gradually add the powdered sugar.
  • Beat in vanilla last.

FRENCH COUNTRY SOUP ~ BLOG 365.310

Don’t forget the crusty bread to go with this comforting fall favorite soup that’s perfect for any cool evening.

FRENCH COUNTRY SOUP

8 ounces Great Northern or Cannellini beans
6 cups water
4 cups homemade chicken broth
1 pound stew meat
2 medium carrots, rustically sliced (1 inch pieces)
2 stalks celery, rustically cut (1 inch pieces)
1 large onion, halved and sliced
1 cup dry white wine
5-6 cloves garlic, FINELY minced
1 teaspoon ground bay leaves
1-2 teaspoons crushed rosemary
FRESH ground sea salt and black pepper

  • Rinse and drain beans.
  • Combine beans and water in large dutch oven. Bring to a boil, reduce heat and simmer for 10 minutes.
  • Remove from heat, cover and let stand 1 hour.
  • Drain beans and rinse.
  • Heat oil or butter in skillet over medium-high heat.
  • Sear beef pieces quickly.
  • Combine beans, browned beef, broth, wine, carrots, celery, onion, garlic, bay leaves, rosemary, salt and pepper in 5-6 quart slow cooker.
  • Cover and cook on LOW 8-10 hours or HIGH for 4-5 hours.
  • Discard bay leaves and serve with crusty bread – we like a good beer bread.

NOTE: you can substitute 2 cans of rinsed Cannellini or Great Northern beans during the last half hour instead of the dried beans. If you choose this option cut the cooking time in half.

BLOGTOBER ~ TOP 10 FAVORITE FALL COMFORT FOODS ~ BLOG 365.289B

October is one of those months that the weather can go either way in our neck of the woods. Well, this year does NOT have an Indian Summer in it’s future. Fall is here and winter is close on its heels from what we’re seeing so far!

Because of the sudden onset change in weather I’m thinking comfort foods! So, here are my top 12 favorite rainy and cold weather recipe links.

RUSSIAN CABBAGE SOUP

GREEN CHICKEN ENCHILADAS

CHICKEN CHILE VERDE CHILI

BLACK EYED PEA CHILI

RED CHICKEN CHILI

SPLIT PEA & HAM SOUP

CHICKEN FRIED CHICKEN

CREAMY RUSTIC TOMATO BISQUE & GRILLED CHEESE DIPPERS

SUNDAY GRAVY

SALISBURY STEAK & GRAVY

CABBAGE ROLL aka WAGON WHEEL WINTER SOUP

GRAM’S CHICKEN & NOODLES 

BAKED CRACK CHICKEN ~ BLOG 365.282

BAKED CRACK CHICKEN serves 4
Juicy chicken breasts seasoned with ranch seasoning, crisp bacon and gooey gooey cheese make an addictive and quick week night dinner.

CHICKEN
4 slices thick cut bacon, diced
1 tablespoon avocado oil
1 tablespoon butter
4 boneless, skinless chicken breasts, pounded to ¼-inch thickness
FRESH ground sea salt and black pepper, to taste
½ teaspoon garlic powder
½ teaspoon smoked or sweet paprika

  • Preheat oven to 400˚.
  • Lightly grease 9×13 baking dish with cooking spray. Set aside.
  • Over medium high heat add the diced bacon to a large skillet; cook until crispy.
  • Remove bacon from skillet and set aside.
  • Return skillet with the bacon grease to heat and add the avocado oil.
Season chicken breast with salt, pepper, garlic powder, and paprika.
Add chicken breasts cooking 2 to 3 minutes until golden brown.
Add butter and flip chicken, cooking 2 minutes more.
  • Remove chicken breasts from the skillet and arrange in a single layer in the prepared baking dish. Set aside.

RANCH CREAM CHEESE
4 ounces cream cheese, softened at room temperature
¼ teaspoon garlic powder
¼ teaspoon onion powder
¼ teaspoon dried dill weed
½ teaspoon dried chives
4 ounces shredded cheddar cheese

  • In a small bowl, combine cream cheese, garlic powder, onion powder, dill weed, and chives, mixing until thoroughly combined. Adjust seasoning to taste.
  • 
Top each chicken breast with 2 tablespoons of the cream cheese mixture, spreading to coat the surface of each chicken breast.

  • Take half of the diced bacon and sprinkle over the cream cheese mixture on each chicken breast.

  • Sprinkle shredded cheese over the chicken breasts.

  • Bake 15 minutes, uncovered or until chicken is cooked through and cheese is melted and lightly browned.
  • Remove from oven.

GARNISH
FRESH chopped parsley
2 sliced green onions

  • Garnish with remaining bacon, fresh parsley, and scallions.
  • Serve.


BAKED PINEAPPLE TERIYAKI CHICKEN ~ BLOG 365.

BAKED PINEAPPLE TERIYAKI CHICKEN

4 boneless, skinless chicken breasts
FRESH ground salt and pepper to taste

  • Season the chicken breasts with salt and pepper on both sides.

MARINADE
1 cup teriyaki sauce
1 cup pineapple juice
1 small pineapple, cored and sliced into rings
2 tablespoons QUALITY honey
2-3 cloves garlic, minced
1 tablespoon freshly grated ginger
1 teaspoon sesame oil

  • Whisk together the teriyaki sauce, pineapple juice, honey, minced garlic, grated ginger and sesame oil.
  • Pour the marinade evenly over the chicken in a large ziplock bag. Marinade 2 hours.


  • Preheat your oven to 375°.
  • Lightly grease 9×13 baking dish.
  • Place chicken breasts in the baking dish in a single layer. Reserve marinade.
  • Arrange the pineapple slices around the chicken.
  • Sprinkle pineapple slices evenly with brown sugar and drizzle with a little pineapple juice.
  • Bake 25-30 minutes, or until the chicken is thoroughly cooked and the juices run clear and pineapple caramelizes.

2 teaspoons cornstarch
Sesame seeds, for garnish
Sliced green onions, for garnish

  • As the chicken is baking, transfer the remaining marinade to a small saucepan.
  • Whisk in the cornstarch and bring the mixture to a boil.
  • Reduce the heat and simmer, stirring constantly until the sauce thickens to a glaze.
  • Once the chicken is cooked, brush the thickened glaze over the chicken and pineapple.
  • Sprinkle with sesame seeds and sliced green onions before serving.

NOTE:  If using canned pineapple rings be sure and drain them really well.

TERIYAKI GLAZED CORN

This recipe has a thick, buttery glaze that resembles salted caramel. This is NOT your average corn on the cob from summer BBQ’s.

1/8 cup Bragg’s liquid aminos
1/4 cup mirin
2 tablespoons sugar
2 tablespoons salted butter

  • Add the liquid aminos, mirin and sugar to a small pot and bring it to a simmer.

  • Reduce the heat to LOW and simmer, stirring regularly (DO NOT BURN) for 15 minutes or until the mixture is reduced to half and has thickened enough to leave a ribbon on your spoon. The glaze will thicken as it cools.
  • 
Remove the pot from the heat and stir in the butter. 

  • Brush the glaze onto cooked corn on the cob and serve immediately.
  • Enjoy!


FRESH pineapple ring, FINELY diced

NOTE:  I like to use a thawed, well drained frozen corn in the winter that I heat in a skillet with a tablespoon of butter before adding the sauce. When using frozen corn I add a tablespoon of glaze to the pan with the pineapple last and cook 5 more minutes until heated through and well coated in glaze.

PIG PICKIN’ CAKE aka SUNSHINE CAKE version 1 ~ BLOG 365.261

I originally had this as a dessert at an Eagle’s auxiliary dinner and decided to research its origin. According to an AI Overview “Pig Pickin’ Cake” originates from the American South, specifically gaining popularity in North Carolina, and is named because it was traditionally served at “pig pickin'” events, which are large outdoor gatherings where a whole pig is roasted and guests “pick” the meat off the bone, hence the name; the cake is considered a classic Southern dessert to accompany barbecue. Ironically, the dinner I had this at was Italian 😀

PIG PICKIN’ CAKE serves 8-12

CAKE
11 1/2 ounces (2 1/4 cups) AP flour
1 tablespoon baking powder
1/2 tablespoon salt
11 1/2 ounces (1 2/3 cups) sugar
2 sticks (16 tablespoons) unsalted butter, softened and cut into 1 inch pieces
4 LARGE eggs, room temperature
2 LARGE yolks, room temperature
1 tablespoon PURE vanilla extract
1 1/4 cups WHOLE milk, room temperature
1 (11-ounce) can mandarin oranges, cut into pieces and WELL drained
8 ounce can crushed pineapple, WELL drained

2 tablespoons zest from one orange

  • Preheat oven to 350°.
  • Grease and flour 3 cake pans. Set aside.
  • In a medium bowl sift together the flour, baking powder and salt. Set aside. 
Cream butter and sugar together on high speed 3-5 minutes until light and fluffy.
  • Reduce mixer speed to medium.
  • Add eggs and yolks, one at a time, mixing well between each addition until incorporated and scraping down sides with a rubber spatula as needed.
  • Add in vanilla.
  • Alternate adding dry ingredients and milk a third at a time on low speed, mixing until just incorporated.
  • Fold in pineapple, mandarin oranges and zest. 

  • Divide batter equally among cake pans and bake 25-27 minutes until golden brown and springy to the touch and cake tester inserted into center comes out clean, rotating the pans halfway through.
  • Cool cakes in the pan for 15 minutes then carefully release from the pan onto cooling racks to cool completely.
  • Do not assemble cake until it has completely cooled.

FROSTING
2 cups heavy cream
1 tablespoon sugar
1 (3.4 ounce) instant vanilla pudding
2/3 cup crushed pineapple, drained of all its liquid

  • Add cream into the bowl of a stand mixer.
  • Turn mixer on to high and begin beating.
  • Add sugar while mixer is running.
  • Once soft peaks form, turn mixer to low and add vanilla pudding mix, mixing for 1-2 minutes.
  • Stop mixer, scrape down the sides and gently stir to incorporate any remaining pudding powder. 

  • Fold in pineapple and frost cake adding a thin layer of frosting between the layers leaving enough to cover the rest of the cake completely.
  • Store covered in the refrigerator. 


NOTE:

  • I now make this with a cream cheese pineapple buttercream style frosting that we much prefer.
  • I also use a Cheesecake or White chocolate flavored instant pudding if making the original frosting.
  • Works quite well in a spring form pan.

PINEAPPLE CREAM CHEESE FROSTING
16 ounces cream cheese, softened
1/2 cup butter, softened
2 tablespoons pineapple juice
2 teaspoons pure vanilla extract
3 cups powdered sugar

  • In a medium bowl beat cream cheese and butter until smooth.
  • Add lemon juice and vanilla. Beat until blended.
  • Add powdered sugar gradually until well blended and smooth.
  • Ice first layer and then add 2nd cake top and ice again including sides of cake.
  • Refrigerate 1 hour to set icing before serving.

CROCK POT REUBENS ~ BLOG 365.254

CROCK POT REUBEN SLIDERS makes 24 slider sandwiches

2-3 pound corned beef brisket with seasonings
16 ounce jar sauerkraut, drained
1/2 cup thousand island dressing

  • Place meat in slow cooker and sprinkle with seasonings.
  • Spread sauerkraut over meat.
  • Pour dressing over sauerkraut.
  • Cover and cook on low 6-8 hours.
  • Remove meat from slow cooker and slice across grain.
  • Return meat to slow cooker and stir to combine with sauerkraut and dressing.

24 rye rolls or Hawaiian rolls, toasted
2 cups shredded Swiss cheese
1/2 cup thousand island dressing, optional

  • Using a slotted spoon, spoon the mixture onto toasted rolls.
  • Top with grated Swiss cheese.
  • Top with more thousand island dressing if desired.
  • Enjoy!

AUTHENTIC CARNITAS aka MEXICAN PULLED PORK ~ BLOG 365.252

CARNITAS (Mexico’s version of pulled pork) is the first thing I look for on any Mexican restaurant menu. It is my very favorite. BUT, it must be prepared in an authentic way.

Being a gulf coast Texas girl and growing up in southern California I LOVE authentic Mexican food. Here in the Pacific North West though many of the Mexican restaurants have Americanized recipes to the point that I don’t enjoy them because they are no longer authentic. There is a local food truck that makes the very best and most authentic carnitas, but being a food truck it’s cold to eat outside in the winter so I have perfected my own recipe for home. This recipe is perfect because it has minimal prep, very few actual ingredients and tastes just as good in a taco as it does fresh out of the skillet by itself.

I read somewhere that every tortilla dreams of being stuffed with Carnitas and I can’t agree more!!!!! The pork must be seasoned perfectly though, slow cooked to make it juicy and then fried crisp! Anything less is just plain pulled pork and not worthy of being called Carnitas.

Traditional Mexican cooking methods of using A LOT of lard isn’t as feasible for American home cooks, so here’s an easy slow cooker method. It can also be made in an insta-pot or even a pressure cooker. They key to the authentic taste and texture is browning it in the skillet before just before serving.

CARNITAS aka MEXICAN SLOW COOKER PULLED PORK

4 pounds boneless pork shoulder (pork butt), trimmed
FRESH ground sea salt and black pepper
1 LARGE onion, chopped
1 jalapeno , deseeded and derided, chopped
4 cloves garlic, minced
3/4 cup juice from FRESH oranges
1 cup chopped FRESH roasted Hatch Chiles
1/2 cup chopped cilantro

1 tablespoon dried oregano*
2 teaspoons ground cumin*
1 tablespoon avocado oil
Crumbled Cotija, for garnish
FRESH chopped cilantro, for garnish

  • Rinse and dry the pork shoulder, rub all over with salt and pepper.
  • Whisk together the rub ingredients if making your own.
  • Rub all over the pork. Marinate in large ziplock bags with the chopped hatch chiles for 24 hours.
  • Place the pork in a slow cooker fat cap up.
  • Sprinkle the chopped onions, jalapeño, cilantro and minced garlic over the meat.
  • Pour orange juice over top.
  • Slow Cook on low for 10 hours or on high for 7 hours until pork is tender enough to shred.
  • Remove from slow cooker and let cool slightly. Then shred using two forks.
  • Discard all but 2 cups of cooking juices. The liquid will be a bit salty, it is the seasoning for the pork. Set liquid aside.
  • Heat avocado oil in large skillet over high heat.
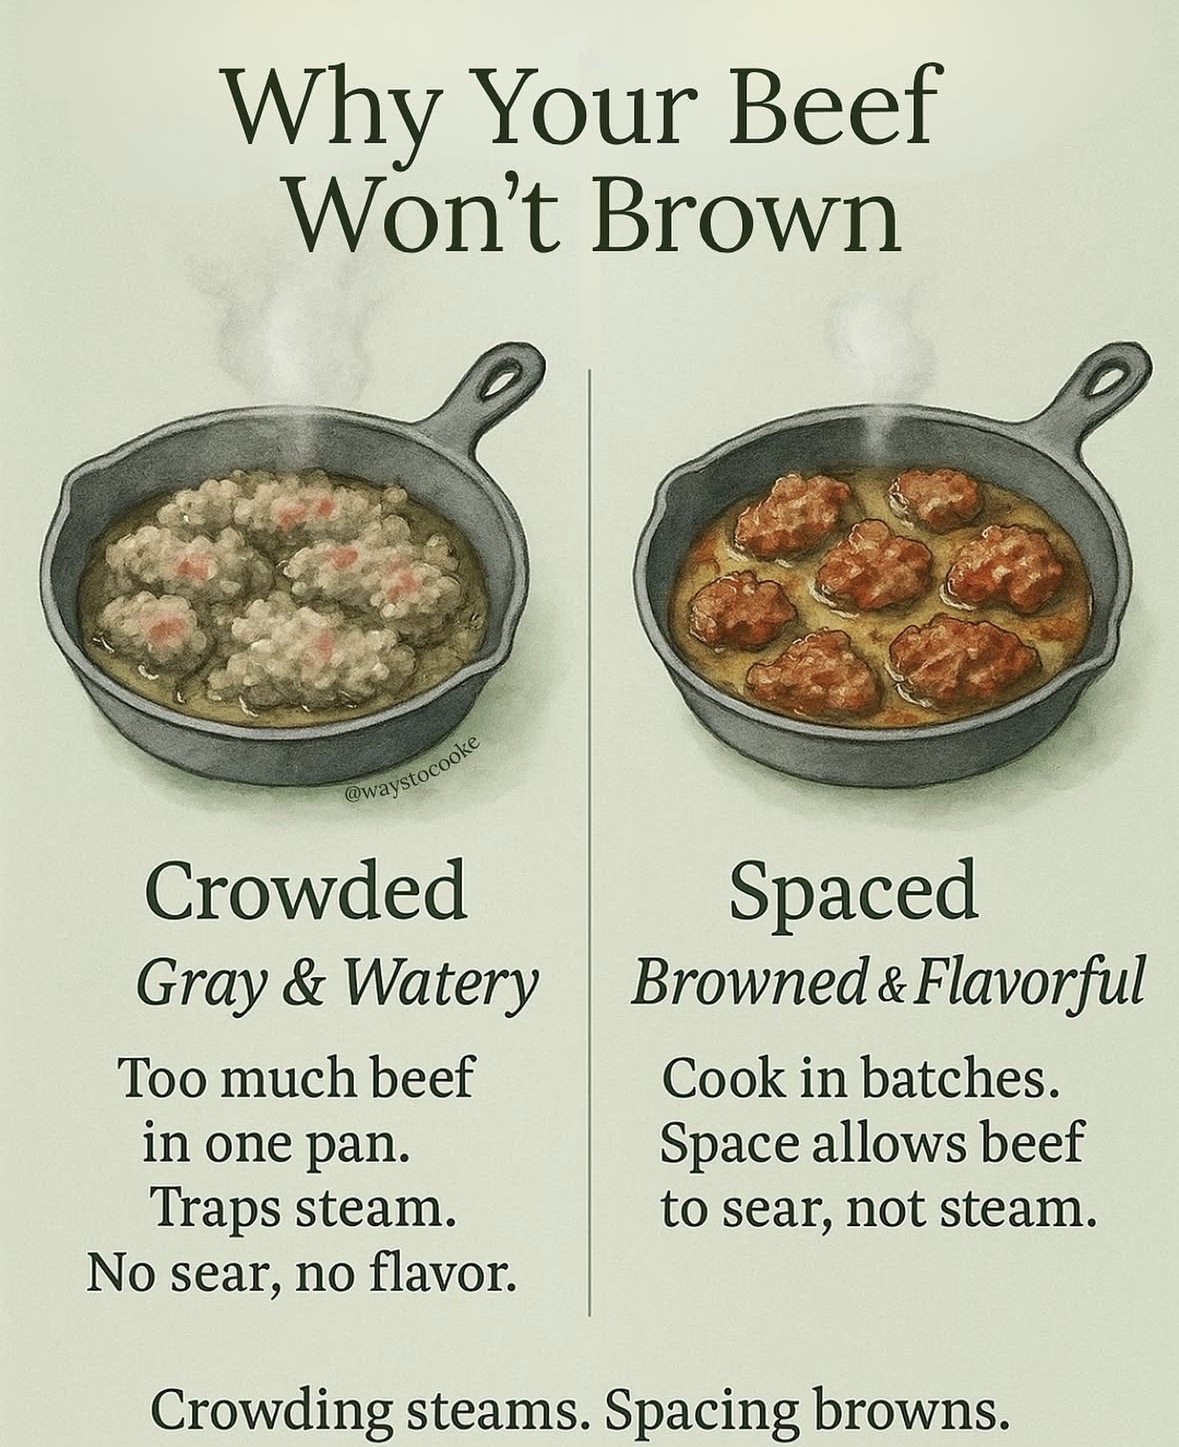
  • Spread shredded pork in the pan, but DO NOT CROWD pan. You’ll probably need to cook in batches.
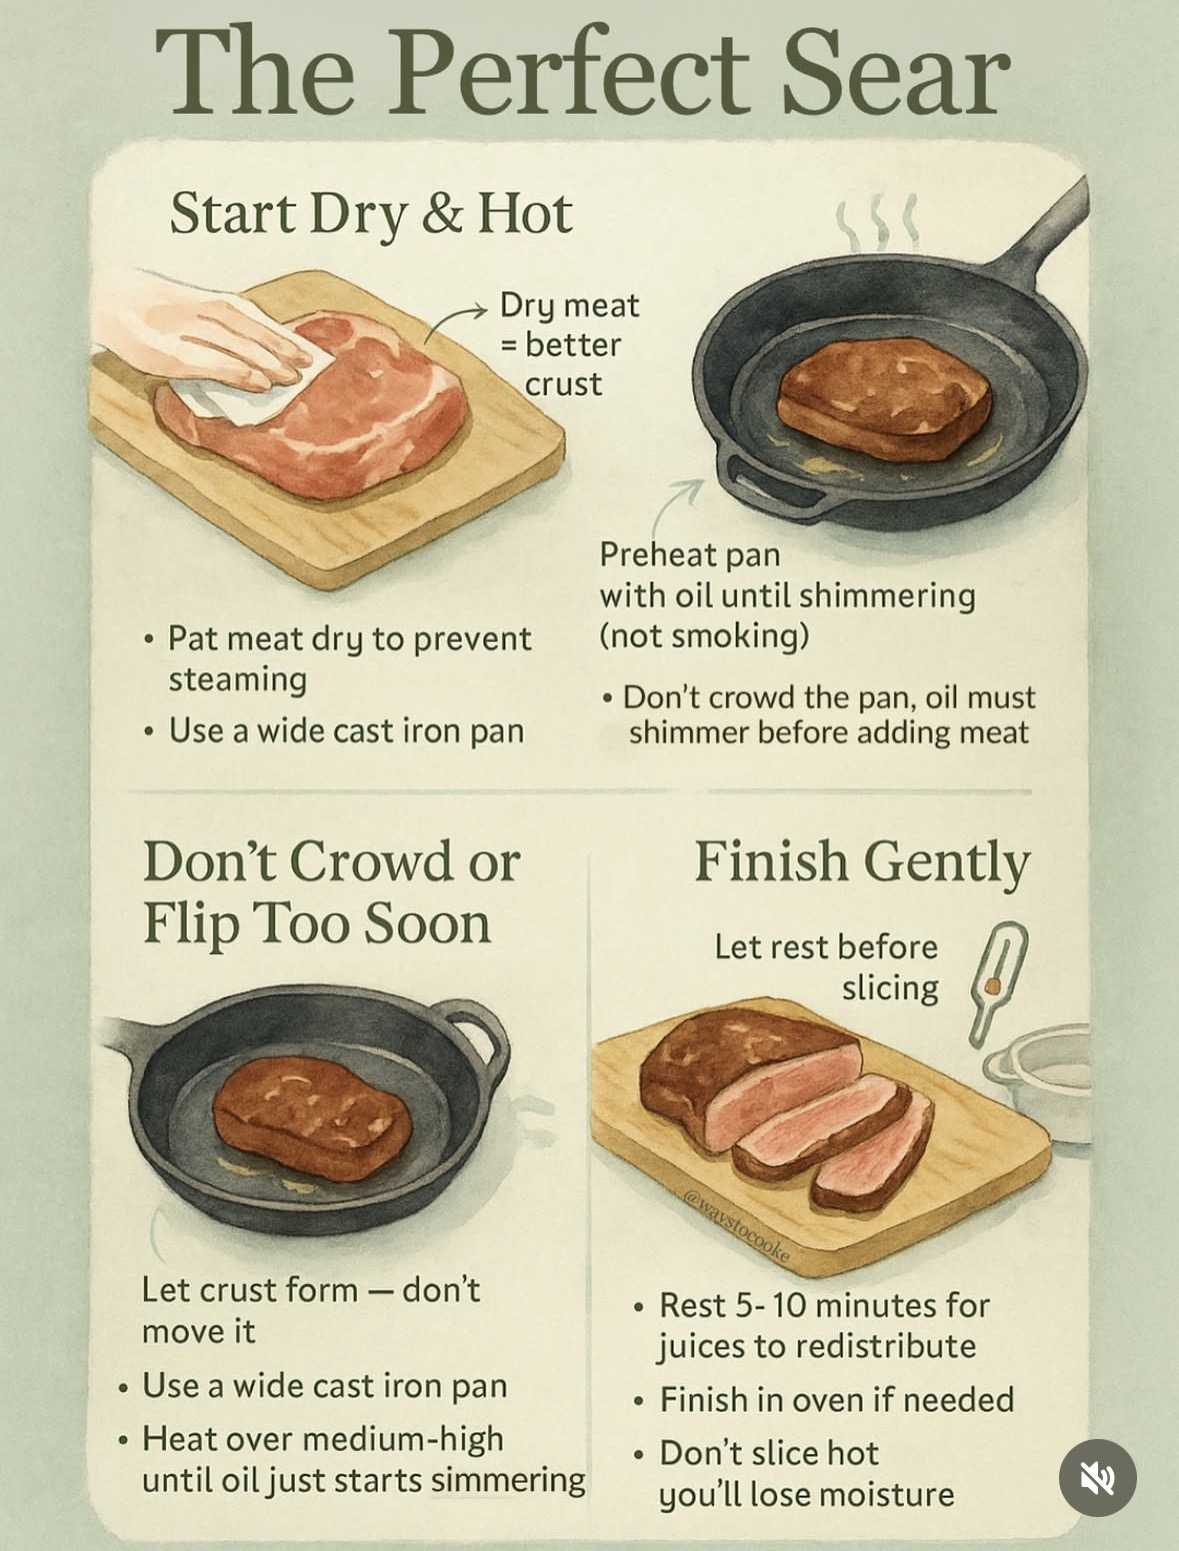
  • Drizzle some of the juice over the pork and allow to evaporate until the bottom side is golden brown and crusty. Turn and sear the other side for a moment, you still want some juicy bits.
  • Just before serving, drizzle more juices over pork and serve hot with crumbled Cotija cheese and chopped cilantro!


NOTES: Pampered chef makes a Carnitas spice mix that I really like and I use it as a rub for 24 hours before slow cooking.

ITALIAN SUNDAY GRAVY ~ BLOG 365.247

I first learned of ITALIAN SUNDAY GRAVY in a magazine and then a cookbook. While there is a GREAT debate in the Italian American community about whether Sunday Gravy and Sunday Sauce are the same thing, my Italian hubby’s family says there is NO debate. There MUST be meat to be called a gravy otherwise it’s only a red sauce!!!! Sunday gravy is thick and hearty and the recipe that turns a simple Sunday into something really special.

An authentic recipe for Italian Sunday gravy aka sugo is a rich homemade red sauce that gets simmered for hours and hours with meatballs, Italian sausage, and melt-in-your-mouth pieces of tender slow cooked pork. It is traditionally served on Sundays making this iconic Italian recipe perfect for big family gatherings, special occasions and for leftovers any other night of the week. According to my research in the old world it was a truly arduous process with nonnas waking at dawn to make meatballs, stuffing and rolling flank steak to make braciole and even adding WHOLE pork chops and sausages to the vat of simmering sauce. They would simmer and stir ALL day until the gravy aroma carried all the way down the street. Obviously I have streamlined the process into a slow cooker situation, but I think it is still quite tasty! The large grind ground beef and mild Italian sausage works great for this version. Using other cuts of beef can make a tasty RAGU.

I don’t personally have an Italian background, but it is the end of summer and I have several bunches of ripe tomatoes to use along with an Italian husband who LOVES red sauce. There is something magical about the smell of this recipe simmering for hours on end. But, I understand that every Italian American makes their pasta sauce a different way, and they all have strong opinions about what it’s called. Many call it sugo, which is the Italian word for sauce. But, no matter what you call it – sugo, sauce or gravy – this is a recipe you definitely want to make again and again. 

This recipe for authentic Italian red gravy is ideal for feeding a large group. I make it at the end of summer using up my tomatoes as well as many other veggies and then freeze it in batches for the winter months and use it to make lasagna as well as chicken Parmesan and the such.

Red gravy does require several hours and hours of low and slow simmering. But, the actual hands-on prep is pretty minimal. This is the best Sunday gravy recipe because it’s incredibly forgiving and adaptable. It can easily be scaled up or down to accommodate your number of guests.
Everyone makes theirs a little bit different. What makes this recipe special is that ultimately you get to decide what tastes best for you and your family!

My best advice is to ALWAYS use QUALITY ingredients! You can adjust the ingredients and amounts to suit your family.

Many start by adding all sorts of meats like short ribs, spare ribs, meatballs, and sausages, letting them all cook together for hours and as the day goes on, the sauce gets thicker, the flavors get richer and the smells are just amazing. Sunday Gravy is a comfort food, a hearty dish meant for the family to enjoy a delicious meal together while having a wonderful family day. Unlike a basic marinara or tomato sauce, Sunday Gravy is enriched with the flavors of various meats, making it more of a meat stew served over pasta.

Most of the time a Sunday Gravy recipe is passed down from generation to generation, with each family member putting their own spin on it. But, while the recipe might vary from family to family, the core elements remain the same – meat, tomatoes and love. No matter the variation, it’s always been about making something full of flavor and filled with love and warmth.

ITALIAN SUNDAY GRAVY

2 tablespoons avocado oil
1 LARGE Vidalia onion, chopped
4-5 garlic cloves, minced
1/2-2 teaspoons red chili pepper flakes
FRESH ground sea salt
1-2 tablespoons sugar
2 tablespoons tomato paste
1 pound pork butt, cut into large chunks
3-4 mild Italian sausage, casing removed
1 pound lean chili grind (large) ground beef
6 cups homemade chicken stock
2-3 pounds FRESH RIPE tomatoes or 3 large cans San Marzano crushed tomatoes
Prepared favorite pasta

  • Heat oil in a large skillet over medium high heat.
  • Add the pork pieces and sear well on each side until golden brown to develop a nice depth of flavor.
  • Transfer the pork to a slow cooker.
  • Lower the heat, then sauté the onions JUST until soft. 
  • Add the garlic and chili flakes, then continue cooking for another 2 minutes. 
  • Add the tomatoes, parsley and bay leaves.
  • Season with salt and pepper, to taste. Transfer to the slow cooker also.
  • Brown the beef and Italian sausage together until browned and well crumbled. DRAIN well of excess fat and add to slow cooker.
  • Add the tomatoes and chicken broth.
  • Cook on low 8-10 hours until the pork is falling apart and the gravy is thick and aromatic.
  • Taste the sauce and adjust the seasonings as needed.
  • Serve with your favorite prepared pasta.
  • Finish with fresh basil or parsley and FRESH grated Parmesan cheese.

NOTES:

  • Canned Tomatoes: You can use whole peeled tomatoes or crushed tomatoes in this recipe. If using whole peeled tomatoes you will need to crush them yourself. Some Italians prefer using tomato puree which produces an extra smooth sauce. It’s really about personal preference. Italians are passionate about which brand of tomatoes they use. San Marzano tomatoes are often said to be the best tomatoes and are what I use if not using fresh. If using whole peeled tomatoes, use an immersion blender to puree the tomatoes to make them smoother before adding them.
  • Herbs and Spices: Keep the spices minimal. I ONLY use FRESH Italian parsley and basil as well as ground bay leaves. It gives the spaghetti sauce a subtle, but distinct flavor. I also use red pepper flakes, but se these to taste as not everyone likes a spicy sauce.
  • Sugar: This ingredient is very controversial, but you can add a pinch of sugar to your sauce to balance the acidity. I usually do this towards the end of the simmering time after tasting and adjust the seasoning with salt and red pepper. Many times the tomatoes are so sweet I don’t need to add sugar, other times though it takes several tablespoons to balance out the acidity.
  • Meats: A good Sunday gravy typically includes a variety of meats. I usually include Italian sausage, chili grind size lean ground beef and large pieces of trimmed pork butt. These meats add a depth of flavor and richness that make it the gravy versus a plain marinara sauce.
  • Tomato paste is optional, but it adds nice body to the sauce. If you like your gravy a little bit thicker, don’t skip it! You can also thin out the sauce with more broth as needed.
  • It’s important to stir the pot about every 20 minutes or so to prevent the bottom from burning.
    Turn off the heat and allow the meats to sit in the sauce until ready to eat. I like to make my sauce on Sunday morning, then let it hang out on the stove all day. 
  • This recipe is very forgiving – you can adjust the amount or type of meat to suit your preference and the number of people you’re serving.


HAWAIIAN SHEET PAN CHICKEN ~ BLOG 365.233

HAWAIIAN SHEET PAN CHICKEN
A quick and easy weeknight meal. The original recipe called for rice, but we prefer a good yaki soba noodle. We also like to use some butternut squash now and then or whatever veggies I have in the drawer that need used up. Enjoy and adapt this delicious and easy Hawaiian Chicken Sheet Pan to your liking!

1 pound boneless, skinless chicken tenders
1/2 cup pineapple chunks, drained
1/4 cup QUALITY teriyaki sauce
1/4 cup QUALITY honey
1/4 cup Bragg’s Liquid Aminos
1 tablespoon rice vinegar
1/2 teaspoon red pepper flakes (optional)
1 cup cooked rice or yaki soba noodles
1/2 cup chopped broccoli or diced butternut squash
1/2 cup chopped red bell pepper, seeds and ribs removed then sliced
Sliced red onion

  • Preheat your oven to 400°.
  • Lightly spray baking sheet with non-stick baking spray.
  • In a bowl, combine the teriyaki sauce, honey, soy sauce, rice wine vinegar and red pepper flakes.
  • Add the chicken and marinate for at least 1 hour.
  • Place the chicken, pineapple chunks, rice (if using), broccoli, butternut squash and red bell pepper on a large baking sheet.
  • Bake 20-25 minutes or until the chicken is cooked through and the vegetables are tender.
  • Serve immediately and enjoy!

NOTES:

  • For a spicier dish, add MORE red pepper flakes to the marinade. If using yaki soba noodles add them during the last 10 minutes.

BURRITO BAKE ~ BLOG 365.226

The flavors of homemade burritos the easy way!

BURRITO BAKE – serves 8

1 medium onion, chopped
1 pound lean ground beef
2 tablespoons Southwestern Seasoning Mix or taco seasoning
2 garlic cloves, FINELY minced
12 ounce can Mexican-style corn, drained well
12 ounce jar chunky salsa, divided
16 ounce can refried beans
1/2-3/4 cups homemade chicken broth
7 (6 inch) corn tortillas or 3-4 golden blend tortillas
2 cups shredded Colby & Monterey Jack cheese blend, divided

  • In a large skillet combine onion, beef, seasoning mix and pressed garlic, mixing well. Saute 5-7 minutes until beef is no longer pink, breaking into crumbles. DRAIN BEEF WELL!!!
  • Add corn and 1 cup of the salsa, mixing well.
  • Combine refried beans and broth, mixing well.
  • Place 1-2 tortillas over bottom of your deep dish baker. Cut other tortillas to fill any gaps as layers are assembled.
  • Spread one-third of the beans evenly over tortillas.
  • Top with one-third of the beef mixture and one-third of the cheese.
  • Repeat layers.
  • Arrange remaining two tortillas over cheese.
  • Top with remaining beans and beef mixture.
  • Bake 30-45 minutes or until center is hot. 
  • Top evenly with remaining salsa and cheese.
  • Let stand, covered, 5 minutes before serving.
  • Serve with sour cream if desired.

NOTE: Golden Blend tortillas work well also. If you’re unfamiliar with them, they are half corn, half flour giving them a wonderful flavor and texture that is not as doughy as flour or as stiff as corn.

CHEESY CHICKEN CHILAQUILES ~ BLOG 365.219

This Mexican classic gets an update as a layered casserole.

CHEESY CHICKEN CHILAQUILES

1 1/2 pounds boneless, skinless chicken breasts or thighs
1 tablespoon Pampered Chef Southwestern Seasoning Mix or taco seasoning
1 tablespoon butter

1 3/4 cups salsa verde
3/4 cup homemade chicken broth
3/4 cup chopped FRESH cilantro
12 cups authentic restaurant-style tortilla chips (see notes) OR**
2 cups shredded Monterey Jack cheese
1 cup crumbled queso fresco (4 ounces)
Sour cream or crema (optional)

  • Preheat oven to 350°.
  • Melt butter in stoneware baker for 2-3 minutes while you are preparing chicken.
  • Cut chicken into 1 inch pieces.
  • Combine chicken and seasoning; mix well.
  • Spread chicken evenly over bottom of stoneware baker.
  • Bake 10-15 minutes until cooked through, stirring to separate chicken occasionally. Drain WELL and set chicken aside.
  • Whisk salsa and broth together.
  • Arrange half of the tortilla chips over bottom of the baker, breaking chips; top with half each of the chicken, salsa mixture and Jack cheese.
  • Sprinkle with 1/2 cup of the cilantro.
  • Repeat layers one time ending with Jack cheese.
  • Return to the oven covered for 10-15 minutes or until cheeses are melted and most of the liquid is absorbed.
  • Let stand, covered, 5 minutes.
  • Sprinkle with remaining 1/4 cup cilantro and Cotija cheese.
  • Serve with sour cream, if desired.

NOTES:

  • Authentic Mexican restaurant-style tortilla chips are thicker than other types of chips and keep their texture in this casserole. I used 2-2 cup bags of Fresh Gourmet Tortilla Strips.