This is another of the “antique” recipes I found recently in one of the discount recipe boxes at a junk store. I did some internet research and found a few similar recipes that included pineapple tidbits which I changed to WELL drained crushed pineapple because I think it makes it pop more.
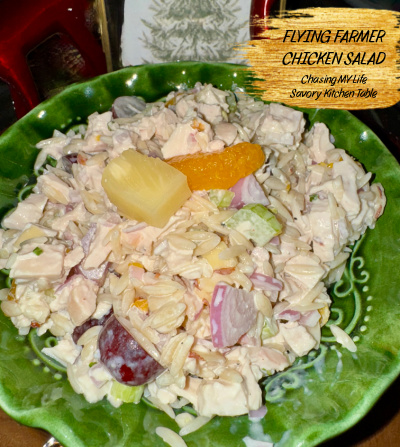
FLYING FARMER CHICKEN SALAD ~ 12 servings
5 cups cooked chicken, cut in chunks
2 tablespoons salad oil
2 tablespoons orange juice
2 tablespoons vinegar
1 teaspoon salt
3 cups cooked rice
1 1/2 cups small green grapes
1 1/2 cups celery, sliced
13 1/2 ounce can pineapple tidbits, drained
11 ounce can Mandarin oranges, drained
1 cup toasted slivered almonds or pecans
1 1/2 cups mayonnaise
- Combine chicken, salad oil, orange juice, vinegar and salt; let stand while preparing remaining salad ingredients or you can refrigerate mixture overnight.
- Gently toss together all ingredients.
- Serve on a bed of lettuce or spinach or in pita pockets.
~~~~~~~~~~~~~~~~~~~~~~~~~~~~~~~~~~~~~~~~~~~~~~~~~~~~~~~
Updated FLYING FARMER CHICKEN SALAD ~ 4 servings
1 1/4 cups rotisserie chicken pieces
1 tablespoon avocado oil
1 teaspoon mandarin orange or pineapple juice
2 tablespoons apple cider vinegar
1/4 cup + 2 tablespoons Duke’s mayonnaise
FRESH ground sea salt and black pepper, to taste
1 tablespoon FRESH chopped Tarragon or Lemon Thyme
1/3 cup diced red onion
¾ cup cooked rice or orzo (orzo is my preference)
1/3 cup small FIRM red or green grapes, halved
1 stalk celery, halved and sliced
1/3 cup crushed pineapple or tidbits, chopped & WELL drained
1/4 cup canned Mandarin oranges, WELL drained (optional – see notes)
1/4 cup toasted slivered almonds
- Whisk together the avocado oil, mandarin orange juice, apple cider vinegar, mayonnaise, salt and pepper. Set aside.
- In a large bowl toss together the chicken, Tarragon or Lemon Thyme, red onion, rice, celery, grapes, pineapple and mandarin oranges.
- Pour wet mixture over and fold together until well blended.
- Sprinkle with almonds.
- Serve over a bed of lettuce or spinach or in pita pockets or croissants.
NOTES:
- I PREFER orzo to rice in this recipe for better texture.
- I also PREFER ALL crushed pineapple to the mixture of of pineapple AND mandarin oranges. When I do use the mandarin oranges I chop them first and drain them extremely well! I also omit the grapes almost completely.
- This salad also benefits by being made the day before so the flavors can meld as it chills.

![]()