These are some of my favorite go to danish for a holiday morning. They can be made ahead and served room temperature or warmed up with a dot of butter for decadence.
ALMOND WALNUT DANISH
1 cup butter
1 cup milk
1 1/2 cups warm water
1 cup sugar
2 teaspoon salt
1/2 teaspoon cinnamon
2 tablespoons yeast
4 eggs, beaten
7 1/2 cups flour
1/2 cup + walnut crumbles
In a saucepan melt butter.
Add milk and water whisking until smooth consistency and JUST boiling.
Cool 5-10 minutes so you don’t kill the yeast.
Add the sugar, salt and yeast to form a sponge like blob.
Add the eggs until uniform consistency.
In a mixer with a dough hook attached, combine flour and yeast mixture.
Knead well. Put in refrigerator for at least several hours, but overnight is better.
Preheat oven to 375 degrees.
Roll a ball of dough the size of a golf ball into a rope and coil into a circle. Make sure the center is thinner than the outer edges to hold the filling in. Sometimes I prefer squares, but you just have to work with your dough after you have it coiled.
Fill with a heaping tablespoon of filling per danish (recipe below).
I don’t even know if Sandra will be doing this meme today so I’m making this short and sweet today as it IS Christmas! OUTSIDE MY WINDOW & THE WEATHER OUTSIDE
A storm and cold front moved in on Friday night and we dropped 20 degrees so it’s finally pleasant here. We are expecting the temperatures to stay low, but rain is expected for several days later this week.
ON THE BREAKFAST PLATE
Protein drink
AS I LOOK AROUND THE HOUSE / WEEKLY TO DO LIST & HOUSE PROJECTS
Nothing that won’t wait until Tuesday or so…
LAUNDRY… quite a few loads this week, towels, bedding and clothing
LIVING AREAS & KITCHEN… hubby is doing fairly good at keeping things relatively clean
STUDIO… is mainly storage these days so nothing going on there
YARD… nothing much after the weekend storms, just too wet to do anything
BLOG… some recipe updating, future post planning and holiday post planning
CURRENTLY READING & TELEVISION / DVR
BIG BANG THEORY, YOUNG SHELDON
THE GOOD PLACE, AMERICAN HOUSEWIFE, GREAT NEWS
MACGYVER, SCORPION, BLINDSPOT, ORVILLE
NCIS, NCIS NEW ORLEANS and NCIS LA, CRIMINAL MINDS, S.W.A.T.
MADAM SECRETARY, DESIGNATED SURVIVOR, WISDOM OF THE CROWD
CHICAGO FIRE, CHICAGO PD, CHICAGO MED
BRAVE, VALOR, SEAL TEAM
LAW & ORDER SVU, BLUE BLOODS, HAWAII 5-0
Z NATION, WALKING DEAD, FLASH, DC LEGENDS, SUPERGIRL
THIS IS US, ONCE UPON A TIME, THE GOOD DOCTOR
GUY’S GROCERY GAMES, BEAT BOBBY FLAY, BOBBY AND DAMARIS, BAKED IN VERMONT and the new KIDS BAKING CHAMPIONSHIP AS WELL AS the new WORST COOKS IN AMERICA begin soon
WHEN CALLS THE HEART
MENU PLANS FOR THE WEEK
Hubby is on his own still while I enter phase 3 of relearning to eat 😀
SUCCESSFUL RECIPE LINKS FROM LAST WEEK
These are recipes that have been waiting in cue to post, I’m definitely NOT back to cooking yet.
From 1558 until 1829, Roman Catholics in England were not permitted to practice their faith openly. Someone during that era wrote this carol as a catechism song for young Catholics.
It has two levels of meaning: the surface meaning plus a hidden meaning known only to members of their church. Each element in the carol has a code word for a religious reality which the children could remember.
The partridge in a pear tree was Jesus Christ.
Two turtle doves were the Old and New Testaments.
Three French hens stood for faith, hope and love.
The four calling birds were the four gospels of Matthew, Mark, Luke & John.
The five golden rings recalled the Torah or Law, the first five books of the Old Testament.
The six geese a-laying stood for the six days of creation.
Seven swans a-swimming represented the seven fold gifts of the Holy Spirit–Prophesy, Serving, Teaching, Exhortation, Contribution, Leadership, and Mercy.
The eight maids a-milking were the eight beatitudes.
Nine ladies dancing were the nine fruits of the Holy Spirit–Love, Joy, Peace, Patience, Kindness, Goodness, Faithfulness, Gentleness, and Self Control.
The ten lords a-leaping were the ten commandments.
The eleven pipers piping stood for the eleven faithful disciples.
The twelve drummers drumming symbolized the twelve points of belief in the Apostles’ Creed.
Merry (Twelve Days of) Christmas Everyone – and, remember, the Twelve Days of Christmas are the 12 days following December 25th. The Christmas Season runs until Epiphany, January 6.
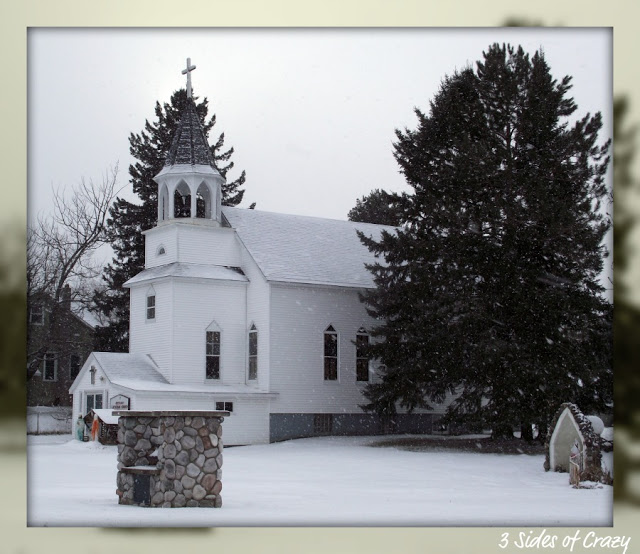
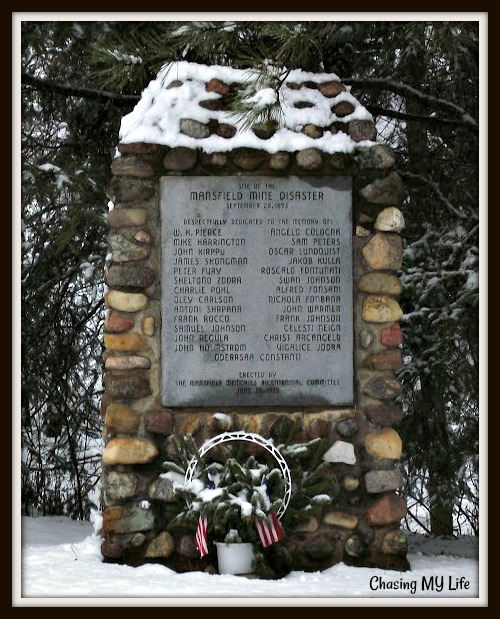
These are 2 of my favorite country churches from Michigan. I took these pictures in 2011 at Christmas time ON THE SAME DAY. That’s how fast weather changes with lake effect snow!
I JUST LOVE OLD CHURCHES! The bottom 3 pictures was a REALLY neat stone church in the middle of town.
But, my favorite country church is from a teeny tiny little town called Mansfield. It was once a growing little town until there was a mine disaster. Now all that exists is the monument to the disaster, the church and a few random homes.
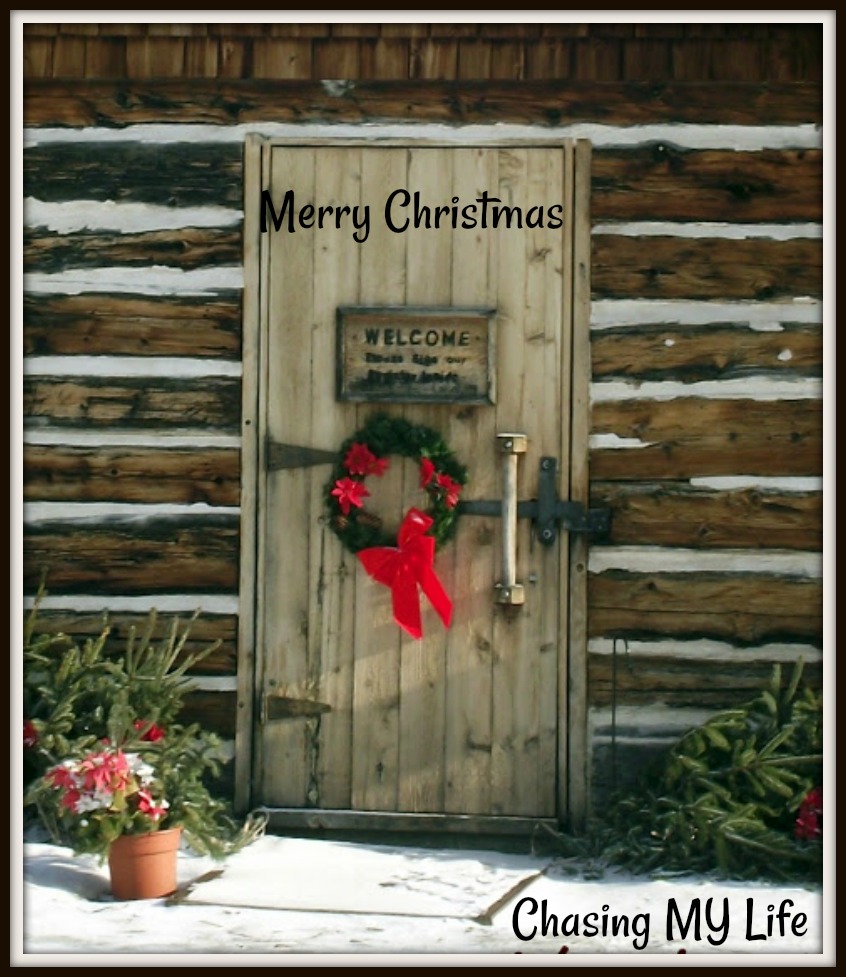
Usually the holiday season is an endless list of tasks and errands. Christmas Eve is usually at our house and then Christmas Day many times too. The last several years though the holiday season has been quiet, many times too quiet. This year in particular was way too quiet.
Personally, I love the hustle and bustle of the holidays. I’m a list writer and as a Virgo usually have my presents bought early and the Christmas cards ready to mail by Thanksgiving, many times they are even hand made. Having all this done and ready made it possible for me to go to the malls, get a nice cup of coffee and just watch other people hustle and bustle. Then I would go home and cook and bake and then bake some more! I MISS that here!
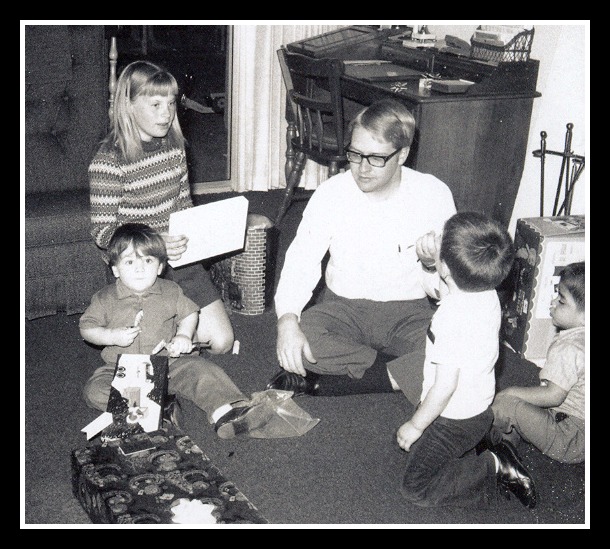
I learned much of this from my folks. My folks would have the majority of their shopping done before Thanksgiving and then because of their hectic schedules dad would sit me down with all the gifts, a card table, wrapping paper, tape, bows and tags on the day after Thanksgiving and that was where I would spend the Thanksgiving weekend watching Christmas movies, eating leftover turkey sandwhiches and wrapping gifts. When the gifts were done, I would start on the Christmas cards. Now this wasn’t an abuse of child labor laws, it was how I earned a chunk of money for my own Christmas shopping. And dad was a generous employer.
Christmas Eve was spent at our house with the immediate extended family (grams and gramps, aunts, uncles and cousins and many times neighbors too). We would do a big buffet and then open all our gifts to each other and have a party. We’d go to sleep happy and sated while waiting for Santa and then start Christmas day with stockings and brunch. By afternoon the turkey and ham were smelling great and we were ready to start all over. Oh it was the same bunch of people, but we would add a great aunt and uncle. Looney Louise, (okay we didn’t call her looney to her face, but it is what made her such fun) made us cornflake wreaths with red hots and fudge! All us cousins would sit on the front porch waiting for them and for our wreaths! It wouldn’t have been Christmas without them!
Looney Louise years before she made us our wreaths!
As always I’m looking forward to the next holiday season just after this one ends, but knowing that the next one will be spent around family makes it already more special.
It’s Christmas Eve and Santa Claus is coming to town tonight. If you have kids, or are just a big kid at heart, you can track Santa’s progress as he travels around the world on NORAD.
Chilis restaurant USE TO have a sweet corn soup that was fantastic! Then, they took it off the menu and I was forced to try and recreate it! I am very happy with the results. Today I made a grilled turkey and cheese with caramelized red onions – YUMMY!
SWEET CORN SOUP
Safflower oil
7 ears sweet white corn, kernels removed
1 large leeks, whites only, chopped
1 small Vidalia onion, chopped
1 tablespoon sugar
2 teaspoons sea salt
1/2 teaspoon white pepper
4 cups chicken broth
1 cup + 2 tablespoons heavy cream
3 tablespoons water
3 tablespoons cornstarch
Juice of 1 lime
In a large stock pot saute’ the corn, onion and leeks until translucent. 5 minutes or so.
Add sugar and cook a few minutes more.
Add stock and bring to a boil.
Reduce heat and simmer 45 minutes or so.
Add heavy cream and simmer 15 minutes more.
Whisk together water and cornstarch until well blended.
Add lime juice, salt, pepper and cornstarch mixture until well blended.
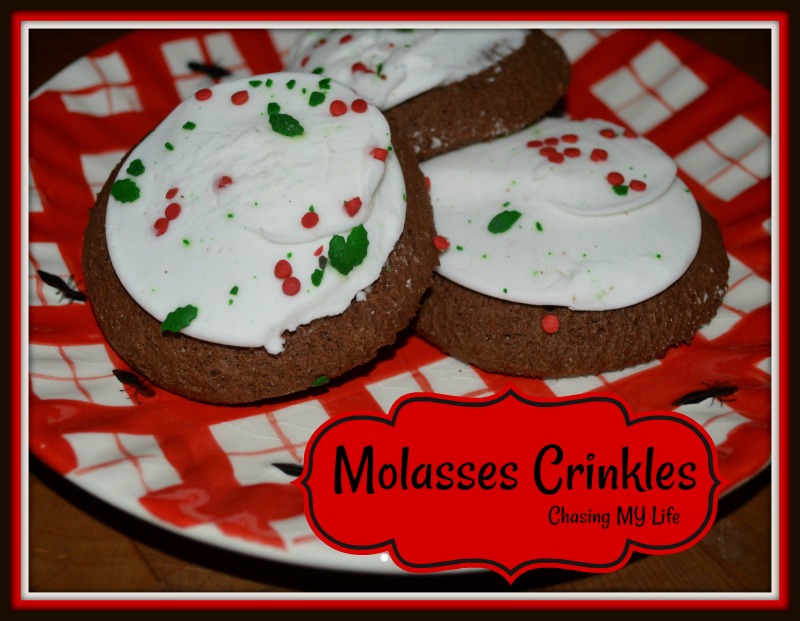
Normally I leave these plain, but just for the holiday we added a little cheery icing and sprinkles. MOLASSES CRINKLES
3/4 cup butter, softened to room temperature
1 egg, beaten
4 tablespoons molasses
1/2 teaspoon salt
1/2 teaspoon ginger
1 cup packed brown sugar
2 1/4 cups flour
2 teaspoons baking soda
1/4 teaspoon ground cloves
1 teaspoon cinnamon
turbinado sugar for dipping
Sift together the flour, baking soda, cinnamon and cloves. Set aside.
Cream butter, add sugar gradually until consistently smooth.
Blend in beaten egg and molasses.
Gradually stir flour mixture into creamed mixture.
Chill dough 1 hour or overnight.
Preheat oven to 350°.
Shape dough into small balls and dip tops in turbinado sugar.
Place cookies on WELL greased cookie sheet or silicone mat. DO NOT FLATTEN.
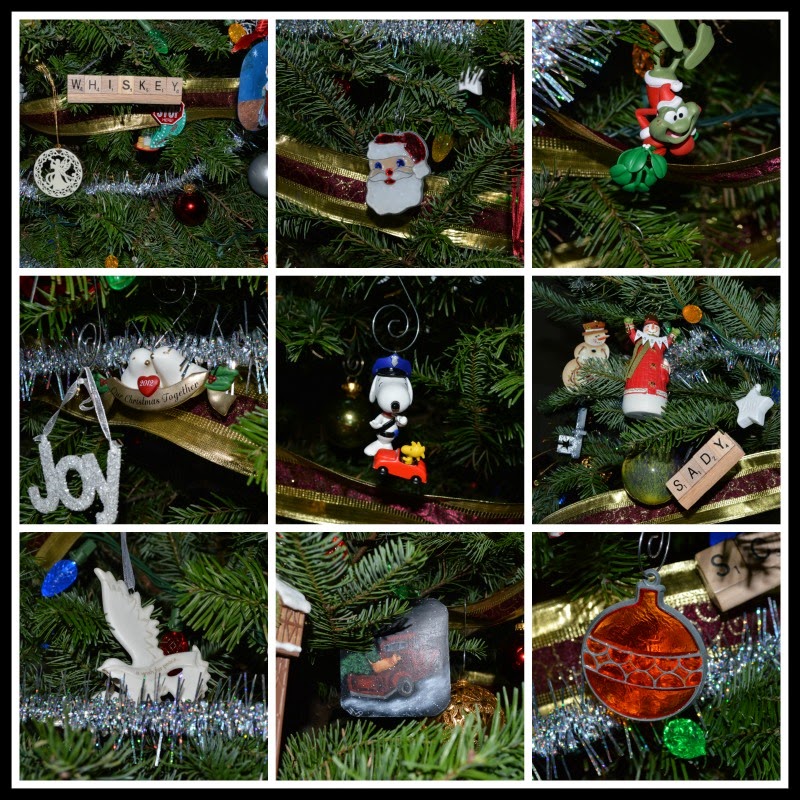
How I decorate each year changes based on my mood, weather, etc… so it will never be the same twice! EXCEPT for the 1st picture the other pictures are Christmases past. The remodel is almost done and at least we have a FULL tree this year. As for us, we PREFER real trees, but last year we decided with the remodel to break down and buy an artificial tree. SHHH don’t tell hubby, but I really love this tree. Next year we’ll have a real tree again. We figure we actually saved money and can donate the tree to the women’s shelter too.
This is actually the back of the tree, but it was the only way I could get a picture of the whole tree with the star.
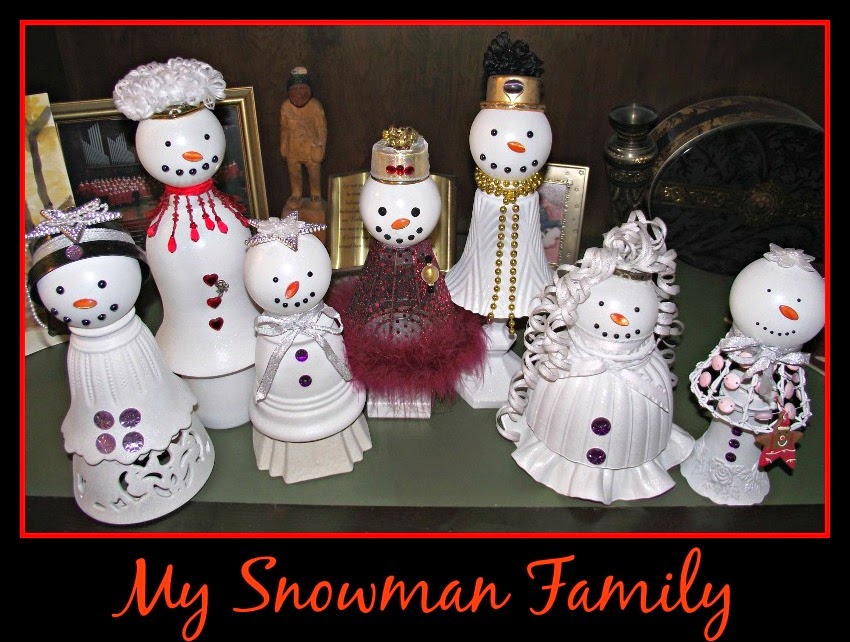
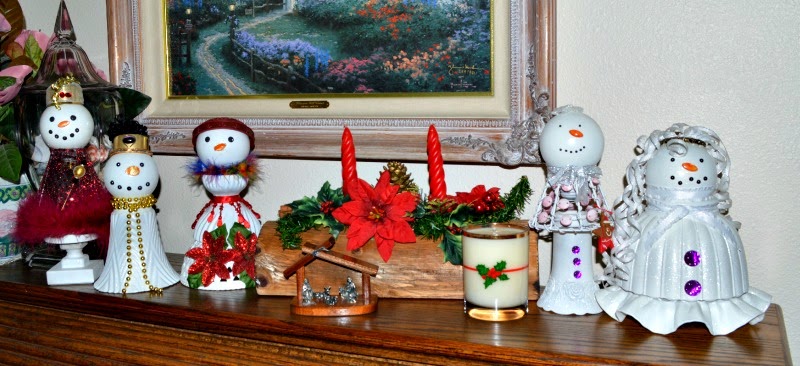
Snowman Family then above and snowman family now below.
We made candle yule logs for Advent craft night at church one year and they were a HUGE success and soooooooo easy to do.
These are a few of my new favorites.
My cousin that passed away in 2014 made this ornament for me. From now it will always be hung by my shooting stars in her honor. That is after I get done being mad at her for leaving me this mess to deal with.
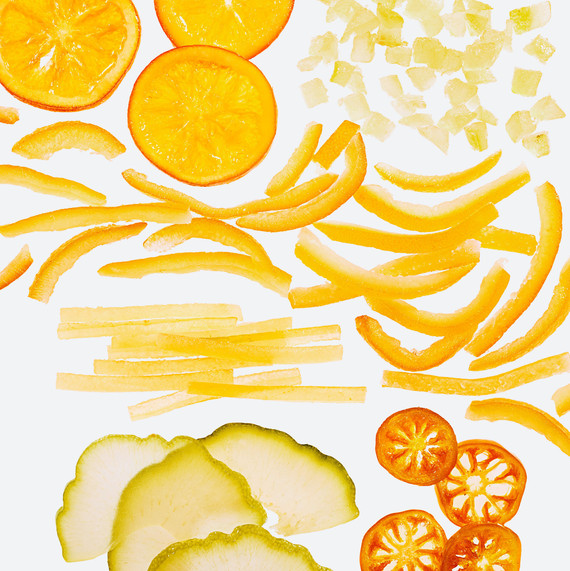
Do you have a recipe that calls for candied citron? Don’t know what it is? Well, it’s not candied lemon or grapefruit peel. Citron is an actual semitropical fruit that’s similar to a lemon but with a thicker skin. To make candied citron, the citron is blanched in water, boiled in sugar syrup, and dried. It lends a mild floral note to fruitcakes and other such confections. While I love candied citron know that you have other options. Each shines in a different way, but they can pretty much be used interchangeably in most recipes, so if you happen to have one kind on hand, try that in your recipe.
Photography by: Chelsea Cavanaugh
ORANGE SLICES (Top Left) – They’re great as a decorative flourish on top of cupcakes. CITRON PEEL (Top Right) – Though the pulp is sour, the candied peel is perfect for baking into stollen or stirring into granola. LEMON RIND (Middle Left) – Finely chop it and mix into muffins and pancakes for a bright flavor. ORANGE PEEL (Middle Right) – Dip pieces in dark chocolate and serve as an after-dinner treat. CITRON SLICES (Bottom Left) – Serve thin slices as part of a holiday cheese plate. CLEMENTINE SLICES (Bottom Right) – You can also garnish cocktails with these.
Candied citrus is available at specialty stores (especially around the holidays) and online at stores like junetaylorjams.com, but you can also easily make your own at home. Either way, store it in an airtight container in a cool, dry place for up to a month.
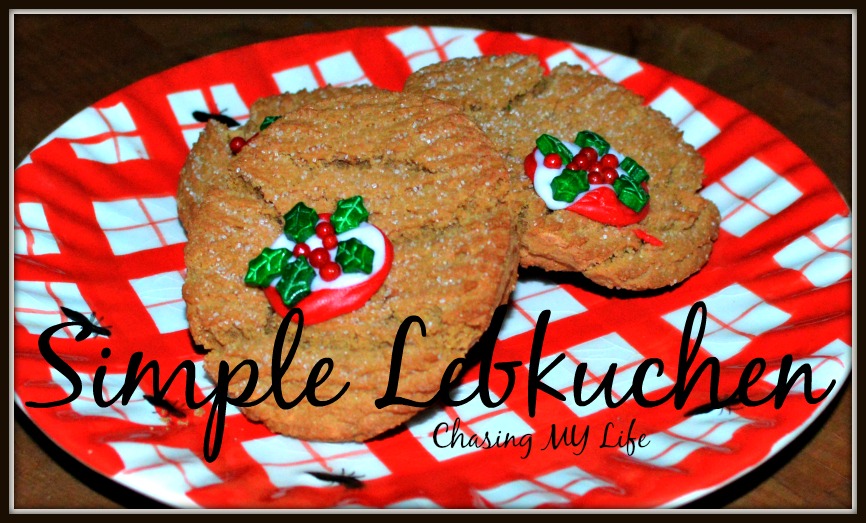
LEBKUCHEN
Traditional Lebkuchen German Christmas cookies are a form of gingerbread descended from medieval times and taste spicy and nutty in flavor. They were typically a combination of spices, honey, and dried bread crumbs. They are often cut into “sugar” cookie shapes and ornately decorated. I made a super “simple” version this year for hubby since I am unable to make neighbor plates and do my normal holiday baking.
Prep time: 15 minutes.
Cook time: 10-12 minutes.
Makes 12 servings.
COOKIES
½ cup honey
½ cup molasses
¾ cup brown sugar
1 LARGE egg
1 tablespoon lemon juice
1 teaspoon lemon zest
2¾ cup flour, plus flour for dusting
½ teaspoon baking soda
1 teaspoon each ground cinnamon, cloves, allspice & nutmeg
⅓ cup candied citron, diced (I prefer candied ginger)
⅓ cup hazelnuts, finely chopped
ICING
1 cup sugar
¼ cup milk
½ teaspoon PURE vanilla extract
½ cup confectioners’ sugar
GARNISH
Sliced almonds
Candied citron or ginger
Melted chocolate
In a medium saucepan, bring honey and molasses to a boil.
Remove from heat; stir in brown sugar, egg, lemon juice and zest.
In a large bowl, combine flour, baking soda and all spices, and stir in molasses mix, citron and hazelnuts. Cover; chill overnight.
Preheat oven to 350°.
Line baking sheets with parchment paper.
On a floured, hard surface roll out a small amount of chilled dough to ¼-inch thick. If dough is sticky, use more flour.
Cut dough in 2-inch rounds or shapes; transfer to prepared baking sheets.
Bake 10-12 minutes.
Meanwhile, make icing by heating sugar and liquids in a small saucepan (do not boil).
Remove from heat; stir in confectioners’ sugar. If icing crystallizes, reheat and add a touch of water or milk.
Transfer cookies to rack and while still hot, brush with icing and decorate with almonds, citron, ginger or sprinkles; or, let cool completely and drizzle with melted chocolate.
When do you open presents? This category has changed a lot over the years. My family traditions of a BIG Christmas eve from when I was a kid carried on through college, but as we got older and got families of our own, parents passed on, blended families (with their own traditions) were formed, etc… getting together for both Christmas Eve and Christmas Day became harder and harder to do. Eventually for me it became more and more Christmas morning only which is fine by me.
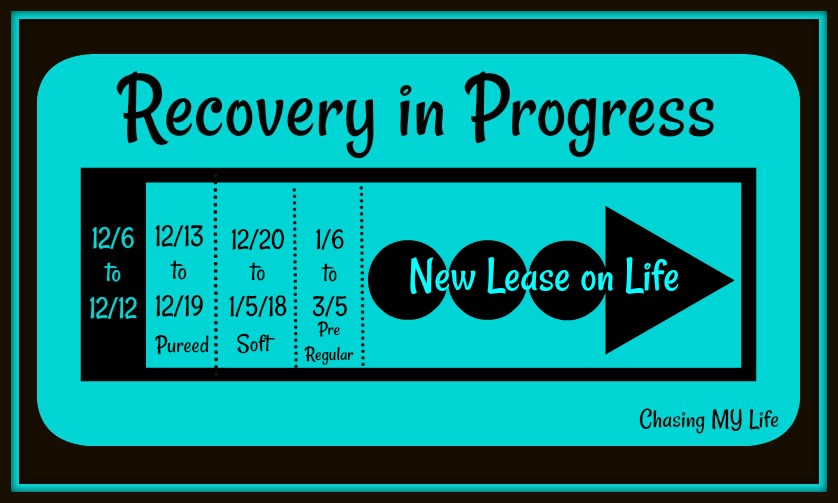
I an now entering the “SOFT” diet for at least 2 more weeks and then everything has to be in VERY small portions that are protein packed. SOFT is a relative word in the world of food. They are really only adding 3-4 things to my diet, so it is still basically bland, unflavorful and plain. This ENTIRE process is about retraining my body and my mind. Life as I knew it in the food world is over! It really is that plain and simple!
The part about this surgery that sucks is that I am NOT obese and did NOT need a gastric bypass for weight loss, but ended up with one because the doctor could not save the stomach after the BIO mesh side affects from previous procedures. So, life literally got tipped on its end from when I went into surgery and when I woke up – what was scheduled had to be drastically altered mid surgery.
I had wanted to lose a few pounds, which is definitely a done deal now. Now, I just have to make sure to get enough calories to not let it get out of hand!
I have been craving a silly scrambled egg FOREVER it seems! I also get to add a spoonful of peanut butter – YUMMY! And I told hubby not to get too comfortable with his bachelor diet. Starting next month as soon as I can muster enough energy to cook I am going to to take a hand at some Ramen Fusion.
I’m already looking forward to 2 weeks from now when we enter the Pre-Regular Stage. The real trick will come in March when the lifetime diet takes affect! I am looking forward to the taste of REAL food, but not the digestive process. Honestly REAL food scares the hell out of me. I’ve always been a type A person who eats too fast and food that too hot. This is FORCING me SLOW down, chew more and eat less more often.


 MOLASSES CRINKLES
 How I decorate each year changes based on my mood, weather, etc… so it will never be the same twice! EXCEPT for the 1st picture the other pictures are Christmases past. The remodel is almost done and at least we have a FULL tree this year. As for us, we PREFER real trees, but last year we decided with the remodel to break down and buy an artificial tree. SHHH don’t tell hubby, but I really love this tree. Next year we’ll have a real tree again. We figure we actually saved money and can donate the tree to the women’s shelter too.