Thursday 13 ~ ALL ABOUT SALT


Thank you Janet and Megan for resurrecting it!
13 things to know about SALT!

  1. Sat is NOT a spice.
  2. Salt is NOT an herb.
  3. Salt is NOT a seasoning.
  4. Salt is a mineral.
  5. Salt is essential to life.
  6. Salt is contained naturally in most foods.
  7. Salt unites the flavors of herbs and seasonings together until they come alive.
  8. Salt does not actually flavor our food.
  9. Salt enhances our food.
  10. Salt increases the flow of saliva.
  11. Salt opens the taste buds.
  12. Salt releases the juices in foods.
  13. Salt stimulates the appetite.

final blog signature.

Health Department Ratings and what it means to you…

I spent most of my adult life working in the food industry on the west coast. This meant strict adherence to city, county and state codes and constant health inspections. We were in LA County where the restaurants are actually letter rated and that letter is posted for public viewing. There was also no smoking in any facility nor any pets allowed.

SO, imagine my surprise when we came here to work on this investment house and found that not only are there no letter grades, facilities are full of smoking, people walk in with their personal pets and let them run around as well as enough other numerous offenses that would have their doors permanently closed in most other cities and states.

The county I’m currently in (thank goodness only temporarily) is said to ‘do their own thing’ and while that seems to be accepted as the norm, it is still wrong, only no one wants to deal with it so it continues. We eat at home 99% of the time because of this.

This post came to be because hubby wants to take me out for my birthday next week and I don’t want to go. LOL you read that right I’m turning down a dinner out. Hubby wouldn’t hear of it, so we compromised on a restaurant in the next state, an hour away.

Many other states are following suit with the California program and it is actually being found that air borne illness and hospitalization are on the decrease since the grading system was instituted and that the number of ‘A’ graded restaurants is on the increase. In Los Angeles you can visit this site to see the rating for any particular restaurant. An ‘A’ or ‘B’ is an acceptable grade in LA County. A ‘C’ gives you a bit of time to get your grade up before the next inspection. A ‘D’ or ‘F’ will close your business. I, for one have no problems with the health inspectors checking for proper temperatures, lack of infestation, proper storage methods, etc… Environmental health affects us all at a social level.

The following is a direct quote from the Retail Food Inspection Guide.

The goal of food inspections is to reduce those risk factors which contribute to foodborne illness. Environmental Health is required to use a grading system to indicate how well food service operators are fulfilling their responsibility in the prevention of foodborne illnesses. All facilities receive grades which are posted on the website. However, only those facilities located in cities that have adopted Ordinance #97-0071 or located within the unincorporated areas of Los Angeles County are required to post the Grade / Score Card at the facility. The grade or score that a food facility receives reflects the conditions observed at the time of the inspection. Each food facility inspection begins with 100 points. As the EHS conducts an inspection, the appropriate categories in Section I – VI on the FOIR will be marked. The categories in Sections I and II and the subcategories in Section III have been assigned a specific point value based on the associated publichealth risk of the violation. This point value is deducted from the 100 points. To determine a facility’s grade; the EHS must first add all of the point deductions from the marked violation categories in Section I – II and subcategories in Section III. That total is then subtracted from the 100 points.

A grade card (A, B, and C) or a score card will be issued at the end of the inspection based on the remaining points:

  • 90 to 100 points A Generally superior in food handling practices and overall food facility maintenance.
  • 80 to 89 points B Generally good in food handling practices and overall food facility maintenance.
  • 70 to 79 points C Generally acceptable in food handling practices and overall general food facility maintenance.
  • 0 to 69 points Score Card Poor food handling practices and overall general food facility maintenance.

There are situations as determined by the EHS, where violations pose imminent health hazards that warrant immediate closure of the food facility, (e.g., sewage, no hot water, vermin, etc.). In those situations, the Public Health Permit will be suspended and a Notice of Closure * will be posted. This closure sign must remain posted until the facility permit is reinstated. This action does not affect the grade or score of the facility but is related to the conditions that warranted the closure.

Food Safety is not a matter of choice when you are serving the public or at least it shouldn’t be. Having a compromised immunity from Systemic Lupus and having spent so many years working in the industry attending classes and seminars I am very much aware and in tune to violations and just plain lack of responsibility. Both of which are running rampant here in this county in the north woods.

final blog signature.

Monday Munchies

Photobucket

Today’s Recipe: Healthy, Homemade Energy Shake

I mentioned last week that I was moving soon and needed to use up a lot of food I have lying around. I’ve also noticed that moving and packing is hard work, and I need an extra boost of energy to get everything done. Most energy drinks are full of sugar and make you jittery, though, so I thought I’d come up with my own alternative.
This is a great recipe for a breakfast, snack, or dessert shake. It’s more like a milkshake than a smoothie.

Ingredients
1/2 cup fruit (frozen works best, or just add a few ice cubes)
1/4 cup prepared pudding OR 1/8 package pudding mix
1/2 cup milk, any kind (3/4 cup if you’re using pudding mix)

It’s very simple – just combine the ingredients in a blender until smooth. The fruit is a good source of carbohydrates, which give you a quick burst of energy that’s healthier than the sugar rush you get from candy or caffeinated drinks. The milk provides protein, which helps keep you going without a crash. The pudding adds sweetness and creaminess and takes away the need for unhealthy ingredients like white sugar or ice cream.

You can use any combination of fruit and pudding flavors. Two of my favorites are dark chocolate pudding with raspberries and lemon pudding with blackberries. The shake pictured above uses peaches and vanilla pudding. If you’re making it for dessert, add more pudding and less milk to make a thicker treat.


—> Budget-friendly Tips

  • Bananas are very inexpensive and make a delicious, smooth shake ingredient paired with almost any pudding flavor.
  • Inexpensive boxed pudding mixes, individual pudding cups, and homemade pudding all work, with adjustments. Use whatever is most affordable for you.


—> Health-friendly Tips


—> Kid-friendly Tips

  • Serve like a diner-style milkshake with a swirl of whipped cream and a cherry on top.
  • You can sneak veggies into this recipe! I know firsthand that a little shredded carrot is undetectable in a well-blended peach shake, and even spinach leaves should be hard to find in a chocolate, blackberry, or blueberry shake.

Let’s talk food!


I posted an entry at my personal blog Menagerie today about menu planning and shortcuts in the kitchen. Tamy and I posted things like this here at the Krazy Kitchen in the very early days. Since we have different memes each day of the week here now I’ve decided to pick up where we left off and post it at my main blog.

I got the OK from Tamy to post this in between memes this evening for a little shameless self promo. I hope you will all endure my extra long post over at Menagerie and play along to give me your own hints, tips and shortcuts in your kitchen! I need all the help I can get!

Have a great week!
Martha 🙂

Monday Munchies

Photobucket

Today’s Recipe: Soda Cupcakes


You might notice that these cupcakes have no icing. They don’t need it! They’re perfectly sweet little cakes that are so much easier to take on-the-go than sloppy iced cupcakes, and they can be made with only two ingredients: cake mix and your favorite soda!

Okay, I’ll admit that it doesn’t sound like the healthiest recipe, but bear with me here. They’re delicious, and you can always check out the health-friendly tips at the bottom of the post.

Take a can (or 12 ounces/about a cup and a half) of soda and stir into a box of your favorite cake mix. It’s as simple as that. You can halve the recipe with no problem for a smaller portion, and if you’re worried about calories, diet soda works great. My taste-test subjects have never noticed when I’ve used diet instead of regular.

You want the consistency of the batter to be similar to the way it’d usually be after preparation, but a little lighter is fine too. Follow the mix box’s instructions for pouring the batter into a cupcake pan and baking. You may need to bake it for a few extra minutes. You can make a plain cake the same way, but it’s more likely to end up undercooked in the middle and too brown at the edges.

Here are some delicious soda and mix combinations I’ve tried:
Devil’s food cake mix with cherry Dr. Pepper (my favorite)
Yellow cake mix with Mountain Dew (it’s like an energy drink in a cupcake!)
Strawberry cake mix with ginger ale
Confetti cake mix with Sprite

After baking, you’ll end up with a batch of moist cupcakes full of wonderful flavors, with the extra sweet touch of icing built right in. Even though you’re using soda in the mix, don’t forget that it means you can leave out the oil or butter!

—> Health-friendly Tips
-Different cake mixes have different nutrition facts. Check the boxes, or use your own cake mix minus liquid ingredients.
-Don’t want to use soda? Use six ounces of carbonated water and six ounces of your favorite juice. Cranberry juice works beautifully and makes cute pink cupcakes with a white mix.

—> Kid-friendly Tips
-Let each of your kids pick their favorite cake mix and soda. With a measuring cup and a few mixing bowls, this recipe halves, quarters, and eighths flawlessly.
-These mess-free cupcakes make great special treats to pack in a lunchbox.

—> Budget-friendly Tips
-You can use less expensive store brand sodas (50 to 80 cents per two-liter bottle around here) and measure them out instead of using cans.
-Since these cupcakes are so moist, I find they don’t usually need a greased pan or extra money spent on pan liners.

As a side note mostly unrelated to this recipe: you know what goes great with cupcakes? Coffee! If you’re reading this on Monday, August 3, most McDonald’s are giving away free hot or iced mochas today. I thought you might want to know so we can all go grab a coffee together. 🙂

Monday Munchies

Photobucket

Today’s Recipe: Stuffed Pizza Slices

There’s a place that sells Italian food on my college campus. It’s not what you’d call authentic or even all that great, but there’s nowhere else to get a slice of pizza if you don’t want to order out. The best thing they have is this great stuffed pizza, two crispy crusts filled with cheeses and veggies. Unfortunately, one slice costs almost $5! I decided there had to be a better way, and I was right.

It turns out that a pita, sliced and baked in just the right way, tastes as great as the crust of this overpriced stuffed pizza. For this recipe, which makes one slice of stuffed pizza, you will need one piece of pita bread, two or three tablespoons of tomato or pizza sauce, around 1/4 cup of mozzarella cheese, and any other pizza toppings.

First, slice the bread so it’s the shape of a big pizza slice, with the crust end closed and the sides open:

You can stuff the leftover edges too, or slice them up and bake them along with the rest to make pita chips.

Heat the pita in the microwave for ten seconds. This will make it easier to open without letting it get crispy too early. Slide a spoon between the two halves at the tip and the pits should open.

Then, put in the fillings in any way you’d like. I used a little plain tomato sauce, slices of mozzarella rather than the shredded kind, spinach, and olives. Put your slice on a baking sheet or a piece of aluminum foil and sprinkle the top with parmesan if you have it. Bake at 250 degrees for about five minutes, or until the cheese all melts but before the pita gets too brown.

Although I expected this recipe to be an imitation that just wouldn’t quite hit the spot, it tasted so much like those big slices that I don’t think I’ll ever waste the money on one again!

—> Health-friendly Tips
-Use a whole grain pita instead of plain white.
-Sprinkle sesame seeds on top instead of extra cheese.

—> Kid-friendly Tips
-If your kids don’t like veggie toppings, sneak finely chopped or pureed veggies into the sauce.
-Don’t tell them they’re having pizza for a snack. Although this recipe is completely picky-eater approved, it is probably very different from their image of a delivery pizza with a thick crust and the cheese on top.

—> Budget-friendly Tips
-Instead of cooking up a separate side dish, serve with more of the veggies you used to stuff the slice and a tasty dipping sauce.
-Want to use extra meats or cheeses but don’t want to pay for a large amount? If you ask for just one slice of anything at your grocery store deli, you’ll probably get it for free.

As a little bonus to today’s post – remember when I suggested last week that you can make the jello recipe inside a watermelon half? Well, I picked up a fresh watermelon at a roadside stand this week, and my kitten is sure enthusiastic about the idea!


Monday Munchies

Photobucket

Today’s Recipe: Jello Wedges


Talk about a fun summer treat! This recipe combines the goodness of fresh fruit with cute and refreshing jello shapes.

For this recipe, you will need two medium-sized oranges, one box of your favorite flavor of jello, and about one and a half cups of water. You can use any color of jello, but it’s fun to use orange and see how long it takes for your family and friends to notice that they’re not being served fruit! Also, although I haven’t tried it, others who have made this recipe said it tastes bitter if you use any other citrus peels like lemon or lime.

First, slice each orange in half and scoop the fruit completely out of the peel down to the white part. Make sure to save the fruit for another recipe. Boil the water and mix it with the jello in a separate bowl. Don’t follow the package directions – the hot water in reduced amounts will help the jello thicken enough to stay in the peel later on. You can use even less water if you don’t mind your jello tasting more concentrated.

Now, place the empty orange peel halves inside bowls or cups where they won’t tip over once they’re filled with the mixture. Fill each peel with an equal amount, then put them in the fridge for at least four hours. Leaving them longer will result in neater slices.

When the jello is set, place each orange half jello side down on a plate or cutting board and slice in thirds with a serrated knife. Arrange on a plate and serve!

—> Health-friendly Tips
-You can use sugar-free jello with this recipe.
-Serve with real fruit and light whipped cream for a healthy hot-weather snack.

—> Kid-friendly Tips
-Let each child pick his or her own favorite flavor of jello to fill two oranges.
-Hollow out a watermelon half and fill it with pink jello, then add some raisins as seeds once it is set for a tricky treat!

—> Budget-friendly Tips
-Store brand jello is less expensive, works just as well, and is usually easy to find in orange.
-You can also use any type of melon rind if oranges are expensive in your area.

COOKING WITH KIDS

My most recent experience of cooking with kids was with my girl scouts on some simple tasks or the time with Amber this summer. What readily comes to my mind is my grandma teaching me way back when. She’d let me wear her apron which she so cleverly converted into a size that fit me pretty well. Then she would bring a kitchen chair over to the counter and let me climb up on it. She would let me help her do simple measurements or read her the recipe (that she already knew by heart, but wanted me to learn to understand) or stir pancake batter. When she taught me to measure it was EXACT. You used a table knife to level off the top of the measuring cup. She also taught me how to make the best cakes with double sifting. These days they say you don’t need to sift, but I feel I get a better texture and moister cake by still sifting.

No matter how old they are, kids want to help in the kitchen and we should be glad and welcome their eagerness. Much of our life revolves around food and cooking in one way or another and boys as well as girls should learn at the very least, the basics. As Barbara pointed out, even finicky eaters become better eaters when they are a part of the process of making their own food.

You can include children of all ages in any food preparation. Just be aware of their capabilities and base their tasks on that. For example, every kid wants to wield the meat cleaver, but probably shouldn’t.

Start their tasks with simple ones like learning to measure correctly, snapping beans, washing vegetables, measuring rice, when to add the different ingredients and even simple things like cracking an egg which can certainly be messy, but every kid wants to do it! Grandma taught me to crack eggs into a separate bowl instead of directly into a recipe which turned out to be a very valuable lesson. You can always pick out egg shells if the only thing in the bowl is a single egg, but you don’t want to be doing it from a bowl with all your cookie makings in it. There was a point when I was using farm fresh eggs and let’s just say I was certainly glad I still used that separate bowl for eggs or my whole cookie batch would have needed to be tossed out. Kids can roll dough or meat into cookies or meatballs. They can use a fork to criss cross the tops of peanut butter cookies. Teaching them to clean up as they go will also be a benefit in so much of their life! If all goes well, this will also bleed over into cleaning up their toys and/or rooms.

As for that meat cleaver task at hand, you can take turns so that their tasks don’t involve the sharp implements, but yours do. Most importantly make it fun for you and them. The more fun they have, the more likely they are to want to learn more and more.

This post originally ran as a guest post series for Barbara over at Candy Hearts and Paper Flowers who is hosting the Homemaking September Shape-up. It was an all around comprehensive house to home style of posts to help us get our homes and lives whipped into shape.

FAMILY DINNERS, HOLIDAYS & ORGANIZING FOR A CROWD

I had a houseful for the Christmas holidays so I will use that as my example.
Besides menu planning and doing everything you can to organize, my best advice is to use cutting boards to aid in stacking items in the refrigerator and use cookie sheets as lids in the oven so you can stack multiple dishes on each shelf and have room for the Turkey or Ham and all your side dishes so they’ll all be ready at the same time.

For a crowd that will be around for an extended amount of time, I also try to prepare dishes in advance and freeze them when possible so that I don’t spend all my ‘visiting time’ in the kitchen. I spent the better part of a day cooking, but it was well worth it as it saved me tons of time while my company ass here.

So to recap:
1) Menu Plan
2) Organize
3) Pre-make as much as possible
4) Stay organized or at least reorganize as necessary

for example:
12/17 ~ Spaghetti Bolegnese & Garlic Bread (sauce was made today and frozen)*
12/18 ~ Winter Soup & Beer Bread (soup was made today and frozen)
12/19 ~ Crock Pot Lasagne & Garlic Bread (sauce was made today and frozen)*
12/20 ~ Everything but the Kitchen Sink Soup & Buttermilk Biscuits & honey (soup made today and frozen)
12/21 ~ Garlic Shrimp Pasta
12/22 ~ Chicken Cacciatore (sauce made today and frozen)*
12/23 ~ Meatloaf Muffins & Cheesy Au Gratin Potatoes
12/24 ~ Pot Roast & Veggies & Mashed Potatoes & Corn Flake Wreaths & Peanut Butter Bourbon Balls
12/25 ~ Rum Raisin Glazed Ham, Holiday Carrot Casserole, Garlic Smashers, Black Bottom Banana Cream Pie
12/26 ~ Chicken Enchiladas and Chile Cornbread (enchiladas made today and frozen)
12/27 ~ CORN (Clean Out Refrigerator Night)
12/28 ~ Lemon Lime Pepper Chicken & Cranberry Rice Pilaf (Rice made today and frozen)
12/29 ~ Taco Ring Salad
12/30 ~ Out for mom’s 69th birthday
12/31 ~ Chicken Fried Chicken with Peppered Gravy & Mashed Potatoes
1/1 ~ Creamy Tomato Soup & Cheddar Cheese Biscuits
1/2 ~ Stuffed Shells & Garlic Bread (Shells made today and frozen)
1/3 ~ CORN
1/4 ~ Meatloaf with a kick & Maple glazed carrots
1/5 ~ out on the way to the airport

All the meals that aren’t already prepared have been proportioned out and seasoned before freezing so they’re immediately ready after thawing.
Now I’ve given you a rather large example, so think how easy it will be to do just a Sunday family dinner after church? All the same principles apply just in a smaller proportion.

*I used the same sauce on all of these so I made a HUGE batch which saved me soooooooooooooooooooooooooo much time!!

This post originally ran as a guest post series for Barbara over at Candy Hearts and Paper Flowers who is hosting the Homemaking September Shape-up. It was an all around comprehensive house to home style of posts to help us get our homes and lives whipped into shape.

Monday Munchies

Photobucket

Sorry for the lateness again, everyone. I’ve been preparing for a big test that’s over tomorrow, so you’ll see a lot more of me this week!

Today’s Recipe: Bento Veggies with Triple Yogurt Dips


What’s so special about a veggie tray? Well, this isn’t any old veggie tray, it’s tailor-made with inspiration from Japan to make eating veggies fun for anyone, guaranteed! The one I made is very simple and doesn’t include all the dips, but you’ll be amazed to see how customizable this recipe is.

First of all, what does bento mean?

It’s a type of boxed lunch eaten in Japan, and mothers are known to often spend hours every morning trying to make their children’s lunches as cute and colorful as possible with a variety of fruits and veggies. Here are a few examples. I didn’t make any of these, of course, just found them online. 😉

http://farm3.static.flickr.com/2154/2378108086_ae5739c383.jpg

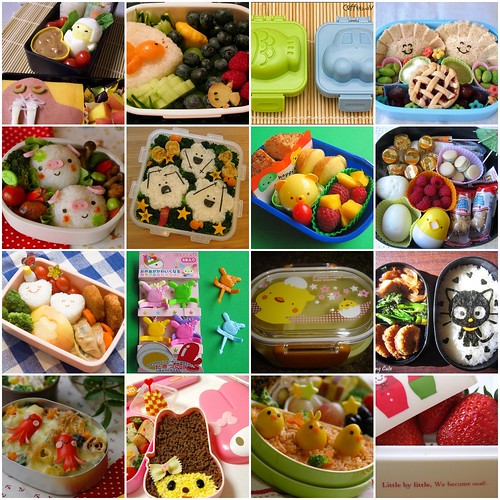
Veggie trays are traditionally used for big parties, but I like to borrow the idea of these adorable little bento boxes and make personal-sized trays. Who wouldn’t rather eat a variety of veggies and dips than a boring bag of plain carrots?

The instructions for this recipe are very simple, though I’ll include my favorite healthy dip recipes a little later on. Just take at least three varieties of veggie or fruit, preferably of different colors, and serve them together. Optionally, cut them into cute shapes, put them in an interesting container like the round bowl in the top picture, or garnish them with your favorite spices and herbs.

Be creative! I love cutting yellow bell peppers into star shapes. Make a space-themed lunch with star peppers, tomato planets, and grapes for comets with shredded carrots for their tails. This recipe can be anything from a simple adult snack to a game for kids.

As fun as it is to eat cute, colorful veggies, we all know that dips are what make them great. Here are my three favorite healthy dip recipes. All use plain yogurt as a base.

Tzatziki Dip

Tzatziki, which is pictured on the veggie tray above, is a Greek cucumber dip. It’s a healthier alternative to creamy dressings like ranch.

Ingredients:
– 1/4 cup plain yogurt, Greek yogurt if possible
– 1 clove garlic, minced
– 1/4 cup or less diced cucumber
– 1/4 tsp olive oil

Just mix all the ingredients and you’ll have the perfect serving for one or two people.

Dessert Dip

This dip is great for fruit. You could just use your favorite store-bought flavored yogurt, but this version comes without added sugar or artificial flavors and colors.

Ingredients:
– 1/4 cup plain yogurt
– 1 or 2 drops vanilla or almond extract
– 2 tbsp any fruit, chopped

Stir them together, or blend in a food processor if you want the dip to take on the color of your fruit. Frozen fruit works great in this dip.

Black Bean Dip

Ingredients:
– 2 tbsp plain yogurt
– 1/4 cup black beans, cooked
– 1/4 cup salsa
– Fresh cilantro, chopped (optional)

Smash the black beans with a fork or blend them until smooth. Mix in the salsa and yogurt. You can use a fruit salsa with mango or pineapple for a different flavor. Garnish with cilantro.


—> Health-friendly Tips

– Use fat-free yogurt in all three dips if desired.
– To make your veggie box a very healthy meal, add cheese cut into cubes or other shapes and rolled slices of deli turkey. Or take more inspiration from Japan and add rice or pasta and hard-boiled eggs.

—> Kid-friendly Tips
– Including a variety of veggies ensures that they’ll at least eat some. If they don’t like one, they can eat the others.
– Use your kids’ favorite colors when you make the box. Is one of your kids a little princess who loves to eat berries with pink strawberry dip? Do you have a sports fan who would love to have a snack dressed up with his or her team’s colors?

—> Budget-friendly Tips
– Use fruits and veggies that are in season to save money.
– Don’t have any containers to pack the dip in? You can make a condiment packet out of tightly wrapped aluminum foil, or plop a spoonful of dip into a muffin pan liner and seal it with a rubber band. Aren’t broke college students creative? 🙂

HUGE HELPFUL HINT!

The next time you’re painting or staining and the directions call for turpentine or paint thinner as a cleaner – STOP & DON’T use it!

With all the home remodeling and rebuilding we’ve been doing around here, my skin has taken a huge beating and in an effort to take the sting out of clean-up, I finally tried this idea that I had read somewhere, but always forgot to try, BUT IT WORKS!!!

Instead of the turpentine or paint thinner, use vegetable oil. Yes, you read that right, plain old vegetable oil. It easily removes the paint or stain from your skin and leaves the skin soft and supple instead of dried out and flaking. Not to mention it’s environmentally friendly and the cost is much better.