BLACK BEAN CHICKEN BURRITOS

BLACK BEAN CHICKEN BURRITOS
corn tortillas
black beans, drained well
KNORR creamy rice mix
4 ounce green chiles, drained well
2 cups rotisserie chicken pieces
15 ounce can HATCH green enchilada sauce
2 cups shredded cojack cheese
sour cream

  • Preheat oven to 350 degrees.
  • Spray a large baking dish.
  • Prepare KNORR rice mix as directed.
  • In a large bowl combine chicken pieces, black beans, green chiles, rice and 1/3 of the cheese.
  • Spread sour cream on each tortilla.
  • Add a scoop of the chicken mixture.
  • Layer in baking dish seam side down.
  • When baking dish is full, evenly pour the enchilada sauce over the enchilads.
  • Sprinkle cheese evenly over all enchiladas.
  • Bake 30 minutes.
  • Enjoy.

PUMPKIN BREAD, Molasses and wedding bands!

Rain is pounding on the roof and the sun porch, darkness has invaded our evenings until daylight savings time comes to play. And since I received a request, the only thing left to do was bake. You know they* say “the way to a man’s heart is through his stomach” so tonight I am making pumpkin bread! When Jim requested pumpkin bread the first cookbook I thought of was “The Wooden Spoon Bread Book”. I have used this book time and time again through the years.
Now you might be asking yourself how this could qualify as a “new” recipe for Make A New Recipe Tuesday, well let me explain. I had never made pumpkin bread with molasses before and let me tell you, it is wonderful! Second, this originally was a recipe that made one loaf and left half a can of pumpkin to be lost, so why not make 2 loaves and if that is too much for your family, you have a great surprise for the neighbor!

Pumpkin Bread
adapted from:  The Wooden Spoon Bread Book
350 degree oven
makes 2 loaves

The intro:  Some of my friends take a pumpkin from the field and cook it themselves. Starting from scratch has it’s virtues, but I personally make pumpkin bread with canned pumpkin. This is one case where I prefer for someone else to do the work.  (my thoughts, canned pumpkin is great to be able to make this wonderful bread, long after fall is gone.)

3 1/2 cups flour
1 1/2 cups sugar
2 teaspoons baking powder
2 teaspoons baking soda
2 teaspoons salt
1 teaspoon cinnamon
1/2 teaspoon each cloves, nutmeg, ginger OR 3 1/2 teaspoons pumpkin pie spice

  • In a large bowl, combine dry ingredients, whisk to mix well. Set aside.

2/3 cup oil
2/3 cu8p molasses
4 eggs
2 cups canned pumpkin

  • In a large bowl, combine wet ingredients, beat well.
  • Mix dry ingredients into the wet ingredients.
Divide between 2 loaf pans, bake 1 hour, or until tests done in your oven. Let cool 10 – 15 minutes, turn out to cook completely.
I do want to take this moment to apologize for being absent from here. Getting married has a ton of chores that need to be done, even if the ceremony will be small and family only. One of the chores we did get done, was to purchase our wedding bands.
My band has 3 diamonds, and Jim’s band is on order for size, with this one going back to stock, when we pick his up. One month and one day and counting………….

As always, thanks for taking a moment to stop by.  I appreciate your time and your wonderful comments.

* do you know who they are?

You can also find me at MomsSundayCafe!

CRY BABY BURGERS and ROASTED PAPRIKA POTATOES

Good Morning everyone, Tamy here filling in for Melynda.  We like burgers, but hate the bread on a regular basis so I often make a “knife and fork” burger with fun toppings and this is one of our favorites.

CRY BABY BURGERS
1 pound ground chuck
sea salt and fresh ground black pepper to taste
1 small can jalapenos, drained and chopped (save a small amount for the mayo)
1 small can green chiles, drained and chopped
1 tablespoon Worcestershire sauce
2 slices pepper jack cheese
jalapeno mayo (small amount of minced jalapenos whisked into mayo)
caramelized onions – 1 small Vidalia onion, thinly sliced

  • Combine ground chuck, jalapenos, green chiles, salt, pepper and Worcestershire sauce until well blended.
  • Form into 3 patties. Refrigerate for several hours.
  • Whisk together mayonnaise and minced jalapenos.  Refrigerate until chilled.
  • Sear and brown patties, turning frequently until cooked through.
  • While cooking the patties, melt a small amount of butter in another pan and caramelize onions to desired doneness.
  • When burgers are done, top with cheese, mayonnaise and caramelized onions.
  • Enjoy!

ROASTED PAPRIKA POTATOES
2 pounds baby red potatoes
sea salt and fresh ground black pepper
Hungarian paprika
1/4 cup melted butter

  • Scrub potatoes.
  • Boil for 10-15 minutes.
  • Drain the potatoes until cool enough to handle.
  • Preheat oven to 400 degrees.
  • Spray a 9×9 shallow baking dish with PURE.
  • Place potatoes on bottom in an even layer.
  • Smash each potato slightly.
  • Evenly sprinkle with salt, pepper and paprika.
  • Pour melted butter evenly over top.
  • Bake 30 minutes until crunchy and bubbling.

GREEN CHILI CHICKEN ROLL-UPS

GREEN CHILI CHICKEN ROLL-UPSadapted from Shay @ Paper Plates & China Jalapeno Popper Chicken Roll-ups

1 1/2 pounds of chicken tenderloins
8 ounces of cream cheese**
1 (4 ounce) can of diced green chilies, well drained
2 teaspoons of Worcestershire sauce
Bacon slices (same amount as tenderloins)
About 2 teaspoons of liquid smoke
toothpicks
Salt and Pepper to taste

  • Preheat oven to 350 degrees.
  • Mix cream cheese, green chilies, liquid smoke and Worcestershire sauce together until well blended.  You can roast your own jalapenos if you’d like.
  • Spread about 1-2 Tablespoons of cream cheese mixture over one side of chicken tenderloin.
  • Roll each piece of cream cheese layered chicken up like a sleeping bag and then roll a bacon strip around it, securing it with a toothpick.
  • Spray a casserole dish with PURE. 
  • Layer any remaining cream cheese mixture in the bottom.
  • Top the chicken roll-ups.
  • Salt and pepper as desired.
  • Bake 25-30 minutes until chicken is cooked through and bacon is crisp.

**I used philly cream cheese savory sauce because I was out of plain and it worked well.

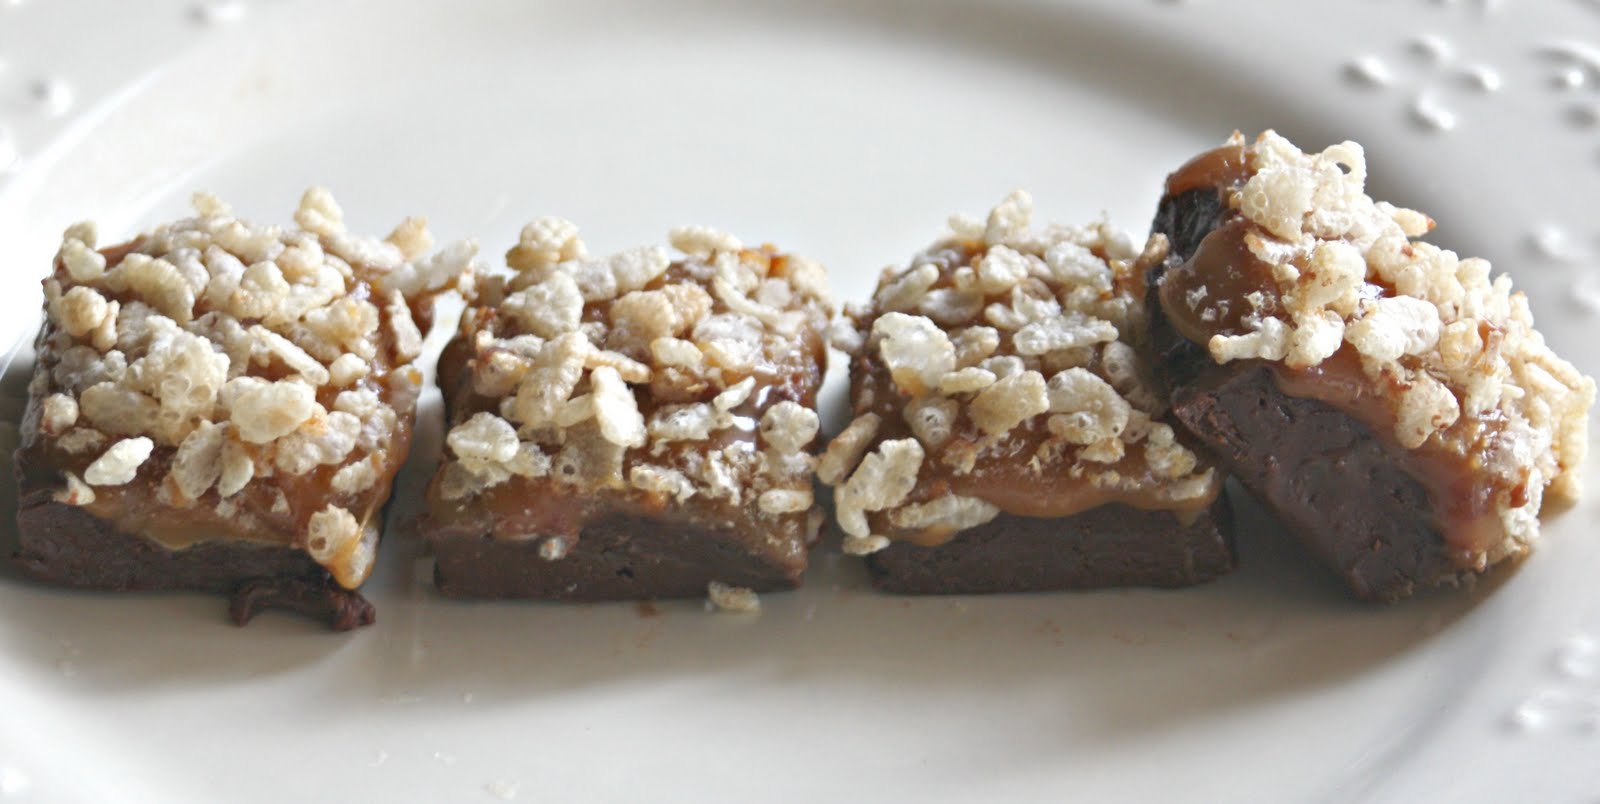
      GRAND FUDGE ~ SAVE ROOM FOR DESSERT

      Grand Fudge


      It’s Monday and time to share one of my favorite things with y’all.

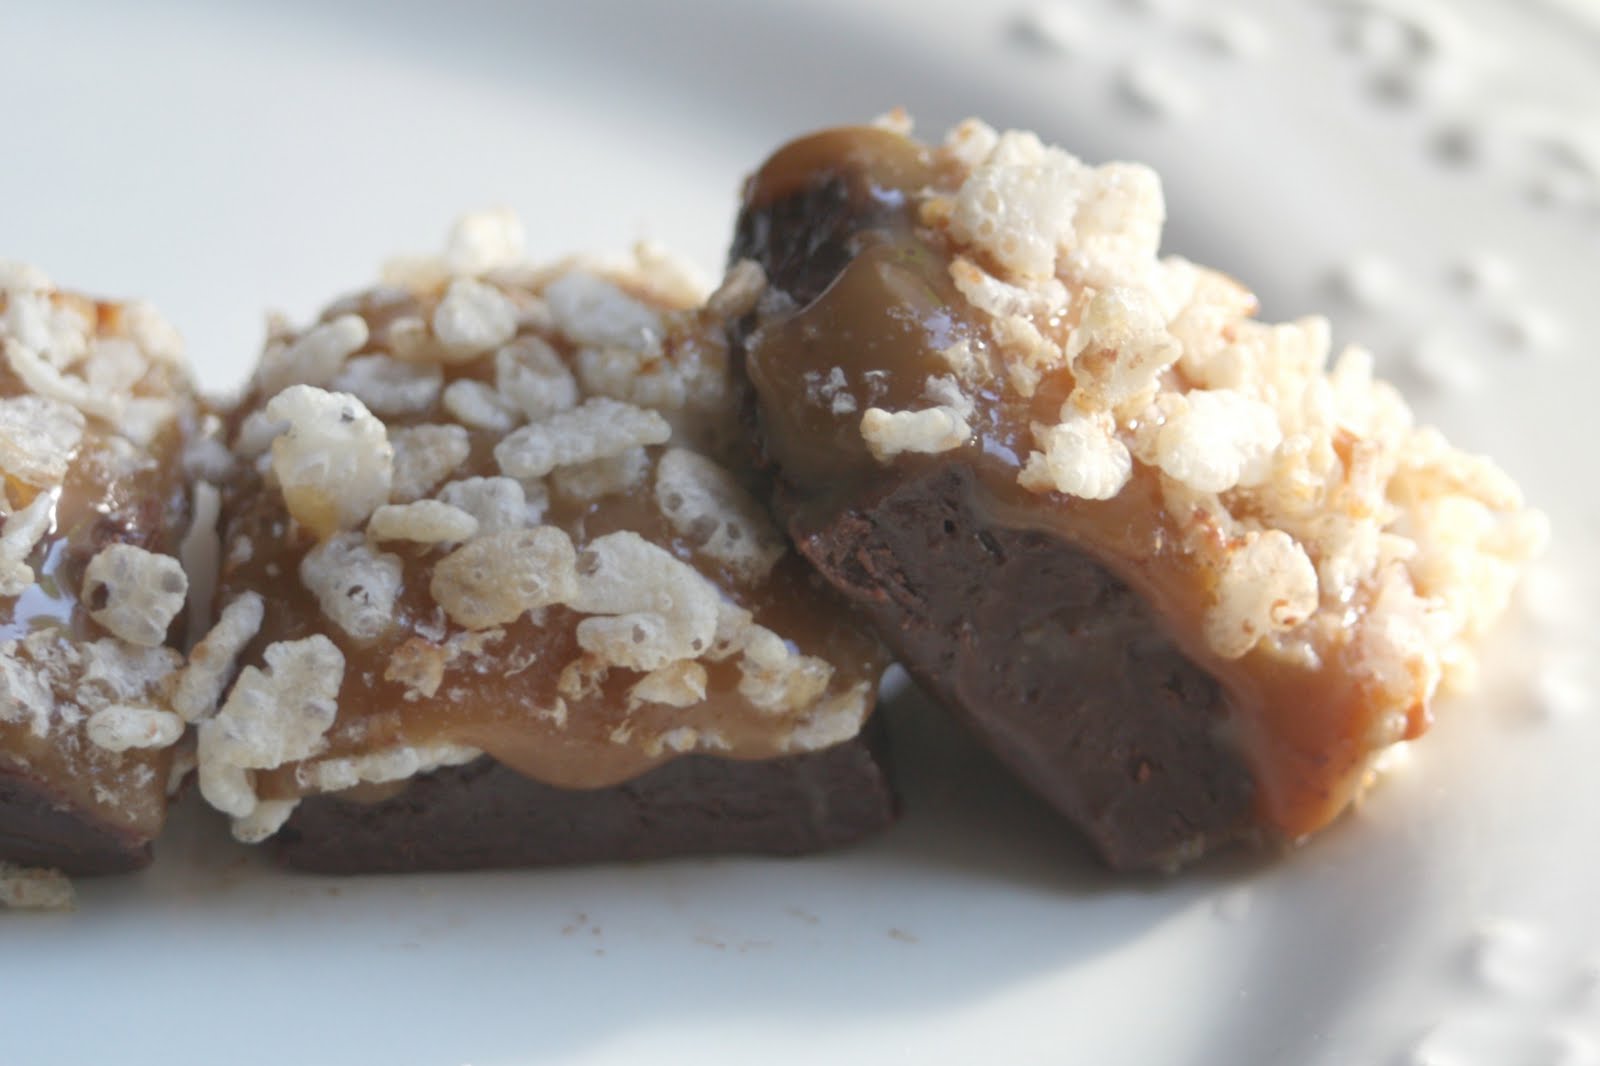
      This takes a little time due to the fact that the fudge layer and caramel layer need time to set but it’s so worth it! I used one of my preferred chocolate fudge recipes that I knew would set. Over the years I’ve made countless batches of fudge and this one (it’s Carnation’s) never gives me any problems.

      I love the rice krispie layer. It doesn’t really add any flavor but gives this rich caramel fudge a little crunch!

      Grand Fudge
      1 1/2 cups white sugar
      5 ounce can evaporated milk
      2 tablespoons butter
      1/4 teaspoon salt
      2 cups miniature marshmallows
      1 1/2 cups chocolate chips (I used semi-sweet)
      1 teaspoon vanilla extract
      1 (14 ounce) bag caramels–wrappers removed
      1 tablespoon milk
      1 1/2-2 cups rice krispie cereal

      • Line a 8 x 8 pan with foil or wax paper.
      • Combine butter, sugar, salt, and evaporated milk in a large heavy saucepan. Bring to a full rolling boil, continue to boil for 5 minutes, stirring constantly.
      • Stir in marshmallows, chocolate chips, and vanilla extract. Continue stirring until well combined and marshmallows are completely melted.
      • Pour into prepared pan, refrigerate for at least an hour, or until almost set.
      • In a double boiler combine caramels and milk, heat over medium heat until caramels are melted, stirring occasionally.
      • Once caramels are melted pour over semi set fudge.
      • Sprinkle rice cereal over caramel and pat down slightly.
      • Cover tightly with foil or plastic wrap.
      • Refrigerate for at least 2 hours to allow caramel layer to firm.
      • Once fudge is set, remove from the pan, remove foil or plastic wrap, and cut into pieces.
      • Store in an airtight container in the refrigerator.
      • Enjoy!!
      Please come by and visit me at www.paperplatesandchina.blogspot.com

      Please come by and visit me at www.paperplatesandchina.blogspot.com

      TAILGATING TIME 2.0

      IT’S OFFICIAL – FOOTBALL SEASON IS HERE!
      We have decided to make a change this year in the way Tailgating Time will work. Instead of a new linky for each week we will be using the same linky to keep all the great recipes in one place. This will provide easy access to the recipes and create one big awesome recipe index collection. There is no limit to how many you add – of course we hope you will add a new recipe each and every week! Tailgating Time will generally be posted each week on Sundays at noon.

      It doesn’t matter if you are a football fan or not, great party food is always a good thing. Bring over your grilled goods, chips and dips, appetizers, chili and chowders, cocktails, or any recipes that would be great for the football party buffet!

      If any of you would like to host along with us you can click –> get the InLinkz code to add the linky to your blog too. You can post it once in awhile or every week during football season, that’s up to you. The only thing we ask is that you leave a comment here to let us know you are co-hosting, and that you visit and comment on as many of the participants as you can. 
       
       We can’t wait to see what you will bring to the party. Let the games begin. Whoo-hoo!

      WEEKLY MENU

      Menu Plan Monday hosted by Laura at I’m an Organizing Junkie

      DATE BREAKFAST LUNCH DINNER
      Monday 10/10 CEREAL SANDWICHES CHICKEN MARSALA 
      Tuesday 10/11 TOAST LEFTOVERS CHICKEN FRIED CHICKEN with PEPPERED GRAVY
      Wednesday 10/12 YOGURT SOUP CARIBBEAN PORK CHOPS
      Thursday 10/13 FRUIT CHEESE & FRUIT GOLDEN FUNGUS BURGERS
      Friday 10/14 OATMEAL SANDWICHES MORROCAN BEEF and NOODLES
      Saturday 10/15 HASH BROWN HAM and CHEESE QUICHE LEFTOVERS CHICKEN WELLINGTONS
      Sunday 10/16 EGGS ala ROOSEVELT aka DEPRESSION EGGS C.OR.N. CHICKEN SCAMPI

      BEEF AND BROCCOLI STIR FRY

      Beef and Broccoli Stir-Fry
      yields 4 servings
      2 1/2 tablespoons cornstarch, divided
      1/4 tablespoon salt
      3/4 pound lean sirloin beef, trimmed, thinly sliced against the grain
      2 teaspoons canola oil
      1 cup reduced-sodium chicken broth, divided
      5 cups broccoli, florets (about 12oz bag)
      1tablespoons ginger root, fresh, minced
      2 teaspoons minced garlic
      1/4 teaspoon red pepper flakes, to taste
      1/4 cup low-sodium soy sauce
      1/2 cup water

      • On a plate, combine 2 tablespoons cornstarch and salt; add beef and toss to coat.
      • Heat oil in a large nonstick wok or large deep skillet over medium-high heat.  Add beef and stir-fry until lightly browned, about 4 minutes; transfer to a bowl with a slotted spoon.
      • Add 1/2 cup broth to same pan; stir to loosen any bits on food on bottom of pan.  Add broccoli; cover and cook, tossing occasionally and sprinkling with a tablespoon water if needed, until broccoli is almost crisp-tender, about 3 minutes.  Uncover pan and add ginger, garlic and red pepper flakes; stir-fry until fragrant, about 1 minute.
      • In a cup, stir together soy sauce, remaining 1/2 cup broth, remaining 1/2 tablespoon, cornstarch and water until blended; stir into pan.  Reduce heat to medium-low and bring to a simmer; simmer until lightly thickened about 1 minute.
      • Return beef and accumulated juices to pan; toss to coat.  Serve.  Yields about 1 1/4 cups per serving.

      Modifications:
      -I also added 2 stalks of green onions and a few mushrooms.

      Here’s what you’ll need:
      If you are using fresh broccoli, cut up the broccoli.  Mince 1 tablespoon of fresh ginger and 2 cloves of garlic.  Trim and slice the beef.

      I went ahead and added some green onions and mushrooms.

      Put some cornstarch in a bowl and then toss and cover the beef.

      Heat some canola oil in a wok or a pan.  Put the beef in the wok until lightly brown, around 4 minutes and then pull out and sit to the side. 
      Pour 1/2 cup of chicken stock in to the pan.  Stir the pan and get all of the leftover meat and crumbles.  Add the broccoli, cover for about 3 minutes until tender-crisp. (They will also turn a very bright green)
      Uncover and add the ginger, garlic and any other veggies.  In a separate bowl or cup, mix 1/4 cup soy sauce, 1/2 cup chicken broth and about 1/2 Tablespoon cornstarch.  Mix and pour into the wok.  Let simmer and thicken just a couple of minutes.  I added some rice to the pan (see below for details) and then put the beef back in.
      Here’s what you’ll end up with:
      I served this with one of those whole grain rice-in-a-bag.  I boiled them separately and then threw them in the wok at the end when the beef went back in the wok.

      You could do all type of variations and add a lot more veggies.  You could buy a bag of frozen stir-fry veggies, add grated carrots, or bean sprouts.

      1 serving of the beef and broccoli (1 cup)=5 points
      1/2 cup of the rice=4 points

      MY BIGGEST WISH!!

      I called my doctor’s office this morning because of serious side affect concerns (nothing important, just congestive heart failure)  from a new drug he put me on.  He’s not in on Fridays, but I was asked to call back in 15 minutes to speak with the person that could help me.  REALLY??  I asked if the couldn’t just take my name and number and have them call me when they were available and you’d think I’d ask the girl to fly to the moon.  With an exaggerated sigh she said, “okay, what’s your name and number?” and then offered up another exaggerated sigh and hung up.  Like I said, REALLY?? How unprofessional is this? 

      Ironically I’m only on this new prescription because he doesn’t particularly like the one I was on from a previous doctor.  I had been on it for quite some time, it worked, but I no longer live there.  I just needed a refill of the prescription that worked!!!

      PEANUT CRUSTED PORK CHOPS ~ Fire Day Friday

      I think it might actually be starting to cool off here.  Seriously… It might finally feel a bit like fall…. Wednesday was only a high of like 79!!  That’s huge considering that last week we were still at 100!!!  The excellent thing about living in Arizona is that I get probably some of the best weather for grilling all year long.  I definitely appreciate that fact.  And thanks to the wonderful weather, I tend to do as much grilling as I can throughout the year, not only to not heat up my kitchen in 110 degree weather OR just the fact that I can… no, I tend to do it because most meals made on it, are simple and ever so fast.  Yes, you can do things nice and slow on the grill… but with the kind of weeks I’ve been having lately… speed and simplicity (along with deliciousness) are what it’s all about it.  And this recipe does not disappoint… Trust me 🙂

      Peanut Crusted Pork Chops
      Adapted from BHG Grillin’ & Chillin’
      Printable Recipe 
      Ingredients:
      1/4 cup creamy peanut butter
      1/4 cup pineapple juice
      1 Tablespoon low sodium soy sauce
      1 Tablespoon honey
      1/4 teaspoon ground ginger
      1/2 teaspoon dry mustard
      1/2-1 teaspoon hot sauce (I used Cholula)
      1/3 cup finely chopped dry roasted peanuts
      2 Tablespoons dry bread crumbs
      1-2 Tablespoons fresh chopped parsley
      1 garlic clove, finely minced
      4 pork chops (I used bone-in; about 1/4-1/2 inch thick)

      Directions:
      In a bowl, mix together peanut butter, pineapple juice, soy, honey, ginger, mustard, and hot sauce until well combined.  Place the pork chops in a resealable bag or shallow dish.  Pour the peanut butter mixture over, seal or cover, and place in refrigerator for 4 hours.

      Preheat grill to 375-400 degrees F.  In a small bowl, mix together peanuts, bread crumbs, parsley and garlic.  Remove pork from the bag/dish and discard marinade.  Place the pork directly on oiled grill grates over direct heat.  Allow to grill 4-7 minutes depending on how thick the chops are.  Flip pork and carefully (and evenly) sprinkle crust mixture on top, and press down with a spatula.  Cover and grill another 4-6 minutes or until the pork is cooked through.  Carefully remove from grill and enjoy!

      PAN SEARED CHICKEN TENDERS & TRI-COLOR COUSCOUS with COCONUT LOBSTER SAUCE ~ MARX FOOD CHALLENGE

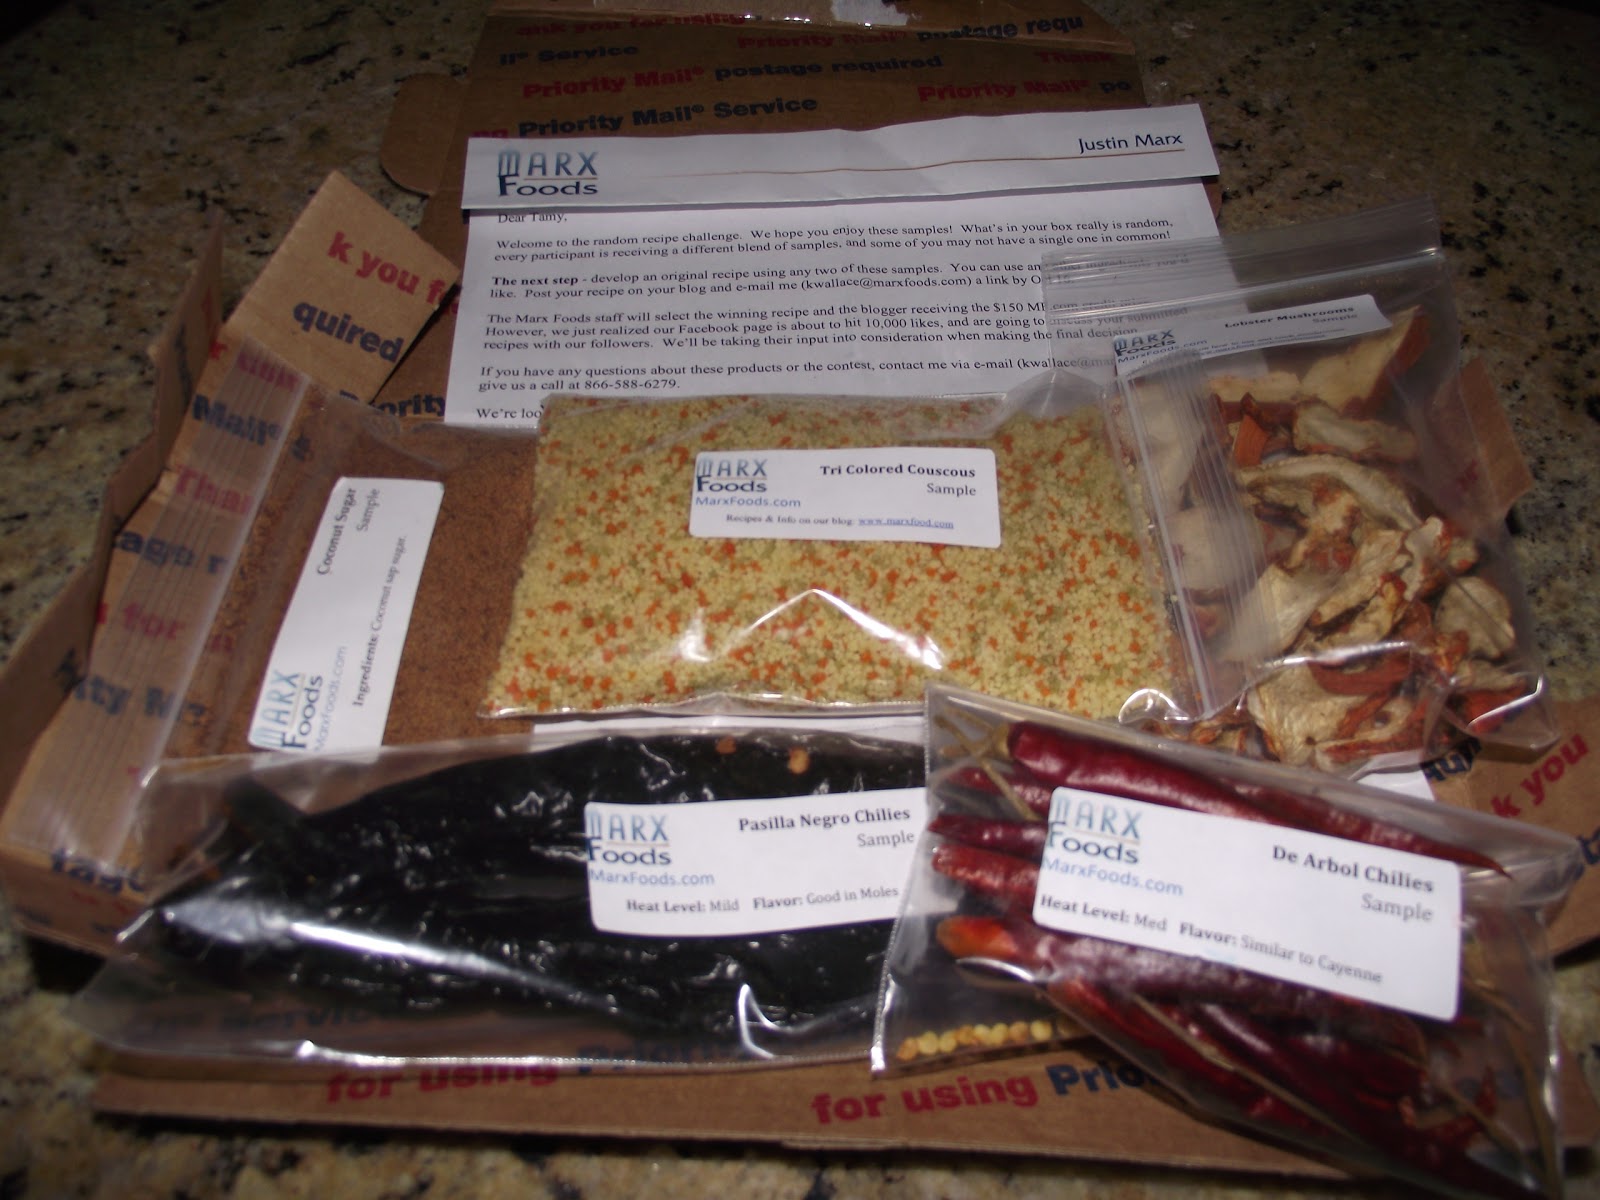
      I ran across a MARX foods Recipe challenge – what fun!  I signed up and they sent me a box full of yumminess.  My box included tri-color couscous, coconut sugar, dehydrated lobster mushrooms, DeArbol chilies and Pasilla Negro Chilies.

      The rules are that I had to use at least two ingredients from my box to create a new recipe.  I really wanted to try and use all five ingredients, but was only able to work in four of them.

      Now for full disclosure. hubby hates mushrooms, especially cooked mushrooms.  He goes out of his way to avoid mushrooms.  He declared he would hate this recipe before its inception.  Seeing a pattern here?  I HAD to use the mushrooms just to prove him wrong, plus I LOVE mushrooms even more than he hates them.  This recipe is proof that you can mount your dislikes and change them with the right combination of ingredients.

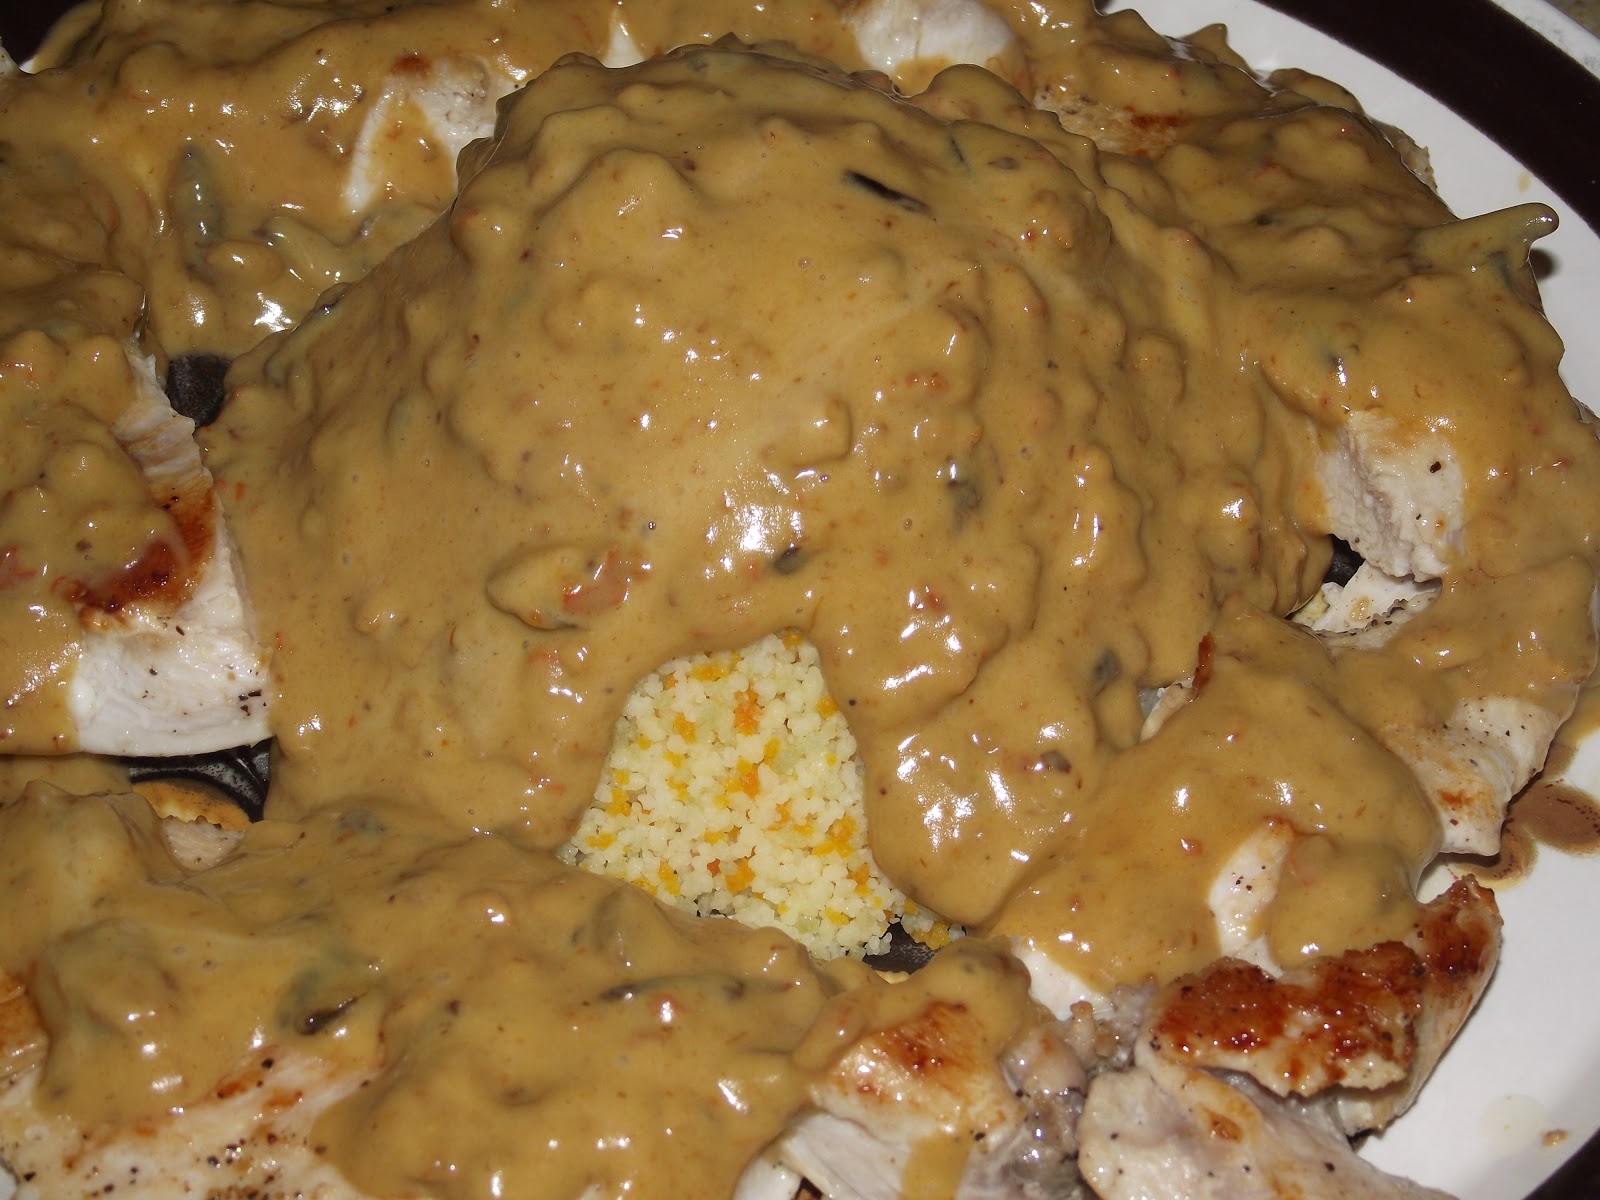
      PAN SEARED CHICKEN TENDERS & TRI-COLOR COUSCOUS with COCONUT LOBSTER SAUCE

      2 pound chicken tenders
      3/4 cup chardonnay
      1/2 cup chicken broth
      2 tablespoons MARX coconut sugar
      1 dried MARX Pasilla Negro Chilie, chopped
      safflower oil
      salt and pepper to taste
      4 tablespoons butter
      3 tablespoons flour
      5-7 tablespoons heavy cream

      • Whisk together the chardonnay and chicken broth until well blended.
      • In a medium bowl combine mushroom pieces and chile pieces.  Pour the chardonnay mixture over the mushroom mixture.  Allow to set for 2-3 hours to rehydrate the mushrooms and chilies.  Stir them around every now and then so all surfaces are able to absorb the liquid.
      • When ready, drain mushrooms and chiles through a sieve, reserving the liquid.
      • Whisk coconut sugar into reserved liquid.  Set aside.
      • In a small food processor pulse mushroom and chile pieces into a fine grind.
      • In a medium sauce pan, melt butter.
      • Add flour 1 tablespoon at a time until roux is a golden brown.
      • Gradually add the reserved liquid until well blended.
      • Add in the mushroom and chile pieces, stirring until well distributed.
      • Add cream 1 tablespoon at a time until desired consistency.
      • Simmer gently while preparing couscous and chicken.
      • Coat a large skillet with safflower oil.
      • While oil is heating, wash and pat dry chicken pieces.
      • Pan sear chicken pieces, salt and peppering as needed until golden outside and cooked through.
      • Pour 1 cup of couscous in a large bowl.  Pour 1 ¼ cups boiling water over top.  Cover the bowl and let it sit for five minutes, then fluff with a fork to separate the granules. 
      • Plate couscous in the in the center of serving platter.
      • Arrange chicken pieces around the couscous.
      • Spoon sauce over couscous and chicken.
      • Serve immediately.

      By the way, hubby who was so dead sure this recipe would suck gave it 2 thumbs up and then proceeded to eat it 2 nights in a row.

      STUFFED SHELLS

      STUFFED SHELLS adapted from Weight Watchers
      15 large shells, cooked and drained**
      1 pound lean ground beef
      1 1/2 teaspoon Pampered Chef Italian seasoning
      1 medium onion, chopped
      8 ounces tomato sauce
      1/2 cup water
      1 teaspoon beef bouillon granules
      3 cloves garlic, minced
      2 tablespoons Classico tomato pesto
      1 cup shredded cheese

      • Brown meat and onion, Drain.
      • Whisk together tomato sauce, water, bouillon, garlic, pesto and seasoning.
      • Stir 1/2 cup of tomato sauce mixture and 1/2 cup of cheese into beef mixture.
      • Stuff shells with meat mixture.
      • Pour 1/2 of remaining sauce on bottom of the baking dish.
      • Put shells on top of sauce.
      • Pour remaining sauce over shells.
      • Top with remaining cheese.
      • Bake at 350 degrees for 30 minutes.

      **If you prefer the shells and beef mixture can be tossed and cooked as a casserole. When I do this I use the smaller shells, but same proportions.