COTTAGE CHEESE DINNER BUNS

I have posted this recipe here before. Before I had a camera and before anyone visited! It is another one from my old little black binder, splattered and made many times over. These are simple, easy and delicious. My three favorite categories! You know the reason folks love to cook, is because not every recipe they make and enjoy is difficult. Lets be honest here, if every meal was a big challenge or difficult, the fun would disappear. Learning about and enjoying these simple, easy and delicious recipes is what begins the journey to other more challenging recipes and fun projects.
If you are a bread lover, fresh bread can turn the most humble dish into dinner. And fortunately yeast doughs are not fussy at all and very forgiving. Yeast dough will wait in the refrigerator, to be baked right before dinner. And of course that wonderful aroma will call the family to dinner, you won’t have to. But enough about my love of bread, lets make some dinner buns.

Cottage Cheese dinner buns
source unknown, in my little black binder
350 degrees, for baking

1 package (1 scant tablespoon) yeast
1/4 cup warm water
1/4 cup sugar
1 egg, beaten
1 teaspoon salt
1/4 teaspoon baking soda
1 cup cottage cheese
2 3/4 cup flour – divided

  • In a large mixing bowl, dissolve the yeast in the water, add the sugar, stir.
  • Gently warm the cottage cheese, and add to the yeast mixture along with the egg, salt, soda and 2 1/2 c of the flour.
  • Slowly blend the flour into the wet ingredients, then mix well until mixture leaves the sides of the bowl, adding last 1/4 c flour if needed. Scrape down sides of bowl, when completely mixed. NOTE: dough is sticky.
  • Cover and let rise until double in bulk.
  •  The rising will take about 1 hour.
  • Stir/punch down dough. Spoon into 12 prepared muffin cups.
  • Cover and let rise for 30 minutes.
  • If not ready to bake after 30 minutes, remove towel. Otherwise it may stick to the dough. If you need/want to store the dough, oil the tops lightly and cover loosely with wax paper and then a towel, put in the refrigerator.
  • When ready to bake, preheat oven to 350, bake 20-25 minutes or until golden brown and done. 
  • Makes 12 buns.

As always thanks for dropping in,
I do appreciate your stopping by.

For more great recipes, visit Mom’s Sunday Cafe!

PO’ BOY BEEF WELLINGTON & TASTE and CREATE

Taste and Create was started as a food event by Nicole from For the Love of Food.  The whole purpose of Taste and Create was, and has been, and continues to be to create a community of bloggers who test each others’ recipes and share links. The participants of the event are paired together and try a new recipe from one another’s blog. 
This month my partner is Kat from STUDY FOOD.  She has some really interesting recipes, but I settled on one that my family would eat LOL without asking. “What’s in this?”  I get a bit too creative at times so wanted to treat them to a straight forward home style meal.  So I chose her Po’ Boy Wellingtons because I just loved the irony of students eating beef wellington, a previously reserved for the rich recipe.  Hubby gave them 2 thumbs up!  They were wonderful and I think I’ll make them again using hamburger steaks next time. Even more PO Boy!! LOL
Kat’s recipe in black, my adaptations in red:
Beef: Here, I only had bolar (blade) roast – which I cut a 350g steak from. Because bolar has a reputation of sometimes coming out tough – I marinaded it in the juice of two lemons, a tsp of olive oil, salt and pepper for an hour a side – hoping that the acid in the lemon juice would break down some of the fibres while the oil would stop the meat from drying out too much… If you’re using rump steak, or another, more tender mean you can leave that bit out…  If using Bolar Beef:  Bake your beef, SLOWLY for 45ish minutes @ 150 degrees while wrapped in foil – this’ll make your Beef Wellington a little dryer than strictly desirable (unless you like your meat well done, in which case it’ll be just the same as normal….) but it should also make it somewhat more tender than partially or fast baked Bolar.

If using not Bolar Beef:  Before browning the meat I  like to rub a little more olive oil, salt and pepper into each side – just to add flavour.  Brown the meat on all sides over LOW heat. You are only browning the beef NOT cooking it – so don’t leave it on the heat for too long! Once all sides of the steak are browned wrap it in foil and leave it to cool before shrouding in pate, mushrooms and pastry…
The purpose of browning the meat first is not only to add flavour but also to prevent it from leaking onto the pastry later.


LOL Kat didn’t quite know what my flank steak was all about and I really didn’t know what her Bolar beef was about, but I did google it and then set off to buy my meat, but was distracted by the wonderful manager’s special markdowns that were going on at the end of my local store’s meat counter.  OOH, top sirloin at rock bottom prices – SOLD!

Duxelles: hubs won’t eat mushrooms so I had to get creative here.  I had some left over roasted carrots and some sauteed brussels sprouts.  I was making dinner for 3 so opted to make each one a different flavor, but boy did I mess up the kitchen!!
10 grams butter
1 teaspoons oil
1/2 a tiny onion (or shallot, I guess…) diced as fine as you can
3 cloves garlic, minced or very finely diced
80 grams mushrooms – chopped into the finest dice you can manage
1 teaspoons dried, mixed herbs
2 tablespoons milk

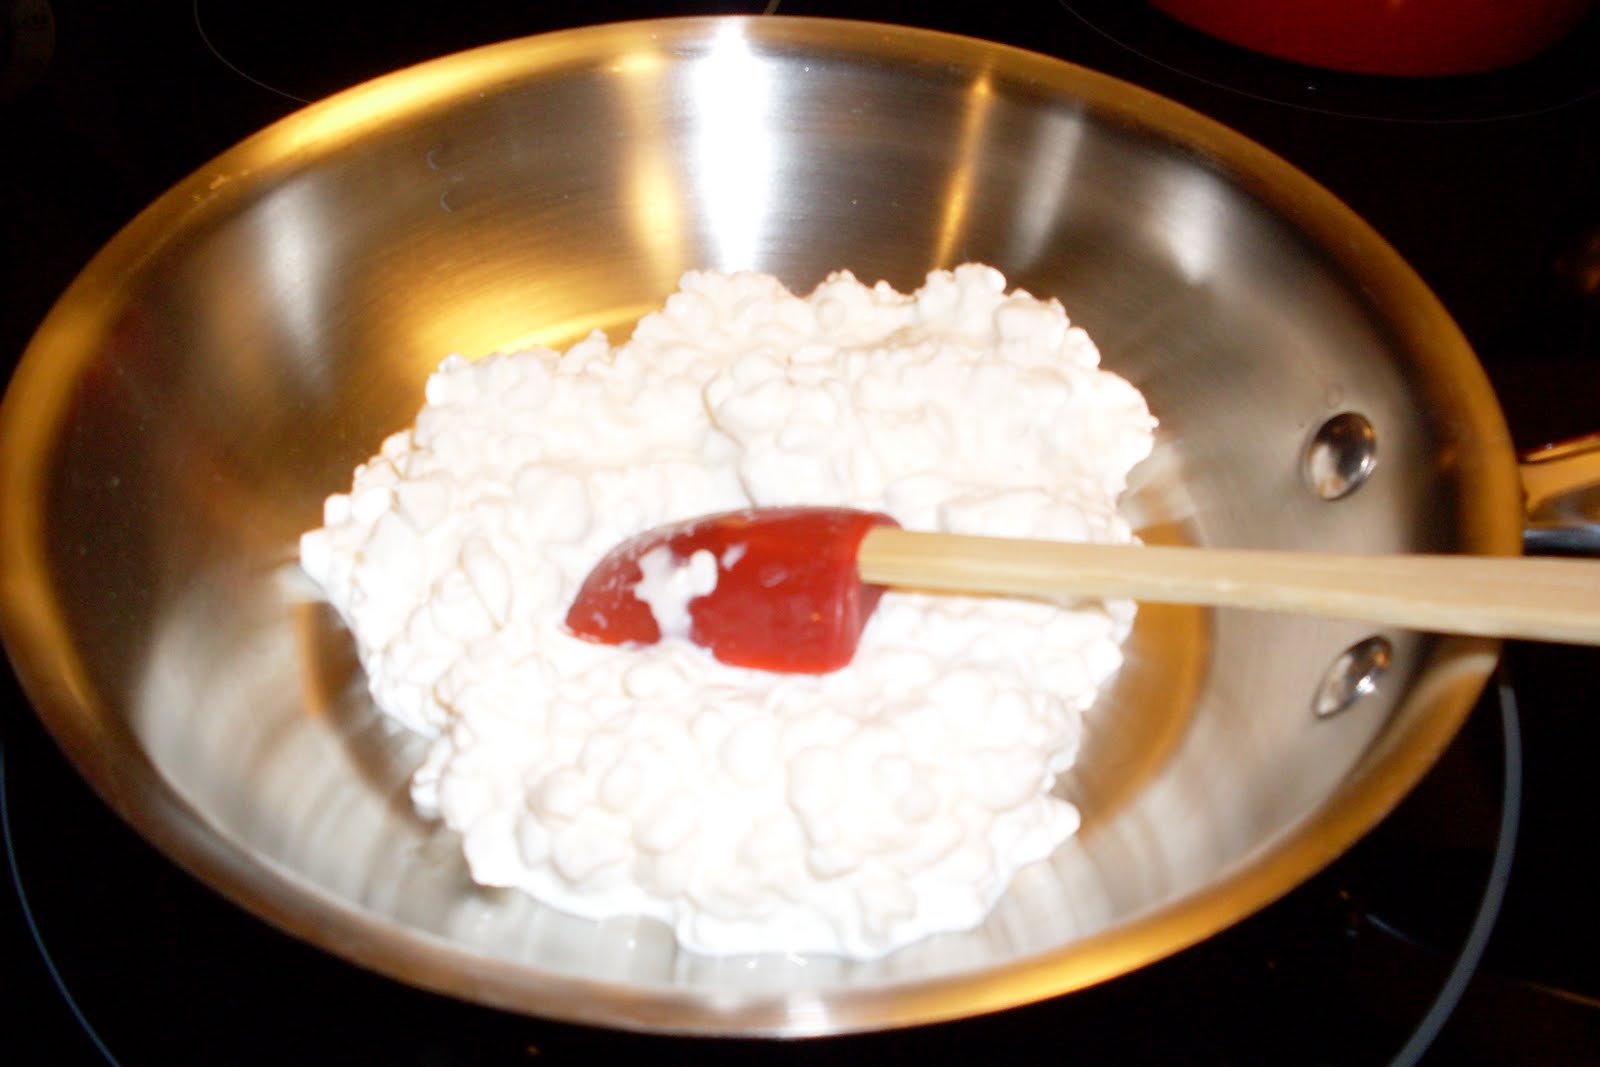
  • Melt the butter in a frying pan with the teaspoon of oil over LOW heat…
  • Briefly fry the onion and garlic until fragrant before adding the finely chopped ‘shrooms. When cooking the mushrooms you may notice that they soak up all the butter pretty quickly – keep stirin’ ’em over low until they release the butter again and begin to brown. At this point add the dried herbs.
  • Continue to fry the mushrooms/onions etc until the pan starts to dry out a little – now pour in the two tablespoons of milk. Cook until as much of the milk has evapourated as you think will happen and the mixture is a dry-ish paste.
  • I tip mine out of the frying pan and into a sieve over a bowl – just in case there’s anymore liquid to drip off…
Crepes: (Kat advises against cooking these in a bowed pan – it makes life very difficult) I skipped this as I used Pepperidge Farm Puff pastry and this was just more than we needed.
1/4 cup flour
1 egg
2 tablespoons milk
1 teaspoon oil
  • Whisk all ingredients together in a bowl and allow to sit for and hour or so. The mix will be fairly liquid – but it will thicken over time.
  • Once rested, fry 1/2 of the mix at a time in a non-stick frying pan until cooked through on both sides. Set aside to cool.
Pate: I skipped this too – just more than we needed.
Kat borrowed some homemade pate from a flatmate – she loosely followed this recipe for Chicken Liver Pate from this month’s Foodtown Magazine.

Pastry:
Kat used shop bought pastry – because that’s what she had! And so did I!

Final Assembly:

  • Cut cooked steak into two. I cut them before cooking
  • Cut pre-rolled pastry square into two.
  • Butter, egg or water the edges of your pastry with whatever you have handy… I used egg
  • Lay your pancakes on each of the pastry pieces and cut to fit. I omitted.
  • Spread half of the pate (I omitted) and half of the duxelles over each of the pastry/pancake halves.
  • Plonk steak pieces in the middle and wrap pastry over it sealing all edges/gaps… 
  • Place on a cookie rack on a baking tray – seam side down. 
  • Make slits half-way through the pastry (purely aesthetical) and brush with egg or butter or milk… I used a butter egg mixture
  • Bake @ 220 for 20-30 minutes, until pastry is golden and crispy. I used 400 F.
This recipe was a raving success!! Tasty, yummy and well worth the time and effort to make the 3 different veggies!

TIME TO TAILGATE!

IT’S OFFICIAL – FOOTBALL SEASON IS HERE!
We have decided to make a change this year in the way Tailgating Time will work. Instead of a new linky for each week we will be using the same linky to keep all the great recipes in one place. This will provide easy access to the recipes and create one big awesome recipe index collection. There is no limit to how many you add – of course we hope you will add a new recipe each and every week! Tailgating Time will generally be posted each week on Sundays at noon.

It doesn’t matter if you are a football fan or not, great party food is always a good thing. Bring over your grilled goods, chips and dips, appetizers, chili and chowders, cocktails, or any recipes that would be great for the football party buffet!

If any of you would like to host along with us you can click –> get the InLinkz code to add the linky to your blog too. You can post it once in awhile or every week during football season, that’s up to you. The only thing we ask is that you leave a comment here to let us know you are co-hosting, and that you visit and comment on as many of the participants as you can. 
 We can’t wait to see what you will bring to the party. Let the games begin. Whoo-hoo!

TAILGATING TIME 2.0

IT’S OFFICIAL – FOOTBALL SEASON IS HERE!
We have decided to make a change this year in the way Tailgating Time will work. Instead of a new linky for each week we will be using the same linky to keep all the great recipes in one place. This will provide easy access to the recipes and create one big awesome recipe index collection. There is no limit to how many you add – of course we hope you will add a new recipe each and every week! Tailgating Time will generally be posted each week on Sundays at noon.

It doesn’t matter if you are a football fan or not, great party food is always a good thing. Bring over your grilled goods, chips and dips, appetizers, chili and chowders, cocktails, or any recipes that would be great for the football party buffet!

If any of you would like to host along with us you can click –> get the InLinkz code to add the linky to your blog too. You can post it once in awhile or every week during football season, that’s up to you. The only thing we ask is that you leave a comment here to let us know you are co-hosting, and that you visit and comment on as many of the participants as you can. 
 
 We can’t wait to see what you will bring to the party. Let the games begin. Whoo-hoo!

WEEKLY MENU

Menu Plan Monday hosted by Laura at I’m an Organizing Junkie

DATE BREAKFAST LUNCH DINNER
Monday 9/26 CEREAL SANDWICHES OUT with FAMILY
Tuesday 9/27 TOAST LEFTOVERS OUT with FAMILY
Wednesday 9/28 YOGURT SOUP CHICKEN PAPRIKA in BALSAMIC CREAM SAUCE
Thursday 9/29 FRUIT CHEESE & FRUIT FRENCH ONION CHICKEN 
Friday 9/30 OATMEAL SANDWICHES GOLDEN FUNGUS BURGERS
Saturday 10/1 BUTTERMILK CINNAMON PANCAKES LEFTOVERS SMOTHERED BBQ PORK CHOPS
Sunday 10/2 LUAU BENEDICTS C.OR.N. BACON CHEESEBURGER HAMBURGER HELPER NOT!

Nacho Slide-Size Burgers

Nacho Slide-Size Burgers from Rachel Ray
1 tablespoon tomato paste
1 15-ounce can lard-free spicy re-fried beans
1 1/2 pounds ground sirloin
1/4 cup grated onion
2 large cloves garlic, grated or finely chopped
1 tablespoon ancho or other medium-heat chile powder (about a palmful)
1/2 tablespoon ground cumin (about 1/2 palmful)
1/2 tablespoon ground coriander (about 1/2 palmful)
1/2 tablespoon sweet smoked paprika or sweet paprika (about 1/2 palmful)
Salt and pepper
Extra-virgin olive oil (EVOO) or vegetable oil, for drizzling
24 tortilla chips
2 cups shredded yellow sharp cheddar, smoked cheddar or pepper jack cheese
1 heart romaine lettuce or 1/2 head iceberg lettuce, shredded
2 plum tomatoes, seeded and chopped
Pickled sliced jalapeño chile rings, drained, for serving

  • In a medium saucepan, bring about 1/2 cup water to a boil. In a small cup, mix the tomato paste with a few spoonfuls of the boiling water to thin the paste. Add the re-fried beans to the pan, stirring with the water in the pan to thin out a bit while they heat through. Lower the heat and keep the beans warm.
  • Place the beef in a bowl and add the reconstituted tomato paste, onion, garlic, chile powder, cumin, coriander and paprika; season with salt and pepper. Form the meat into 8 small patties (thinner at the center than at the edges). Heat a griddle or skillet over medium-high heat. Drizzle the patties with EVOO, add to the griddle and cook for a couple of minutes on each side.
  • Position a rack in the upper third of the oven and preheat the broiler. Place the burgers on a rack-covered baking sheet and top each with about 2 tablespoons beans. Spread 3 chips with some of the remaining refried beans and pile on a burger (the beans are the glue between the chips). Repeat with the remaining chips, beans and sliders. Top the chips with the cheese and broil for a minute to melt.
  • Scatter the lettuce on plates or a platter and top with the sliders, tomatoes and pickled Jalapeños.
Here’s what I started with:

  • Measure out some tomato paste.  Put 1/2 cup of water on to boil.  Once it is boiling, put a few spoonfuls of hot water into the tomato paste.
  • Put some re-fried beans in with the remainder of the boiling water.
  • Put 1 1/2 pounds of ground sirloin into a bowl and add 2 grated garlic cloves in with the meat. 
  • Add 1/4 cup of onion, the reconstituted tomato paste, and all of the spices.
  • Shape the burgers and put them into a medium-high cast-iron skillet.
  • Turn on the broiler.
  • Pull the burgers out of the skillet and put them on a baking sheet.  The burgers did fall apart a bit.  Next comes a couple of tablespoons of the re-fried beans onto the burger with some tortilla chips and cheese.
  • Into the broiler for a couple of minutes.
Here’s what you’ll end up with:
These little sliders are perfect for Sunday football and they give you the taste of two favorite tailgating foods; nachos and burgers.  They did fall apart a bit while in the skillet but I was able to form them back together on the baking sheet and then “glue” them together with the re-fried beans.  The actual ground sirloin and herbs could definitely be used in tacos and would taste great!
I served them on a bed of lettuce with some tomatoes, jalapenos, sour cream and salsa on the side.  I ended up just tearing my burger all apart and basically made a “nacho/taco” salad out of mine.

PICKLED EGGS

 I used to make these for our VFW and they were a favorite!

PICKLED EGGS
1 dozen JUMBO eggs
1 1/2 cups vinegar
1/2 cup water
1/2 cup sugar
1/2 teaspoon salt
1 teaspoon ground cloves
1 onion, sliced into thin rings
1 whole dried chile pepper

  • Hard boil the eggs.
  • Drain and fill with cold water. Allow eggs to sit in cold water for 20 minutes.
  • Peel the eggs and place in a glass jar, alternating with the onion rings. Add the red pepper.
  • In a medium saucepan combine the vinegar, water, sugar, salt and cloves. Bring to a boil, reduce the heat and simmer 5 minutes.
  • Pour the hot vinegar solution over the eggs. Cover tightly and let stand in refrigerator for several days before serving.

Fire Day Friday: Grilled Steak Burgers

It is that time of year when folks are transitioning from summer back yard cook outs to fall tailgating.  If you want to make something other than the same old burger, drop the burger and make a “steak burger” instead.

This isn’t so much a recipe as it is just a trick – use cubed sirloin steak in place of ground beef burgers. 

The sirloin steak comes out tender and has a great beefy flavor.  It’s LIKE a ground beef burger but…..different. 

Grilled Steak Burgers
www.nibblemethis.com

4 ea cubed sirloin steaks
Kosher salt to taste
pepper to taste
2 tsp Worcestershire sauce 
1 cup shredded cheese
4 buns

Season both sides of the steaks with salt and pepper.

Preheat your grill to 450f.  Grill the steaks for 4 minutes.

Flip the steaks, sprinkle each with the Worcestershire sauce and top each with 1/4 cup of the cheese. 

Cook for 4 more minutes. 

Serve with your favorite toppings, condiments, and side dishes like bacon wrapped tater tots

Our boys love these burgers every time I make them and I hope you will too!  Today is the first day of Fall – everyone enjoy it.

CHICKEN COUNTRY CASSOULET

CHICKEN COUNTRY CASSOULET
3 boneless, skinless chicken breasts, cut into bite sized pieces
1/2 pound thick-cut bacon, diced
1 pound fat sausages of choice, cut into bite sized pieces
3 tablespoons butter
1 large Vidalia onion, diced
4 garlic cloves, minced
4 carrots, sliced
1/2 pound snap peas, washed and deveined
1/4 cup fresh minced parsley
1 14-ounce can petit diced tomatoes, basil, garlic & oregano
1 tablespoon Classico sun-dried tomato puree
1/2 teaspoon dried sage
1/2 teaspoon dried oregano
2 tablespoons chopped fresh thyme or 1 tablespoon dried
2 +/- cups chicken stock
2 cups seasoned bread crumbs**
salt and ground black pepper

  • Preheat oven to 325 degrees.
  • Brown the bacon until browned and crumbly in Dutch oven casserole dish.  Remove with a slotted spoon and drain on paper towels.
  • Add chicken and sausages and brown on all sides. Remove from fat and set aside. 
  • Add the onions and garlic and cook 3-4 minutes until softened. 
  • Add the carrots, snap peas and parsley, sauteing 3-4 more minutes.
  • Add tomatoes, tomato puree, spices and salt and pepper to taste.
  • Add meat back in.
  • Add enough of the stock to just cover the meat and veggies, you don’t want things swimming around too much.  You can always add more stock during the cooking if needed. 
  • Cover dish and cook 1 hour.
  • Add more stock if necessary. Spread crumbs over the top and cook uncovered for 40 more minutes or until browned. 

**Try adding other vegetables such as broccoli or white beans for variety.   I used crushed Ritz crackers today and they worked reallllllllllllllly well as a substitute!

CHICKEN MILANO

CHICKEN MILANO

4 tablespoons butter, divided*

2 pounds chicken tenders

1 cup sun-dried tomatoes, chopped**

3-4 cloves garlic, minced

1 bunch green onions, sliced thin

2 cups chicken broth

2 cups heavy cream

1 pound fettucini

salt and pepper, to taste

2 tablespoons chopped basil

  • In a large skillet, melt 2 tablespoons of butter over medium heat.  Add garlic and saute until fragrant.
  • Add onions and saute until soft.
  • Add tomatoes and 3/4 cup of the chicken broth. Simmer 10minutes.
  • Add the cream and bring to a boil, stirring constantly.
  • Reduce heat to a simmer and cook until sauce is thickened to desired consistency.
  • Meanwhile prepare pasta per package directions.
  • In another skillet melt remaining butter over medium heat.
  • Wash chicken pieces and pat dry.
  • Sprinkle chicken with salt and pepper generously.
  • Add chicken to butter and saute on both sides until cooked through.
  • Plate chicken.
  • Toss fettuccini and sauce together until well coated. Add to plated chicken.
  • Sprinkle with basil.
  • Enjoy.

* I use butter or safflower oil

**next time I will probably puree them slightly

CHICKEN MILANO

CHICKEN MILANO
4 tablespoons butter, divided*
2 pounds chicken tenders
1 cup sun-dried tomatoes, chopped**
3-4 cloves garlic, minced
1 bunch green onions, sliced thin
2 cups chicken broth
2 cups heavy cream
1 pound fettucini
salt and pepper, to taste
2 tablespoons chopped basil

  • In a large skillet, melt 2 tablespoons of butter over medium heat.  Add garlic and saute until fragrant.
  • Add onions and saute until soft.
  • Add tomatoes and 3/4 cup of the chicken broth. Simmer 10minutes.
  • Add the cream and bring to a boil, stirring constantly.
  • Reduce heat to a simmer and cook until sauce is thickened to desired consistency.
  • Meanwhile prepare pasta per package directions.
  • In another skillet melt remaining butter over medium heat.
  • Wash chicken pieces and pat dry.
  • Sprinkle chicken with salt and pepper generously.
  • Add chicken to butter and saute on both sides until cooked through.
  • Plate chicken.
  • Toss fettuccini and sauce together until well coated. Add to plated chicken.
  • Sprinkle with basil.
  • Enjoy.

* I use butter or safflower oil

**next time I will probably puree them slightly