LIMONCELLO CAKE

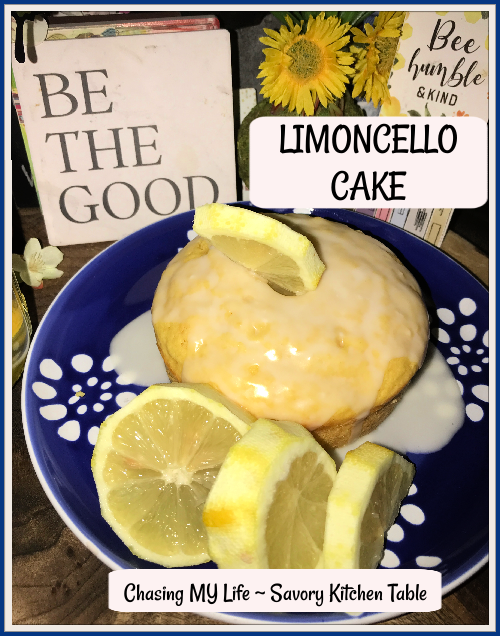
LIMONCELLO CAKE adapted from MOM ON TIMEOUT

This is a SUPER MOIST cake full of lemony flavor that is PERFECT for everything from a breakfast treat, afternoon snack or an elegant dessert!

1 ¾ cups all-purpose flour
2 teaspoons baking powder
½ teaspoon salt
½ cup avocado oil
1 cup granulated sugar
3 tablespoons homemade limoncello or lemon vodka
1 cup FULL fat sour cream at room temperature
2 LARGE eggs at room temperature
1 tablespoon lemon zest
1 teaspoon lemon extract
½ teaspoon vanilla extract
2-3 drops yellow food coloring

  • Preheat the oven to 350°F.
  • Spray a 9×5 loaf pan or decorative rounds with non-stick cooking spray and line with parchment paper. Set aside.
  • In a large bowl, whisk together the all purpose flour, baking powder and salt.
  • In a medium bowl, whisk together oil, granulated sugar, sour cream, limoncello, lemon zest, eggs, lemon extract, vanilla extract and food coloring, whisking together just until combined. Be careful not to over mix.

  • Transfer the batter to the prepared pan and smooth top.

  • Bake for 45 to 55 minutes or until a toothpick inserted into the center of the cake comes out with moist crumbs. If using decorative rounds you’ll need to adjust your baking time accordingly.
  • Let the cake rest in the pan for 10 minutes before carefully removing and transferring to a cooling rack. Allow the cake to cool completely before adding the glaze.

LIMONCELLO GLAZE
1 cup powdered sugar sifted
2 to 3 tablespoons limoncello

  • Whisk the powdered sugar and limoncello together until no lumps remain. If it’s too thin add additional powdered sugar a tablespoon at a time until you reach your desired consistency. If it is too thick add a bit more Limoncello, a teaspoon at a time.)

  • Drizzle glaze over the top of the cooled cake. Let the glaze set up before slicing and serving.


HOMEMADE LIMONCELLO
10 LEMONS, washed
1 770 ML bottle of VODKA (brand of your choice)
3 cups water
2 cups sugar

  • Using a vegetable peeler, remove the peels from the lemons in long strips. Reserve the lemons for another use. If any of the peels still have pith on them use a sharp knife to remove and discard the pith.
  • Place peels in a 2 quart pitcher or bowl.
  • Pour the vodka over the peels and cover with saran.
  • Steep the peels for 4 days at room temperature undisturbed.
  • Add the water and sugar to a large saucepan over medium heat, whisking 5 minutes until sugar is completely dissolved.
  • Cool completely.
  • Pour the syrup over the vodka mixture.
  • Recover and let stand overnight at room temperature.
  • Strain the mixture through a mesh strainer, discarding the peels.
  • Transfer the Limoncello to your bottle.
  • Seal and refrigerate until cold.
  • Keep refrigerated up to a month.

CALABRIAN CHILE CHICKEN PASTA

CALABRIAN CHILE CHICKEN PASTA adapted from Blue Apron

Avocado oil
2 Boneless, Skinless Chicken Breasts
1 shallot, small diced
2 tablespoons Mascarpone cheese
1/2 pound Bucatini Pasta, prepared per package directions reserving 1 cup pasta water
1 ounce Castelvetrano Olives, diced (optional-hubby loves, I don’t)
1 lemon, juiced
1 1/2 teaspoons Calabrian Chile paste
1 zucchini, halved and sliced (optional-hubby hates)
2 cloves garlic, minced
1/4 cup grated Parmesan cheese
1 tablespoon Italian seasoning
3 tablespoons WONDRA flour
FRESH ground sea salt and black pepper

  • Heat avocado oil in a large nonstick pan over medium high heat.
  • Add the sliced zucchini (if using) in an even layer. Cook, without stirring, 1 to 2 minutes, or until lightly browned. Season with salt and pepper. Cook 1-2 minutes more, stirring frequently until softened. Transfer to a plate.
  • Wipe out the pan and add 1-2 tablespoons more avocado oil and heat over medium high heat.
  • Pat the chicken dry.
  • In a large ziplock bag add wonder flour, Italian seasoning and FRESH ground sea salt and black pepper. Shake to mix.
  • Add chicken breasts and shake to coat. Shake off excess dredging.
  • Add the seasoned chicken to the hot oil, cooking 4-5 minutes per side, or until browned and cooked through.
  • Leave any browned bits in the pan, transfer chicken to a cutting board.
  • When cool enough to handle, slice crosswise.
  • In the same pan, heat a drizzle of avocado oil on medium-high until hot.
  • Add the chopped shallot, chopped garlic, and as much of the chile paste as you’d like, depending on how spicy you’d like the dish to be; season with salt and pepper. Cook, stirring frequently, 1 to 2 minutes, or until lightly browned.
  • Add the cooked pasta, lemon juice, Mascarpone cheese, browned zucchini (if using), chopped olives, and half the reserved pasta cooking water. Cook, stirring constantly, 1 to 2 minutes, or until the pasta is well coated. If necessary, gradually add the remaining cooking water to ensure the pasta is thoroughly coated.
  • Turn off the heat.
  • Serve the finished pasta topped with the sliced chicken.
  • Garnish with the Parmesan cheese.
  • Enjoy!

NOTE: To make your own Italian seasoning use +/- equal parts of these dried seasonings, to taste: Basil, Sage, Oregano, Savory, Rosemary, Thyme & Marjoram.


BAKED GRILLED CHEESE

Do you ever see those recipes on facebook or instagram that just look so perfect you have to try them? Or maybe they seem so so simple that it’s a no brainer. I’ve tried more than one that just didn’t live up to all the hype, BUT this isn’t one of them! Donna’s recipe for baked grilled cheese sandwiches has the same golden, crispy crust and gooey melted center you’ve always known and loved, but you can cook a HUGE batch for a crowd all at once in under 30 minutes total WITH THE ADDED BONUS OF NOT BEING TOO GREASY! I did adapt the flavoring to our likes, but the process is pretty much the same.

Adapted from the Slow Roasted Italian  Yield: 12 Sandwiches

BAKED GRILLED CHEESES
24 slices of thick sliced bread (Texas toast or a thick sourdough are perfect)
1 cup FRESH FINELY grated Parmesan cheese
12 thick slices Baby Swiss cheese
12 thick slices mild cheddar cheese
12 slices Havarti cheese
12 slices beefsteak tomato
12 slices bacon, halved and cooked crisp
1/2 + cup unsalted butter, room temperature
Tomato soup for dipping

Preheat oven to 450°.

  • Generously butter a slice of bread.
  • Sprinkle a tablespoon of Parmesan cheese evenly over the butter and press cheese gently into the buttered surface. Place it face down on your baking sheet.
  • Place a slice of Baby Swiss cheese on each slice of bread followed by a slice of Havarti, a slice of tomato, 2 bacon slices and then a slice of cheddar.
  • Place a slice of buttered bread on top.
  • Sprinkle a tablespoon of Parmesan cheese evenly over the butter and press cheese gently into the buttered surface. Set aside and repeat until you have enough sandwiches for your crowd.
  • Bake 5 minutes until tops are golden and crusty. Watch carefully to make sure sandwiches don’t get too brown.
  • Flip sandwiches and bake another 5 minutes until second side is golden and crusty and centers are melted.

BLACKENED ORANGE ROUGHY

BLACKENED ORANGE ROUGHY for 2

Buttery, tender and super quick make this the PERFECT weeknight menu choice.

2 orange roughy fillets
2-3 tablespoons butter
1 teaspoon paprika
FRESH ground sea salt and black pepper
pinch of cumin
1 tablespoon FRESH chopped thyme
1 teaspoon garlic powder
2 LARGE lemons, 1 sliced in rings the other in wedges
scallion greens or chopped cilantro for garnish

  • Rinse orange roughy fillet in cold water and pat dry with paper towels.
  • Mix spices in a small bowl and cover the fish entirely.
  • Preheat WELL seasoned cast iron pan in oven if you have time.
  • Heat butter in HOT skillet.
  • Add fillets, cooking for 3-4 minutes.
  • Gently flip and cook another 3-4 minutes.
  • Add lemon slices.
  • Top with wedges and chopped greens.
  • Serve immediately.

NOTES: DO NOT move fish during cooking otherwise it may stick to the skillet.

GRASSHOPPER CHEESECAKE SQUARES

I’ve made Creme de Menthe Brownies for years, but when I found this recipe over at The Kitchen is My Playground I instantly fell in love.

The classic combination of a Grasshopper cocktail (creme de cacao and creme de menthe with cream) turned into a beautifully layered cheesecake treat is so very delicious! and a nice change from the deeper, darker and heavier brownie version.

GRASSHOPPER CHEESECAKE SQUARES Yield: 9 squares
1 1/2 cups (30-40 cookies) chocolate wafer cookie crumbs (gingersnaps are also quite good)
1/4 cup butter, melted
24 ounces cream cheese, at room temperature
1 1/4 cup granulated sugar
3 LARGE eggs, at room temperature
4 tablespoons white creme de cacao
1/4 cup + 2 tablespoons green creme de menthe
2 drops green food coloring (optional)
2 ounces semi-sweet baking chocolate squares, chopped

  • Preheat oven to 350°.
  • Spray a 9×9 baking dish with non-stick cooking spray.
  • Combine chocolate cookie crumbs and melted butter, mixing well.
  • Press cookie crumb mixture into the baking dish. Set aside.
  • Beat cream cheese for a minute at medium speed with an electric mixer until light and fluffy. Gradually add sugar, beating well.
  • Add eggs, one at a time, beating after each addition.
  • Stir in creme de cacoa.
  • Scoop out 2 and a 1/2 cups of the cheesecake batter and pour it over the cookie crumb crust, spreading evenly with a spatula.
  • Stir creme de menthe into remaining cheesecake batter.
  • Using a spoon or small measuring cup to work with small amounts of batter at a time, GENTLY pour the green cheesecake batter on top of the white cheesecake batter in the baking dish. You don’t want to disturb the layers too much.
  • Bake 45 – 55 minutes.
  • Cool to room temperature and then chill over night.
  • Cut cheesecake into small bars. cutting the bars prior to putting on the chocolate drizzle helps keep the drizzle intact and pretty.
  • Microwave chocolate squares in 20 second intervals until melted, stirring after each interval.
  • Add melted chocolate to a ziplock bag and seal.
  • Snip a very tiny hole in one corner of the bag and drizzle the chocolate over the bars. 
  • Store covered in the refrigerator. 

BARBACOA BURRITO BOWLS with CILANTRO LIME RICE

BARBACOA BURRITO BOWLS with CILANTRO LIME RICE serves 8

BARBACOA BEEF
2 1/2 pounds chuck roast, cut into 2 inch cubes
2 tablespoons apple cider vinegar
1/2 cup homemade bone broth
Juice of 2 limes
4-5 pepperoncinis
1 tablespoon pampered chef TEX MEX seasoning
1 red onion, halved and sliced thin
2 cloves garlic, minced
FRESH ground sea salt and black pepper

  • Whisk together the broth, lime juice, vinegar and seasoning.
  • Add beef chunks to pressure cooker.
  • Pour broth mixture over top.
  • Add pepperoncinis, garlic and onion slices.
  • Bring to a gentle simmer.
  • Add lid and pressure rocker.
  • Simmer with the rocker gently rocking for 40 minutes.
  • Allow to steam to release naturally.
  • Carefully open and remove beef chucks to cutting board.
  • Shred beef with 2 forks.
  • Strain broth and set aside.

NOTE: Chipotle seasoning with chipotle peppers are a great alternate flavor.

CILANTRO LIME RICE
1 1/2 cups long grain rice, rinsed
2 cups homemade bone broth
1 garlic clove, minced
1/3 cup FRESH chopped cilantro leaves
1 LARGE lime, juiced

  • Add the rice, broth, garlic and half of the cilantro leaves to a sauce pan.
  • Bring to a boil.
  • Reduce heat to simmer, cooking until liquid is absorbed and rice is tender.

ASSEMBLY
garnish toppings – sour cream, lime wedges, Cotija cheese, hot sauce…

  • Fluff rice with remaining cilantro leaves and lemon.
  • Divide rice into serving bowls, top with shredded beef, a drizzle of the strained broth and your favorite Tex Mex toppings.

GREEN ENCHILADA CHICKEN SOUP

Thank you Carrie for making me try this recipe. I had seen it on Pinterest and Facebook, but now I’ve gotten around to making it in reality. 😀

GREEN ENCHILADA CHICKEN SOUP

2 1/2 pounds boneless, skinless chicken breasts or thighs
1 recipe homemade green enchilada sauce (recipe below) or 1 (28 ounce) can green enchilada sauce
3 cups homemade chicken bone broth
1 cup half and half or heavy cream, depending on desired consistency
2 cups Monterey jack cheese or pepper jack cheese
4 ounces cream cheese, cubed at room temperature
4-8 ounces green salsa verde, to taste
FRESH ground salt and pepper, to taste

  • In a 6-quart slow cooker add chicken breast or thighs, green enchilada sauce, and chicken broth. Cook on LOW 6 to 8 hours.
  • Remove chicken and shred.
  • Add shredded chicken, jack cheese, cream cheese, half and half, and green salsa to slow cooker.
  • Turn slow cooker to warm and stir until cheeses are melted.
  • Add hot sauce or additional salsa to taste.
  • Top with lime wedges, avocado, cilantro, green onion, shredded cheese and sour cream or any other topping of your choice.
  • Serve and enjoy!

NOTE: you can short cut this recipe using chopped Costco chicken rotisserie pieces. They now come already picked in a large package. Using this chicken also makes it easy to cut the recipe in half or double it 😀

GREEN ENCHILADA SAUCE
Homemade Green Enchilada Sauce is a quick and simple homemade recipe for use in your TEX-MEX recipes.

1 recipe = 1 (28 ounce) can of store-bought green enchilada sauce

2 tablespoons avocado oil
1 cup chopped onion
2 garlic cloves, FINELY minced
1 cup UNDRAINED diced canned green chiles
2 cups homemade chicken bone broth
1 teaspoon cumin
1 teaspoon oregano
FRESH ground sea salt and black pepper, to taste
Optional to spice it up: 1 jalapeno pepper, diced

  • Heat oil in a skillet over medium high heat.
  • Saute onion until soft.
  • Add garlic and cook for 1 minute.
  • Reduce heat to medium.
  • Add green chiles, broth, cumin, oregano, salt, pepper, and jalapeno if using.
  • Simmer, uncovered, for 15 minutes until the liquid is reduced to about 3 cups, by about 25%.
  • Use an immersion blender to blend ingredients to your desired consistency.
  • Transfer back to your skillet.
  • If the sauce is for later use, let it cool, then store it in an airtight container for storage in your refrigerator or freezer. I use a canning jar with an airtight lid.

PASTEL DEVILED EGGS

PASTEL DEVILED EGGS

This recipe is making the rounds these days and is absolutely perfect for the late Easter this year. These colored deviled eggs will make a beautiful addition to any Easter table! Also fun to do for baby or wedding showers as well.

EGGS
12 LARGE eggs

  • Place eggs in a large saucepan and cover with cold water.
  • Set pan over medium-high heat and bring water to a boil.
  • Turn off heat, cover pan with a lid and let sit for 12 minutes.
  • Drain and rinse eggs under cold water.

FILLING
1/2 cup mayonnaise
2 teaspoons pickle juice
2 teaspoons QUALITY mustard
4 tablespoons FINELY chopped dill pickles
FRESH ground sea salt and pepper (to taste)

  • Peel shells off of the eggs.
  • Cut eggs in half lengthwise and scoop out yolks into a bowl.
  • Add mayonnaise, pickle juice, and mustard to bowl, then mash the yolks and stir until mixture is smooth.
  • Stir in minced pickles and then season with salt and pepper.
  • Place the mixture in a large ziplock bag.
  • Cut the tip off of the ziplock bag and pipe the egg mixture back into the colored eggs.

DYE
6-8 ounces water in a cup
1 teaspoon white vinegar
GEL Food coloring

  • Stir desired color of food coloring into cups of water.
  • Add the vinegar to the colored water.
  • Gently place boiled and peeled eggs into the cups.
  • Let the eggs soak in the colored water for at least 10 minutes until desired shade is achieved.
  • While the eggs are soaking in food colored water prepare the deviled eggs from the recipe above.
  • Gently remove the colored eggs with a large slotted spoon and place them on a stack of paper towels to dry.
  • Pat dry with additional paper towels.
  • Fill with prepared egg mixture.

KARAAGE AMAZU? AMASU? Chicken I’ll just call it TANGY YUMMY Fried Chicken

I have a small piece of a note that says AMASU Chicken on it from an old folded recipe in an antique box I found in an antique store. I have no idea when or even when I found it. I started researching it and came up with a few recipes that sounded interesting, but none of them sounded interesting enough by themself to be worth trying in my book. So, I piece mealed the bits and pieces of all of them into a recipe we like.

Karaage is basically a Japanese term/technique for deep frying in oil. It is most often used for chicken. The meat is usually coated in a corn or potato starch dredge before frying.

Amasu – means “leave over” in Japanese
Amaza – means “ no one knows everything” in Zulu

Karaage Amazu? Amasu? Chicken I’ll just call it TANGY YUMMY Fried Chicken Serves: 4-6 people
3 pounds chicken thighs (cut into bite size) OR chicken wings
1 cup cornstarch
Vegetable oil for deep-frying
1/2 cup Mirin
1/2 cup rice wine vinegar (unseasoned)
1/4 cup Bragg’s Liquid Aminos
1/2 cup water
1 small can crushed pineapple (DO NOT DRAIN)
1/4 cup ketchup (Jalapeno ketchup adds a bit of a kick!)
1/2 cup sugar
2 tablespoons lemon juice (1 LARGE lemon)
½ teaspoon salt
1 tablespoon FRESH, FINELY chopped cilantro coriander
1 teaspoon red chili flakes (or more if you like more heat)
Chopped green onions for garnish

  • Marinate the chicken pieces with liquid aminos and set aside.
  • Combine mirin, rice wine vinegar, water, pineapple, salt and sugar in a pot and bring to a boil.
  • Reduce heat to medium and cook until the liquid thickens.
  • Completely cool the mixture.
  • Whisk in lemon juice, cilantro and red chili flakes, to taste.
  • In a large ziploc bag coat chicken in cornstarch, shaking to coat well. Tap off excess cornstarch before frying.
  • Heat oil to 350° and fry until crispy and cooked through.
  • Add chicken to large bowl.
  • Pour sauce over and toss to coat.
  • Plate, garnish and serve hot.

ONION SALISBURY STEAK

SALISBURY STEAK adapted adapted from the Pioneer Woman, Ree Drummond
1 1/2 pounds lean ground beef
1/2-1 pound FRESH mushrooms, sliced
1/2 cup seasoned breadcrumbs
2 tablespoons Worcestershire sauce
1 teaspoon creamy horseradish
2 tablespoons jalapeno ketchup
1 packet LIPTON French onion soup mix
FRESH ground sea salt and black pepper, to taste
1 tablespoon butter
1 tablespoon avocado oil
1 tablespoon WONDRA flour
1/4 cup cream sherry
1 1/2 cups beef broth
FRESH parsley leaves as garnish

  • Combine the ground beef, breadcrumbs, Worcestershire, 1 tablespoon of the ketchup, horseradish, 1 tablespoon of the soup mix and some salt and pepper in a bowl and knead until well combined.
  • Form into 4 oval patties, and using the side of your hand, make lines across the patties to give them a “steak” appearance.
  • Place a HEAVY skillet (preferably cast iron) over medium high heat and add the butter.
  • Add mushrooms, cooking until caramelized. Remove with a slotted spoon and set aside.
  • Add oil and more butter if necessary.
  • Fry the patties about 5 minutes per side until no longer pink in the middle.
  • Remove from the skillet and pour off all but 2 tablespoons of the grease.
  • Sprinkle the flour remaining grease and let cook for a minute.
  • Remove the skillet from the heat and deglaze with the sherry, scraping up all the little bits from the bottom to release all the flavor.
  • Return to the heat and add the beef broth, remaining ketchup and remaining soup mix. Bring to a boil and let thicken, 2 to 3 minutes.
  • Taste and adjust the seasoning as needed.
  • Fold mushrooms into gravy, stirring a minute or two to reheat mushrooms.
  • Remove the skillet from the heat.
  • Return the patties to the gravy, spooning a little gravy over each.
  • Garnish with the parsley.


LEMON HERB BAKED SALMON

LEMON HERB BAKED SALMON

2 pound boneless salmon (preferably 1 inch thick) – skin on or off, wild caught if possible (or fillets)
5 sprigs FRESH chopped tarragon or thyme rosemary
2 small lemons, 1 cut into thin slices, the other juiced
2 tablespoons avocado oil
FRESH ground sea salt and black pepper
4 cloves garlic, minced
Chopped green onions or parsley for garnish
Lemon slices for garnish

  • Let salmon stand at room temperature for 10 minutes.
  • Preheat oven to 375.
  • Line a large baking dish or rimmed baking sheet with a large piece of aluminum foil.
  • Lightly coat the foil with baking spay.
  • Arrange half the lemon slices in the center of the foil.
  • Top lemon slices with half the chopped herbs.
  • Drizzle the salmon with avocado oil and generously season with FRESH ground sea salt and black pepper. Gently rub the oil and seasonings into the fillets.
  • Lay salmon over sliced lemons and herbs. If using fillets, nestle them closely together.
  • Scatter the remaining herbs and lemon slices on top of the salmon.
  • Scatter the garlic over the top.
  • Pour lemon juice over top.
  • Fold the sides of the aluminum foil up and over the top completely enclosing the salmon, but tenting the foil a bit.
Bake 15-20 minutes or until the salmon is almost completely cooked through at the thickest part and it flakes easily.
  • Remove the salmon from the oven and carefully open the foil so that the top of the fish is completely uncovered, but be careful of hot steam.
  • Change the oven setting to broil, then return the fish to the oven and broil for 2-3 minutes – WATCH CLOSELY SO IT DOES NOT BURN.
  • Sprinkle with additional fresh herbs and top with a squeeze of lemon.

BACON GREEN BEANS

BACON GREEN BEANS

Total: 40 minutes Active: 10 minutes Yield: 6 servings

1 pound green beans, trimmed
3 slices bacon, diced
2 tablespoons bacon grease
2 cloves garlic, minced
1 large onion, SMALL chopped
1 cup chicken broth, plus more as needed
1/3 – 1/2 cup chopped mini red bell pepper
FRESH ground sea salt and black pepper

  • Cooked bacon JUST until crisp. Remove with a slotted spoon to drain on paper towels. Reserve 2 tablespoons of bacon grease. If you don’t have 2 tablespoons supplement with salted butter.
  • Add garlic and onions, cooking for 1-2 minutes.
  • Add the green beans and cook 1 minute until the beans turn bright green.
  • Add chicken broth, chopped red pepper, salt and pepper to taste.
  • Reduce heat to low and cover, leaving the lid cracked to allow steam to escape.
  • Cook 20-30 minutes until the liquid evaporates and the beans are fairly soft, yet still tender crisp. You may need to add more chicken broth during the cooking process, but don’t be afraid to let it all cook away so the onions and peppers can start to caramelize.
  • Stir in bacon pieces.
  • Serve immediately.