December 14 – Amber of Cobbler du Monde chose Apple-Coconut Family Cake, on page 214.
Save Room for Dessert…Christmas Cake

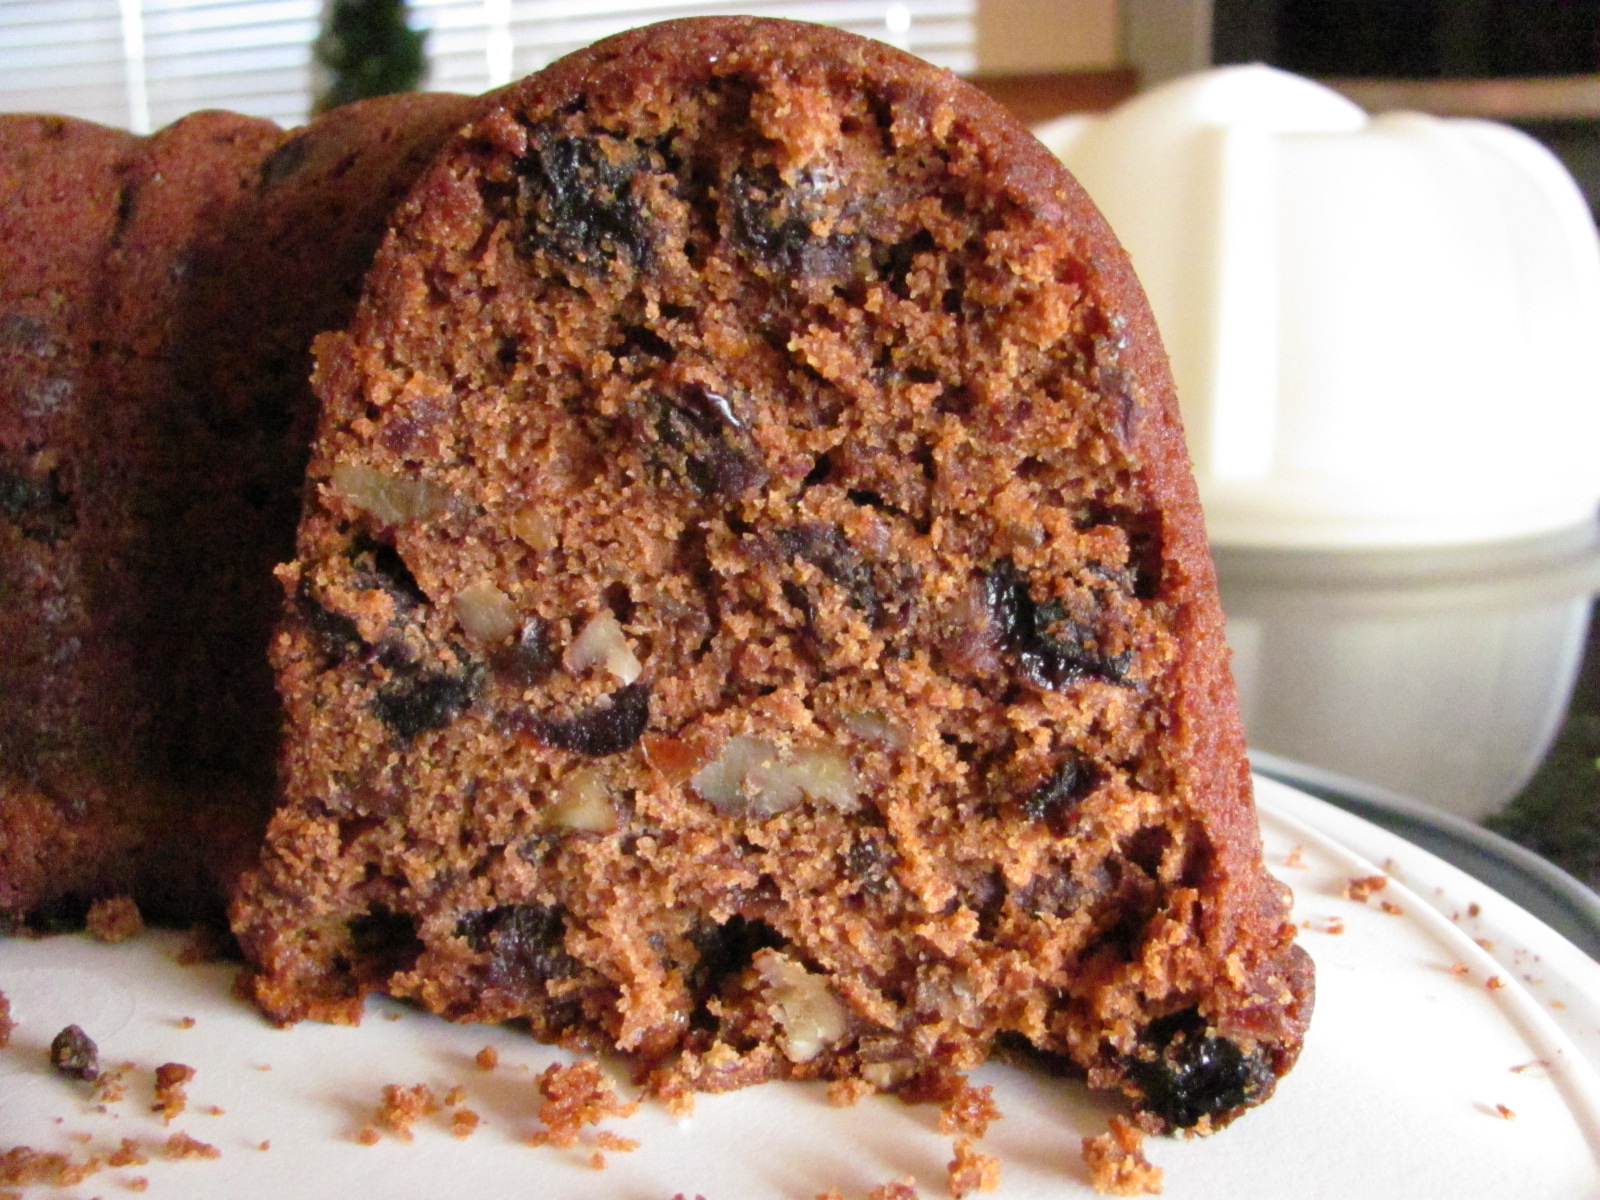
I love fruitcake, in fact, I’ve always loved fruitcake, even as a kid. Weird kid, I know. Anyway, I’m not naive enough to believe that everyone loves fruitcake; I suppose it’s likely that more people dislike fruitcake than not. However, this cake, which I’ve cleverly renamed as Christmas Cake, could possibly turn a fruitcake hater into, well, maybe not a fruitcake lover, but perhaps someone who likes fruitcake. It’s chockful of big red raisins, dried cranberries, toasted pecans, and spiced with nutmeg, cinnamon, and cloves. Everyone who takes a bite always says the same thing, “this tastes like Christmas!” And, it does, it’s a wonderful cake. The recipe is actually an adaptation of many war cake recipes that I found a few years ago when I was doing some research for a library program. During war, items such as butter, milk, and eggs are rationed, so cakes from war times were made sans expensive ingredients. All of the recipes I found contained shortening, some used brown sugar, others used granulated sugar, none of them had eggs or milk, but they all had nuts and raisins. I’ve made many versions of the cake, and this is my favorite version thus far. I use butter rather than shortening and granulated sugar instead of brown. Dried cranberries have been added along with the raisins, and while walnuts were very common in the original recipes, I used pecans. I also add an entire ground orange, which appeared in a few of the recipes, but not all. I love the hint of citrus flavor. For an impressive look, not to mention, truly over the top deliciousness, drizzle on a brown sugar glaze…drool-worthy.

Christmas Cake
2 cups water
2 cups sugar
1 cup unsalted butter
1 navel orange, ground in food processor
2 cups raisins
2 cups dried cranberries
2 teaspoons nutmeg
2 teaspoons cinnamon
2 teaspoons cloves
1/8 teaspoon salt
4 cups flour
2 teaspoons baking soda
2 cups pecans, toasted and chopped
Brown sugar glaze, optional
- In a large pot, combine water, sugar, butter, raisins, dried cranberries, nutmeg, cinnamon, cloves, and salt. Bring to a boil, then lower to a simmer; continue to cook for 10 minutes. Turn off heat, and allow mixture to cool to room temperature.
- When mixture is cool, preheat oven to 325 degrees.
- Butter & flour a Bundt pan and set aside.
- Whisk flour and baking soda together. Add to cooled mixture, mixing well. Stir in pecans.
- Pour into prepared pan and bake at 325 degrees for 75-90 minutes, or until a tester inserted comes out clean.
- Allow to cool for 15 minutes in pan before inverting onto a dish. Cool completely before drizzling with glaze or slicing.
FRENCH ONION CHICKEN

These were serious Dolly Parton chicken breasts that I found on sale. I just didn’t realize HOW big they were until I opened the package today. I made these tonight with bone in breasts, but next time will use boneless to make the meal easier for everyone.


FRENCH ONION CHICKEN
4 chicken breasts
4 tablespoons butter
4 slices bacon, diced and browned
1 package Laura Scudder’s French onion dip mix
2 tablespoons dehydrated red pepper
1/3 cup flour
1 large bunch green onions, sliced
2 cups homemade chicken broth
PURE
1 cup sour cream
- Rehydrate the dehydrated red pepper in chicken broth for an hour before beginning to cook.
- In a large skillet melt butter.
- Sift together the flour and Laura Scudder’s green onion dip mix into a large plastic bag.
- One at a time dredge chicken in flour mixture coating well.
- Brown chicken on both sides until crisp.
- Using an electric skillet, spray with PURE.
- Add browned chicken breasts.
- Gently pour the broth mixture around the edges of the chicken.
- Top chicken pieces with green onions.
- Set on 200 degrees and simmer for an hour.
- Brown bacon and drain oil.
- Remove chicken and keep warm.
- Sprinkle the bacon over the chicken pieces.
- Bring drippings to a boil and reduce to 1 cup.
- Remove from heat and quickly whisk in sour cream for gravy.
- Serve with mashed potatoes.
ARE YOU READY FOR SOME FOOTBALL????????????
 We’re HUGE football fans! Well, it’s that time of year again! Football season is already way too many weeks old (where does the time go?) and that means it’s time for tailgating again, serious football food and game day buffets. Bring over your best appetizers and your biggest appetite and oh don’t forget the Brewskis to go with it all. I like mine really cold please with a side of lime!
 Tailgating Time will be posted every Sunday at noon and open all week for you to add your football favorites. We’ll play each and every week until Superbowl Sunday. I can’t wait to see what you’ll be bringing!
It’s Tailgating Time!
HOSTED BY:
Tamy at 3 sides of Crazy
Lyndsey at Tiny Skillet
Martha at Seaside Simplicity
HOSTED BY:
Tamy at 3 sides of Crazy
Lyndsey at Tiny Skillet
Martha at Seaside Simplicity
Martha will be back with us next week.
Would you like to be a host of Tailgating Time too?
Leave me a comment here with your email or with Martha over at Seaside Simplicity so we can send you the code and add you to the host list – more exposure, more links, more football food!
note: TAILGATING TIME WILL BE MOVING TO OUR KRAZY KITCHEN NEXT WEEK.
FRIED RICE with HAM

2 tablespoons peanut oil
1/2 cup thinly sliced green onions including tops
1/2 teaspoon peeled and minced fresh ginger root
1/2 teaspoon minced garlic
2 eggs, lightly beaten
1/4 teaspoon salt
1/4 teaspoon sugar
1/3 pound finely diced cooked lean ham
1/2 cup frozen tiny peas
2 tablespoons soy sauce
2 cups cold cooked rice
1/2 teaspoon sesame oil
Heat oil in uncovered wok at 325.
Add next 3 ingredients; stir-fry 1 minute.
Add eggs; scramble loosely; break up with spatula.
Add next 5 ingredients; stir-fry 2 minutes. Add rice; stir-fry 30 seconds.
Add sesame oil; stir and serve immediately.
Makes 4 servings.
Happy Eating…
CHOCOLATE OATMEAL PEANUT BUTTER BLUEBERRY BARS


CHOCOLATE OATMEAL PEANUT BUTTER BLUEBERRY BARS
2 sticks unsalted butter, softened
1 1/4 cup flour
1 teaspoon baking flour
1 teaspoon salt + pinch salt
1 teaspoon cinnamon
2 cups packed dark brown sugar
2 JUMBO eggs
3 cups old fashion oats
1 1/2 + 3/4 teaspoon vanilla
2/3 + 1/2 cup honey roasted peanuts
1 /2 cup golden raisins
1/2 cup raisins
1 cup dried blueberries
1 can sweetened condensed milk
2 tablespoons peanut butter
12 ounces semi-sweet chocolate chips
- Preheat oven to 350 degrees.
- Sift together the flour, soda, teaspoon of salt and cinnamon.
- In a large mixing bowl, cream the butter.
- Add the brown sugar and blend well.
- Add eggs, one at a time, blending well after each one.
- Add vanilla and blend until light & fluffy.
- Add flour mixture and blend until smooth.
- Gently mix in oatmeal and 2/3 cup peanuts.
- Set aside 2 cups of mixture.
- Press the remaining mixture into the bottom of a 9×13 well greased baking dish.
- Scatter the blueberries randomly over the top of the oatmeal mixture.
- In a double boiler mix together the sweetened condensed milk, peanut butter and chocolate chips until melted and well blended.
- Stir in vanilla, raisins and remaining peanuts.
- Spread over the oatmeal layer.
- Working in small amounts flatten oat oatmeal dough and top chocolate mixture.
- With well greased fingers press gently on the top oatmeal dough to spread it out evenly over the chocolate layer.
- Bake 30 minutes.
- Cool completely before cutting.

Fire Day Friday: Beefy Bite Appetizers
It is the holiday season, which unleashes a torrent of parties and get togethers.
That means it is advantageous to have an extra appetizer, hors d’oeuvres, or dessert snack trick up your sleeve. So tonight I played around with an idea I had for an appetizer. This is work in progress kind of thing.
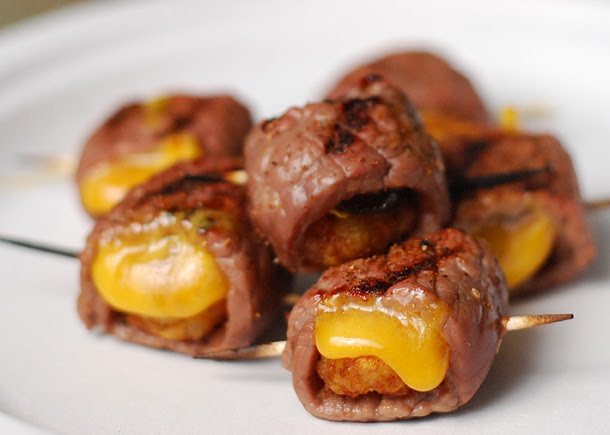
Steak Wrapped Tater Tots
I know. That’s twisted. But sometimes you just have to cut loose and do something different.
For the first round, I cooked tater tots (well, actually Ore Ida Crispy Crowns) according to directions. I placed each one on a 1″ strip of milanesa style sliced beef (thin sliced sirloin) and topped with a variety of ingredients like pickled sweet jalapeno (we used Hobo Howey’s Jalapeno Treats), cheddar cheese, and steak sauce.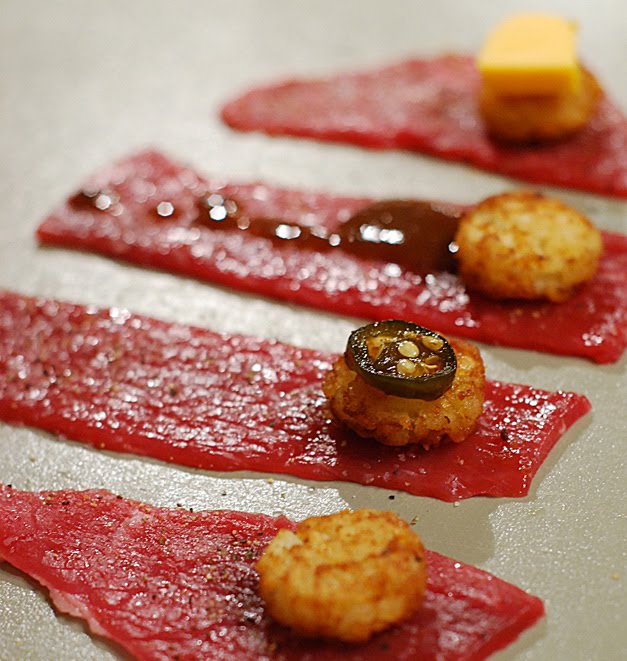
I rolled them up and secured with a toothpick and seasoned with a little bit of steak rub (I used Dizzy Pig Cow Lick).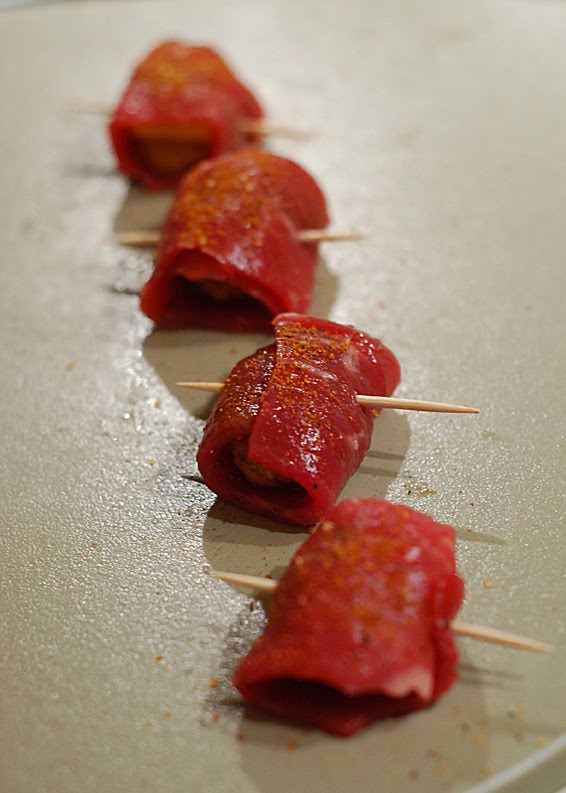
I tried cooking them on the griddle plate of my grill cooking at 450f. It only took 1-2 minutes per side.
While it gave good sear marks, the sides didn’t get much radiant heat so they weren’t as evenly cooked as I would have liked.
It was 35f outside while I was cooking these, but I could not resist making a second attempt. This time I did the same thing but went with direct heat.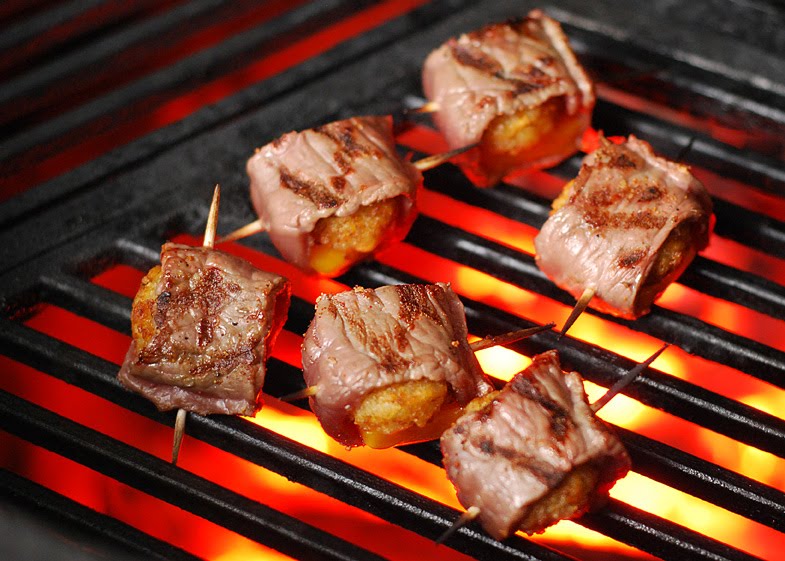
That cooked through much better.
And despite my fears the cheese would melt out during the cook, it finished just right.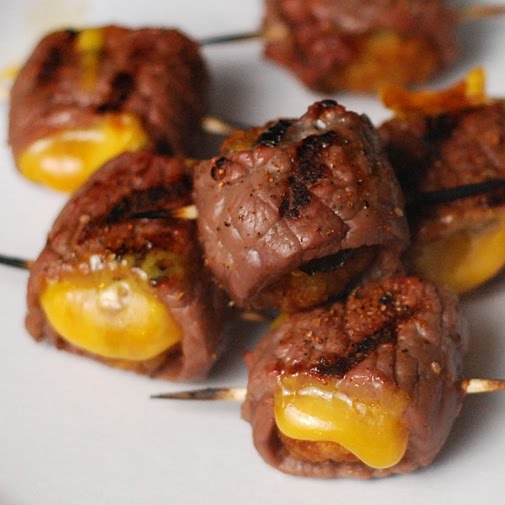
Lessons learned:
- Instead of using a griddle pan, go for direct heat like grilling or broiling.
- If using cheese, start with your tater tot facing the hot side (below for grilling, above for broiling) for the first minute.
- Serve these quickly after cooking. These are not a “cook and leave on the table” kind of thing if you want to impress.
- Idea for the world’s most awesome slider – A juicy lucy style slider with a crispy crown and cheddar inside. Gonna work on that one.
- After testing the varieties twice tonight, I think our favorite is a combo of the sweet pickled jalapeno and cheddar. The sweet and heat combine perfectly.
Tell me: When the pressure is on during the holidays, what is your “go to” appetizer/snack?
Meat Problem, Meat Probe
Greetings all…
Did you know the meat that you are buying at the grocery store is not the same as the meat your mama bought just 20 years ago? Pork, poultry, beef and fish… they are all changing. I’m going to get on my soap box here for just a second, but the neighborhood grocery store has evolved. Factory farms now produce most of the meat sold in stores, and more importantly, all of the meat if you are budget conscious. While cheap is good, it is almost impossible to justify paying twice as much for meat that is locally and organically produced. It’s just a fact.
Let’s talk pork. 20 years ago, a pig was at least 6 months old before achieving his purpose in life (slaughtered for meat). Now, with advances in feed and farm techniques, a pig achieves it’s special purpose in 3 to 4 months. But, the meat is not the same. Pigs are leaner than they were 20 years ago.
That means your meat cooks different.
Also, when was the last time you saw a pork chop with the bone attached. Often now, you pay more for the less processed bone in chop. Market research has decided that boneless meat is more appealing and sells better than bone in. But that also means your meat has a different flavor, plus…
That means your meat cooks different.
That also means all those recipes from Mom are just slightly off. With less fat, with fewer bones in your meat, it is much more difficult to cook pork chops (as an example, but any pork cut is the same) the same way Mom cooked and get the same results. It’s not mom’s fault that her cooking skills have gone down hill. It’s the ingredients. The pork chop she learned her skills on is not the same as the chop she buys today.
But that’s OK, as long as you know.
Cooking time is not as important as internal temperature. Those little electronic temperature gauges with attached probes that go right into the meat and stay there throughout the process are a Godsend.

Here’s the last batch of pork chops I made. Thick cut, just salt, pepper and a little Worcestershire sauce in a frying pan. Cooked to an internal temperature of 160 degrees only. Put the probe in the center of a chop (from the side, you can’t really tell the center from the top).
Moist, tender, juicy still.
If it gets to 180 degrees, it will be tough, dried out and very chewy.
Same goes for your turkey. It takes less time today to cook a bird than the same size bird from 20 years ago. Cooking by time is a sure way to serve dried out bird.
It’s Christmas. Treat yourself. Get and use an internal temperature probe thermometer. Kohl’s has them on sale for less than $20.
With the price of meat these days, it’s a bargain.
Seriously, ask your mom about shopping in her day. It’s not the same, so cooking techniques need to change as well.
In my opinion!
.
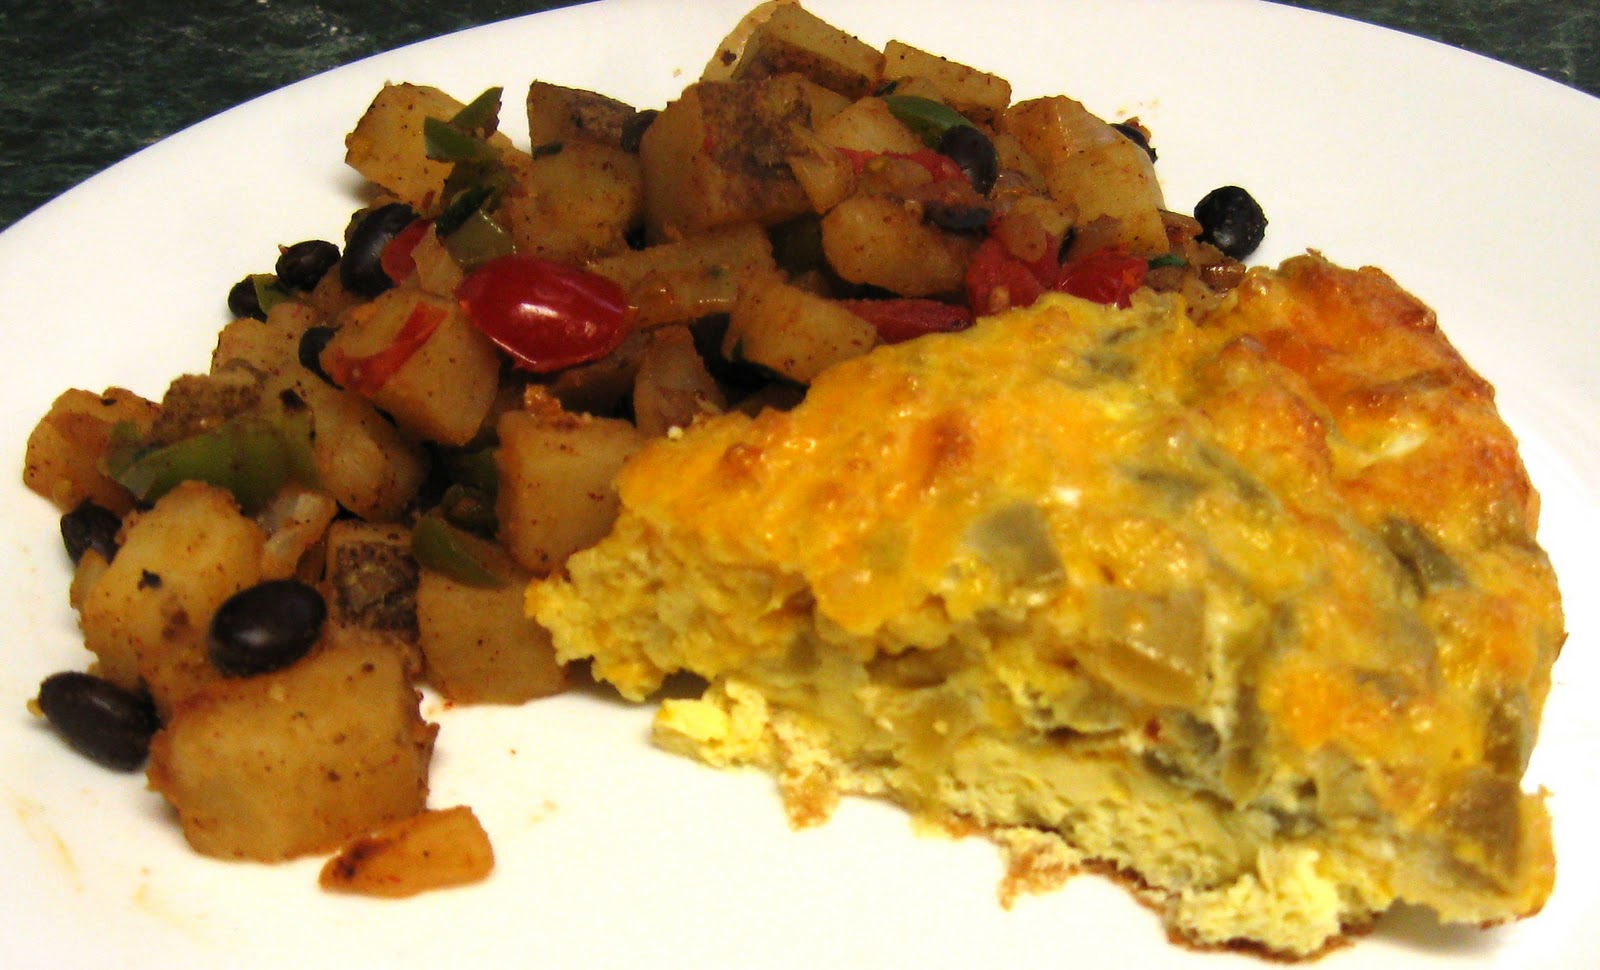
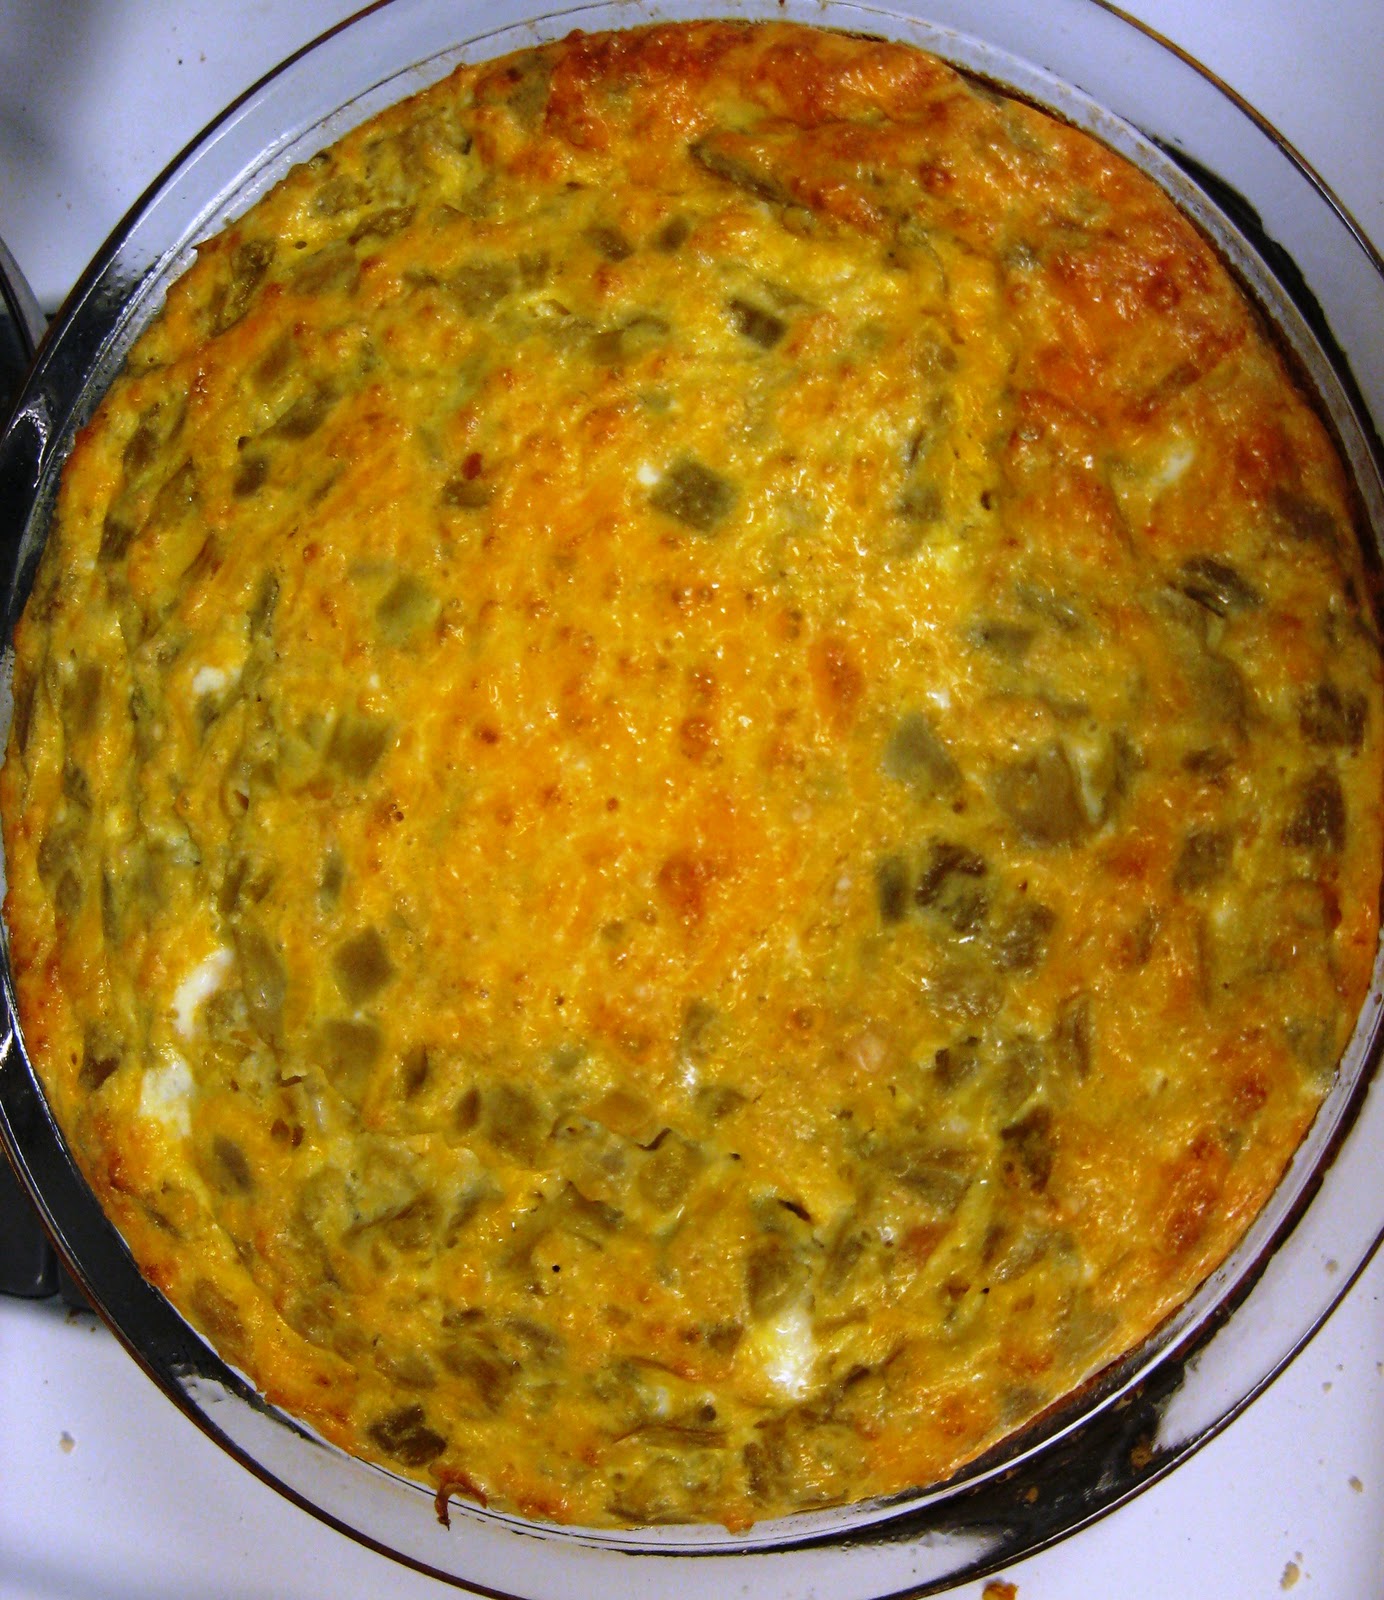
Green Chili Cheddar Eggs

This healthy meal would make a great brunch. In our case, dinner but we love breakfast for dinner. It made for several days of leftovers so I was able to enjoy it for breakfast too!
I love green chiles, I was a little cautious about putting 2 cans in here but I am SO glad I did. I think people tend to shy away from the green chiles as they think they will be spicy. Well, they aren’t really spicy, just super flavorful.
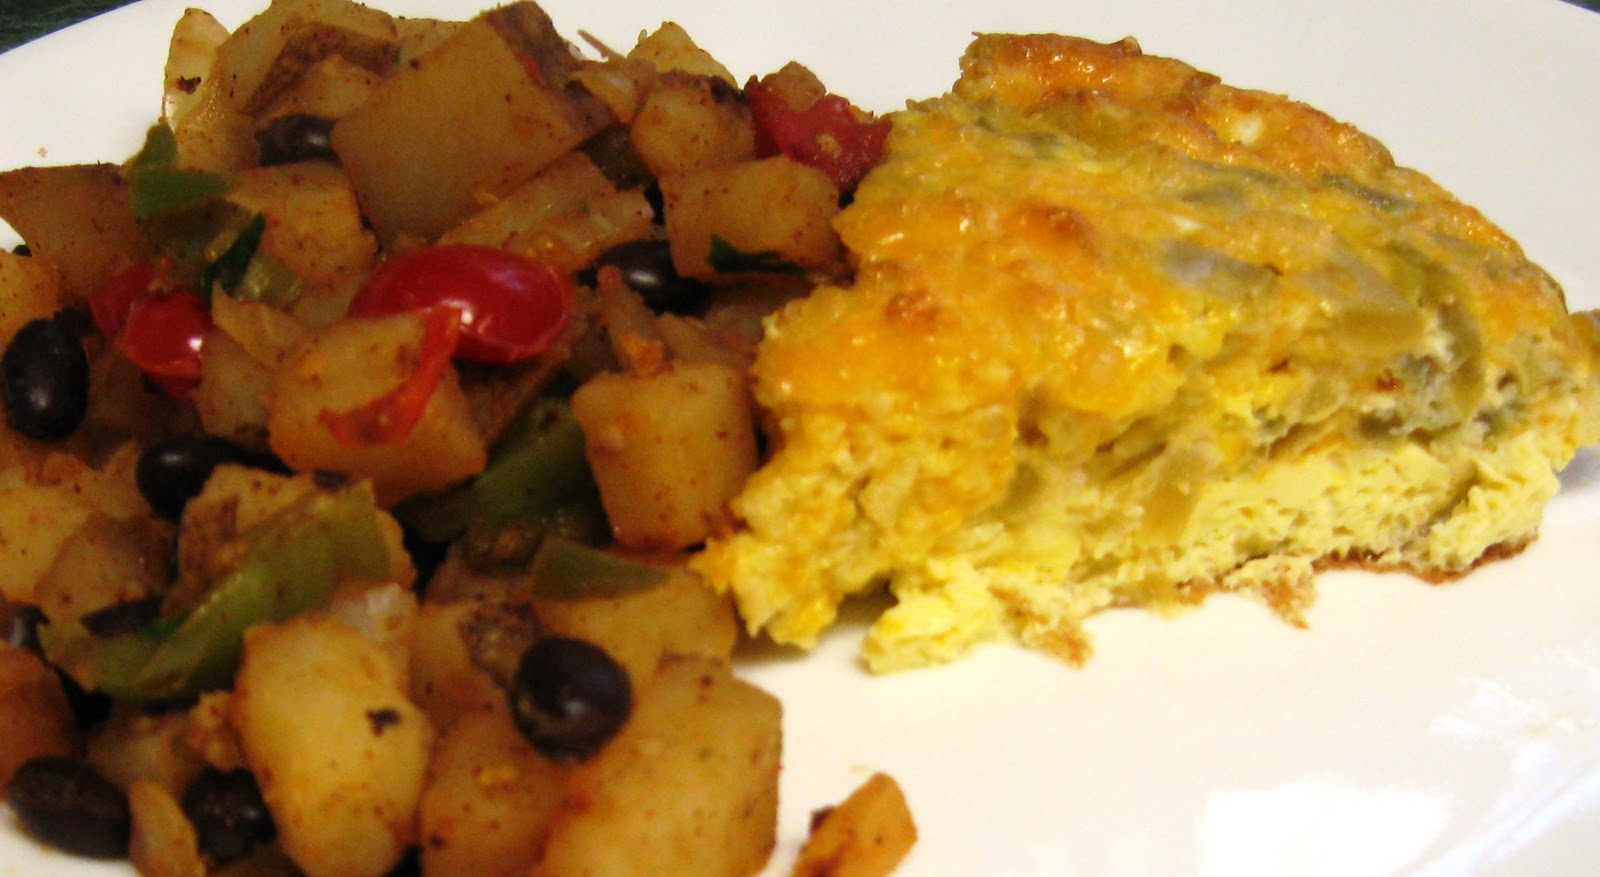
We ate this with an awesome southwestern hash that complemented the eggs beautifully. There was nothing spicy about this meal, just full of flavor. It was also very hearty and filling as well as incredibly healthy!
Green Chile Eggs Recipe
8 eggs
2 tablespoons milk
1 tablespoon all purpose flour
4 ounces cheddar cheese
2 (4 ounce) cans chopped green chiles
Preheat the oven to 375 degrees. Spray a 9 inch pie plate with cooking spray.
Whisk the eggs in a large bowl. Stir in the milk and flour, then mix in the green chilies and cheese. Pour into the prepared pie plate.
Bake in the oven until the center is set, about 35-40 minutes.
Total calories = 1089 calories
8 servings = 136 calories per serving
Green Chili Cheddar Eggs + Southwestern Hash = 311 calories
Check out more recipes on Debbi Does Dinner Healthy!
Check out more recipes on Debbi Does Dinner Healthy!
Try a New Recipe: Chewy Chocolate Gingerbread Cookies
 Try as I may, I just can’t think about December recipes without coming back to cookies. Holiday cookies are the best, and these cookies are our family’s all-time favorites. A classic Martha Stewart recipe, but worth Every Single Masochistic Step. Truthfully, they take some time but it’s not that bad, and you can divide it up and make them in stages if you need to.
Fresh ginger, molasses and high quality chocolate make these cookies spectacular. Please don’t even consider skipping the fresh ginger, or you’ll be sorry.
|
|
|||||||||||||||||||||||||||||||||||||||||||||||||||||||||
|
Chewy Chocolate Gingerbread Cookies
Makes 2 dozen
|
|||||||||||||||||||||||||||||||||||||||||||||||||||||||||
|
|||||||||||||||||||||||||||||||||||||||||||||||||||||||||

Don’t forget to visit me at The Bad Girl’s Kitchen for more fabulous recipes!
TWD
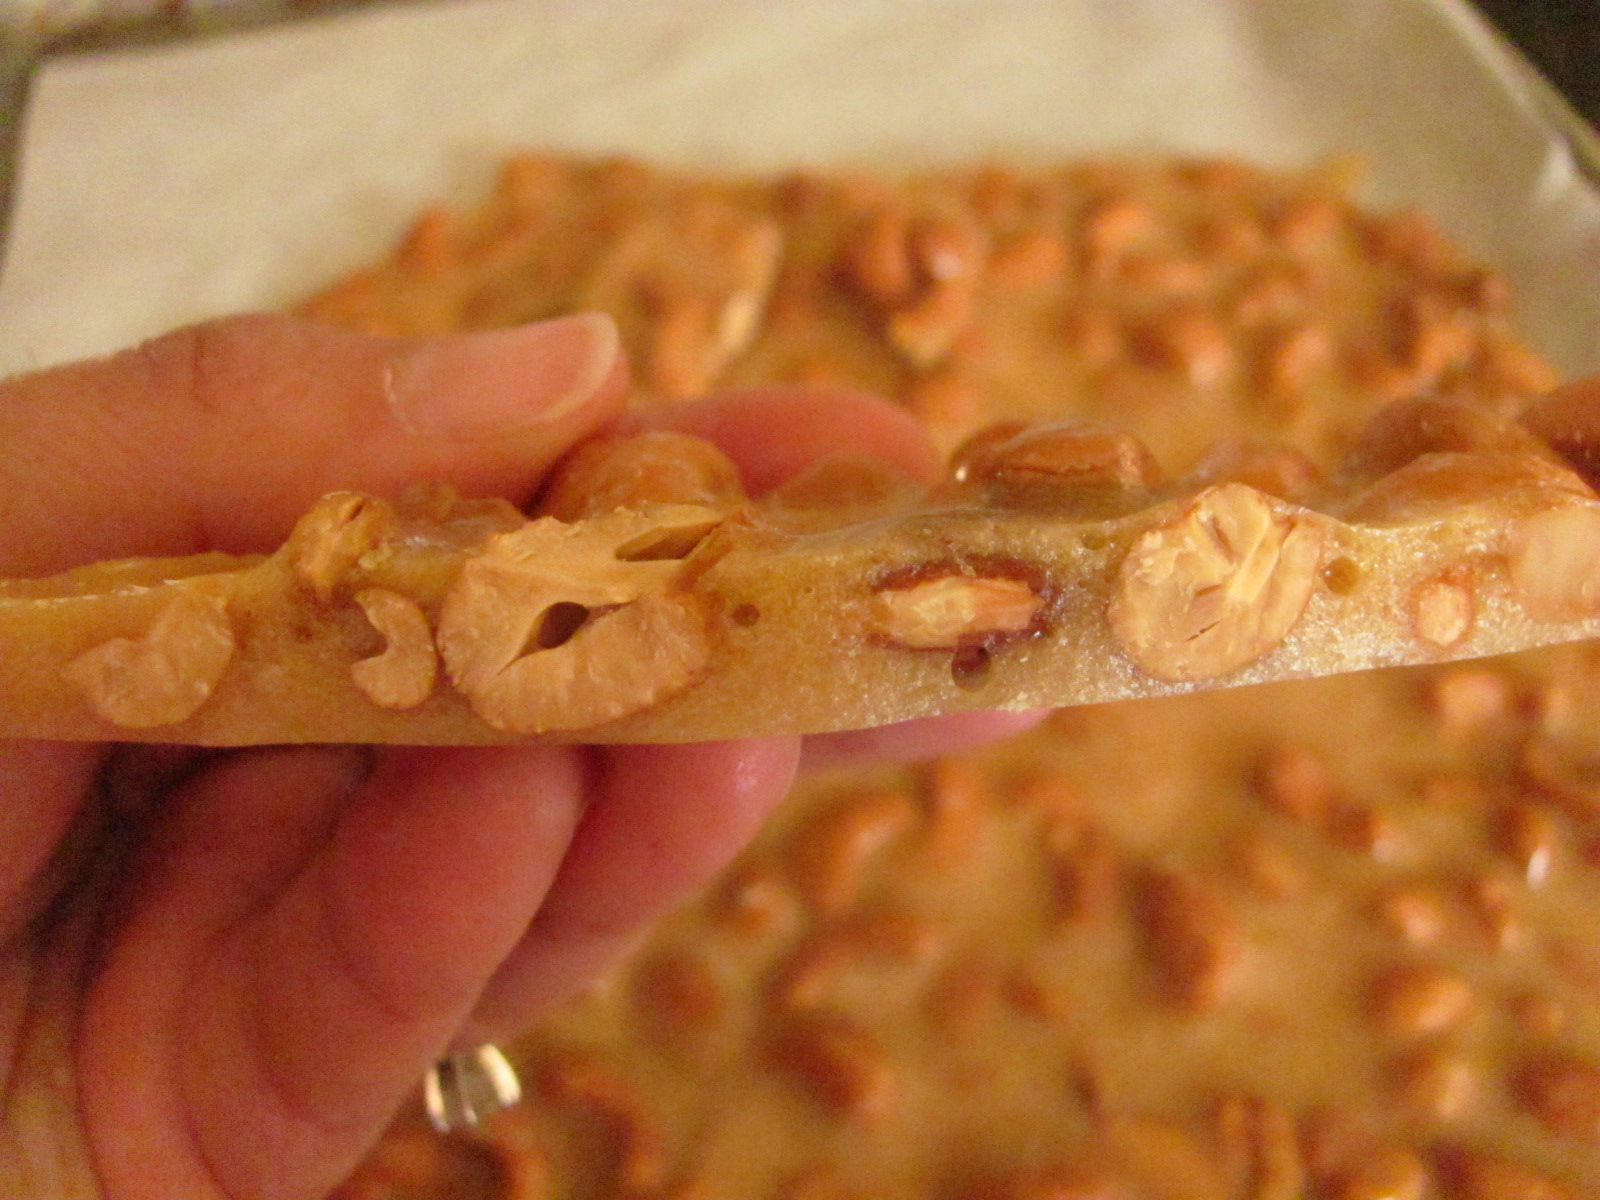
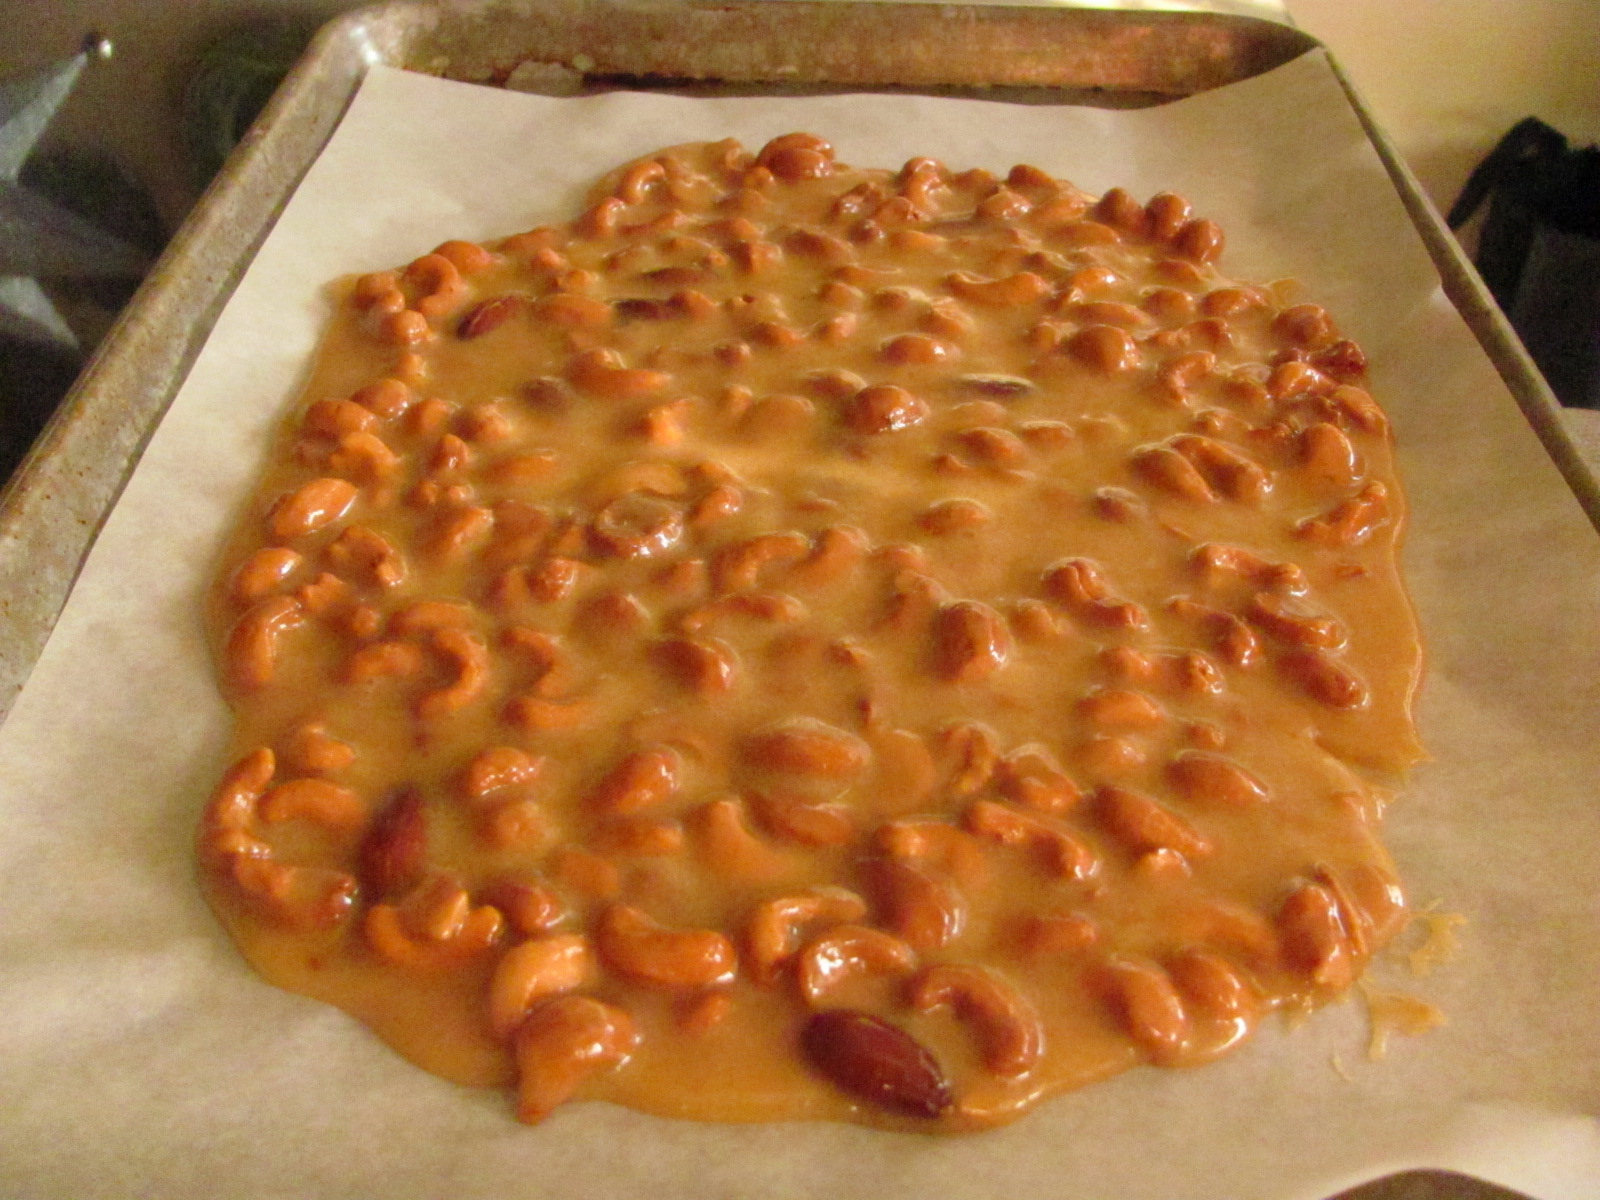
Save Room for Dessert…NUT BRITTLE

Everyone needs a quick, easy, and best of all, microwavable dessert in their repertoire. Today’s recipe gets high marks in all three categories. Additionally, it’s delicious! I’ve always been a fan of nut brittles. I just love the crunchiness and buttery flavor which results when sugar is cooked. However, I do know that cooking sugar on the stove top is very intimidating to many people, and rightfully so, as a burn from a molten drop of sugar is awful. But, today, we are using the microwave, and it couldn’t be easier. This is an adaptation of a Martha Stewart recipe. I’ve added a smidge more salt and vanilla, as well as increasing the microwave time by 30 seconds. Not huge changes, but the change in the outcome of the candy is significant. So, if you’re looking for a quick recipe that ships wells and is impressive, give this a whirl!
Nut Brittle Printable recipe
1 1/2 cups sugar
1/2 cup corn syrup
1 teaspoon salt
1 1/2 cups salted nuts (use your favorite combination, just make sure they are roasted & salted)
2 tablespoons unsalted butter, cut into pieces
1/4 teaspoon baking soda
2 teaspoons vanilla
Line a cookie sheet or large baking pan with parchment paper. Alternatively, you can also butter the baking pan.
Combine sugar, corn syrup, and salt in a 2 quart measure – be sure you use something with a handle. I used a Pyrex 2 quart measuring bowl.
Stir mixture until sugar is fully moistened.
Place in microwave, uncovered, and microwave on full power for 4 minutes (My microwave is 1100 watts)
Remove from microwave, add butter pieces stirring until butter melts.
Add nuts and stir to fully coat with sugar mixture.
Return to microwave, and cook on full-power for 5 minutes, 30 seconds.
Remove from microwave and stir in vanilla.
Add baking soda – mixture will foam up a bit.
Stir until well-mixed and pour onto prepared pan.
Allow to cool for 30 minutes before breaking into pieces.
Yield: 1 1/2 lbs
Do not double this recipe – make another batch.