I was having a conversation with my favorite homemaker friend Barbara about the dread I was having over the upcoming packing of my studio. I commented that my fabric stash for quilting alone was one of the worst parts because of the weight. The past couple of years have been all about this house so I haven’t gotten as much studio work done as originally intended. She mentioned how she’d love to learn to quilt but felt that it was too complicated to take on with her busy schedule. This got me thinking that I should do a post that would take the intimidation out of of learning to quilt.
I had always felt that way myself, intimidated that is to learn to quilt. I always wanted to learn but figured it took more time and effort than I had to give. I got my start quilting by accident and out of boredom one day. I wandered into a fabric store, Bolts in the Bathtub, and started browsing. The owner and her sister befriended me almost immediately and we began a wonderful friendship. They convinced me I needed something to fill my time and that it wasn’t as hard as I was making it out to be
Hubby’s unit had just been deployed to Yakima, Washington for training before being shipped to Iraq so I agreed to sign up for a class to fill a few evenings and get the quilt bug out of my system. I got lucky though, the bug didn’t leave my system, but it bit really hard instead and drew out the quilter blood in me. Quilting became like a medicinal leech. It made me feel whole again and well. I also got lucky that hubby stayed state side for the duration of his deployment, but it still left me with quite a bit of time to fill during his long days, weeks and TDYs. I went on to complete ten quilt tops during that eighteen months. All but one of which now live somewhere else.
My biggest tip for any beginner who may feel intimidated by the thought of learning to quilt is to start by taking a beginner class at a qualified fabric store and/or quilt guild, start small and pick an easy to do pattern for your first quilt.
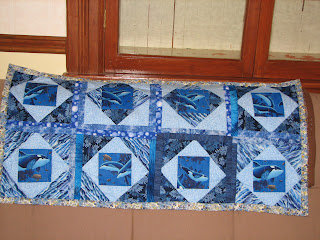
The whole process wasn’t as expensive as I thought it would be either. My beginner class ran about $30 plus fabric. During the duration of that class I learned and completed enough blocks of varying patterns for a small sampler quilt that I kept on my treadle sewing machine until recently and a sampler table runner. I had an awesome teacher too. If she didn’t know the answer to my question she would find out. She was also hands on and did quite a few tutorials. You were always welcome to drop in, bring your sewing machine and learn. The store became my home away from home. Ironically I have still yet to bind the table runner. The sampler now hangs in my foyer. Even with 2 dozen quilts completed I feel like a novice. There is always something new to learn about quilting which makes it a fun and rewarding hobby.
There are many internet sites out there offering free quilt patterns, but one of the easiest to use that I have found is free patterns.com.
There were a few tools to purchase such as a good rotary cutter, cutting mat, quilting ruler and quilting square. One of the most valuable tools I purchased was Harriet Hargrave’s Heirloom Machine Quilting. This book truly is a comprehensive reference guide to machine quilting. This book is full of easy to follow instruction and diagrams for doing the most complicated of tasks and doing them correctly. I keep it handy near my sewing machine and freely write notes in the margin.Dawna asked me help out at the quilt show that next summer. I had a blast. I visited all of the vendors at least twice and talked and listened to so many experienced quilters. I learned so much in that 2 days I felt like I should have been paying for a class. One of the coolest things I learned was using a kaleidoscope for choosing colors. What you do is put all the fabrics you are thinking of choosing into a stack (bolts work really well) then step back and use this little toy as a kaleidoscope. If any one fabric stands out, remove it and start again. Keep this up until you have the fabrics you need and they make a continuous kaleidoscope pattern where no one color or fabric stands out by itself.
Over the last several years I have acquired a HUGE fabric stash, but nothing compared to Dawna’s stash. The store, Bolts in the Bathtub was aptly named because she had such a HUGE stash of fabric that she actually stored the extra bolts in the spare bathroom’s bathtub.
These little Sterilite organizing boxes are perfect. I write the pattern name and recipients name on each box. I may not get them made right away, but I’m ready. The only thing not in each box is the batting and occasionally the backing. I also keep all my patterns in plastic sleeves and then I keep those alphabetically in a couple of large binders. That way they are always easy to find and never misplaced.
One of the greatest things I discovered when I learned to quilt is 108 inch backing materials. For most size quilts this eliminates having to piece your backing.
While organizing the studio I ran across duplicates of 2 super easy patterns and and picture quilt book of poems. In order to be entered to win one of these just leave me a comment on this post. I’ll be giving away the book, Winter Lights ~ A Season in Poems & Quilts by Anna Grossnickle Hines, the pattern, Tree farm by Thimbleberries and the pattern Allegro by Atkinson Design. I’ll leave this giveaway open until March 21st to celebrate National quilt day, the 3rd Saturday in March.These are some of the quilts I have either just finished or am working on.


Now just for your reading pleasure also is the Elm Creek Quilt series by Jennifer Chiaverini. These are warm and refreshing novels. I have read the entire series. The series does not have to be read in order, but I recommend it for a more pleasurable experience. I learned quite a bit just from these books about the rich history of quilting and patterns. This is an outstanding series of novels that allows us to explore human relationships on so many levels of depth.


