STRAWBERRY PINEAPPLE BANANA BREAD
1 cup packed brown sugar
1 cup butter, DIVIDED
2 JUMBO eggs
1 tablespoon QUALITY cinnamon
1/4 cup coconut flavored rum
1/2 cup golden raisins
8 ounces crushed pineapple, drained WELL
1 cup rustic chopped strawberries
2 LARGE, RIPE bananas
1/2 cup crushed walnuts (optional)
1/4 cup sugar
2 1/4 cups AP flour
1 1/2 teaspoons baking powder
1/2 teaspoon baking soda
- Place the raisins in a small bowl and cover with rum. Set aside to soak for 10 minutes and then drain WELL.
- Combine 1 stick of the butter, brown sugar and bananas in a sauce pan cooking until smooth and sugar is dissolved.
- Fold in strawberries, pineapple, nuts and raisins.
- Stir until well coated & set aside to cool.
- Cream softened butter, sugar and eggs until fluffy.
- Sift together flour, baking powder, baking soda and cinnamon.
- Add this to the creamed mixture gradually until well blended.
- Add cooled banana mixture.
- Pour into greased and floured pan(s)*
- Bake at 350° for 45+ minutes.
*NOTE:* This recipe will make 2 large loaves or 1-2 snack cakes or 18 muffins…
FROSTING (optional) – use this if you want to turn it into a snack cake.
8 ounces cream cheese, softened
1/4 cup butter, softened
Juice of 1 SMALL lemon
1 teaspoons PURE vanilla extract
1 1/2 cups powdered sugar
- In a medium bowl beat cream cheese and butter until smooth.
- Add lemon juice and vanilla. Beat until blended.
- Add powdered sugar gradually until well blended and smooth.
- Frost snack cake.
- Refrigerate 1 hour to set icing before serving.
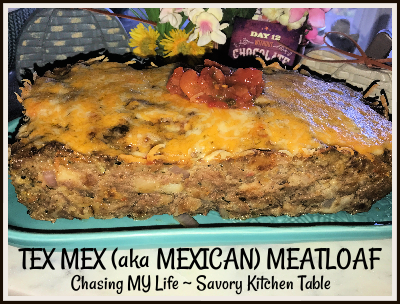
 TEX MEX aka MEXICAN MEATLOAF