Chocolate Chip Cookie Dough Cheesecake Bars: Lovin’ From the Oven

Sometimes, I visit blogs just to read the introduction to the recipe.  Some authors are so witty and clever.  They share little snipets of their lives or teach something interesting about the recipe they are posting.  It’s all incredibly entertaining.  Me, well, I am a Harried Homemaker; literally.  I realized at 6pm on Thursday that I didn’t have this post anywhere near ready.  In fact, I didn’t have a post.  Panicking, I grabbed some cooking magazines that I have been meaning to read and poured over them, hoping inspiration would strike.  I weighed the options and then scrambled out to the kitchen to start baking.  I assembled all of my ingredients,  substituted a few things, and whipped up these amazing bars.  Oh!  the aroma that filled my kitchen as they baked.  Chocolate; cheesecake; buttery yumminess.  These would make a great Valentine’s treat, especially if they were baked in a heart-shaped pan. 

Chocolate Chip Cookie Dough Cheesecake Bars:  (adapted from July 2006 Cooking Pleasures)
crust
1 1/2 graham cracker crumbs (I used Chips Ahoy cookie crumbs)
5 Tbsp butter, melted
filling
10 ounces cream cheese
1/4 cup sugar
1 egg
1 tsp vanilla
dough
1/2 stick butter
1/4 cup brown sugar
3 Tbsp sugar
1/8 tsp salt
1 tsp vanilla
1/2 cup flour
3/4 cup chocolate chips
topping
2 Tbls chocolate chips, melted
Preheat your oven to 350 degrees.  Combine the crumbs (whichever you choose to use) and melted butter press it into the bottom of a greased 9X9 pan.  Bake 6 minutes.  Remove the pan from the oven and turn it down to 325 degrees. 
With a mixer, combine the cream cheese and sugar.  Add the egg and vanilla.  Scrape it all down and mix one little bit more and pour it onto the crust.
In the same mixing bowl that you used for the filling, cream the butter and sugars.  Add the salt and vanilla.  Add the flour.  Stir in the chips.  (I used my hands to mush the chips into the buttery dough).  Drop the dough over the filling with a spoon (or your hands…).  Bake for 30 minutes or until set if you jiggle it a bit. 
With a fork, lightly drizzle the melted chocolate chips over and around the top in a quasi-decorative manner. (Having 4 sons has almost completely ruined me for any kind of fanciness; my poor daughter).

Let these cool completely before serving and keep them in the fridge until they are gone….that might not be too long if your family is anything like mine!

SOUR CREAM DUTCH APPLE PIE

I love apples – all apples. There I said it. Who can resist a slice of hot apple pie? Hubby want dutch apple, FIL wanted a turnover and I just wanted apples. So I dug into my files and found 3 recipes from grams, a vintage magazine and an old friend. I had never made any of these. Mainly because alone they weren’t all that interesting. They needed some UMPF! so I combined the parts I liked best from all three and came up with my version of Sour Cream Dutch Apple Pie. Together they were awesome.


SOUR CREAM DUTCH APPLE PIE
PIE
3+ cups apples, cored, peeled and chopped
lemon juice
3/4 cup sugar
2 tablespoons flour
pinch of salt
1 tablespoon cinnamon
1/2 teaspoon vanilla extract
1/2 teaspoon maple extract
1 small egg, beaten
1/2 cup sour cream (not light)
9 inch pastry shell, pre-baked and cooled
TOPPING
1/3 cup flour
1/3 cup dark brown sugar
1 teaspoon cinnamon
4 tablespoons butter, sliced extremely thin

  • Preheat oven to 350 degrees
  • Chop the apples and combine with just enough lemon juice to coat and prevent browning in large bowl.
  • In a small bowl sift together the flour, sugar, cinnamon and salt.
  • Fold in the sour cream, egg, vanilla and maple extract until well blended.
  • Fold the sour cream mixture into the apples until well coated.
  • Carefully pour into the pie shell, mounding towards the center.
  • Toss together the topping ingredients until well blended.
  • Sprinkle topping evenly over the apple mound.
  • Lay the pieces of butter all over the top.
  • Bake 30 minutes or until apples are tender.
  • Best served with ice cream or fresh whipped cream. If you want to be really decadent try it with Caramel Sauce.

DECADENT CHOCOLATE BROWNIES

DECADENT CHOCOLATE BROWNIES (make 4 ramekins)
2 Tablespoons butter + 1 Tablespoon butter
1 ounce Baker’s Bittersweet Chocolate
1 ounce Baker’s Semi-Sweet Chocolate
1 1/4 ounce Baker’s sweet German chocolate
1 Tablespoon + 1 teaspoon flour
1/8 scant teaspoon baking powder
1/8 scant teaspoon salt
1 egg
1/4 cup sugar

  • Melt 2 tablespoons butter in microwave safe ramekin for 30 seconds, add the bittersweet & semi-sweet chocolate and microwave in 30 second increments until you can stir it smooth.
  • Set aside to cool slightly.
  • Sift together the flour, salt and baking powder.
  • Mix together the egg and sugar and beat on high with a hand mixer until slightly thick and turns a dull yellow.
  • Lower speed and add chocolate mixture to egg mixture.
  • By hand stir in the flour mixture until consistent in color.
  • Spoon into ramekins and bake on cookie sheet for 25 minutes or until centers are set.
  • Just after you put these in, prepare the topping.
  • Melt the other tablespoon of butter and then add the German sweet chocolate and melt until you can stir smooth.
  • Just after the brownies come out of the oven, pour the topping over.

Homemade Chocolate Covered Cherries

I wanted to make something special to take to my nieces house for Superbowl Sunday so thought I’d try Chocolate Covered Cherries. I found the recipe in an old Taste of Home magazine. This recipe is sooooooooooooooooo simple, but messy! Have fun making them. They are quite rich though – be forewarned!

1 cup butter, melted
1 can sweetened condensed milk
3 pounds confectioners sugar (about 8 cups)
3-10 ounce jars maraschino cherries(about 120 cherries), really well drained
1-2 pounds milk chocolate candy coating, chopped (I used almond bark)

  • Combine butter and milk until smooth.
  • Gradually add in confectioner’s sugar until a soft dough forms.
  • Roll into 1 inch balls and flatten into 2 inch circles.
  • Place a cherry in the center of each one.
  • Wrap sides around cherry until cherry is completely covered and roll into a smooth ball.
  • Melt chocolate until smooth and dip each ball into the chocolate.
  • Place on wax paper until cool and sprinkle with sprinkles.
  • Cool well.

BREAD – And YOU can make That Loaf ala Year on the Grill

Greetings! Here’s another YOU Can Cook That post when it should be I can Cook that. BTW, hi again, Dave here from MY YEAR ON THE GRILL. The resident cook in training. Today, I am addressing only one blogger out there (but I suspect there are other bloggers who have not baked a loaf of bread on their own). So this post is directed at Lea Ann of MANGOS CHILI and Z. However it is dedicated to all those “want to be” bread bakers out there.

Now, on my own site, I joke that I am a master baker. Truth is, I have about a dozen loafs of bread under my belt, several trays of rolls and I regularly make hamburger buns, but I am far from a master baker. But, as I have said before, whenever I tackle a project, I do a great deal of research. So what I lack in actual experience, I make up for in book learnin’. I think I can help Lea Ann with her bread baking issues.

Her first issue is that her loafs were chunk hard. In her words, a brick.

You see, she recently was gifted a Kitchenaid mixer. WHOO WHOO! what a great gift! HOWEVER, it has a flaw. The flaw is that Lea Ann believed it’s hype. While it is great for mixing, and with the “dough hook”, it advertises itself as doing the kneading for you; in my opinion, I am going to guess that the kitchenaid over kneaded the dough. Too much kneading will cause the bread to be too hard. So, one suggestion, let the dough mix in the kitchenaid, but do the kneading by hand.

Next, she suggests that the dough does not rise.

OK, a couple of solutions. First, are you premixing the yeast in water. Just a little so that it is dissolved does the trick. And, if you are (as you should), be sure that the water is only luke warm. Just a shade above skin temperature, but not uncomfortably warm. Pee warm if you will (but don’t ask me how I know how warm pee is). If the water is too warm, the yeast will die and nothing will rise. Book says about 105 degrees, but no more than 110.

But yeast dough does rise best in a warm area. I keep the heat turned down in the house while my wife is away at her inconvenient day job. So, I need to find the warmest spot in the house to set my dough in while it is rising. Especially on cold days, I like to preheat my oven while my bread rises, and I set the rising dough on top of the stove. With the dough covered, this is by far the warmest spot, and I always get a great rise out of the dough. OR, you can just let the dough rise longer. Dough will rise in a refrigerator if you leave it long enough. Just because the recipe says to let it rise an hour does not mean it will hurt to let it rise three hours.

Another suggestion for Lea Ann is to do a second rise. That is, to do the initial rise, take the dough and hit it hard with a fist. the dough will partially collapse again. then, form the dough into the final product (a dome, a loaf or rope… or whatever). Place the dough on the baking surface, and return to that warm spot and allow to rise again. This second rise will be the one that adds bubbles and tenderness inside the loaf (making it soft).

And finally, to get a more crisp crust, that seals in moisture, take a cup of ice and dump that into the bottom of your stove as the bread is baking (at the beginning of the bake only). The steam will help to seal the crust faster and keep the moisture inside the loaf.

OK, as I promised Lea Ann, I have a wonderful no fail recipe for bread. When hunting for a “standard” bread recipe, I asked for a bit of advice from my favorite blog buddy, Mary from ONE PERFECT BITE. I was a bit surprised when she explained that she does not have a recipe of her own, but uses one from another blogger. Surprised until I found the site of said blogger. These are the famous Moomie’s Buns (I dream of having someone name buns after me one day, but I digress). If you google “Moomie Buns”, you will find about 212,000 links. I initially blogged this on my own site when I made Hamburger buns. Now that I am posting here, you can count at least 212,002. Click HERE to get to my post on hamburger buns.


So, Here’s my Moomie recipe…
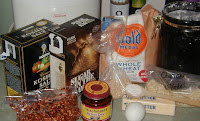
� 1 c water
� 2 tbsp butter or margarine

� 1 egg

� 3 1/4 c. flour

� 1/4 c. sugar

� 1 tsp salt

� 3 tsp instant yeast

� Place all ingredients in your bread machine. Select dough. Allow to run cycle.

Now, I have heard that Lea Ann does not have a bread machine. when I learned that, I had already made my loafs for this post. But, it is easy to do what a bread machine does on the “dough cycle”. Just add all the ingredients together in you kitchenaid bowl. Mix until it just forms a ball. Do not over mix.

Then, knead the dough into a ball shape, coat with a bit of oil and allow to rise for at least an hour, until it has doubled in size.

Punch the ball and allow it to collapse a bit (this is all a bread machine does on “dough cycle”).
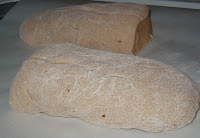
� Dump out onto lightly floured surface. form into bread shape, or cut and form into bun shape. Place on greased cookie sheets or your bun pans, cover; rise about 30 to 40 minutes. Bake in preheated 375 degree oven for 12 to 15 minutes til golden. Cool on wire racks.
I cut them into two loaf size, a little on the flat size, I was going to make Cajun Po’Boy sandwiches, so wanted that size.

OK, in the spirit of the original recipe, i made a few additions…
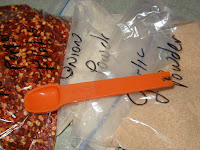
I added…

1 teaspoon of Garlic Powder
1 teaspoon of onion powder
and for an extra kick,
1/2 teaspoon of red pepper flakes!

This recipe is wonderfully adaptable. Add fresh herbs, a little cheese or what have you, and it should work fine. I never make the same loaf twice.
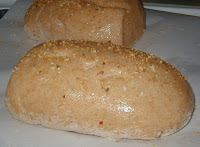
I also brushed the bread with some melted butter prior to baking and sprinkled some onion and garlic flakes on top of the loafs.

I bake bread on a cookie sheet, on parchment paper. Works great for me.
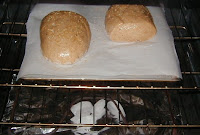
I wanted to include a picture of the ice cubes in the bottom of my oven as the bread was first going into the preheated oven.

It sounds so odd, but it does work to have some steam in the oven.
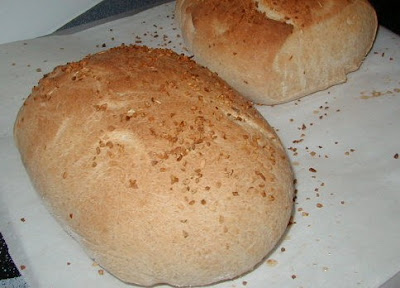
Lea Ann… You can do this, this recipe, this process has never failed me. There is something primal in making your own bread, knowing what you want to do with it and shaping it accordingly. Once you have some success, you will go crazy as a baker. ALMOST as satisfying as cooking over live fire… but just almost.


And look what I CAN COOK…

Shrimp Po’Boys, and plantain fries…

Come take a look at my site today for the Plantain recipe. and I will post the Po’Boy recipe tomorrow on my site…

See you all next Thursday!

Dave here from MY YEAR ON THE GRILL.

And if anyone else has any suggestions for Lea Ann, drop her a comment here!

CHOCOLATE PINEAPPLE CREAM CHEESE PASTRIES

CHOCOLATE PINEAPPLE CREAM CHEESE PASTRIES
1 package Puff Pastry Sheets (2 sheets)
1/2 cup milk chocolate chips
1 egg, beaten
4 ounces Philadelphia cream cheese, softened
1/2 cup sugar
1-8 ounce can crushed pineapple, well drained
2 tablespoons butter
1 cup confectioners’ sugar
2 tablespoons hot water

  • Thaw the pastry sheets at room temperature until they’re easy to handle (about 45 minutes).
  • Pre-heat the oven to 375°.
  • Line baking sheet with silicone mat or parchment paper.
  • Beat together the softened cream cheese, sugar and pineapple.
  • Unfold pastry sheet on a lightly floured surface. Roll the pastry sheet into a 10-inch square. Cut the pastry sheet into 4 (5-inch) squares. Repeat with the remaining pastry sheet.
  • Spread 1 tablespoon of cream cheese mixture in the center of each pastry square.
  • Sprinkle 1 tablespoon of chocolate chips on top of cream cheese mixture.
  • Brush the edges of the pastry squares with the egg.
  • Fold each pastry in half over the cream cheese mixture and chocolate chips and press the edges to seal.
  • Place the filled pastries onto the baking sheets.
  • Brush the tops of the pastries with the egg.
  • Bake for 15-20 minutes or until the pastries are golden. Let cool on the baking sheets for 2 minutes. Remove the pastries to a wire rack and let cool.
  • Place the remaining chocolate chips and the butter into a small microwave-safe bowl. Microwave on HIGH for 30 seconds or until the chocolate is starting to melt. Stir until the chocolate mixture is smooth. Stir in the confectioners’ sugar. Stir in the water, adding additional water, if necessary, until the icing is the desired consistency.
  • Drizzle the icing over the pastries.

Strawberry cream pie recipe; Surprise your Valentine

Here’s one very tasty strawberry cream pie recipe from my Joy of Desserts archives. It’s a great dessert to surprise your Sweet Valentine — notice how the strawberries are hulled into a heart shape — or you could bake this pie in a heart-shaped plate, too.

It’s quite easy with a store bought pie crust and a basket of strawberries. All you’ll have to prepare is the custard, but if you want to cut corners there too, you could always just replace it with store bought pudding.

Another variation would be to prepare in small tartelette molds. You’ll love this recipe so much, you’ll want to enjoy it all during strawberry season.

STRAWBERRY CREAM PIE

4 Egg yolk
1/4 Cup Sugar
1 Pinch of salt
1 Tablespoon of natural flavoring

such as vanilla, lemon, rum, or
Grand Marnier

1 Prebaked pie or tart shell
1 Basket of strawberries

Gently beat the yolks, add sugar and salt. Slowly bring to almost a boil while stirring. DO NOT BOIL or it will curdle. Add flavoring and let cool.

While you are waiting for the custard to cool, wash and cut your strawberries in halves. Gently stir in a few teaspoons of sugar to macerate (marinate for fruits). When cool, add the custard to your favorite pre-baked pastry shell. Line the macerated strawberries all around on top of the custard, covering it completely. Pour all sugar syrup over the top.

Voila! Simple as Strawberry Pie!

Joy of Desserts

The new Inlinkz system is located HERE for you to add your weekly links. We look forward to your recipes.

PEANUT BUTTER FUDGE DROPS


PEANUT BUTTER FUDGE DROPS

2/3 cup Hot water
10 ounces Land of Lakes cocoa mix
2 cups JIF creamy peanut butter
1/2 cup light corn syrup
3 cups C&H powdered sugar, divided 2cups + 1 cup
2 cups crushed vanilla wafers
2 cups crushed ginger snaps
72 Hershey Kisses (I like the cherry cordials)

  • Whisk together the hot water and cocoa mix until smooth.
  • Add peanut butter and corn syrup. Blend until smooth.
  • Add 2 cups powdered sugar and stir until well blended.
  • Stir in cookie crumbs until well blended.
  • Spray wax paper with PURE (these will be sticky so don’t forget this step).
  • Drop heaping teaspoonfuls of dough onto the wax paper.
  • Place the remaining 1 cup of powdered sugar in a shallow bowl.
  • Roll each piece of dough into a ball and dredge in powdered sugar.
  • Press your thumb into the center and fill with a Hershey’s kiss.

CHOCOLATE OATMEAL PEANUT BUTTER BLUEBERRY BARS

CHOCOLATE OATMEAL PEANUT BUTTER BLUEBERRY BARS


CHOCOLATE OATMEAL PEANUT BUTTER BLUEBERRY BARS
2 sticks unsalted butter, softened
1 1/4 cup flour
1 teaspoon baking flour
1 teaspoon salt + pinch salt
1 teaspoon cinnamon
2 cups packed dark brown sugar
2 JUMBO eggs
3 cups old fashion oats
1 1/2 + 3/4 teaspoon vanilla
2/3 + 1/2 cup honey roasted peanuts
1 /2 cup golden raisins
1/2 cup raisins
1 cup dried blueberries
1 can sweetened condensed milk
2 tablespoons peanut butter
12 ounces semi-sweet chocolate chips

  • Preheat oven to 350 degrees.
  • Sift together the flour, soda, teaspoon of salt and cinnamon.
  • In a large mixing bowl, cream the butter.
  • Add the brown sugar and blend well.
  • Add eggs, one at a time, blending well after each one.
  • Add vanilla and blend until light & fluffy.
  • Add flour mixture and blend until smooth.
  • Gently mix in oatmeal and 2/3 cup peanuts.
  • Set aside 2 cups of mixture.
  • Press the remaining mixture into the bottom of a 9×13 well greased baking dish.
  • Scatter the blueberries randomly over the top of the oatmeal mixture.
  • In a double boiler mix together the sweetened condensed milk, peanut butter and chocolate chips until melted and well blended.
  • Stir in vanilla, raisins and remaining peanuts.
  • Spread over the oatmeal layer.
  • Working in small amounts flatten oat oatmeal dough and top chocolate mixture.
  • With well greased fingers press gently on the top oatmeal dough to spread it out evenly over the chocolate layer.
  • Bake 30 minutes.
  • Cool completely before cutting.

On a personal note I would like to point out SnoWhite from Finding Joy in My Kitchen. She has 32 different and yummy oatmeal recipes for you to choose from. Head on over and check out her impressive list of oatmeal recipes. I made the oatmeal waffles this morning myself and was very surprised by them. They were really yummy!

OATMEAL ROUNDUP!!

By strange coincidence, January is National Oatmeal month. Cross my heart, I didn’t know when I chose oatmeal as our mystery ingredient challenge. It just seemed like a good thing for the cold Januaries that many of us are experiencing.
I have an Oatmeal Sandwich Bread over at my blog today. For here, I thought I’d post a mock pecan pie made with no nuts and lots of oatmeal. It’s frugal, easy peasy and for anyone allergic to nuts, they can appreciate an almost pecan pie.
Oatmeal Pie (mock pecan):
2/3 c. uncooked oatmeal (quick)

2/3 c. sugar
2/3 c. dark Karo syrup
1 stick butter (melted)
2 eggs (beaten)
1 tsp. vanilla
1 pie shell
Mix all ingredients and pour into uncooked pie shell. Bake at 350 degrees for 45 minutes.

For all of your information, this Friday feature is changing its name and will be henceforth known as “Lovin’ from the Oven.”

Now for the important part, what wonderful oatmeal dishes do you have to share?

Get ready for Valentine’s Day with classic Mousse au Chocolat recipe

Today, I’m sharing another recipe from my Joy of Desserts archives. It’s Julia Child’s Mousse au Chocolat or Chocolate Mousse. It’s all over the Internet, including on well-respected sites, likely a recipe used by the publisher for press releases and other promotions, so I’m saving you the Google search. 😉

Even David Lebovitz who lives that sweet life in Paris says “her recipe is a classic….”

Chocolate mousse is a perfect dessert for anytime of the year, and it can be so easily adapted to any occasion such as adding heart sprinkles on top, or serving in heart shaped ramekins for Valentine’s Day. When Spring comes along, switch the decoration to sugar daisies or pastel sugar glitter. It’s just that easy.

Share your own delicious dessert recipes below. It’s time to Save Room for DESSERT!

Bon appetit,

Joy of Desserts


Julia Child’s Classic Chocolate Mousse

8 oz sweet or semi sweet baking chocolate, melted with
1/4 cup strong coffee
3 oz unsalted butter (6 Tb)
3 egg yolks
1 cup heavy cream (make sure it’s the heavy variety)
3 egg whites
1/4 cup instant (finely ground) sugar
whipped cream (not so optional)

Beat the soft butter into the smoothly melted chocolate. One by one, beat in the egg yolks.
Beat the cream over ice until it leaves light traces on the surface.
Beat the egg whites until they form soft peaks. While beating, sprinkle in the sugar by spoonfuls and continue beating until stiff shining peaks are formed.
Scrape the chocolate mixture down the side of the egg-white bowl, and delicately fold in the whipped cream.
Turn the mousse into attractive serving bowls. Cover and chill several hours. You may wish to decorate the mousse with swirls of whipped cream, or to pass whipped cream separately.

From: The Way to Cook by Julia Child
Publisher: Alfred A. Knopf, Inc.
ISBN: 0-394-53264-3

Pick your favorite badge!

Pina Colada Bread Pudding ala My Year on the Grill

Hello foodies! Pina Colada Bread Pudding… It just sounds rich and decadent doesn’t it!

Oh, BTW, Dave here from MY YEAR ON THE GRILL. The resident cook in training that you may recognize from OUR KRAZY KITCHEN. Today is an exciting day for me, and Tamy has agreed to let me do a guest spot on her blog in honor of my special day. You see, the suburbs of Kansas City is hip and happening in a far out way, last night, my neighborhood celebrated “Mardi Gras in the Cul de Sac”! Counting drinks, 13 menu items, to feed 10 people… Laissez les bons temps rouler indeed! I got to spend the day cooking, have fun with my friends, and my proposal to take part in the 24,24,24 FOODBUZZ challenge was accepted. I want to thank Tamy for letting me make an extra post to her readers to tell you all about an amazing CAJUN inspired dessert, perfect for your Mardi Gras party, or if the gods are in alignment, perfect for your Superbowl party featuring the New Orleans SAINTS (as I write this, the Saints are one game away from a birth in the big game)!

I have been in love with all things Cajun, and the food of New Orleans for a very long time. This year, my wife and I vacationed in New Orleans, and we took full advantage of an amazing business there…

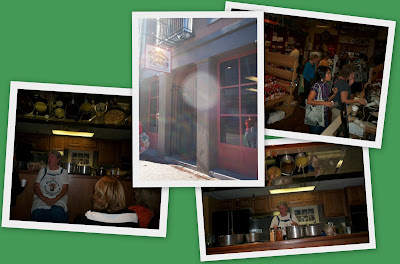
THE NEW ORLEANS SCHOOL OF COOKING is the best bargain in town. For three hours, you learn the history of the city, you get fed lunch and you learn to cook a complete three course Cajun/Creole meal. We were in town for 5 days, and we took three classes, each day learning different menus. Every one’s favorite was bread pudding.

At the school, we were given a basic bread pudding recipe. We were also given some suggestions about what you could add to make it your own…

Here’s what I did.

First, assemble your ingredients…

This took just a bit of advance planning. Stale bread works best for bread pudding. the more moisture in the bread, the less it is able to absorb the liquid ingredients. The more the bread absorbs the liquid, the more custard like your pudding will be. So, 4 days ago, I baked a loaf of french bread, just so I could leave it out to get stale. You can read about my bread baking experience by clicking HERE.

The ingredients you need are…

  • 1 loaf stale french bread, shredded (6-8 cups)
  • 4 cups buttermilk
  • 2 cups sugar
  • 1 stick (8 TBS) butter
  • 4 eggs
  • 2 TSP vanilla
  • 1 cup shredded coconut
  • 1 can crushed pineapple, drained
  • 1 cup whole pecans
  • 1 cup white chocolate chips

Combine all the ingredients in a greased 9X12 casserole dish. Mixture should be very moist, but not soupy.

Bake at 350 degree oven for @1 hour 15 minutes until top is golden brown. Serve warm with whiskey sauce.

WHISKEY SAUCE
(can be made “virgin” by leaving out the whiskey)


Ingredients:

  • 8 TBS butter (one stick
  • 1 1/2 cup powdered sugar
  • 2 egg yolks
  • 1/2 cup bourbon

Cream butter and sugar over medium heat til all the butter is absorbed. Remove from heat and blend in egg yolk. Add bourbon to your taste, stirring constantly. The sauce will thicken as it cools.

Pour this over the bread pudding and serve everything warm.

If you should be lucky enough to have any leftovers, pop a slice into the microwave for about 30 seconds and it is even better the next day!


We also served a Cream Cheese King Cake for the party, but that’s a story for another posting.

The cake was just as good as it sounds. Sweet, filled with custard and different textures, from the crusty bread on the top, the soft custard bread inside and the crunchy pecans, with hints of pineapple, coconut and white chocolate in every bite. And the whiskey sauce doesn’t hurt either!

So, thanks Tamy for letting me hangout with your friends today. Start planning your Superbowl party or Mardi Gras event today. This Pudding Cake will be welcome at either!

BTW, if you would like to learn more about the NO School of Cooking, you can read my blog post about the school by clicking HERE.

Come take a look at my site today. I will have plenty to post about all the different foods… Everything that worked great (and maybe a couple that I need to revisit later). And see you all Thursday over at OUR KRAZY KITCHEN!

Dave here from MY YEAR ON THE GRILL. ..

aprons 3