Carne Asada ~

Guess Who’s Coming to Dinner is being hosted by Dave from My Year at the Grill over at OuR KraZy KiTcHeN today. Head on over and see what he has going on.

According to Wikipedia Carne asada is a roasted beef dish, literally meaning “roasted meat”[1][2]. The dish mainly consists of pieces or thin cuts of beef (e.g. flank steak, skirt steak), sometimes marinated, sometimes lightly salted or rubbed with salt, pepper and/or spices, and then grilled. It can be eaten alone, with side dishes, chopped and eaten as tacos, or chopped and used as filler for tortas, burritos, etc. It is commonly accompanied with guacamole, salsa, beans, and grilled scallions and tortillas.

The dish is commonly prepared in the northern parts of Mexico (in the states of Baja California, Baja California Sur, Coahuila, Sonora, Sinaloa, Chihuahua, Nuevo León, and Tamaulipas) as well as in the American Southwest (especially Texas and New Mexico). It can be found as the main ingredient in tacos, tortas, burritos and fajitas, or is simply served as a stand-alone. It is sold at Mexican meat markets called “carnicerias” in the American Southwest; especially those states with Mexican/Mexican-American enclaves.

When purchasing carne asada from meat markets, consumers have two options available to them regarding the amount of preparation the steak has undergone pre-purchase: preparada, marinated meat as described above, serving as a time-saver for the home cook but typically at higher cost; and no preparada, unprepared meat, allowing for a home cook to create one’s own marinade. I buy unprepared meat and doctor my own.

All my pictures are before as we’re having it for dinner tonight. I’ll add an after picture later.


What you have left after the marinating.

CARNE ASADA
2-3 pounds flank or skirt steak, sliced THIN
1 medium Vidalia onion, sliced thin
2 lemons, 1 sliced thin, 1 wedged for squeezing
1 lime, sliced thin
1 orange, sliced thin
1/3 cup champagne vinegar
2 teaspoons minced garlic, jar
1 teaspoon salt
1 teaspoon FRESH ground black pepper
1 teaspoon ground white pepper
1 teaspoon garlic powder
1 teaspoon chili powder
1 teaspoon dried oregano
1 teaspoon ground cumin
1 teaspoon Hungarian paprika

  • Soak the meat in the vinegar for an hour or so.
  • Remove meat from vinegar and dry on paper towels.
  • Sift together all the seasonings and rub into the meat on both sides.
  • Layer the meat into a container alternating with the slices of lemon, limes, oranges and onions squeezing lemon juice on each layer as you go.
  • Let marinate for overnight or a day or so.
  • Grill on a VERY hot grill to desired doneness.
  • Serve with warm tortillas, Fresh Guacamole and Garden Tomato Salsa.

wildatheart

Guess Who’s Coming to Dinner – MY YEAR ON THE GRILL with a Vegetable and Cheese GALETTE with Balsamic Vinegar

WHAT AN HONOR, to be invited to be a guest blogger on this wonderful site! I was only introduced to this site last week when Chris from NIBBLE ME THIS hosted the first “Guess Who’s Coming to Dinner” guest post, and I have really enjoyed everything about it. I love the idea of blogging to begin with, but to have such a group band together to create a whole better than the parts is amazing. Thanks to Tamy and the girls for letting me be a part of this. I called in a couple of favors to thank not only the active participants on the site, but also the readers and followers of the site for something special… A wonderful giveaway contest for one of Oprah’s favorite things… Read on, details about the contest to follow at the end.

My name is Dave, and I am a hairy knuckled neanderthal fire cooker. I love to grill, smoke and use my backyard for entertaining (although the Kansas winter is setting in, so my entertaining is starting to move indoors. My site is called MY YEAR ON THE GRILL, and I certainly invite any and all of you to come take a look by clicking HERE! But today, I am going to abandon my grill and honor all these wonderful bloggers by stepping out of my comfort zone and publish an original recipe I created as part of a dinner party I recently hosted for my wife’s boss. Lots of pressure on making that dinner work (I likened the pressure to hosting your first Thanksgiving for your Mother-in-Law). I did extensive research, found a few ideas, and adapted them to fit my likes and came up with…

Vegetable and Cheese GALETTE
with Balsamic Vinegar

Galette, or more properly Breton galette, a fancy name for flat, round or free form crusty cake. Kind of tart thingies (pretty fancy word for a hairy knuckled Neanderthal, but I was putting on airs for my wife’s boss… and you all).

Here’s what I did…

As always, assemble the ingredients first. Nothing worse than getting ankle deep in the cooking process and finding out you are short something crucial. I needed…

For the Cornmeal Dough, BTW, this recipe makes 4 Galettes.

1-1/2 cups flour
1/3 cup yellow cornmeal
1 teaspoons sugar
1 teaspoons salt
8 tablespoons (1 stick) unsalted butter, softened
3 tablespoons top quality olive oil
1/4 cup ice water

Combine the ingredients and mix well. The dough needs to be chilled well in order to work for the look you want. Refrigerate for at least an hour. Which gives me time for a commercial about the giveaway contest…

OK, here’s the advertisement for the
giveaway contest to come…

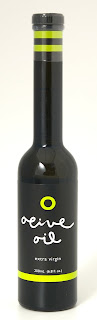
I was recently contacted by O. No, not “that” O, but O OLIVE OIL (Which you can reach by clicking HERE). O Olive Oil is the original maker of organic CITRUS-CRUSHED Olive Oils and premium Barrel aged Wine Vinegars. I was given a sampling of their extensive product line, and was asked to “PLAY – ENJOY – WRITE/BLOG AWAY”. Well, while waiting for my shipment to arrive, I took a look at their website for details about their company… Oh My is all I can say. These are artists in the art of oil press and aging vinegar. For details, click this link for the process an Abruzzese olive mill that crushed lemons along with the olives creates. From the humble beginnings, they have been recognized by OPRAH (yeah, that O), Bon Appetit, Gourmet, magazines, as well as Good Morning America, The Tyra Banks Show and the New York Times as perfect products! While you can make this recipe with generic products, the top quality artisan products that O OLIVE OIL company provide really made this recipe sing… And keep reading, as you will get a chance to win some of these as well!

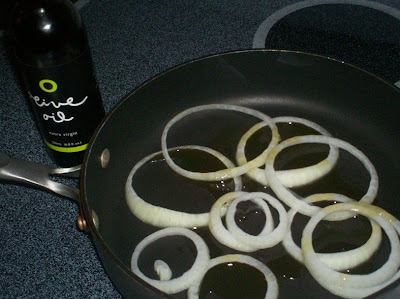
I used about a tablespoon of the extra virgin oil to saute sweet onion rings. When using EVO, be careful not to get the oil too hot, or the oil will burn.

I then added some green pepper rings and let these simmer for about 15 minutes to caramelize.

And now, get the dough out of the fridge, and separate into four equal parts. The dough separates easily, and you want a well floured surface to work on. work the dough into small thin circles, about 6 inches across.

Put them on a parchment paper sheet, or a well greased cookie sheet. Sprinkle a little EVO on the circles, flip over and sprinkle a little more on the other side.

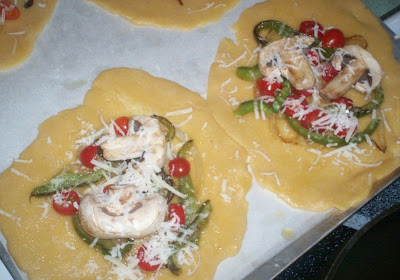
Add the stuffings… For these, I used …

Onion rings Green bell pepper rings sliced cherry tomatoes diced mushrooms (but I saved a presentation mushroom slice to put on the top of each)

Before closing up, I added some grated fresh provolone cheese. I like using provolone to cook with, it not only tastes great but it melts better than most cheeses.

I was making this a vegetarian dish. But you can make the same thing with any number of ingredients, including bacon (everything tastes better with bacon), sausage, peperoni… squash, or any number of vegetable combinations. And as to cheese, imagine brie or goat cheese or fresh mozzarella or how about a good Stilton, blue cheese… This is a very versatile and adaptable for whatever you might have in mind, or what is left over in your pantry.

And now, sprinkle on some wonderful Balsamic Vinegar! I love balsamic, but not all is created equal. I like to have a bottle of really good stuff to use for specialty items or occasions like this.

Next, close up about one inch of the dough all around for that Galette look (instead of a pizza). BTW, I am not a fan of the texture of mushrooms, so I left them off mine (It’s good to be the cook).
Everyone else got that presentation mushroom slice put on the top. I then brushed on a little butter to make sure the edges would stay shut while cooking.

Just as I was putting in the oven, I topped with a little more grated provolone so that it would brown up nicely while cooking…

In a preheated oven at 375 degrees, for 45 minutes…

And Viola! I served this in place of a salad, as an appetizer. You could also make these larger, and if there happens to be a vegetarian in your midst and don’t want to hog tie them and force bacon down their throats, this would make an excellent vegetarian option. Also, as I was serving, I drizzled a little more fresh Balsamic Vinegar on the top, with a little splashing to one side of the tart (maybe a tablespoons worth total per Galette). Nice little extra taste, and for presentation. The holidays are coming up, those inconvenient vegetarians are out there, and need to be treated with the same respect you show your fowl (eating) guests. This is a nice little item to have ready, prep time takes about 2 hours (because of the dough temperature issue), but well worth it.

Bon Apetite!

OK… Contest time…
3 ways to win!
3 prizes to win!!!

I LOVE these products. Quality will show, and I was inspired to create something special with them. O Olive Oil has been very generous in offering not just one gift, but three combinations of their oils/vinegars. So, I will be offering three ways to win…

First, I will be running a similar contest at MY YEAR ON THE GRILL, (which you can reach by clicking HERE)! Follow the link, follow the rules about posting a comment on that site and you double your chances.

Next, on this site, just follow the link I am posting to the O OLIVE OIL HOME PAGE (that you can reach by clicking HERE). Surf around and see what they are all about. take a look at their about us page, and especially enjoy their “crush” page where you can really see the quality and difference they put into their product. Finally, head to their products page and follow the links on the side to see all the different items they have for sale. then come back here and just make a comment about which is your favorite product. Everyone who leaves a comment on this page listing a product that O OLIVE OIL sells will receive an entree into the contest/ I will assign each entry a data base number, and use WWW.RANDOM.ORG to pull a virtual number out of a hat and let you know who won! This contest is open to US and Canada only (sorry to the international readers, but the shipping is prohibitive). You can get a second entree if you become a “follower” to this site (those little pictures of faces at the middle of the lefthand sidebar). If you are already a follower, just drop me that message in the comment section. And finally, if you post a note on your blog advertising OUR KRAZY KITCHEN and the contest, you will receive 5 additional entrees. Be sure to leave a comment so I know to follow and see what your blog is all about!

One more time, here is what the winner wins… a bottle of each of the EVO and Balsamic I used to make this recipe…

O extra virgin olive oil This fine Extra Virgin Olive Oil is our house blend of our favorite oils from around the world. Small family farms from around the Mediterranean and California. Hand blended. Spain for fragrance. Greece for richness. Tunisia for mystery. Italy for love. And California for taste. A house favorite for everyday use. $9

AND a bottle of…

O california balsamic vinegar. The beloved balsamic vinegar, California style. Aged in the traditional way in oak wood. Hand-crafted in small batches right here in Sonoma. Rich, sweet, round & smooth flavor. Our obsession with quality and healthy ingredients led us back to California. Excellent brushed over grilled chicken with rosemary and black pepper. Drizzle over fresh strawberries or pears. Great in vinaigrettes and sauces. $12

Good luck to all!

Oh wait… that’s just two ways to win (comment here, comment on MY YEAR ON THE GRILL, I promised a third…

How about a …

RECIPE CONTEST!
The good folks at O OLIVE OIL COMPANY want to see what you might do with their oils or vinegars. Now, you do not have to list an original recipe, simply comment here a link to something you have posted in the past. It can be a magazine recipe, original or great grandma’s recipe. It can even be just an idea for something you might like to try. I will forward all these ideas to the vice president of O OLIVE OIL and he will decide which recipe he would most like to see made with any of their products. Please leave these comments separate from the comments you made above so I can keep track. The comments must be attached to this post, and are only open to residents of the US or Canada. Again, no need to post the recipe on my comments page, just send me a link to what you have posted previously. If you have not posted, you have a week to post and get the link to me. Or, you can comment with just your idea of what you would like to do with their oils.vinegars. One hint I should pass on from O – remember these are mostly finishing oils and do not do well when heated—the citrus portion tends to dissipate under certain temps. Though our blood orange does well on roasted fowl and grilled seafood so often it depends on the recipe/use. Jalapeno lime does great on grilling veggies so…depends. That’s what makes it fun to experiment. The vinegars, of course, are another thing. They are great for reductions, for punching up soups/stews, adding flavor texture to most any thing. Experiment. Play. Enjoy.

Feel free to submit a recipe post on this site AND submit a recipe on my home, MY YEAR ON THE GRILL site. There will be only one recipe contest winner from both sites, but this way you can enter twice to double your chances. If you have any questions, drop me a note. The contest closes at midnight, next Friday, November 13th, and a winner will be announced over the weekend. It will take just a few days longer to announce the winner of the recipe contest…

Oh yeah, the winner of the recipe contest will receive a gift box of your choice of one of the seasonal box collections…

  • fall collection O Zinfandel Vinegar, O Blood Orange Olive Oil, O Porto Vinegar. Imagine roasted beet salads with chunks of insalata ricotta cheese. $38 value
or
  • spring collection O Ginger Rice Vinegar, O Jalapeño Lime Olive Oil, O Citrus Champagne Vinegar. Early spring fish tacos with crunchy slaw will sing with these exotic flavors. Crumble feta cheese in there for the Wow! $38 value
or
  • summer collection O Champagne Vinegar, O Meyer Lemon Olive Oil, O Pomegranate Vinegar. Perfect for late summer heirloom tomato & garden lettuces. $38 value
or
  • winter collection O Sherry Vinegar, O Ruby Grapefruit Olive Oil, O Porto Vinegar. The Ruby and Porto in this gift set will dazzle home chefs gathered around warm fires with crusty bread & brie. $38 value

And now… Good luck to everyone! And thanks for letting me come and play on your site… it was fun!

Pass the bread recipe and save room for dessert and Thanksgiving

Do you have a bread recipe? Tamy and I want it! It could be a yeast bread, or a quick bread. It could be a muffin or a flat bread. We’re rounding up all bread recipes on our blogs, and you get to link to both blogs too, just link back to us. Tamy’s bread roundup and my Joy of Dessert bread roundup are ready for your links now.

Get ready for another party right here at Our Krazy Kitchen, too. We’ll be celebrating Thanksgiving all together from November 15-28. Bring your favorite recipe, decorating idea, pictures, anecdotes, and let’s have some fun together. Help us spread the word by linking to us.

Pick your favorite badge!

Please leave a link to your post, not your homepage, and be sure to link back to this post or blog.

Peach Pancake Napoleon ~ Dieter’s Delight

1/2 cup fat free cottage cheese
1 tablespoon skim milk
1 tablespoon sugar or splenda
1/2 cup of canned light peaches
3/4 cup of Heart Healthy Bisquick
1 teaspoon vanilla extract
2 tablespoons fat free whipped cream if desired

Mix cottage cheese, skim milk & Splenda or sugar. I used my Magic Bullet.

Chop 1/2 of the serving of peaches & stir them into the cheese mixture.

Mix Bisquick with water to make it pancake consistency (I’m sorry I didn’t measure the water).

Stir in vanilla.

I sprayed my small pan with Pam & put in 1/2 of the pancake mix.

While that is cooking, microwave the cheese & peach mixture for a little bit to just warm it.

Take out the first pancake, top it with the cheese & peach mixture & make the second pancake.

Put the second pancake on top, then top with the remaining chopped peaches & a dollop of Cool Whip Free.

*This is a recipe for one serving, but you can see it would be easy to multiply.

My husband was jealous & my son accused me of cheating on my diet.

If you are on the Nutrisystem plan this counts a complete breakfast, fruit & dairy + 1 free food (Cool Whip)

*this would work really well with some fat free ricotta & a little Splenda instead of the cottage cheese, but I didn’t have any ricotta.

UPDATE!!!!

So it’s time I did an update. Many of you know we pretty much finished the investment house from hell this past summer and were anxious to get home to family. That trek home entailed moving cross country 1 step ahead of snow storms with a moving truck towing hubby’s jeep and the 2 cats in their carriers and me in my truck with the 2 big dogs in the back seat (thank God it’s a super cab) and the bed loaded. The animals traveled like troupers! It took us 4 days to get here and then another 2 to unload the moving truck into storage.

Then we began the process of settling into 144 square feet from the 2700 we had been in! Even knowing this is temporary while we help out his folks and sell our house, it was still difficult to know what to pack into storage and what not to. I have 2 small baskets of “necessary” kitchen tools, my computers and a few books.

Hubby’s folks are still in their own home and his mom will be 90 in a few months and has dementia as well as limited mobility and his dad will be 89 next month and has limited mobility due to multiple back surgeries. Dad has been caring for mom the past couple of years as well as the house, yard, pool and cooking. So hubby and I volunteered to move in with them to help make their life easier.

As with any investment in life, your intentions are to do the right thing for the right reason, but sometimes you can’t even begin to comprehend how difficult that change in your life will become before it is all settled. Whenever emotions are a factor life decisions are not easy.

So for now we are where we are and are still hoping to be “home home” soon. We welcome a prayer our way now and then! Thank you for all the wonderful notes and thoughts you have sent our way.

wildatheart

Spicy Shrimp – Monday Munchies

I think everyone knows The Pioneer Woman. This recipe is the basics from one of her recipes and boy is it ever good!

Ingredients

  • 2 pounds of shrimp in shells
  • About 1/2 cup olive oil
  • 2 -3 lemons
  • Tabasco
  • Worcestershire
  • Kosher salt
  • Fresh ground pepper
  • 1-2 sticks of butter
Directions – Spread shrimp in single layer on a large, deep cookie sheet. Drizzle oil over shrimp, squeeze fresh lemons over shrimp, add generous splashes of Tabasco and Worcestershire all over the top along with a sprinkle of kosher salt and fresh ground pepper, dot top with pats of butter. Broil until done, about 10-15 minutes.

This is a great one for the game day buffet or add a loaf of fresh french bread for dipping and a salad and you’ve got a great meal – YUM!

Share your favorite game day munchies with us!

You’re invited to a Thanksgiving Soiree’


WHEN: Sunday, November 15th ~ Saturday, November, 28th, 2009
WHERE: OuR KrAzY kItChEn
RSVP: MR. LINKY

We’re having a party here at OuR KrAzY kItChEn and you’re invited. Bring your favorite recipe, decorating idea, pictures, anecdotes and let’s have some fun together.
  • Do you have a special pumpkin pie recipe recipe?
  • What is your favorite side dish recipe?
  • Do you have a favorite apple recipe?
  • Do you have special way to carve a turkey?
  • How about a party punch that’s perfect for the Thanksgiving crowd?
  • What is your idea of a best decorating idea?
We’ll post Mr. Linky on November 15th and leave him in place through November 28th. Write your post piece and come link it up. We’ll all have some time to blog hop and see each other and try recipes.

wildatheart

Menu Plans for 3 Sides of Crazy


Menu Plan Monday hosted by Laura at I’m an Organizing Junkie


DATE
BREAKFAST
LUNCH
DINNER
Monday

11/2

CEREAL
SANDWICHES

Avocado Citrus Salad

Tuesday 11/3

TOAST
LEFTOVERS
Chicken Enchiladas Suiza
and
Refried Beans
Wednesday 11/4
YOGURT
SOUP

Meatball Stew

Thursday 11/5
FRUIT
CHEESE & FRUIT
Tuna Noodle Bake
Friday 11/6
OATMEAL

C.O.R.N.

Chicken Fried Chicken
with mashed potatoes and
Peppered Gravy

Saturday 11/7
Blueberry Crumb Cake leftovers
Roast Chicken w/ Lemon Herb Sauce
and
Maple Glazed Carrots
Sunday 11/8
Huevos con Yummy Deviled Eggs Carnitas ~ Traditional Style
with the leftover
Refried Beans

wildatheart

Situated proudly on a large fenced corner lot, you will enjoy the city convenience and country atmosphere in this warm and airy beautifully restored 1892 Queen Ann Victorian gem. Log cabin barn and 2 car garage provide plenty of storage. Totally remodeled, this home is a cook’s dream with its farm style family kitchen. Hardwood floors, double mantle fireplace, large covered porch and side deck along with many other amenities too numerous to mention!

final blog signature.

Menu Plan Monday


Menu Plan Monday hosted by Laura at I’m an Organizing Junkie


DATE
BREAKFAST
LUNCH
DINNER
Monday

11/2

CEREAL
SANDWICHES

Avocado Citrus Salad

Tuesday 11/3

TOAST
LEFTOVERS
Chicken Enchiladas Suiza
and
Refried Beans
Wednesday 11/4
YOGURT
SOUP

Meatball Stew

Thursday 11/5
FRUIT
CHEESE & FRUIT
Tuna Noodle Bake
Friday 11/6
OATMEAL

C.O.R.N.

Chicken Fried Chicken
with mashed potatoes and
Peppered Gravy

Saturday 11/7
Blueberry Crumb Cake leftovers
Roast Chicken w/ Lemon Herb Sauce
and
Maple Glazed Carrots
Sunday 11/8
Huevos con Yummy Deviled Eggs Carnitas ~ Traditional Style
with the leftover
Refried Beans


wildatheart

2nd Annual Bread Round Up

It’s FINALLY time? Are You Ready? Here are a few recipes to whet your appetite & inspire you. Click on the badge for more details. All regular posts will appear directly below this round up for the next 2 weeks.

When participating, please use common blog etiquette and courtesy by linking your participating bread recipes back to Joy of Desserts and 3 Sides of Crazy, and visiting the other participants.

TIPS for GREAT Bread Making

  • Always keep flours in airtight, moisture proof containers.
  • Once cooled, always store breads in airtight bags in a cool dry place.
  • When freezing bread, always cool first and do NOT frost or decorate. Wrap them first in airtight plastic and then foil. Store no more than 3 months.
  • To warm breads, wrap bread in foil. Place in 350 degree oven for 15-20 minutes.
  • Dark flours such as rye ore whole wheat have less strength and should be mixed with bread flour for better results.
  • Always cool breads fully before slicing. For best results use a serrated knife or electric knife for even slices.
  • Kneading is a very important part of the bread making process. Kneading develops the protein structure which in turn produces higher volumes.
  • Flavor and texture improve by allowing the dough to double in the size. Be patient.
  • Allowing the dough to “REST” for 15 minutes also helps to achieve the desired volume.
  • The true test for doneness is when the loaf sounds hollow!
  • Remove from pans immediately and cool on wire racks to prevent them from becoming soggy.
ADOBE BREAD A Native American bread made by the pueblo-dwelling Indians of the Southwest and baked in the adobe ovens common to their dwellings. The bread’s made from unbleached flour, salt, yeast, water, lard or shortening and sometimes sugar and/or eggs. A hot fire is started in the adobe oven and allowed to burn out. The ashes are immediately removed and the bread is then baked. This crusty bread of the Pueblo Indians is still baked today in beehive shaped ovens. The round loaves are often decorated with symbols for special occasions.
2 cups whole wheat flour, medium grind
1/4 cup fine white sugar
1 tablespoon instant yeast
1/4 cup vegetable shortening or vegetable oil
2 cups warm water, 100-110 degrees
3 – 4 cups unbleached bread flour (preferred) or all-purpose flour
2 teaspoons salt (fine sea salt preferred)

MIXER METHOD:

  • In a large mixing bowl, place whole wheat flour, sugar, dough enhancer if using, yeast and shortening; use the paddle attachment to mix on low speed until well-combined.
  • Add warm water and beat for 1 minute or so.
  • Stir in 3 cups of bread flour and mix on low speed until the dough forms a soft ball.
  • Change to the dough hook and knead on medium speed about 5 minutes, adding only enough additional bread flour to make a manageable dough. The dough should have pulled away from the sides of the bowl but can still stick to the bottom of the bowl.
  • Turn the dough out onto a floured board let it rest 10 minutes, covered with a towel.
  • Knead the dough an additional 4-5 minutes or until the dough is soft and pliable, tacky but not sticky.
  • Place in lightly greased bowl, cover with plastic wrap and let rise at room temperature (72 deg.F.) 45-60 minutes or until doubled in bulk.
  • Spray a large baking sheet with PURE and set aside. Gently deflate the dough and turn out onto a lightly floured board.
  • Divide in half and let rest 5 minutes.
  • Shape each half into a round, stretching the dough across the top and tucking under; place the rounds on opposite wnsa of the cookie sheet.
  • Cover and let rise in a warm place 40-50 minutes or until almost doubled.
  • Meanwhile, preheat oven to 375 F. Using a lame or sharp knnife, make 1/2 inch deep slashes across each loaf (in lattice design if desired).
  • Sprinkle each loaf lightly with bread flour. Bake 35-40 minutes until loaves are deep, golden brown and register 200 degrees on an instant thermometer.
  • Remove from the pan and cool completely on a wire rack before slicing. Yields 2 loaves
MANUAL METHOD:
Follow the above instructions, kneading the dough by hand about 10-12 minutes.

NOTE~this is best made using a stand mixer!

APPLESAUCE RAISIN BREAD
2 cups applesauce
2 JUMBO eggs, beaten
1 cup fine sugar
1/2 cup butter, melted
4 cups flour

4 teaspoons baking powder
1 teaspoon salt
1 teaspoon baking soda
2 teaspoon cinnamon
2 teaspoon nutmeg
1 cup golden raisins
1/4 cup golden rum
1 cup minced walnuts
  • In a large bowl, beat together the applesauce, eggs, sugar and melted butter.
  • In a smaller bowl, sift together the dry ingredients.
  • Stir the dry ingredients into the applesauce mixture and mix only until smooth.
  • Add the raisins and nuts.
  • Pour into 2 greased 9x5x3-inch loaf pans and bake in a 350 degree oven for 50 minutes or until a wooden toothpick inserted into centers comes out clean.
BUTTER HORN ROLLS
1 cup scalded milk, cooled

1 package yeast, dissolved in 1/8 cup warm water
1/2 cup unsalted butter, softened

1/2 cup sugar
1 teaspoon salt

3 eggs, beaten
4 1/2 cups flour
  • Add yeast mixture to cooled scalded milk.
  • Combine butter, sugar and salt with electric mixer on low.
  • Add milk and yeast to butter mixture.
  • Add beaten eggs.
  • Add half of flour and increase speed to medium. Beat well for two minutes.
  • Stir in remaining flour by hand to form a very soft dough.
  • Let rise till double – about 3 hours.
  • Divide into 3 equal parts. Roll each portion on lightly floured board to 9 -10 inch circle.
  • Brush with butter.
  • Cut each circle into 12 wedges (like a pizza).
  • Roll from wide end (similar to a crescent roll) and place on cookie sheet.
  • Let rise in a warm place for an hour before baking.
  • Bake at 400 for 10 minutes.
  • Makes 3 dozen
BUTTERMILK CORNBREAD
1 cup yellow cornmeal

1/3 cup all-purpose flour
1/4 teaspoon baking soda
1 teaspoon baking powder
1 teaspoon salt
1 egg, beaten
1 cup buttermilk
  • Sift together dry ingredients.
  • Add egg and buttermilk, mixing well.
  • Pour into greased, heated 8-inch or 9-inch iron skillet.
  • Bake at 400° for 20 minutes, or until lightly browned.
CHOCOLATE WALNUT BREAD CAKE
CAKE

2 cups flour

1/2 cup sugar
Pinch of salt

1 teaspoon cinnamon
2 tablespoons butter, softened
2/3 ounce fresh yeast
1/3 cup milk

1/2 cup heavy cream
1 egg

FILLING
1 cup + heavy cream
12 squares Baker’s semi-sweet chocolate, finely chopped
1/3 cup walnuts, minced
6 tablespoons butter, melted & cooled
  • Sift the flour into a large mixing bowl.
  • Add the sugar, cinnamon, salt, butter, yeast, milk, cream and egg. Using the hook attachment blend for 5 minutes – this can be done manually if you prefer. After 5 minutes the dough will be ready, so flour your hands to avoid sticking.
  • Knead and allow to rise.
  • On a floured surface, knead the dough and transfer to a bowl.
  • Cover the bowl with a four sack towel and allow to rise for 2 hours in a warm place.
  • In a saucepan heat the cream over medium heat bringing it to a slow boil. Remove from heat.
  • Pour the hot cream over the chopped chocolate and mix together.
  • Add the butter and whip with the spoon.
  • Stir in walnuts and allow to cool.
  • Press down on the dough and transfer to a floured surface. With a rolling pin, flatten the dough into a round about half an inch thick.
  • Pour the chocolate sauce over the dough and spread evenly with the rubber spatula.
  • Using a large knife, cut the dough into thick slices approximately 2 1/2 inches wide.
  • Roll slices cinnamon roll style.
  • Transfer the slices to a spring form pan with the edges very slightly touching.
  • Allow to sit for 15 minutes before baking.
  • Preheat the oven 350 degrees.
  • Brush the top of the cake with butter and bake 15-20 minutes.
  • Remove the cake from the oven, brush once more with butter and sprinkle with powdered sugar.
HONEY NUT BRAN MUFFINS
1/2 cup honey

1 1/2 cups flour
1/2 teaspoon baking soda
1/2 teaspoon salt
1 1/2 cups bran
2 tablespoons butter, melted

1 1/4 cups buttermilk

1 teaspoon maple extract
1 teaspoon vanilla extract
1 tablespoon molasses
1 teaspoon pumpkin pie spice
1 egg, beaten
1/4 cup walnuts, finely chopped
  • Sift together flour, soda and salt. Combine with the bran.
  • Add remaining ingredients, mixing just until well blended.
  • Pour batter into greased and lightly floured muffin pans and bake at 425° for 25-30 minutes or until done in center.
ORANGE OATMEAL MUFFINS
1 cup flour
1 tablespoon baking powder
1/2 teaspoon salt
1 cup quick-cooking oats
1/4 cup sugar + 2 tablespoons sugar

1 JUMBO egg, beaten
1 tablespoon grated orange rind
1/2 cup fresh orange juice with high pulp
1/4 cup 2% milk
2 tablespoons vegetable oil
1/2 teaspoon grated orange rind
PURE
  • Combine the flour, baking powder, salt, oats, and 1/4 cup sugar in a large bowl. Make a well in center of the flour mixture.
  • Stir together egg, 1 tablespoon grated orange rind, orange juice, milk and oil.
  • Add to flour mixture, stirring just until moistened.
  • Spray muffin tins with PURE or line with papers.
  • Spoon batter into muffin pans , filling three-fourths full.
  • Stir together 2 tablespoons sugar, orange rind, and ground cinnamon until blended.
  • Sprinkle evenly over tops of muffins.
  • Bake at 400 for 15 minutes or until muffins are lightly browned.
  • Remove muffins from pans immediately, and cool on a wire rack.
PARMESAN CHEESE BREAD
3 1/4 cups unbleached flour
1 tablespoon active dry yeast
2 teaspoons sea salt
1 1/3 cup warm water
1/2 cup freshly grated Asiago Parmesan Cheese
extra-extra virgin olive oil
  • Sift together the four, yeast and salt.
  • Stir in the water until dough forms.
  • Sprinkle with 1/2 the cheese.
  • Transfer to a well floured surface.
  • Knead until soft, elastic and no longer sticky (about 10 minutes). Add flour as necessary to reduce stickiness.
  • Knead the dough until it remains rounded and doesn’t flatten out when left to sit for a few minutes.
  • Arrange into a round.
  • Brush the surface with olive oil.
  • Cover loosely with a tea towel and let rise in a warm place until double in size (about 2 hours).
  • Preheat oven to 425 degrees.
  • Brush a 9 inch round pan with olive oil.
  • Put remaining cheese on a plate.
  • Punch down the dough and knead a few more times with fresh flour.
  • Divide dough into 12 pieces.
  • Roll each piece into a ball.
  • Roll each ball in the cheese and then place in pan with the edges touching. 9 balls around the outside, 3 balls in the center.
  • Cover with a flour sack towel and allow to rise again.
  • Cut a small slash in the top of each ball.
  • Sprinkle with more Parmesan cheese.
  • Bake for 10 minutes and the reduce oven temperature to 375 degrees and continue to bake until golden and crispy, about 20-30 minutes more.
  • Serve hot or transfer to a wire rack and cool.
POLENTA BREAD

Polenta is made with ground yellow or white cornmeal and was originally made with Chestnut meal in ancient times. As it is known today, polenta derives from earlier forms of grain mush (known as puls or pulmentum in Latin or more commonly as gruel or porridge) commonly eaten in Roman times and after.

3 cups unbleached bread flour
1/2 cup finely ground polenta
2 teaspoons quick rise yeast
1 teaspoon sea salt
1 1/3 cups warm water
1 tablespoon extra-extra virgin olive oil
1 Jumbo egg, beaten
  • In a large bowl sift together the flour, polenta, yeast and salt.
  • Stir in the water and olive oil until dough forms.
  • Transfer to a well floured surface.
  • Knead until soft, elastic and no longer sticky (about 10 minutes). Add flour as necessary to reduce stickiness.
  • Knead the dough until it remains rounded and doesn’t flatten out when left to sit for a few minutes.
  • Arrange into a round.
  • Cover loosely with a tea towel and let rise in a warm place until double in size (about an hour).
  • Preheat oven to 425 degrees.
  • When dough has risen, use a VERY sharp knife and slash the center of the loaf.
  • Brush the surface with the beaten egg.
  • Sprinkle cornmeal on the baking sheet and then transfer the loaf on top.
  • Bake for 15 minutes and the reduce oven temperature to 375 degrees and continue to bake until golden and crispy, about 30-35 minutes more.
  • Transfer to a wire rack and cool.
SOURDOUGH STARTER & BREAD
The novel thing about sourdough baking is that it requires that you keep something alive in your fridge. Think of your starter as a pet that needs to be fed. Sourdough “starter” is a batter of flour and water, filled with living yeast and bacteria. The yeast and bacteria form a stable symbiotic relationship, and as long as you keep the starter fed can live for centuries, a thriving colony of microorganisms. To make sourdough bread, you blend the starter with some flour and make dough. The yeast propogates, and leavens your bread. This is how you make your starter:

  • Select a container that your starter will live in. A wide-mouthed glass jar is best. A small crock with a loose lid is also great. You can also use a rubbermaid or tupperware container. Metallic containers are a bad idea; some of them are reactive and can ruin your starter (for the same reason, avoid using metal utensils to stir your starter).
  • Blend a cup of warm water and a cup of plain unbleached flour, and pour it into the jar. That’s the whole recipe! If you want, you can add a little commercial yeast to a starter to “boost” it. Note that starter made with commercial yeast often produces a bread with less distinctive sour flavor than the real thing.
  • Every 24 Hours, Feed the Starter. You should keep the starter in a warm place; 70-80 degrees Farenheit is perfect. This allows the yeast already present in the flour (and in the air) to grow rapidly. Temperatures hotter than 100 degrees or so will kill it.
  • The way you feed the starter is to (1) throw away half of it and then (2) add a half-cup of flour and a half-cup of water. Do this every 24 hours. Within three or four days (it can take longer, a week or more, and it can happen more quickly) you should start getting lots of bubbles throughought, and a pleasant sour or beery smell. The starter may start to puff up, too. This is good. Here’s the gist: When your starter develops a bubbly froth, it is done.
  • Refrigerate the Starter. Keep the starter in your fridge, with a lid on it. Allow a little breathing space in the lid. Once the starter is chilled, it needs to be fed only once a week. Realistically, you can get away with less; it’s important to remember that your starter is a colony of life-forms that are almost impossible to kill (except with extreme heat). Even starving them is difficult.
  • Aside from weekly feeding, the only other thing you need to worry about is hooch. Hooch is a layer of watery liquid (often dark) that contains alchohol. It smells a bit like beer, because it is a bit like beer – but don’t drink it! Hooch builds up in your starter, especially in the fridge. Just pour it off or stir it back in. It doesn’t hurt anything. If your starter is looking dry, stir it back in. If your starter is plenty wet, pour it off. Just remember that hooch is nothing to worry about!
  • Several hours before you plan to make your dough (recipe below), you need to make a sponge. A “sponge” is just another word for a bowl of warm, fermented batter. This is how you make your sponge.
  • Take your starter out of the fridge. Pour it into a large glass or plastic bowl. Meanwhile, wash the jar and dry it.
  • Add a cup of warm water and a cup of flour to the bowl. Stir well, and set it in a warm place for several hours. This is called “proofing,” another word for fermenting.
  • Watch for Froth and Sniff. When your sponge is bubbly and has a white froth, and it smells a little sour, it is ready. The longer you let the sponge sit, the more sour flavor you will get. The proofing-time varies. Some starters can proof up to frothiness in an hour or two. Some take 6-8 hours, or even longer. Just experiment and see how long yours takes. If you’re going to bake in the morning, set your sponge out to proof overnight.

Of course, there are a lot of recipes for sourdough bread. There are also recipes for sourdough rolls, sourdough pancakes, sourdough pretzels, sourdough bagels…

You should have some leftover sponge and that is your starter for next time: Put it into the jar, and give it a fresh feed of a half-cup each of flour and warm water. Keep it in the fridge as above.

BASIC SOURDOUGH RECIPE
2 Cups of sponge (proofed starter)
3 Cups of unbleached flour
2 tablespoons softened butter
4 teaspoons of sugar
2 teaspoons of salt

  • To the sponge, add the sugar, salt, and softened butter instead, or no oil at all). Mix well, then knead in the flour a half-cup at a time. Knead in enough flour to make a good, flexible bread dough. You can do this with an electric mixer, a bread machine on “dough cycle,” or a food processor. You can also do it with a big bowl and your bare hands. Keep in mind that flour amounts are approximate; flour varies in absorbency, and your sponge can vary in wetness. Use your judgement; treat it like ordinary white or french bread dough. Trust your hands and eyes more than the recipe, always.
  • Let the dough rise in a warm place, in a bowl covered loosely with a flour sack towel . Note that sourdough rises more slowly than most yeast bread. Let the dough double in bulk. When a finger poked into the top of the dough creates a pit that doesn’t spring back), you’ve got a risen dough.
  • Punch the dough down and knead it a little more. Make a loaf and place it on a baking sheet (lightly greased or sprinkled with cornmeal). Slit the top if you like, and cover the loaf with a paper towel and place it in a warm place to rise again, until doubled in bulk.
  • Place the pan with the loaf in your oven, and then turn your oven to 350 degrees and bake the bread for 30-45 minutes. Do not preheat the oven. The loaf is done when the crust is brown and the bottom sounds hollow when thumped with a wooden spoon. Turn the loaf out onto a cooling rack or a towel and let it cool for an hour before slicing.

SOURDOUGH TOMATO CHEESE BREAD
1 1/2 cups sourdough starter
1 cup warm water (110 degrees F)
1 (.25 ounce) package active dry yeast
1 cup warm tomato juice
2 teaspoons white sugar
1 teaspoon salt
7 cups all-purpose flour
2 cups grated Sargento sharp cheddar cheese

  • Dissolve yeast in 1 cup warm water, set aside.
  • In large bowl; mix starter and tomato juice. Add yeast mixture, salt, sugar and stir well.
  • Add 1 cup of flour at a time and beat well to develop the gluten.
  • Add cheese just until well blended.
  • When a stiff dough forms, turn out onto a floured surface and knead until smooth and elastic, adding the last 1 cup of flour as you go.
  • Turn into greased bowl and lightly grease top, cover with towel and place in draft free area for 2 hours. Will double in bulk.
  • Punch down and divide dough in two, form into rounds and place each on a baking sheet that has been sprinkled generously with cornmeal.
  • Let rise 1/2 hour, rub top lightly with flour and slash with sharp knife. Bake at 350 degrees F for 45-60 minutes or until bottoms are lightly browned.
  • For a soft crust, cool under a clean flour sack dishtowel. For a harder European type crust, cool without.

♥♥final blog signature. ♥♥